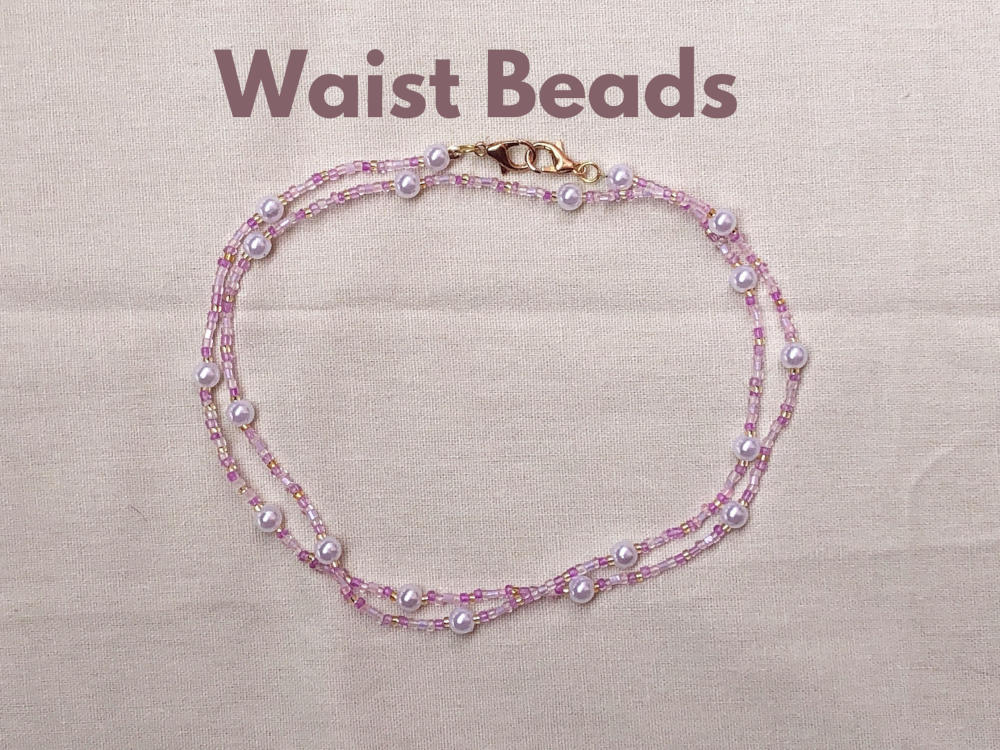
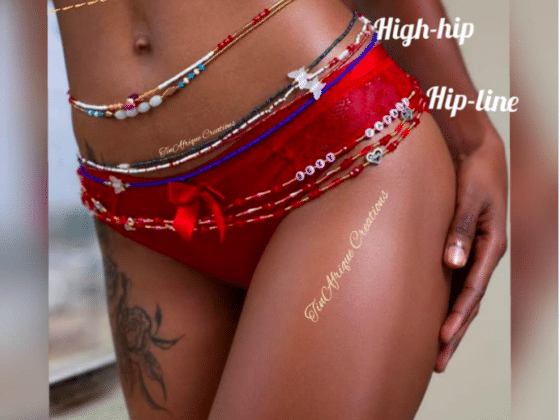
Waist beads are commonly used by women of the Luo tribe in Kenya, East Africa. Waist beads are mostly worn during special occasions such as weddings or festivals. This accessory is only limited by creativity, but there are specific guidelines when it comes to color combinations and patterns depending on geographical location and family tradition.
Table of Contents
- 1 What is the main purpose of waist beads?
- 2 What do you need to make waist beads?
- 3 Step 1 – Measure your waist.
- 4 Step 2 – Cut the string.
- 5 Step 3 – Add the crimp lock.
- 6 Step 4 – Adding the beads.
- 7 Step 5 Final locking
- 8
- 9 Step 6 The finished product
- 10 Waist beads F.A.Q.
- 11 How many waist beads should I wear?
- 12 What kind of string do you use for waist beads?
- 13 Are waist beads supposed to be stretchy?
- 14 Do you shower with waist beads?
- 15 How to put on waist beads
- 16 How to make waist beads for weight loss?
What is the main purpose of waist beads?
Waist beads are a popular form of jewelry worn by women to enhance their curves. They are typically made of glass, gemstones, or metal and are worn around the waist to create a flattering silhouette. Waist beads can also be used as a form of communication, with different colors and patterns representing different messages.
For example, a woman might wear blue beads to indicate that she is available for dating, or green beads to signify that she is married. Waist beads can also be used as a source of inspiration, with different designs and patterns serving as reminders to stay strong and confident. No matter why you choose to wear waist beads, they are sure to add beauty and distinction to your look.
Here I am just giving you a super easy-to-follow tutorial. Then, let your imagination run wild!
What do you need to make waist beads?
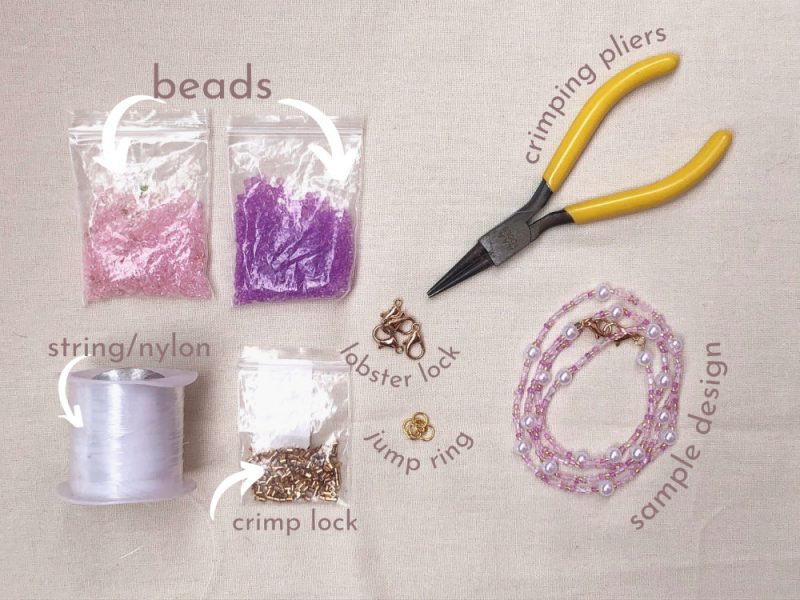
List of materials needed to make waist beads:
- String/Nylon – Find out What string to use to make African waist beads
- Crimping pliers
- Beads of choice
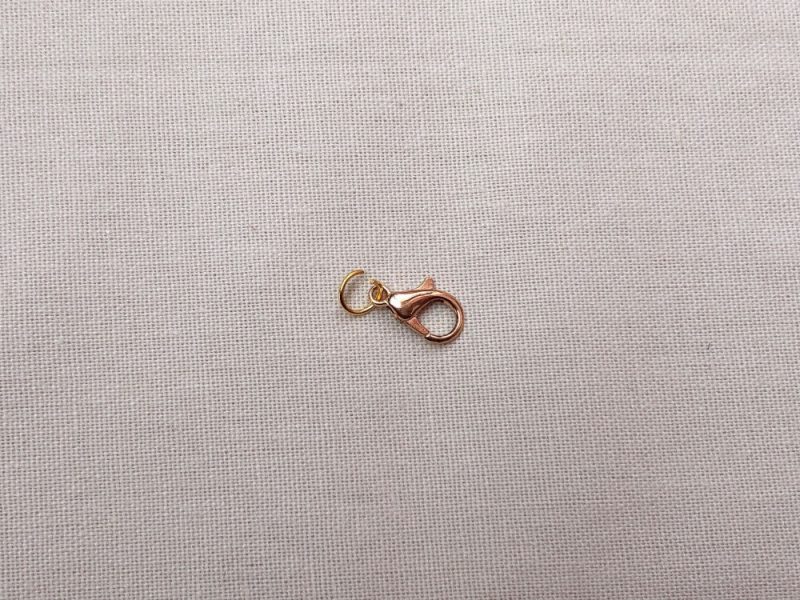
- Lobster lock
- Jump rings
- Crimp lock
- Total Time: 1 hour and 30 minutes
- Difficulty level: Beginners
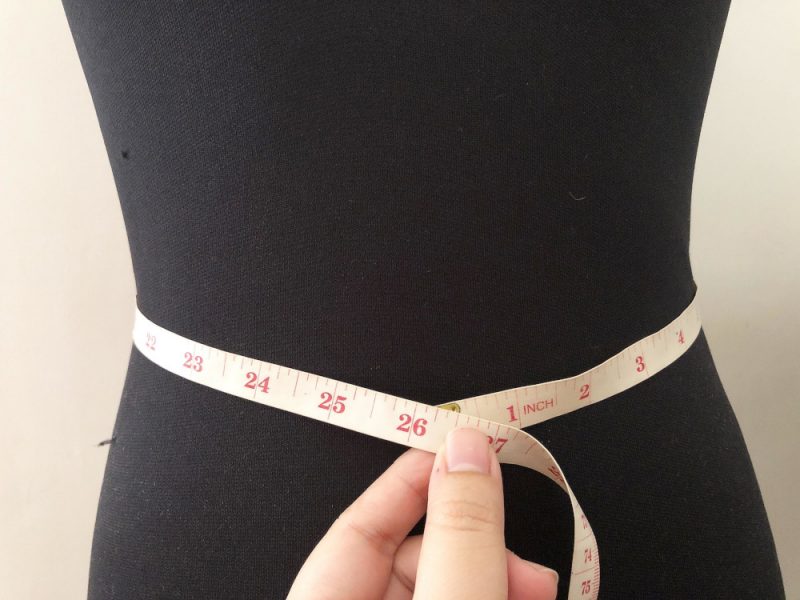
Step 1 – Measure your waist.
Wrap a measuring tape or the string/nylon around your waist where you want the waist beads to sit.
Step 2 – Cut the string.
Cut the string/nylon- take the waist measurement and add 8 inches (20 cm) to ensure you have enough string left to lock the waist beads.

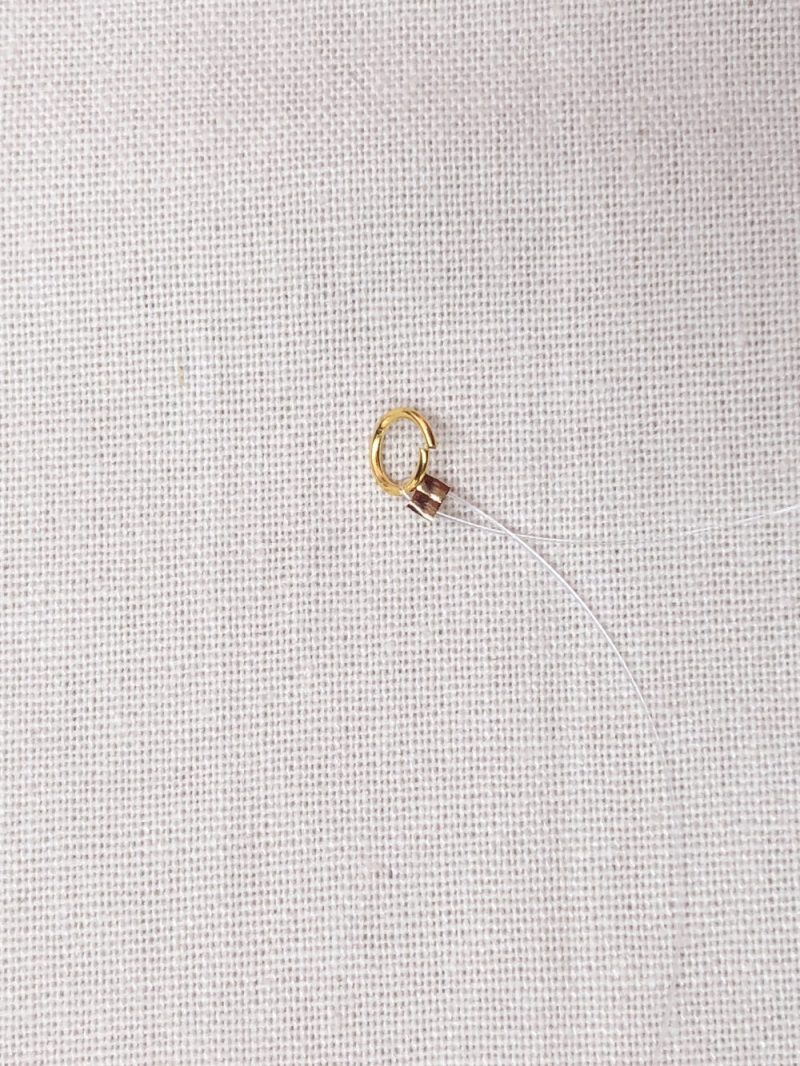
Step 3 – Add the crimp lock.
Add your crimp lock to the string, then the jump ring, and loop it back in the crimp lock. Flatten it with your crimping pliers. I am doing this first to ensure your beads don’t fall accidentally.
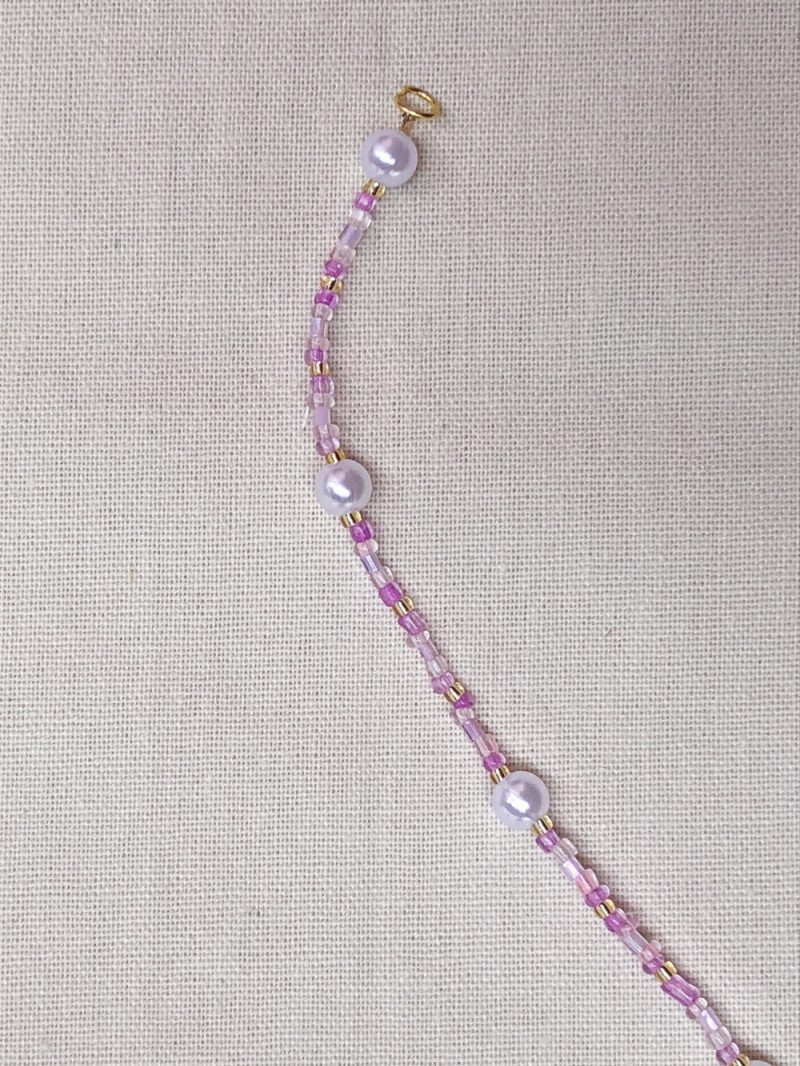
Step 4 – Adding the beads.
Arrange the beads to your liking until you’re satisfied with the pattern, and continue doing so until you reach your waist measurement.
Step 5 Final locking
Open your jump ring with the crimping pliers and attach the lobster clasp. Then, repeat step 3.
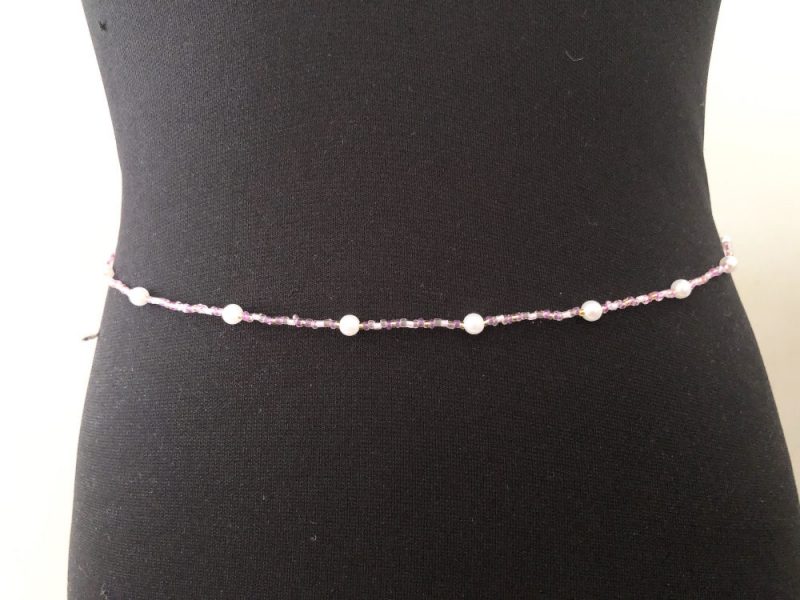
Step 6 The finished product
The finished product- wear it around your waist.
Waist beads F.A.Q.
How many waist beads should I wear?
This is a question that does not have a definitive answer. It depends on your personal preference, as well as the type of look you are going for. Generally, though, three or four waist beads is a good number to start with. You can always add or remove beads depending on how you feel. Just make sure that the beads are evenly spaced out along your waistline for the most flattering effect. experiment and see what works best for you!
What kind of string do you use for waist beads?
Cotton is the most common material used to make waist beads. Cotton is cheap, easy to dye, and knits easily into thread, allowing for bead making. The cotton strings are used because they are soft, pliable, and come in great colors. I am using nylon in this tutorial as it is a material you will probably have already.
Are waist beads supposed to be stretchy?
Yes, waist beads are supposed to be elastic. They are not supposed to break or snap even with strong pulling or movements. That’s why I proposed using nylon in this tutorial. It makes them very comfortable for the wearer compared to stiffer materials like plastic. They are also often made of cotton that stretches easily and returns to its original shape after use. Waist beads cannot be washed by machine, so they should be cleaned manually using a brush dipped in soapy water.
Do you shower with waist beads?
Just like any other piece of jewelry, waist beads can be worn in the shower. However, it is important to take precautions to protect them from getting wet. If you are not careful, the beads could rust or tarnish. Always make sure that they are thoroughly dry before putting them away.
How to put on waist beads
The simplest way is to tie the waist bead around the waist. It can also be tied diagonally or even on one hip depending on preference. You can also tie two or more waist beads at once. In this tutorial, I am using lobster locks, which is the easiest and cheapest way to go. Note that you could also use screw-on or clasps if this is what you have.
How to make waist beads for weight loss?
Waist beads are not made to be used as a weight-loss device. I suppose you could choose a non-elastic type of string to control your waist over time. However, as mentioned before, it is better to use elastic material for waist beads in general. The whole idea of making this piece of jewelry is to enjoy it and make it fit your size, no matter what the size is!


2 comments
I would love to learn more about it I do some crafts but I have slowed down but I need to pick up on it but I would really love to make somebody beads