Art & Craft, DIY ideas and Tutorials – Craftbuds
  • About Us
  • Needlecraft
    • Crochet
    • Knitting
    • Quilting
    • Sewing
    • Embroidery
  • Cricut
  • Jewelry Making
  • Paper Craft
    • Origami
    • Drawing
  • Engraving
  • Collectibles
    • Numismatics
43K Followers
25K Followers
1K Subscribers
Subscribe
Art & Craft, DIY ideas and Tutorials – Craftbuds
  • About Us
  • Needlecraft
    • Crochet
    • Knitting
    • Quilting
    • Sewing
    • Embroidery
  • Cricut
  • Jewelry Making
  • Paper Craft
    • Origami
    • Drawing
  • Engraving
  • Collectibles
    • Numismatics
  • Craft
  • Sewing

Tutorial: Flat Iron/Curling Iron Travel Case

  • Mary
  • Posted: March 11, 2011
Total
155
Shares
0
0
155

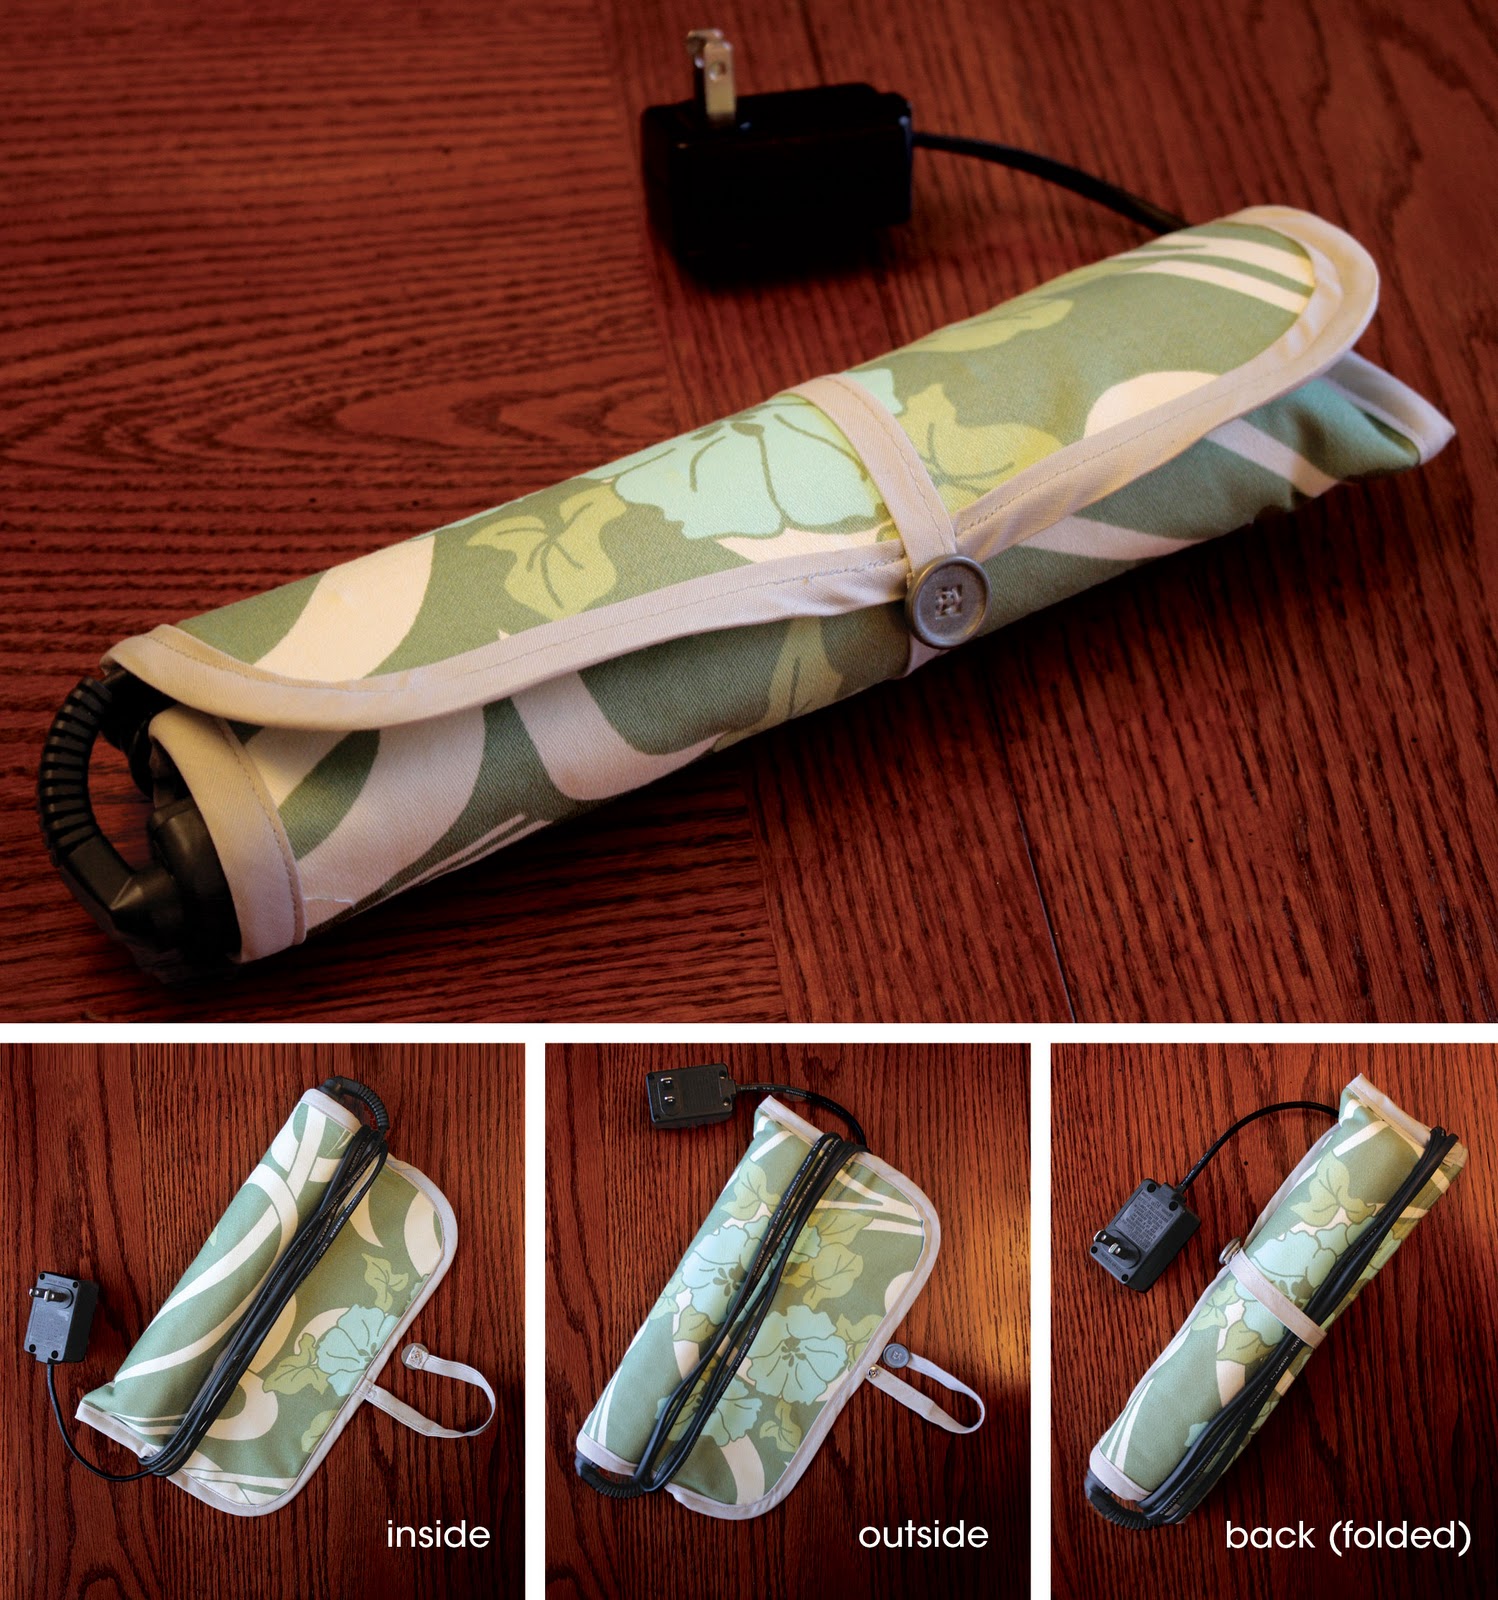
My flat iron is hands down the best thing that’s happened to my hair. I don’t travel without it! It seems like like straightening my hair is one of the last things I do and then I can’t pack the flat iron or I wrap it in a towel to avoid burning my clothes. Enter the flat iron travel case! This baby means I can straighten my hair then immediately pack it up for storage or for traveling.

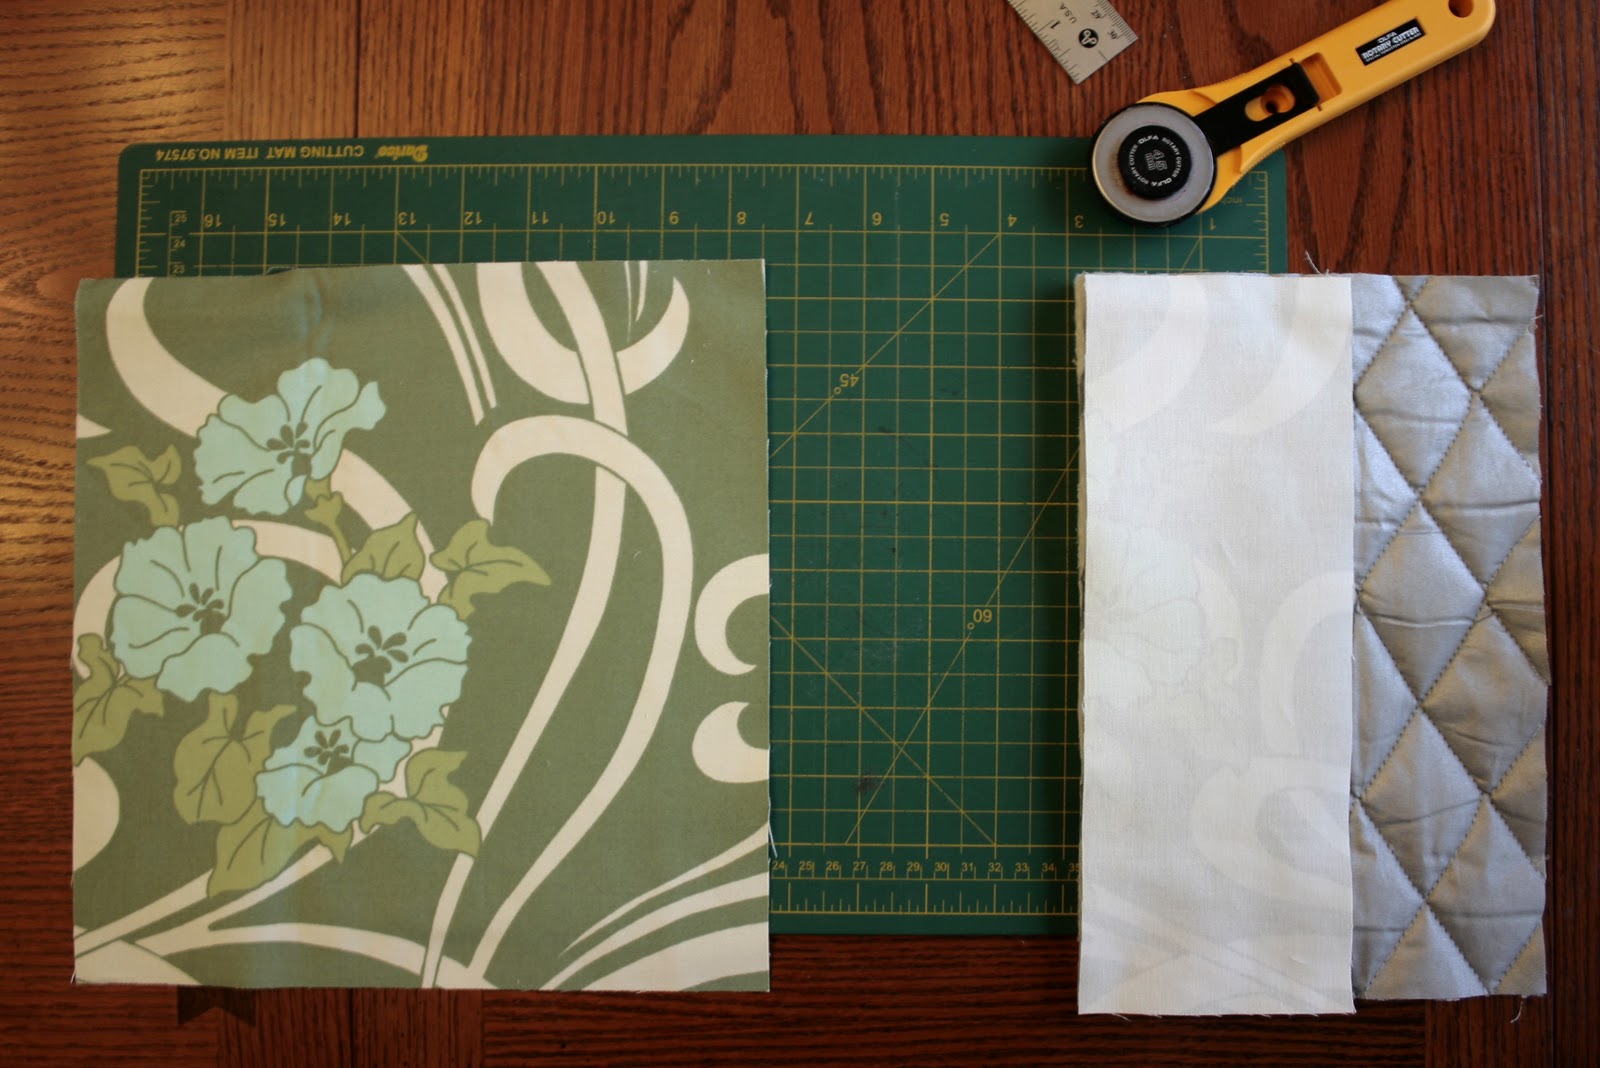
For this project I used an upholstery weight fabric and a silver quilted ironing board fabric cover. I found the ironing board fabric at my local JoAnns. My flat iron is a CHI 1″ ceramic so that’s what I’ve based all my measurements on. The trickiest part of this project is measuring correctly.

Here are the measuring guidelines I used:
1. Length: Measure the length of your flat or curling iron not including the cord then add an extra 1/2″. The CHI is 10 1/4″ so once I add the extra 1/2″ I’m using 10 3/4″.
2. Pocket width: Measure the diameter around the widest part of your flat or curling iron and add 2″. CHI diameter at the widest point is 5″. Add 2″ and my pocket is 7″.
3. Flap width: Use half of the measurement of your pocket for the flap. That’s 3 1/2″ for me.
4. Total width: Add together the pocket plus the flap (7″ + 3 1/2″ = 10 1/2″) then subtract 1/2″ (10 1/2″ – 1/2″ = 10″).

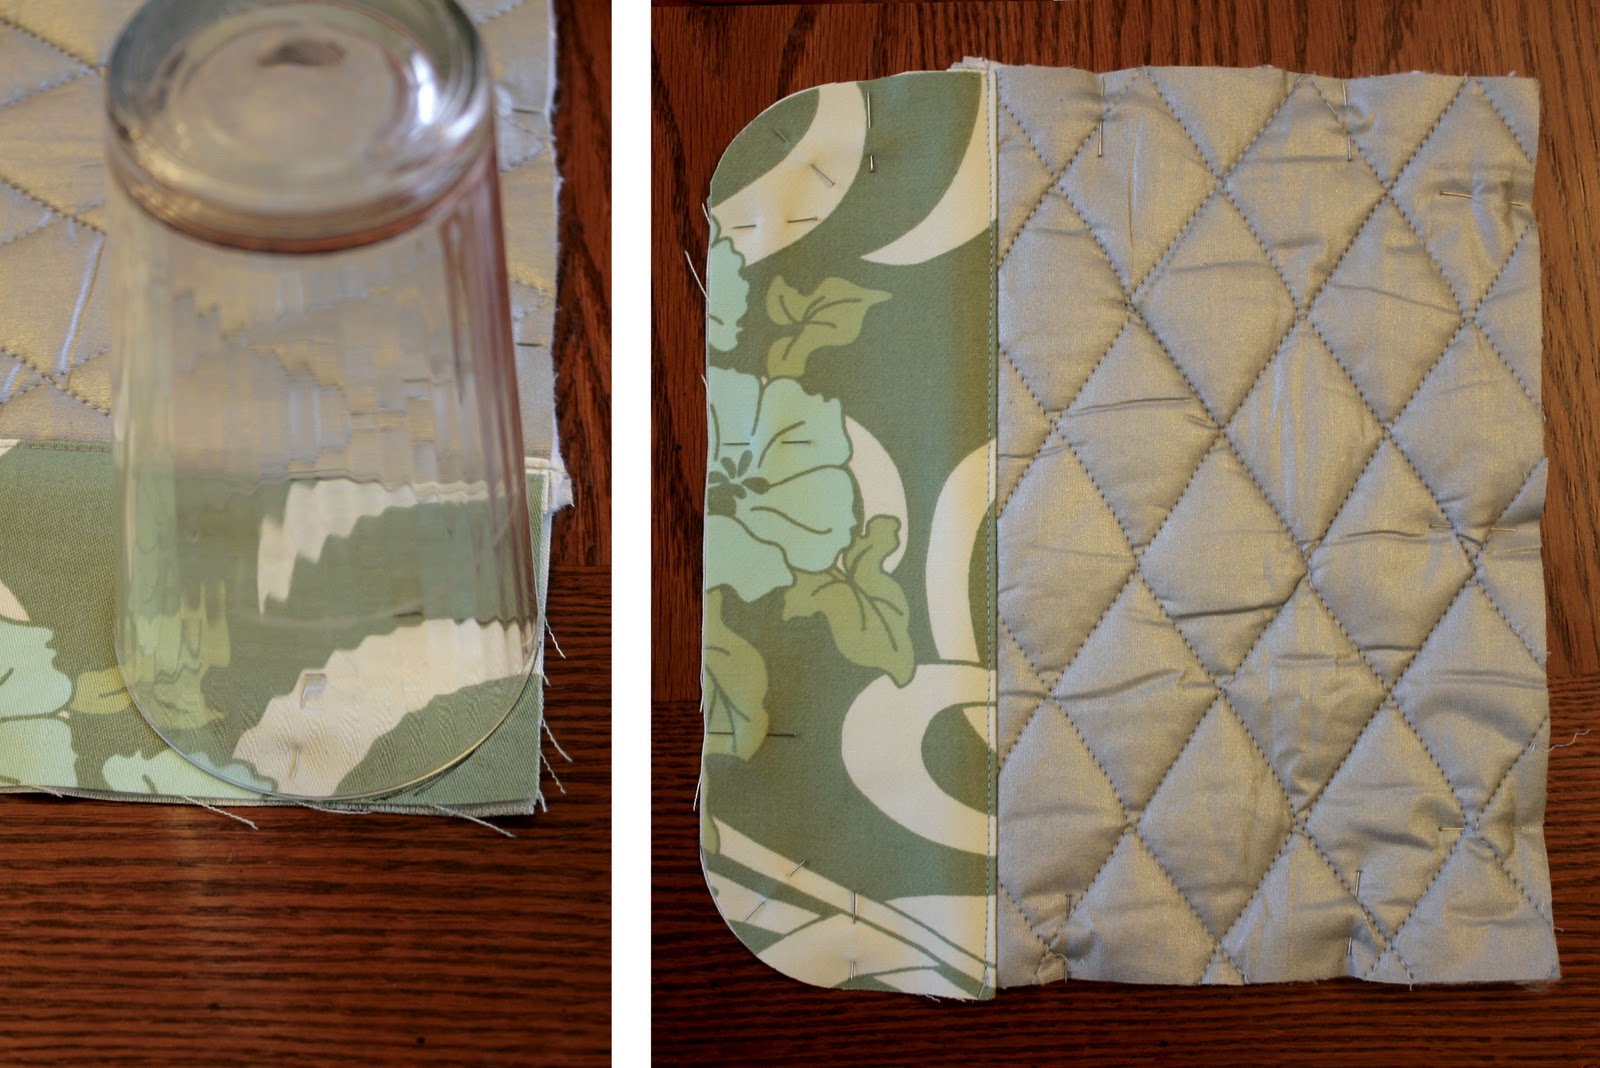
Now you’re going to match up right sides of the flap and the pocket and stitch them together. I found that the fabric fed more smoothly with the batting side of the quilted fabric facing up.

Open it up and place it on top of your remaining piece of fabric with wrong sides together and pin. Stitch a seam down the flap 1/8″ from the seam between the two fabrics.

Now trace out and cut the corners on the flap. I used a drinking glass.
At this stage you can cut an optional plastic mesh to add to the flap to help stabilize it. When the project is all done this makes wrapping the cord around the flap easier. I used a sheet of plastic mesh (also called plastic canvas) that I found near the yarn in JoAnn’s. This is the same mesh you may remember stitching yarn through to make a tissue box cover as a kid–or at least that’s how I remember it! I cut it to fit the flap but left a 9/16″ border. I wanted to make sure that when I added my 1/2″ bias tape there was no chance I was going to hit the plastic with my needle.

Once the mesh was cut I did a loose stitch all around the piece to hold it together. Just to reduce the possibility of hitting the mesh with the sewing machine needle, I started sewing at the X and went almost all the way around, slid the mesh into the opening then finished stitching the rest of the way back to the X.

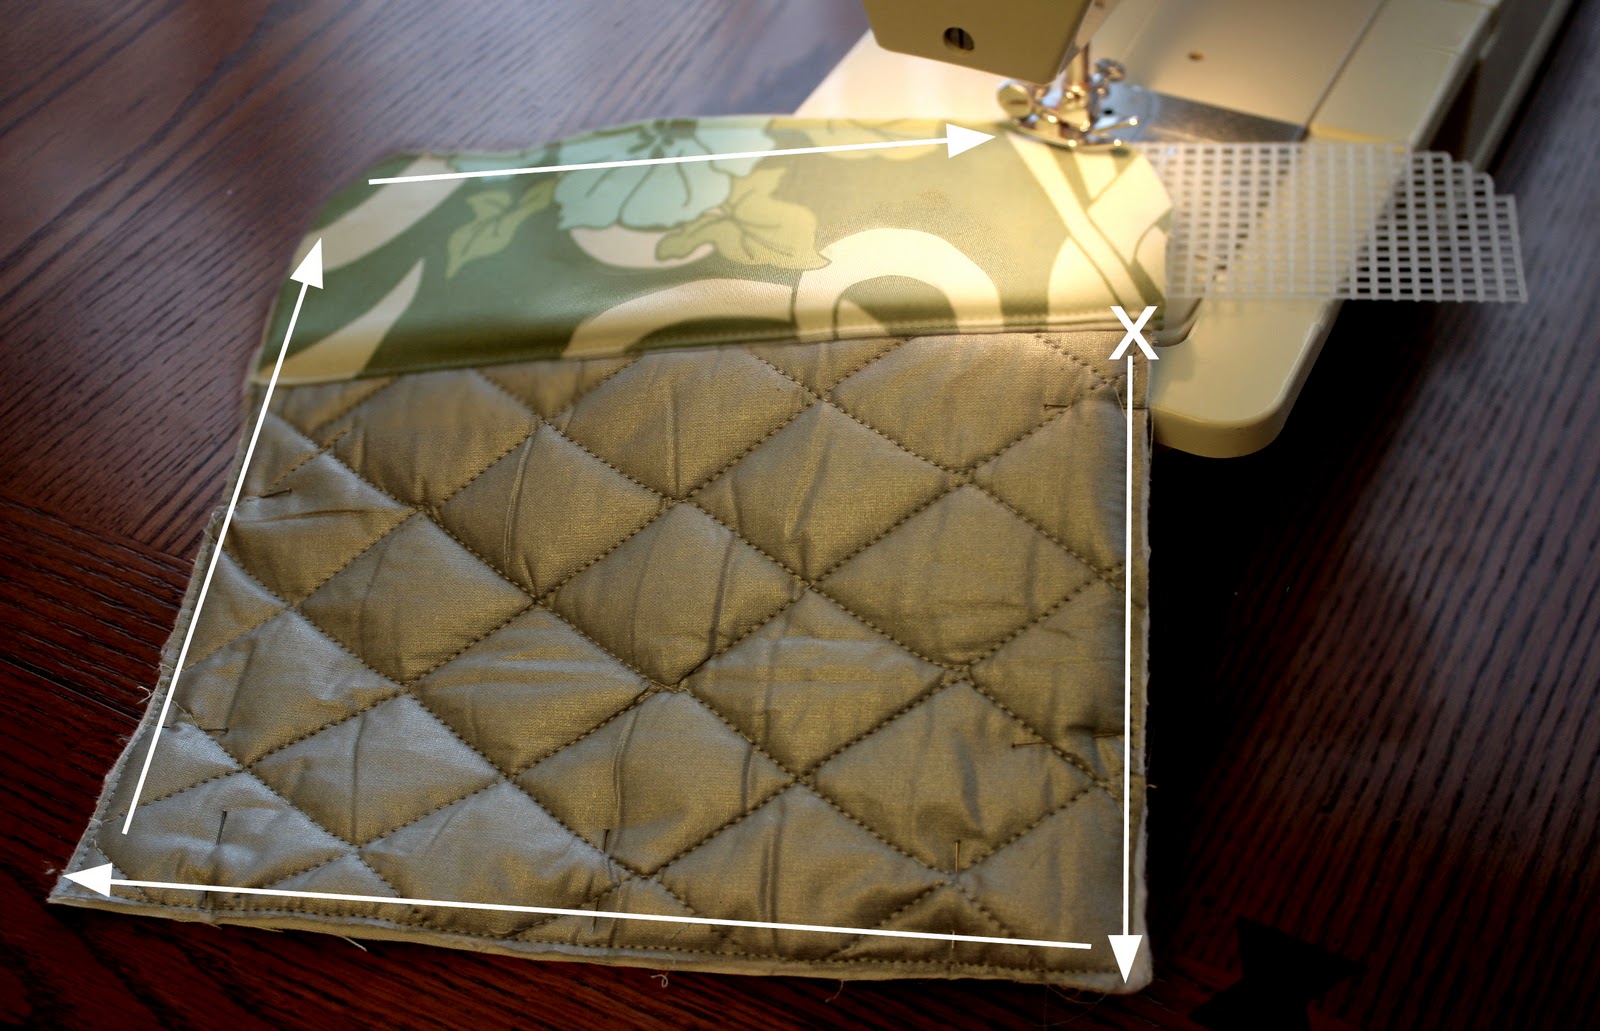
Now you’re going to add bias tape all the way around and it’ll look like you’ve made a hot pad. That means you’re almost done!

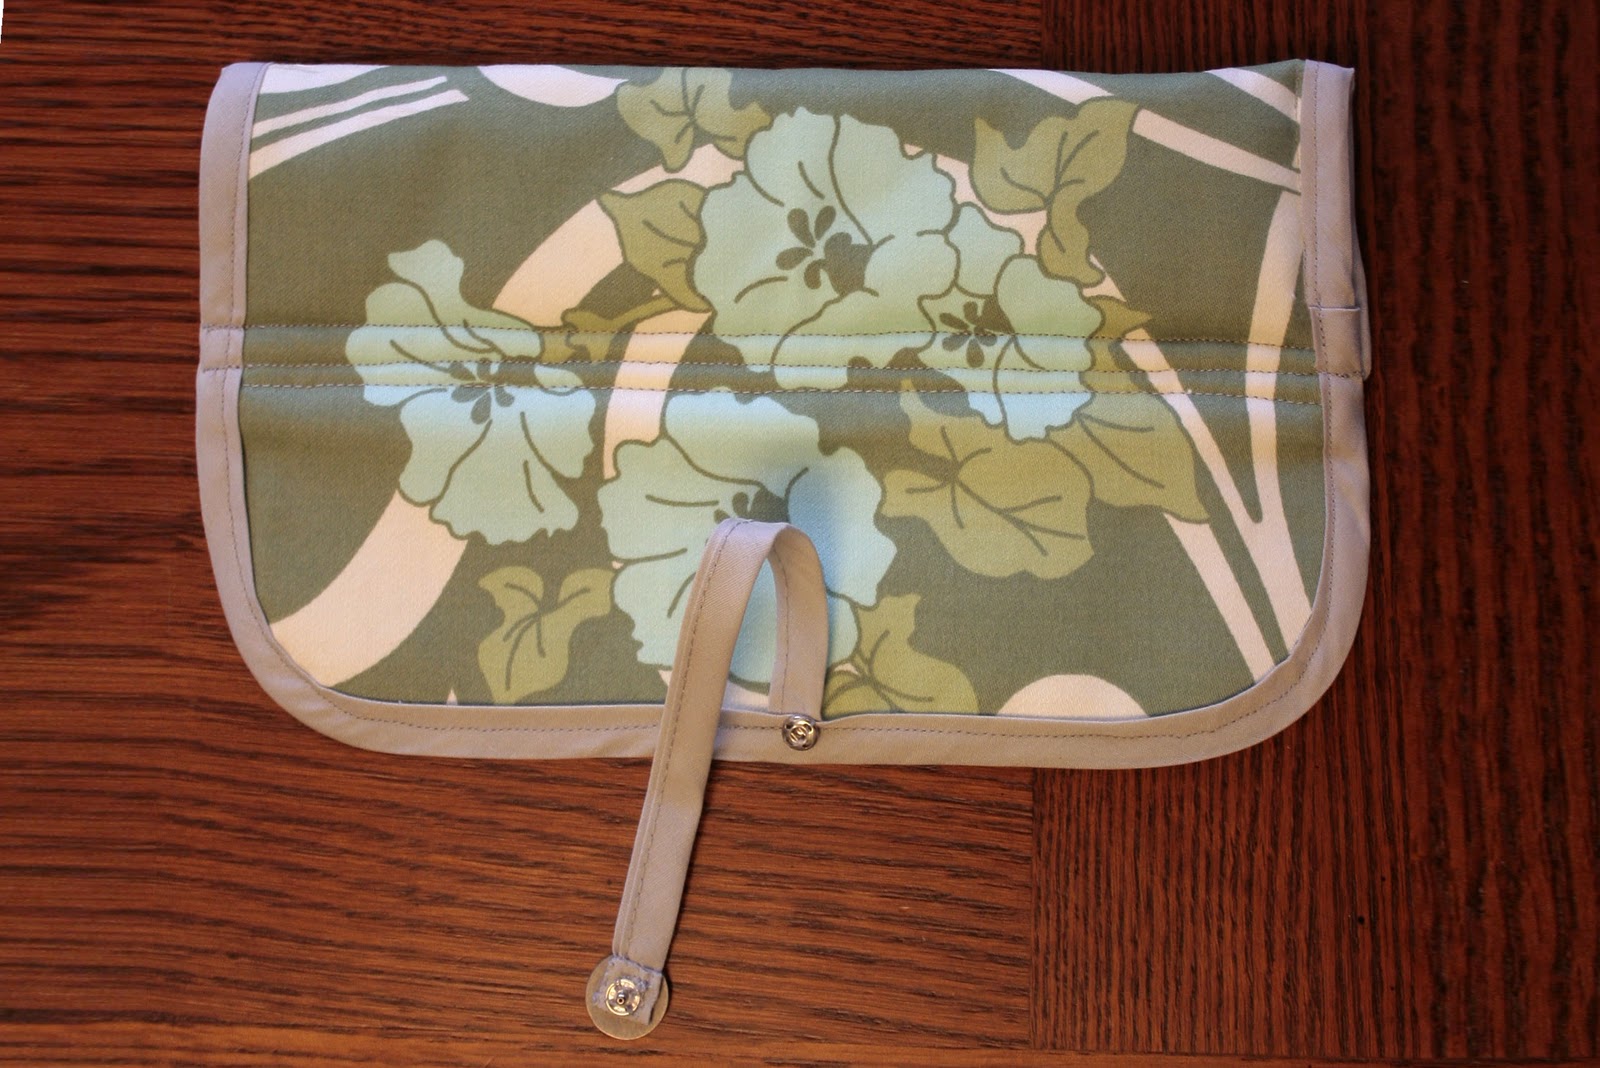
Now fold your pocket over. Stitch three seams, one just to the side off the bias tape and two seams on the bias tape. You really only need one seam, but the three seams help stabilize the area where you’ll be wrapping the cord around.

At this stage I added the strap. It may be easier for you to add it while you’re stitching on the bias tape. As is, I had to seam rip a half inch opening, inserted the strap, folded it over, then stitched it down. You can click the image below to enlarge it to see exactly what I did. You’ll also see that I stitched a decorative button and a snap onto the strap. I used a strap that was 8 1/2″ long, and tucked 3/8″ under the bias tape and folded the end with the button over 3/8″ to reinforce it. In case your flat/curling iron has a longer or shorter cord than mine, you may want to put it in the pocket and wrap the cord around the flap then measure how long your strap needs to be rather than using my measurements.

Here’s a close up of the button/snap area:

And you’re finished! Ready to travel or organize!

PS. Click on any of the photos for a larger view!

Total
155
Shares
Share 0
Tweet 0
Pin it 155
Related Topics
  • bias tape
  • cord
  • curling iron travel case
  • flat iron travel case
  • hair straightener
  • organization
  • organize
  • straight hair
  • straightening
  • travel
  • tutorial
Mary

Previous Article
  • Giveaways

Giveaway Roundup

  • Mary
  • Posted: March 9, 2011
View Post
Next Article
  • Craft
  • Giveaways

Sherbet Pips Charm Pack Giveaway

  • Lindsay
  • Posted: March 14, 2011
View Post
You May Also Like
View Post
  • DIY projects
  • Home

nPhoto – Professional Photo Printing Services for Photographers: Develop Your Brand with Us!

  • Jeremie Berton
  • Posted: January 14, 2025
View Post
  • Craft
  • Outdoor

5 Great Destinations in Costa Rica for Your Next Crafting Retreat

  • Craftbuds Editorial Team
  • Posted: December 16, 2024
Why-Professional-Locksmiths-Are-Essential-for-Home-Security
View Post
  • Home

Avoiding DIY Disasters: Why Professional Locksmiths Are Essential for Home Security

  • Jeremie Berton
  • Posted: April 3, 2024
Putting Together a Wooden Nativity Set for the Holidays
View Post
  • Craft
  • DIY projects
  • Home
  • Outdoor

Putting Together a Wooden Nativity Set for the Holidays

  • Sheila Mae Pedregosa
  • Posted: February 7, 2024
How is AI Impacting Crafting
View Post
  • Craft
  • Tools & Supplies

How is AI Impacting Crafting

  • Craftbuds Editorial Team
  • Posted: December 5, 2023 - Updated at: December 7, 2023
How to Sew Leather
View Post
  • Needlecraft
  • Sewing

Sewing Leather & Faux Leather Made Easy: A Step-by-Step Guide to Perfection

  • Michelle Rowley
  • Posted: October 24, 2023
How Funny Phrases on Shirts Have Transformed
View Post
  • Craft

The Evolution of Humor: How Funny Phrases on Shirts Have Transformed 

  • Craftbuds Editorial Team
  • Posted: October 23, 2023 - Updated at: October 24, 2023
Craft Organizers for Efficient Storage Use
View Post
  • Craft
  • DIY projects

DIY Craft Organizers for Efficient Storage Use

  • Craftbuds Editorial Team
  • Posted: October 23, 2023 - Updated at: October 25, 2023
4 comments
  1. Linae Stoner says:
    May 9, 2011 at 9:32 pm

    Ohh… My daughter’s have been asking for these. I think these will make great Christmas presents. Thanks so much. I saw your site on foodwineandmodgepodge.com

  2. Giselle says:
    May 10, 2011 at 5:24 pm

    So useful and will make splendid gifts for all the teenagers in my life whom simply cannot live without their flat irons! Thank you for sharing.

Leave a Reply

Your email address will not be published. Required fields are marked *

Subscribe

Subscribe now to our newsletter

Art & Craft, DIY ideas and Tutorials – Craftbuds
  • About Us
  • Editorial Guidelines
  • Our Experts
  • Privacy Policy
  • Contact Us
Find fun and creative craft ideas and tutorials across various categories such as Knitting, Quilting, Sewing, PaperCraft, Jewelry Making and much more

Input your search keywords and press Enter.