Art & Craft, DIY ideas and Tutorials – Craftbuds
  • About Us
  • Needlecraft
    • Crochet
    • Knitting
    • Quilting
    • Sewing
    • Embroidery
  • Cricut
  • Jewelry Making
  • Paper Craft
    • Origami
    • Drawing
  • Engraving
  • Collectibles
    • Numismatics
43K Followers
25K Followers
1K Subscribers
Subscribe
Art & Craft, DIY ideas and Tutorials – Craftbuds
  • About Us
  • Needlecraft
    • Crochet
    • Knitting
    • Quilting
    • Sewing
    • Embroidery
  • Cricut
  • Jewelry Making
  • Paper Craft
    • Origami
    • Drawing
  • Engraving
  • Collectibles
    • Numismatics
  • Craft
  • DIY projects

How to Make a Simple LOVE Shirt? Short & Sweet

  • Mary
  • Posted: February 7, 2022
How to Make a Simple LOVE Shirt
Total
0
Shares
0
0
0
**Note: This was one of the first posts on Craft Buds. I’ve updated it and re-posted it in time for Valentine’s season since we only had a few followers when it was first posted!**
This Valentine’s Day I decided to make a shirt based on the LOVE statue in Philadelphia.
_MG_2955b
It was a fast and easy project with some homemade applique letters and a little stitching.


Table of Contents

  • 1 Step 1
  • 2 Step 2
  • 3 Step 3
  • 4 Step 4
  • 5 Step 5

Step 1

To make the letters, iron Wonder-Under paper-backed fusible web or something similar to the back of your fabric. We used Pellon Wonder Under Fusible Web Heavy Duty found on amazon.

Step 2

Trace the letters backward onto Wonder-Under on the back of the fabric using a stencil of the letters. You can download the PDF of the letters for personal use here.

Step 3

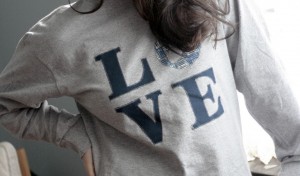
Cut out each letter, peel off the Wonder-Under backing, and position the letters onto the shirt.

Step 4

Iron down the letters following the instructions on the Wonder-Under or the product you are using.

Step 5

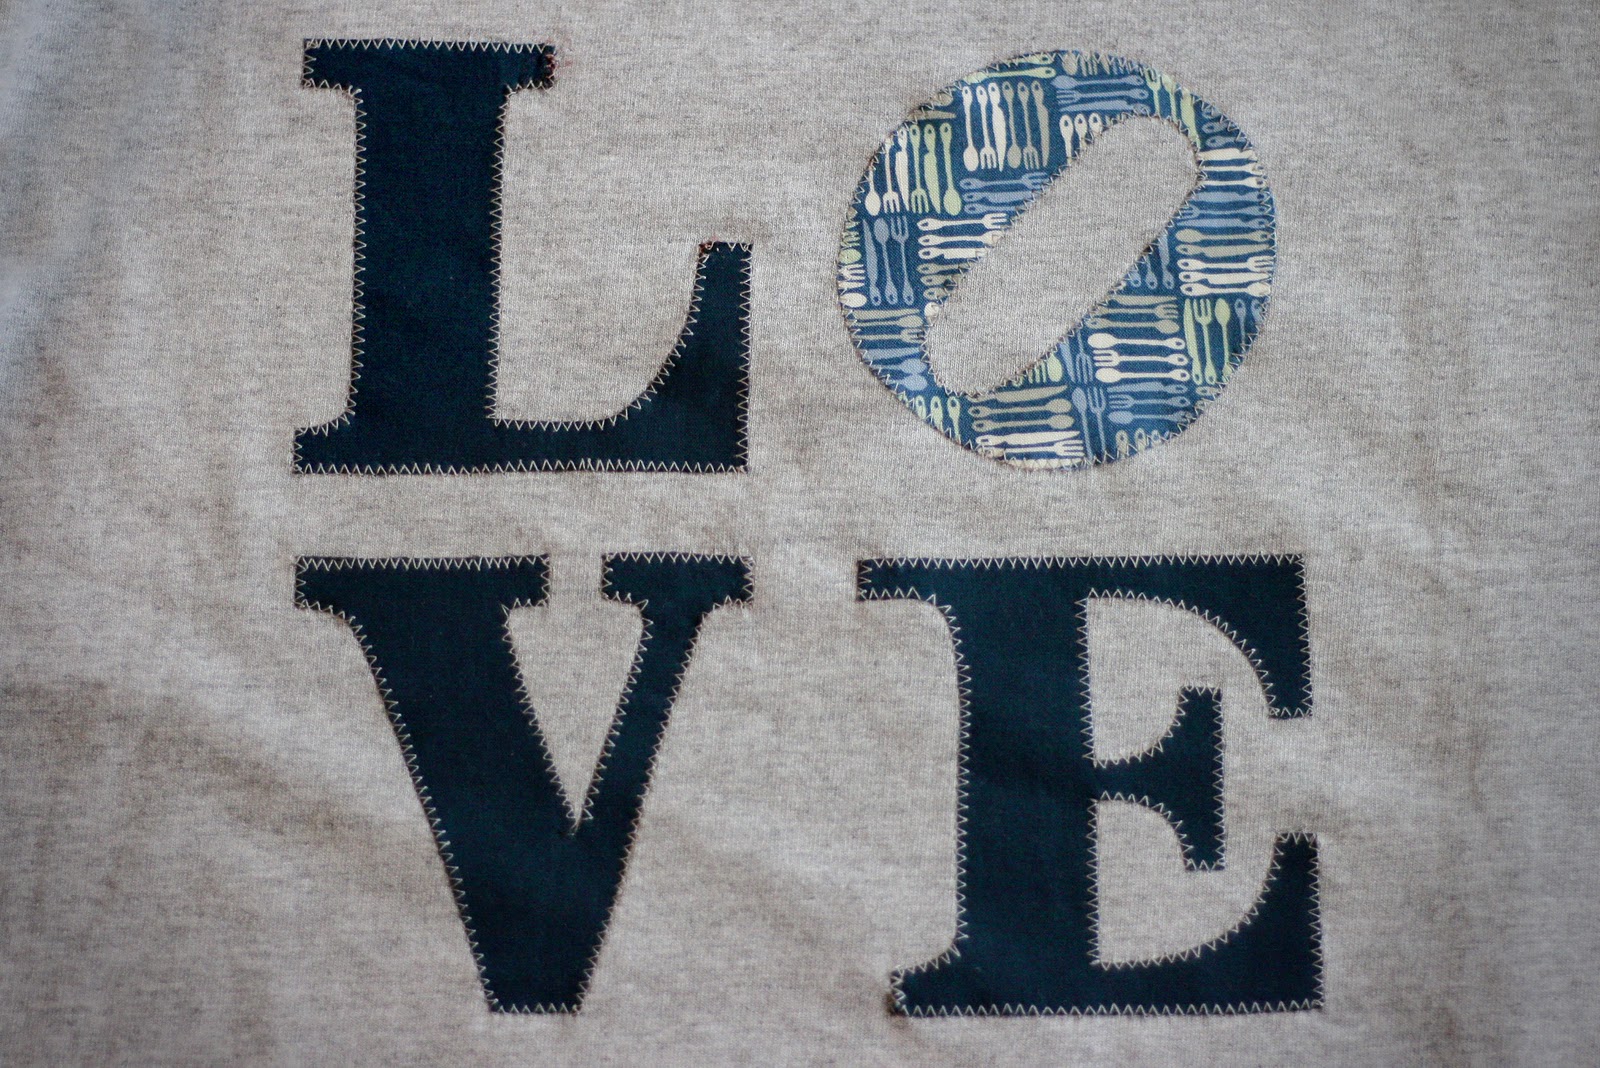
Finish the shirt by doing a zig-zag or similar stitch around each letter and project complete! You could skip doing the stitching but the shirt may not last as long because the letters could eventually peel off.

We found the plain long-sleeved gray shirt at Target in the men’s section. They had a variety of colors and they had a few in the boy’s section if you need a smaller size. Here’s a close-up of the letters. We chose a navy quilting cotton for the L, V, and E. For the O we used a fabric with tiny forks, spoons, and knives since the recipient of this shirt is well known for her fabulous baking creations. You can personalize with fabrics that coordinate with something you love or go with a more traditional Valentine’s red/pink look. This would be a cute shirt for an adult or a child!


Total
0
Shares
Share 0
Tweet 0
Pin it 0
Related Topics
  • kid's valentine's day shirt
  • kid's valentine's day tshirt
  • LOVE shirt
  • LOVE shirt tutorial
  • Valentine's day shirt
  • valentines day t-shirt
  • valentines day tshirt
Mary

Previous Article
Whirligig Quilt Block Tutorial
  • Craft
  • Needlecraft
  • Quilting

Whirligig Quilt Block Tutorial

  • Lindsay
  • Posted: February 7, 2022 - Updated at: March 16, 2022
View Post
Next Article
How Long to Bake Polymer Clay?
  • Craft

How Long to Bake Polymer Clay?

  • Lindsay
  • Posted: February 7, 2022 - Updated at: May 2, 2022
View Post
You May Also Like
View Post
  • DIY projects
  • Home

nPhoto – Professional Photo Printing Services for Photographers: Develop Your Brand with Us!

  • Jeremie Berton
  • Posted: January 14, 2025
View Post
  • Craft
  • Outdoor

5 Great Destinations in Costa Rica for Your Next Crafting Retreat

  • Craftbuds Editorial Team
  • Posted: December 16, 2024
DIY Tips for Creative Wedding Decoration Ideas
View Post
  • DIY projects

DIY Tips for Creative Wedding Decoration Ideas

  • Jeremie Berton
  • Posted: April 3, 2024
Why-Professional-Locksmiths-Are-Essential-for-Home-Security
View Post
  • Home

Avoiding DIY Disasters: Why Professional Locksmiths Are Essential for Home Security

  • Jeremie Berton
  • Posted: April 3, 2024
Stay Ahead of Car Hackers Craft a DIY Faraday Bag
View Post
  • DIY projects

Stay Ahead of Car Hackers: Craft a DIY Faraday Bag

  • Petar Dimov
  • Posted: March 21, 2024 - Updated at: April 3, 2024
Putting Together a Wooden Nativity Set for the Holidays
View Post
  • Craft
  • DIY projects
  • Home
  • Outdoor

Putting Together a Wooden Nativity Set for the Holidays

  • Sheila Mae Pedregosa
  • Posted: February 7, 2024
How is AI Impacting Crafting
View Post
  • Craft
  • Tools & Supplies

How is AI Impacting Crafting

  • Craftbuds Editorial Team
  • Posted: December 5, 2023 - Updated at: December 7, 2023
How Funny Phrases on Shirts Have Transformed
View Post
  • Craft

The Evolution of Humor: How Funny Phrases on Shirts Have Transformed 

  • Craftbuds Editorial Team
  • Posted: October 23, 2023 - Updated at: October 24, 2023
15 comments
  1. Katie says:
    January 23, 2012 at 11:29 am

    That turned out great! What a cute idea!
    You should join me for Handmade 52! https://raisingoranges.blogspot.com/2012/01/handmade-52-3.html

  2. Katy says:
    January 23, 2012 at 4:00 pm

    Cute idea, you get get a pile done for your kids :o)

  3. Jenny Pedigo says:
    January 23, 2012 at 4:14 pm

    What a great idea!! My girls would love that!

  4. Claire Jain says:
    January 23, 2012 at 4:42 pm

    Ah! That is so cute! Thanks for sharing.

  5. Jill says:
    January 23, 2012 at 7:22 pm

    Great t-shirt!

    Thanks for linking to a Round Tuit!
    Hope you have a fabulous week!
    Jill @ Creating my way to Success
    https://www.jembellish.blogspot.com/

  6. Megan @ Canoe Ridge Creations says:
    January 23, 2012 at 10:42 pm

    so fun! great idea for v-day! 🙂 thanks for linking up to {sew} modern monday!

  7. Adrianne (Little Bluebell) says:
    January 24, 2012 at 12:43 am

    This is a really cute idea! Thanks for re-sharing it and putting up the templates for us to use!! : )

  8. Joquena says:
    January 24, 2012 at 2:17 pm

    Do you think it would hold up without the fusible web and is that the same as fusible interfacing?

  9. Megan Loop says:
    January 24, 2012 at 6:55 pm

    This is super cute. I have been thinking of making a sign like this. I’m stopping by from Funky Polka Dot Giraffe. I hope you’ll come visit me.

    https://theloops13.blogspot.com

  10. Tara@Tales of a Trophy WIfe says:
    January 25, 2012 at 8:05 pm

    Awesome-i always forgot to do it on the wrong side and then make mirror images by mistake:)

  11. Eileen says:
    January 29, 2012 at 8:43 am

    Definitely worth reposting. Thank you.

  12. Holly Lefevre says:
    February 2, 2012 at 8:45 pm

    so darn cute! featuring it on tickled pink!

  13. Danielle says:
    February 6, 2012 at 11:29 pm

    I just wanted to let you know I featured your LOVE shirt on Blissful and Domestic tonight. Stop by and grab a button:>

    https://blissfulanddomestic.blogspot.com/2012/02/25-wearable-refashions.html

  14. Pat Sloan says:
    February 15, 2012 at 6:00 pm

    Happy Valentines day and thank you for sharing at my blog!

    Please be sure to visit my new “Learning Center” at quiltinggallery.com/learning-center/

  15. candie ellis says:
    February 18, 2012 at 3:59 pm

    I love this… Very Cute Idea….

    Candie Ellis

Leave a Reply

Your email address will not be published. Required fields are marked *

Subscribe

Subscribe now to our newsletter

Art & Craft, DIY ideas and Tutorials – Craftbuds
  • About Us
  • Editorial Guidelines
  • Our Experts
  • Privacy Policy
  • Contact Us
Find fun and creative craft ideas and tutorials across various categories such as Knitting, Quilting, Sewing, PaperCraft, Jewelry Making and much more

Input your search keywords and press Enter.