
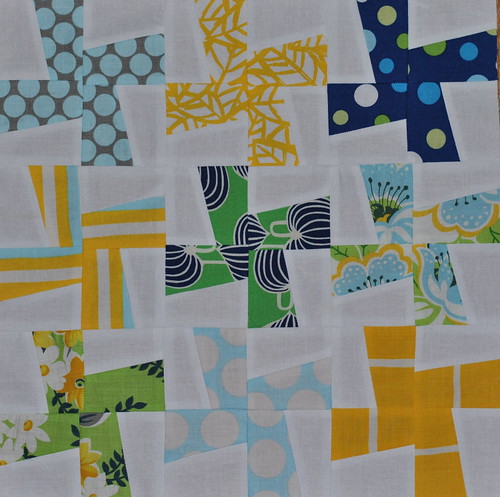
This tutorial will show you how to make a 12.5″ square whirligig block, alternating colorful scraps of fabric with your background or focus fabric. This is the perfect size for many quilting bees – I hope you find it helpful!
Best Quilting Sewing Machine for Beginners
To begin, make a template from cardboard (like a cereal or pasta box). Cut a cardboard rectangle that is 2.5″ x 3.25″.
With the rectangle positioned longways, mark 1.25″ from the top left and 1.25″ from the bottom right. Cut a straight line connecting these dots. In other words, you will slice the rectangle on a slight diagonal right through the center of the longer edges.
You now have a cardboard template that is 2.5″ (left side) x 1.25″ (skinny top) x 2.5″ (diagonal right edge) x 1.75″ (wide bottom). Discard half of the template; you will only need one side.

From your white background fabric, cut 18 rectangles that are 2.5″ x 3.25″ (your original rectangle size). Now use your cardboard template to slice your rectangles on the same diagonal as your template, creating 36 individual pieces. Set aside.
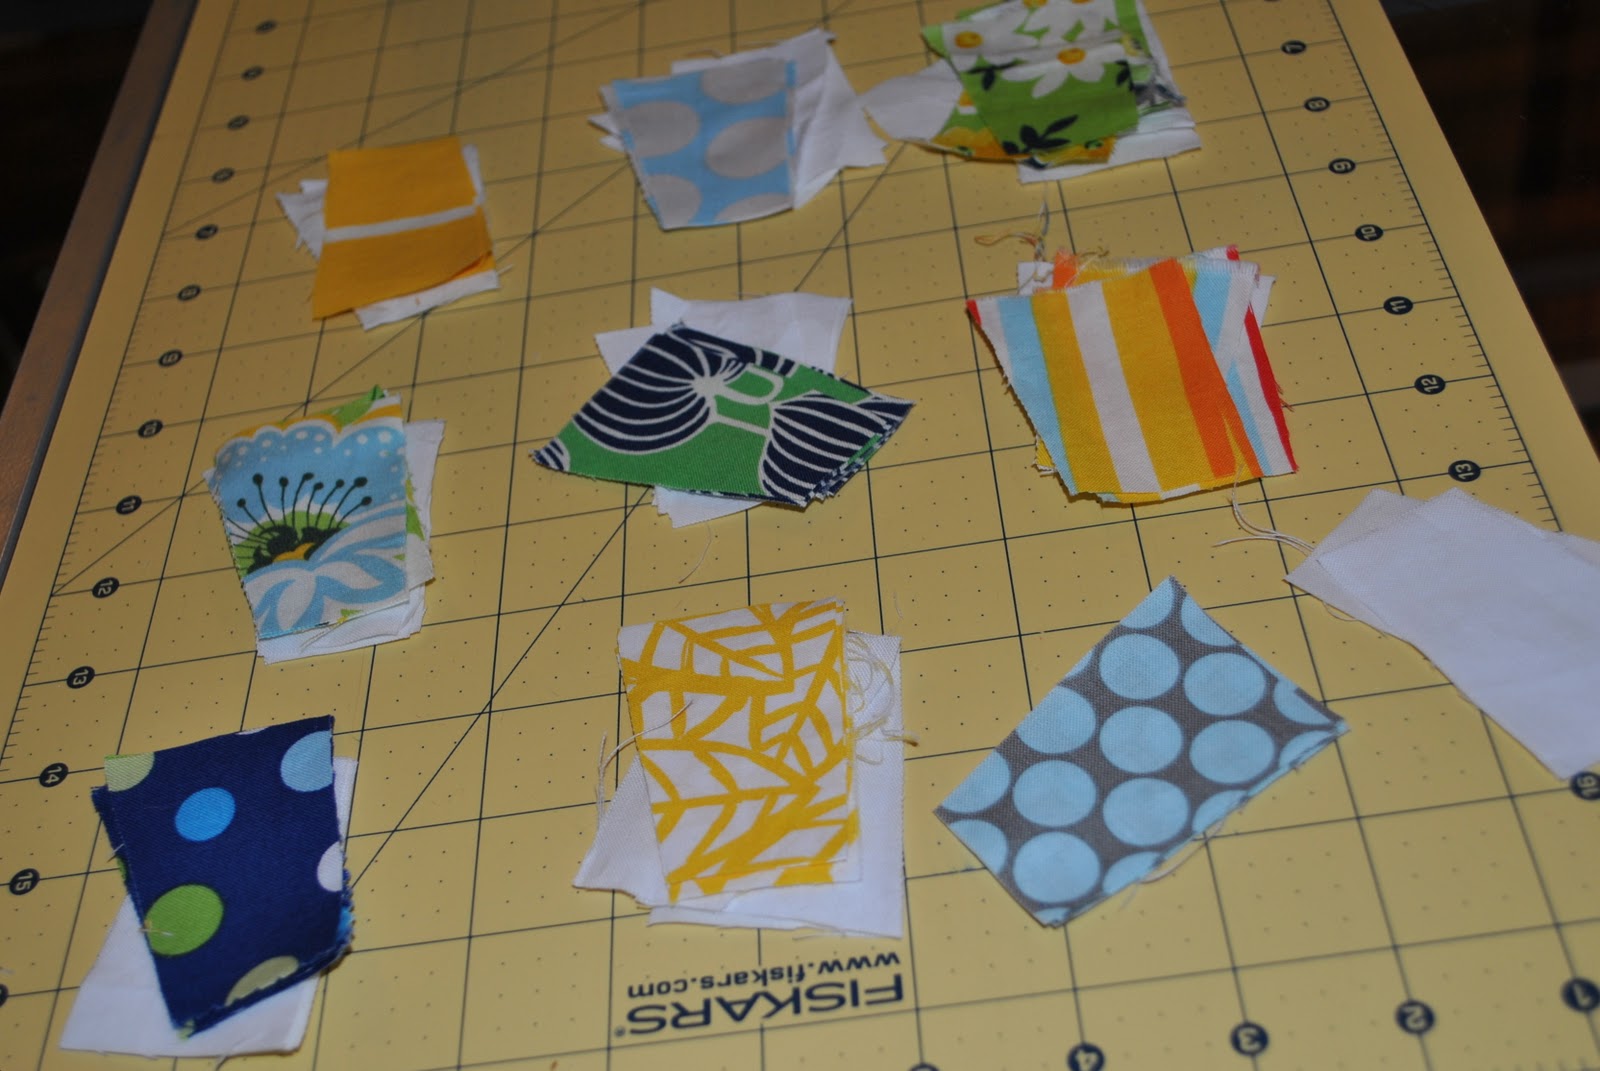
Next, sort your scraps and locate 9 different fabrics. Each fabric scrap should be large enough to cut 4 pieces directly from the cardboard template. Cut and arrange your whirligig “wings” so that like fabrics are grouped together.
Pair each white background piece with a colored piece, right sides facing. You’ll be stitching pieces together along the diagonal.

Here’s another view showing how the white and colored fabrics should go together. As you can see, I let the top corner of the white piece stick out a bit (about 1/16″ to 1/8″), just as I let the bottom corner of the bottom piece poke out. This will actually help your blocks to be even when you stitch them together.

Use a scant 1/4″ seam allowance. This is just a hair smaller than a true 1/4″. You’ll probably want to chain-piece these fabrics to save time and thread. (See below.) Back-stitch at the beginning and end of each piece. After chain-stitching the blocks, snip the connecting threads to separate.

With the back of each block facing you, use the back of your fingernail to press each seam open. The other option is to push your seam over to the patterned side; however, I find that pressing seams open makes the patchwork look more exact. Arrange your blocks as shown.

To join these blocks, stitch the two left blocks together, then the two right blocks, using your scant 1/4″ seam allowance. Chain stitch as before, and snip the threads, to save a few steps.

Again, press the seams open, then join the left and right sides with your scant seam allowance. Make sure the center seam from each side matches up in your whirligig block.
Carefully trim edges even. You should barely need to trim off anything, but trim up to 1/8″ if anything is hanging over. This will help make your final block easier to stitch. Repeat this process for your other 8 whirligigs, being sure to trim as needed.
To join your whirligig blocks together, change your seam allowance to a true 1/4″. (I slid my needle just one place to the left.) If you forget this step, your block will be closer to 13″ square when finished.

Arrange your 9 whirligigs so you have a good balance of colors, then pin together and stitch the first two blocks from each row. Join the third block to each row, making sure each point matches up with the seam from the next block. Press the seams open, and trim each row up to 1/8″ to even up the long edges.
To join your rows, match up seams, pinning together at each intersection. Stitch slowly, slightly pulling the fabric as needed when you approach an intersection. No matter how carefully you measure, you’ll need to push and pull fabric slightly to match seams perfectly.

Using these recommended seam allowances, you should now be able to trim the block to an even 12.5″ square. I made these blocks in assorted colors for a quilting bee on Flickr, based on this fun variation by Jessica. This is a great block to make in a variety of colors and patterns for your quilting bee.
If you make any blocks using this tutorial, feel free to send us a link, or share it on Facebook.


18 comments
Yay! Thank you Lindsay! I was going to reply to your email, and then saw this. Thank you, thank you, thank you!
Lindsay, thank you for posting this great and easy to follow tutorial.
What a wonderful tutorial, thanks!
This is great, Lindsay!
I loved this block when Jessica first posted hers, so I’m thrilled to know how to make it!
That turned out super cute! Great tutorial
Thank you for posting this. I hate to throw away fabric scraps and am always looking for new ways to use them up! I’ve only quilted basic squares… so this should be challenging.
Thanks for the great tutorial…..found you @LadyBugBlessing party!
Great tute! Looks so cute!
Lindsay, I love this block!! I wish there was a place to upload a picture of the block I made though. I need help to see what I did wrong. You said I might have to trim a scant 1/8th inch, well mine needs to be trimmed 1/4 in on each corner. My quilt block is going into a charity fundraiser quilt and has to be exactly 12.5 inches. I may have to change to a different block. If you can help please reply. Thanks, Kathy from the MO Ozarks
This is such a fun quilt. Thank you for taking the time to do the tutorial.
I am having the same problem. There is something wrong with the math. If you have length of 3.25 and cut away 1.25 that leaves a side length of 2″ not 1.75 in.
Hello,
I am very interested in making a quilt with the whirlygig block. Would a fat quarter be enough for this pattern? If I want to make a quilt queensize, (84×92) How much fabric would this require. I am a newbie to quilting, hope you can help, thanks.
Hi Kim, I just did some calculations and I think if you’re careful, you can cut around 80 pieces using your template (instructions at the beginning of this post) from one fat quarter (18″x22″ of fabric). There’s 8 whirligig pieces per square and 9 squares in this 12.5″ block, for a total of 72 total pieces. I don’t have the ability to calculate how much fabric you’d need for a queen sized quilt, but hopefully this information helps out!
TAMG–my quilt swap group had exactly the same problem with the template..the bottom ended up being 2″ if you cut the 1.25′ from the 3.25″ side..the extra .25 made everything uneven…we ended up cutting the template to 3″ and it seemed to work out alright…if you check out the link to [url=https://sewcraftyjess.blogspot.com/2011/07/mini-whirly-gigs.html]Jessica{/url] referenced above, you will see that she also cut the template down to 2.5×3. It really is a lovely block once you get going on it!
Hope to post the finished blocks at the end of the swap! Thanks.
Great post! Have nice day ! 🙂 xahws