Art & Craft, DIY ideas and Tutorials – Craftbuds
  • About Us
  • Needlecraft
    • Crochet
    • Knitting
    • Quilting
    • Sewing
    • Embroidery
  • Cricut
  • Jewelry Making
  • Paper Craft
    • Origami
    • Drawing
  • Engraving
  • Collectibles
    • Numismatics
43K Followers
25K Followers
1K Subscribers
Subscribe
Art & Craft, DIY ideas and Tutorials – Craftbuds
  • About Us
  • Needlecraft
    • Crochet
    • Knitting
    • Quilting
    • Sewing
    • Embroidery
  • Cricut
  • Jewelry Making
  • Paper Craft
    • Origami
    • Drawing
  • Engraving
  • Collectibles
    • Numismatics
  • Craft
  • Craft with Kids

DIY Train Costume for Under $10

  • Lindsay
  • Posted: February 3, 2022 - Updated at: November 13, 2022
DIY Train Costume
Total
451
Shares
0
0
451

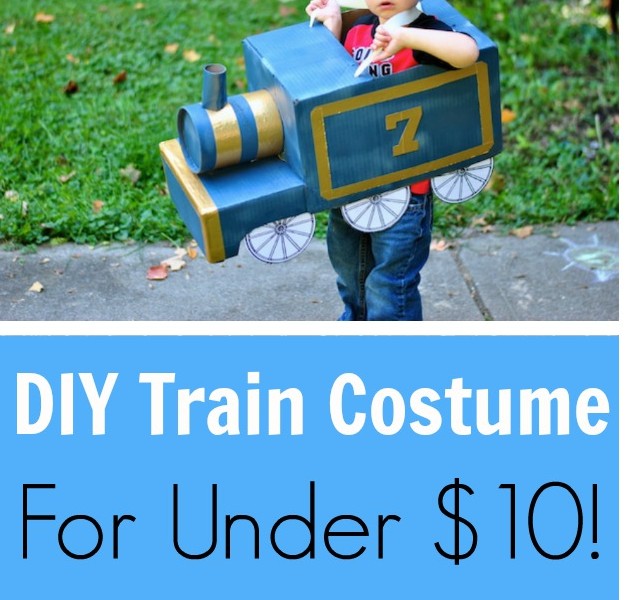
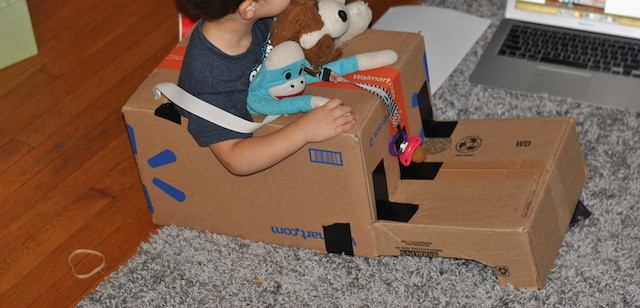
My son loves trains, and since it’s close to Halloween, I thought it would be fun for us to make a DIY train costume together. So I searched Pinterest for ideas, and I was so inspired by this train costume that I went into the garage searching for boxes!

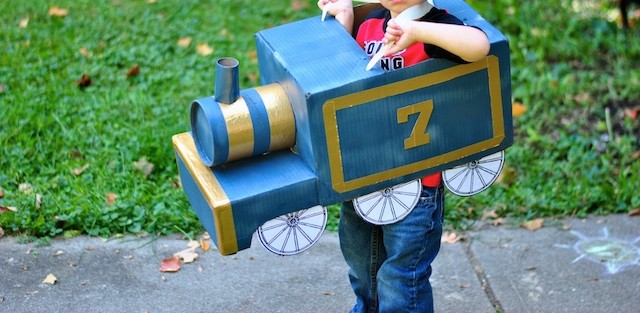
Here’s the finished product! This DIY train costume was easy to make and cost less than $10! I used almost everything I already had at home, and you probably have many materials in your junk drawer. I only purchased this blue spray paint and this Gold Duck Brand Tape on Amazon.

1. To get started, I chose a deeper box for the base and a shallow box of the same width for the front. After cutting off all the box flaps (set these aside for later!), I cut a hole large enough for my son to squeeze through in the base of the deeper box. I cut a slot for the shallow box to insert it into the end of the deeper box, then curved the front to make space for the wheels.

2. Use as much strong tape as you can to secure the two boxes together. You’ll spray paint over this later.

DIY Toddler Train Costume | Craft Buds

3. Gather materials from around your house for the other elements of the choo-choo train. Have fun! Cut 6 circles out from cardboard for your wheels. I printed off this train wheel clipart (resize as desired) and used a glue stick to adhere to each cardboard wheel. I think they turned out so cute, and they were much more straightforward than drawing my own.

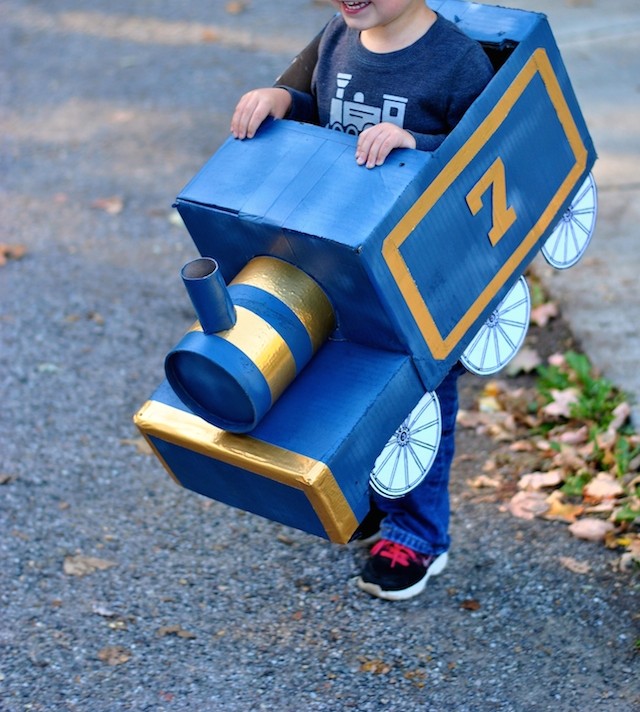
4. I used an oatmeal container with a toilet paper tube stuck inside (not pictured) for the train’s “nose.” Any time I could, I cut the boxes and inserted one shape into another to make them fit snugly. After you get the shape of the box to your liking, spray paint it! This is more secure than taping.

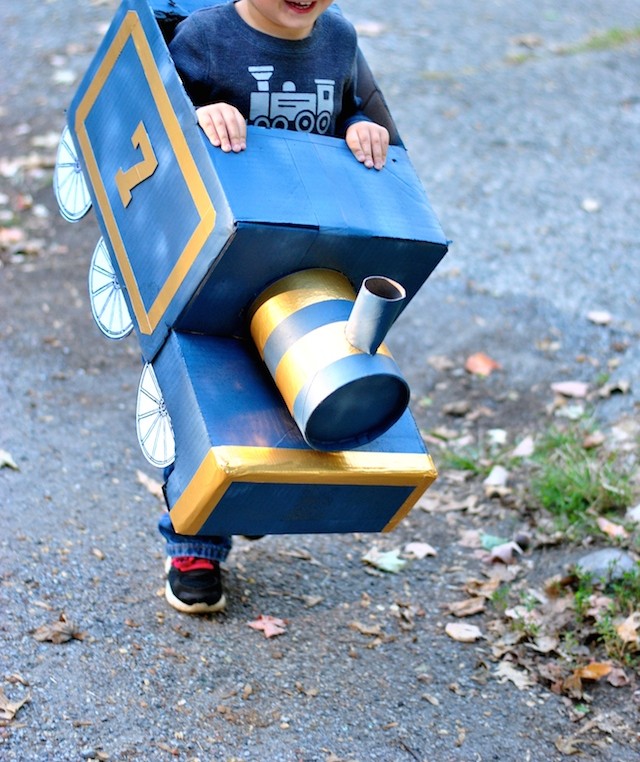
5. Let the box dry and apply gold Duck Tape to decorate the train. To get the number, I printed a number on computer paper, then traced the outline of the number on the back of the paper. I then covered the number completely with gold tape and cut it out using my outline on the back. The number can then be glued onto your train!

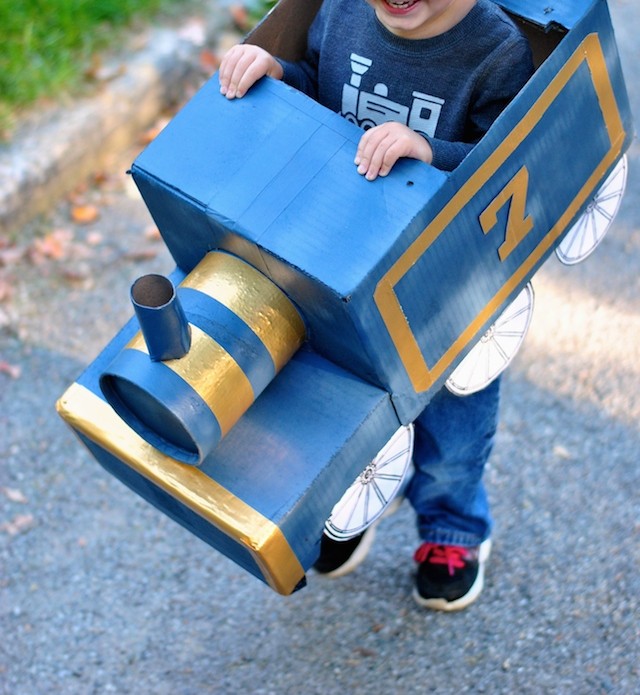
6. To adhere the wheels to the box, I used e6000 glue I already had at the house. It is strong and worked the best out of anything else I tried!

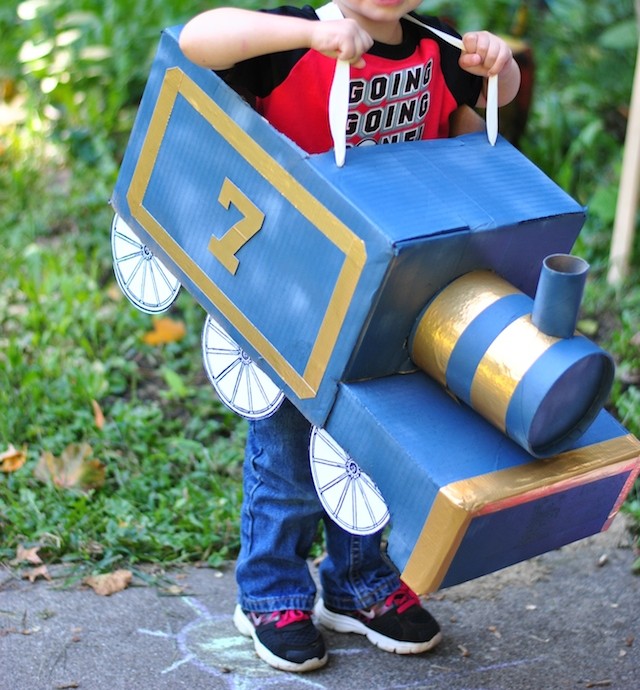
7. You’ll notice that I took the straps off the train because my son didn’t like them. To make the straps, I put a safety pin at each end of a ribbon, then used the pin to feed the ribbon through 4 tiny holes in the box, crisscrossing the straps. For an older child, you could leave the straps straight. I tied a double knot and left the safety pins on the ribbon if they needed to be adjusted.

Thanks for checking out this toddler DIY train costume! Read about Mary’s fabric pumpkin tutorial to help you get into the spirit of the season.

Total
451
Shares
Share 0
Tweet 0
Pin it 451
Related Topics
  • boy costume diy
  • diy halloween costume
  • diy train
  • diy train costume
  • thomas costume
  • thomas the train costume
  • toddler boy costume
  • toddler train costume
  • train costume
Lindsay

Hi, I’m Lindsay Conner, an author, modern quilter, editor, and founder of the Lindsay Sews blog. I’m a Baby Lock ambassador and Stash Books author who loves writing modern sewing and quilt patterns for beginners and weekend sewists! I live in Indianapolis, Indiana with my husband, son, and two loveable cats, Murph and Chloe. I’ve been crafting for as long as I can remember. As a kid, I saved my dollar bills for trips with my mom to Jo-Ann Fabrics, where I’d find new floss for friendship bracelets or mini cross-stitch kits. Because my mom has always shared my love for crafting, she bought me my first sewing machine, a Hello Kitty Janome.

Previous Article
How to Make a Dreamcatcher with Beads
  • Craft
  • Jewelry Making
  • Wire work

How Do You Make a Dream Catcher with Beads Step By Step

  • Jeremie Berton
  • Posted: February 3, 2022 - Updated at: June 13, 2023
View Post
Next Article
What is Polyamide Fabric?
  • Craft

What is Polyamide Fabric?

  • Lindsay
  • Posted: February 4, 2022 - Updated at: October 14, 2022
View Post
You May Also Like
View Post
  • DIY projects
  • Home

nPhoto – Professional Photo Printing Services for Photographers: Develop Your Brand with Us!

  • Jeremie Berton
  • Posted: January 14, 2025
View Post
  • Craft
  • Outdoor

5 Great Destinations in Costa Rica for Your Next Crafting Retreat

  • Craftbuds Editorial Team
  • Posted: December 16, 2024
Why-Professional-Locksmiths-Are-Essential-for-Home-Security
View Post
  • Home

Avoiding DIY Disasters: Why Professional Locksmiths Are Essential for Home Security

  • Jeremie Berton
  • Posted: April 3, 2024
Putting Together a Wooden Nativity Set for the Holidays
View Post
  • Craft
  • DIY projects
  • Home
  • Outdoor

Putting Together a Wooden Nativity Set for the Holidays

  • Sheila Mae Pedregosa
  • Posted: February 7, 2024
How is AI Impacting Crafting
View Post
  • Craft
  • Tools & Supplies

How is AI Impacting Crafting

  • Craftbuds Editorial Team
  • Posted: December 5, 2023 - Updated at: December 7, 2023
How Funny Phrases on Shirts Have Transformed
View Post
  • Craft

The Evolution of Humor: How Funny Phrases on Shirts Have Transformed 

  • Craftbuds Editorial Team
  • Posted: October 23, 2023 - Updated at: October 24, 2023
Craft Organizers for Efficient Storage Use
View Post
  • Craft
  • DIY projects

DIY Craft Organizers for Efficient Storage Use

  • Craftbuds Editorial Team
  • Posted: October 23, 2023 - Updated at: October 25, 2023
make-christmas-more-special-for-your-loved-ones
View Post
  • Craft

5 Ways to Make This Christmas More Special For Your Loved Ones!

  • Craftbuds Editorial Team
  • Posted: September 28, 2023

Leave a Reply

Your email address will not be published. Required fields are marked *

Subscribe

Subscribe now to our newsletter

Art & Craft, DIY ideas and Tutorials – Craftbuds
  • About Us
  • Editorial Guidelines
  • Our Experts
  • Privacy Policy
  • Contact Us
Find fun and creative craft ideas and tutorials across various categories such as Knitting, Quilting, Sewing, PaperCraft, Jewelry Making and much more

Input your search keywords and press Enter.