Who doesn’t enjoy getting their fingers a little muddy while working with clay? You can use it with your children safely because it’s organic, non-toxic, and simple to use. However, adults can also enjoy this. Clay doesn’t discriminate between kids and adults!
But what can be made out of bare clay? This question must be bouncing inside your head, and it’s obvious. To help you out, I’ve compiled what I believe to be the most fantastic yet accessible clay suggestions for kids and adults of all levels.
Let’s look at some of the best DIY clay projects to make your creativity bloom.
Related: 8 Amazing Clay Bead Bracelet Ideas You Must Try!
Table of Contents
8 Easy Things To Make Out Of Clay
Let the fun begin with the following 8 super easy yet enjoyable clay ideas!
1. Stylish Clay Ring Holder

To kickstart, this stylish clay ring holder is perfect if you want to play with clay. This ring holder is the most practical and likely nicest item you’ll ever make for your nightstand.
And the prerequisites aren’t much, either. You’ll require some clay, a sanding block, favorite acrylic paint, thin washi tape, a paintbrush, and gloss varnish.
Once you’ve gathered the above stuff, follow these steps.
- Take a tiny lump of clay. Form it into a cone by rolling it between your hands. To arrange the clay into the form depicted above, use your fingertips. Start giving the cone a stable bottom so it will sit upright. The cone should be about 8 cm (3 1/8 in) tall, with a base that is 2 cm (3/4 in) wide. Your brand-new clay ring holder is here!
- Allow it to dry out totally.
- Sand the clay ring holder down after it has dried. Sand the cone’s bottom and sides lightly to create a level, flat finish.
- Apply the acrylic paint as a base coat using the brushes. If you’d like, you can paint the clay ring holder’s bottom to achieve an even appearance.
- Using the picture as a reference, wrap washi tape around the cone and then paint the top a single color. After painting the bottom of your clay ring holder with some touch-up paint, let it dry.
- When the washi tape has dried, slowly and carefully remove it from the clay ring holder. Retouch any peeling paint as required, then allow the area to cure.
Tip: Apply gloss varnish on both sides of the cone to secure your clay ring holder. Let it fix entirely before using.
Related: Polymer Clay – The Ultimate Guide
2. Durable Clay Vases
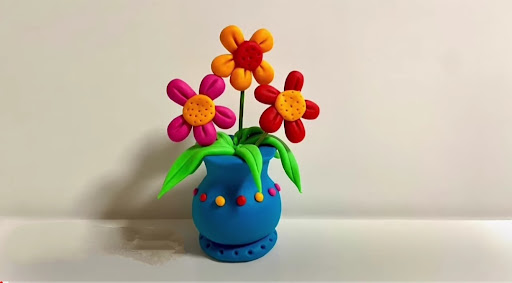
This decorative vase built with clay is a terrific place to start if you’re new to clay sculpting and seeking a productive expression and beautiful DIY to brighten your house. The finished object can be embellished with acrylic paints and used as ornamental artwork or to hold dried and fresh flowers in your mini garden at home.
To make this, gather clay, water, sculpting tools, acrylic paints, and a paintbrush.
Once done, the following steps are to be followed.
- Start molding a sizable piece of clay into an enormous egg. To keep your egg shape upright, press the clay onto your tray or dish with moderate power (but not too much). We want the bottom to be as level as possible because this will serve as the vase’s body.
- To create a well, insert a clay tool into the upper center of your egg shape. Using water and your fingers, you can create this bigger.
- Roll each of the two tiny clay bits into a spherical shell.
- Use a sharp clay tool to scrape each ball on its side and the vase’s midsection in short, gentle strokes.
- To bind the spheres to the body, attach them and flatten the edges.
- Allow it to dry completely. Based on your item’s thickness and the space’s relative humidity, this could take anywhere from 24 to 48 hours.
- Use your favorite acrylic paint to finish off the vase. Choose a sealant like a matte acrylic solution, or make your own by combining 80% PVA glue and 20% water to produce a creamy texture. Then, treat the dry clay piece with the sealant.
- Your clay vase is ready to store your plants after getting thoroughly dried.
Did you like this vase?
3. Trinket Dish
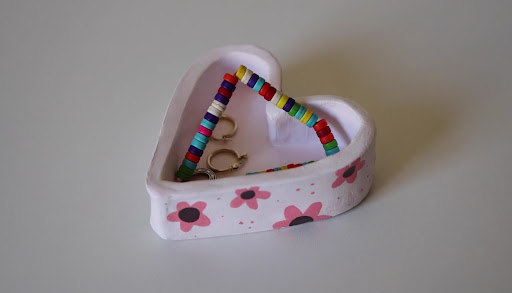
Clay-based trinket bowls are ideal for gifting, safely storing tiny accessories or jewelry items, or decluttering your vanity table. You’ll appreciate crafting more after learning our simple, fast, and soothing method for making clay trinket dishes.
To start, gather some clay, acrylic paint, a rolling pin, a board, a round clay cutter, an x-acto knife, a paintbrush, and a little bowl.
Then, follow these steps.
- Cut a 1.5 cm piece of clay from the clay slab using a scalpel or x-acto blade. With both palms, massage the clay slice by pushing it against your palm. Make an effort to mold the clay into a sphere.
- With the palms of your hand, flatten the clay against the mat.
- The clay should be rolled flat until it is smooth and even, around .25 cm.
- It would be best to place the small bowl on the ground with its exterior bottom facing up.
- Put the clay piece that has been flattened on the little bowl’s bottom outside edge. To ensure that the clay piece is properly shaped around the bowl, push it tightly against it.
- Trim the clay piece’s crooked edges with an x-acto knife. Alternatively, if you prefer irregular borders, you can leave them alone. Gently remove the rough edges that were cut.
- Remove the clay dish from the mold (small bowl). Afterward, let the clay jewelry dish sit in a dry location overnight so that it can completely dry out.
- The clay jewelry dish can be painted using acrylic paint. If you paint the clay jewelry dish, wait until it has dried before using it.
And that’s it! The clay trinket dish takes some time to dry, but it is reasonably easy to make and doesn’t require special abilities.
4. DIY Clay Napkin Rings
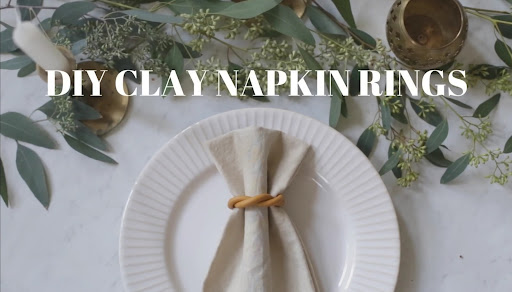
A homemade napkin ring is effortless to make. A cardboard tube, clay, ruler, varnish, paint brushes, and alphabet stencils are all you require.
Tip: You can utilize the clay rings as custom, one-of-a-kind table cards by imprinting your guests’ names on them.
Follow these steps to make these.
- Massage the clay until it becomes soft.
- Roll out the clay to a thickness of about 3 mm and cut out a rectangle.
- Inscribe a name in the clay (optional.)
- Shave to size after wrapping around your cardboard tube. There should be a 3–4 cm overlap.
- To make the clay adhere properly, score it and add water.
- Allow drying outside. Depending on the temperature and moisture, this could also take between 24 and 72 hours. So, don’t rush.
- Remove any uneven edges or sides with sandpaper.
- To remove any dust, wipe with a moist cloth.
- Put on a light coat of varnish and let it dry again.
And you’re ready with custom clay napkin rings!
5. Door Nameplate
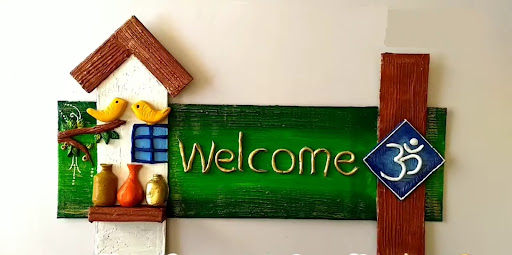
What better way to utilize clay than to hang it somewhere everyone who enters your home can see? Yes, I’m talking about a clay door nameplate. This is a perfect idea if you’re bored with those traditional nameplates.
You’ll need clay, some cutting tools, glue/adhesive, and acrylic paint. When you’ve arranged all these items, follow these steps.
- A block of clay can be rolled out and cut into any shape you like, or you can just cut out a rectangle to use as a nameplate.
- After the clay slab has dried, paint your name on it. You might make clay characters of your name and attach them on the slab as an option. You can purchase letters made with a cookie cutter.
- While the clay is still wet, you can mix the letters onto the slab. The letters can also be glued to the plaque after the clay has dried.
- The letters and nameplate can be painted once dry and in position.
Making the letters pop with vivid color will enhance the name.
6. Clay Letters & Numbers
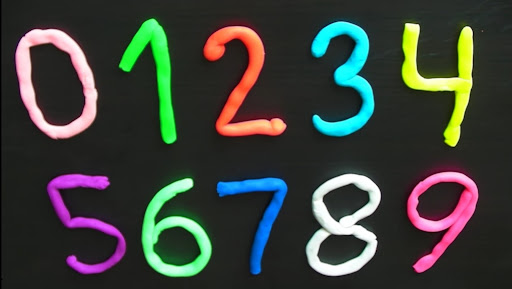
Clay numerals and letters are fantastic if your child is studying mathematics and literacy. They have to consider how letters and numbers are shaped thoroughly.
To aid in their understanding of the true significance of the numbers, you can also create clay balls.
You’ll need clay, a rolling pin, some cutting tools, and acrylic paint for all these.
Then, use the following steps to make some vibrant letters and alphabets for your child.
- With a rolling pin, flatten a slab of clay to begin.
- Roll it out to be about half-inch thick so that you can stand them up if you like once they are dried.
- You can highlight where your child needs to cut on the clay according to their age.
- Making a pattern of dots for youngsters to follow on the clay is a fantastic idea.
- After that, your youngster can cut out the shapes using a secure kid’s “knife.”
After the above steps, paint the letters with any suitable acrylic color.
7. Fridge Magnets
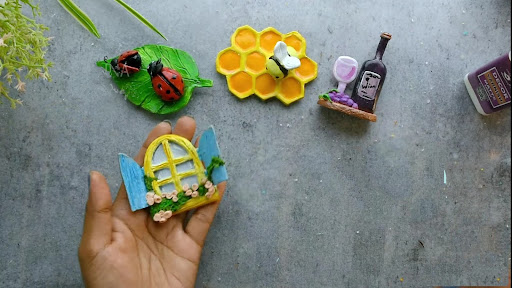
For both youngsters and adults, creating DIY clay fridge magnets is a terrific clay craft idea. This clay project is not only a fantastic pastime for kids but also makes it simpler to organize the papers and pictures that clutter your refrigerator.
For these fridge magnets, you’ll require today’s essential item – clay, some small magnets, dental picks, gorilla glue, and a silicone-based work mat.
And follow these steps.
- First, pick a color and manipulate the clay until it is malleable enough to work with.
- Aluminum foil should be used to line a cookie sheet. The clay will be baked until it becomes hard and unyielding.
- Additionally, if you choose air-dry clay, you can omit the baking step and leave your clay magnets out to dry naturally.
- Use gorilla glue to attach the magnets since it swells as it cures, helping the magnets stick to the clay figurines’ uneven surfaces.
- Check the gorilla glue after about 10 minutes, and if it is growing excessively, scrape part of it off with a toothpick.
- Before using, give the magnets 24 hours to dry.
The fridge magnets are ready to go! You may adorn any metal surface with them or organize your refrigerator.
8. Fruit Basket
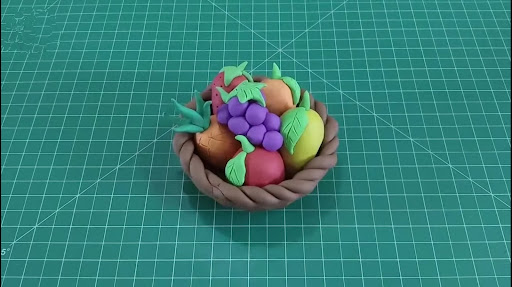
Get your child invested in making these attractive fruit baskets and add them to their collection of creativity.
You’ll need air dry clay, a bowl, cutting tools, adhesive, and cookie cutters (optional).
The steps to be followed are:
- Start by rolling out a piece of clay dough into a flat, thick enough sheet and place it over a bowl of your choice.
- While wet, add creative ropes and designs to the molded clay. If you’re using glue to stick these, ensure the molded clay on the bowl is dry.
Wait 24-48 hours, then paint with your desired colors. The fruit basket is ready.
Conclusion
So, here you go. If you got inventive with arts and crafts, you would be surprised at how much money you might save. Arts and crafts are no longer merely leisurely hobbies in today’s DIY era.
You can truly put the items you make to use around the house. And what’s better than regular clay to use? Make sure you try out the items above, and let me know your thoughts in the comments.
Things To Make Out Of Clay FAQs
- What Can I Make From Clay?
Ans: Ultimately, it depends on how well you work with clay. You can make:
- Vases,
- Bowls,
- Mini succulent plants,
- Pots and more
- What Can I Make From Air Dry Clay?
Ans: Air-dry clay spontaneously dries and hardens at room temperature, usually in less than 24 hours. Air-dry clay can be used for:
- Fridge magnets,
- Mugs,
- Paperweight,
- Pencil holders, etc.
- What Can I Make And Sell From Clay?
Ans: You can make the following fabulous stuff out of clay and later sell it to others.
- Jewelry
- Keychains
- Tray dishes
- Clay toys
- Pendants
Put your items up for sale in consignment stores, neighborhood shops, or mall booths to earn money.