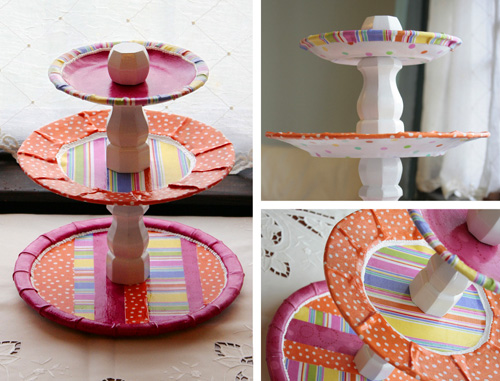
This was my week 2 entry for One Month to Win It contest. Thanks to all those that voted! The contest started with 12 contestants and each week 3 are voted off. I just found out that I not only made it to week 3, but I was the winner for week 2 with this entry!
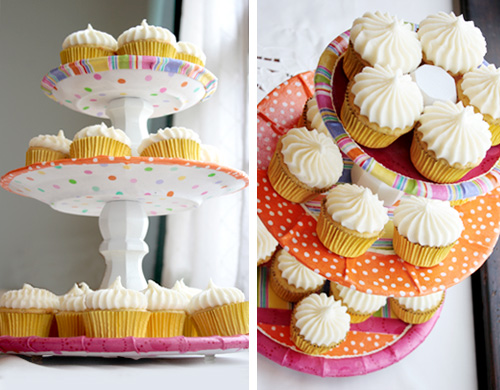
Besides sewing and crafting I also really enjoy baking (yes, I did make the cupcakes above). So I decided to make myself a spring/Easter inspired tiered dessert tray using Mod Podge, which was the required item for the contest this week. This ended up being a lot more work than I was expecting so I came up with an easy method option for those without access to a workshop. The great thing about making one of these is that you can customize it for a special event or match it to your decor. And if you don’t bake you can always use it for displaying decorative items!
Easy way: Buy melamine plates and short (around 6″) table legs or candlesticks. Paint the table legs or candlesticks if necessary. Use epoxy to glue it all together. Our local Target has a nice selection of everyday and seasonal melamine plates and bowls that can be individually purchased. I think this would be fun with a bowl as the top piece that you could fill with M & Ms, nuts or candies.
Hard way (also known as the way I did it):
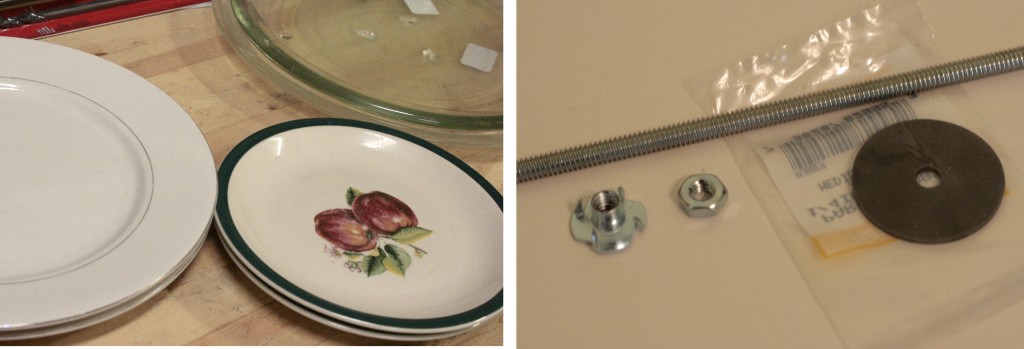
Materials list: one 8 oz. jar outdoor Mod Podge, three ceramic plates, two 6″ table legs, one can of white enamel spray paint, one piece of 1/4″ all thread, one 1/4″ bolt that fits the all thread, one 1/4″ T nut (it’s the lower left item in the photo), a rubber washer, enough fabric to cover your plates, six self- stick 1/4″ rubber feet (or three 1/2″ if you can find them), 1 bottle white puffy paint
Other supplies: pliers (depending on your table legs), drill, 5/16″ ceramic bit, wood saw (optional to trim down table legs), hacksaw
The photo below shows my plates (I started with two of each just in case any broke during drilling but none did) and the rubber washer, all thread, T nut, and bolt.
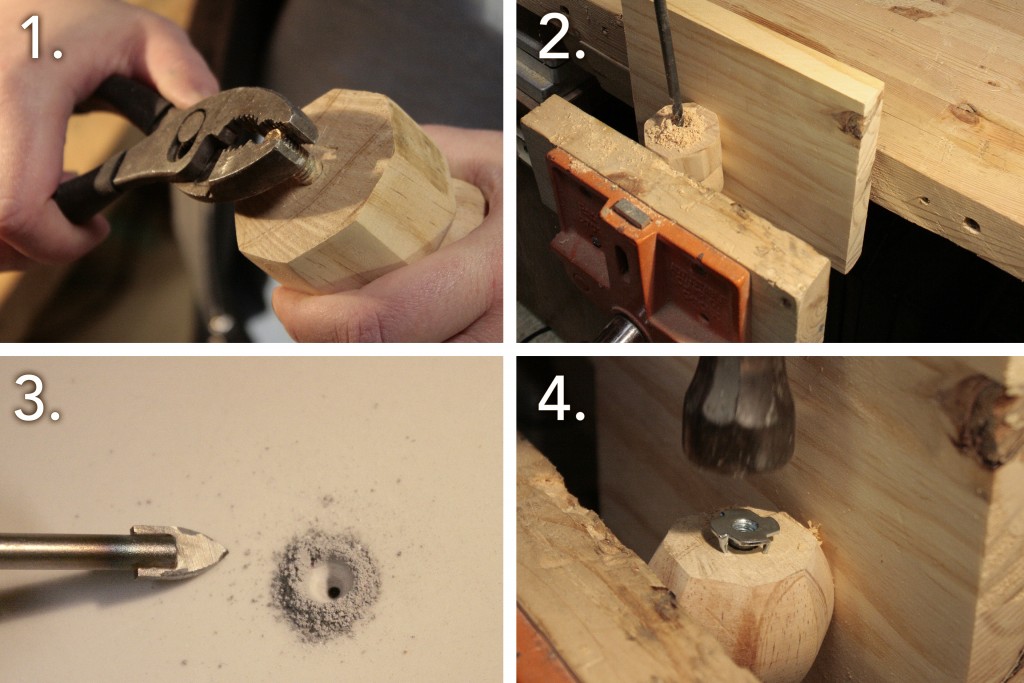
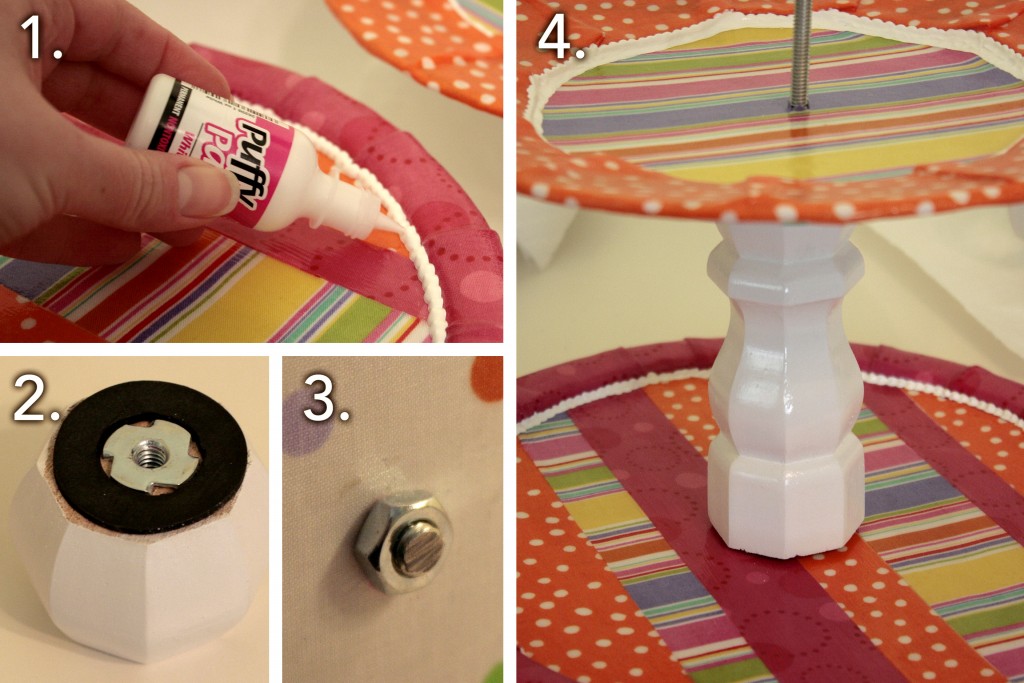
1. Remove any hardware from the table leg with pliers. 2. I cut the 2″ ball off the top of one of my two 6″ table legs with a wood saw. Then I drilled all the way through my 6″ and 4″ pieces, and drilled 3/4″ into the bottom of the 2″ ball. 3. Drill a 5/16″ hole through the center of each plate (the photo shows only partway drilled through). Make sure to wear eye protection and a breathing mask to protect you from ceramic bits and dust. 4. Hammer the T nut into the bottom of the ball.
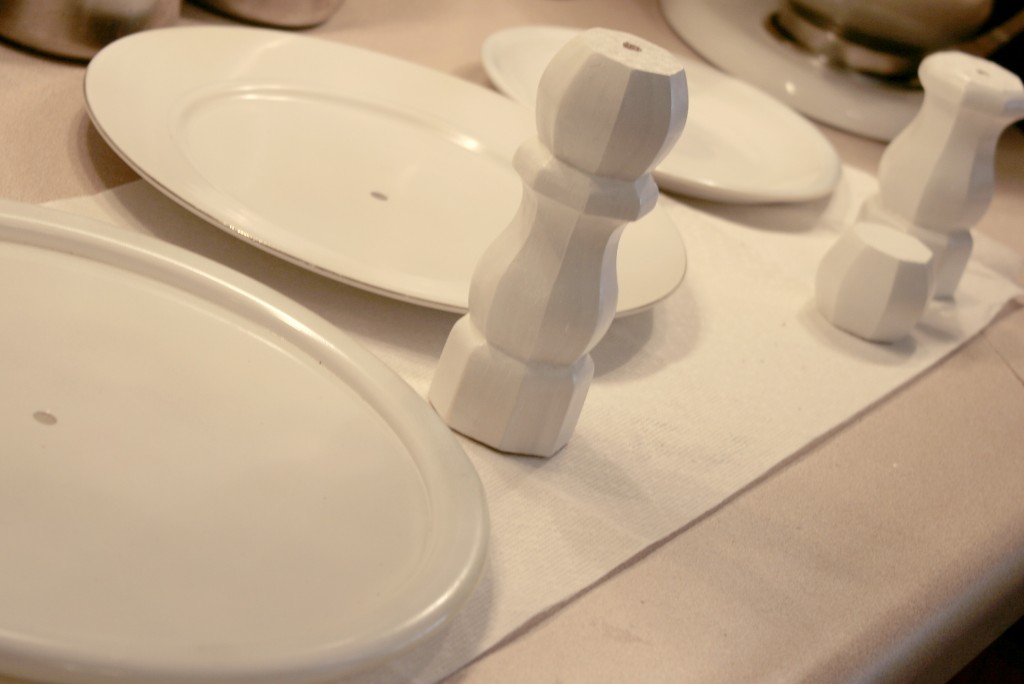
Next, clean any dust and dirt off the plates and table legs and spraypaint them all white. Do several light coats of paint.
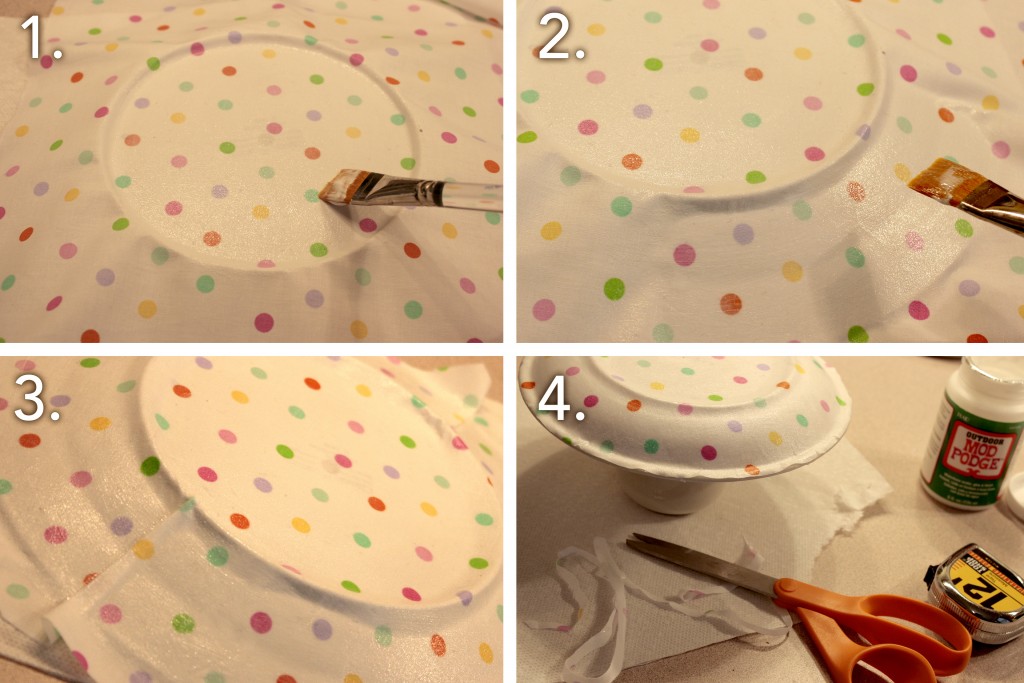
Then, working on one plate at a time, paint a thin layer of Mod Podge onto the bottoms of the plates. That will help hold the fabric in place as you brush more Mod Podge on top of the fabric to permanently hold it down. I found it easiest to 1. Brush Mod Podge on the fabric around the bottom of the plate 2. Mod Podge the sides 3. Add any pleats if necessary to keep the fabric from wrinkling 4. Trim off any excess fabric.
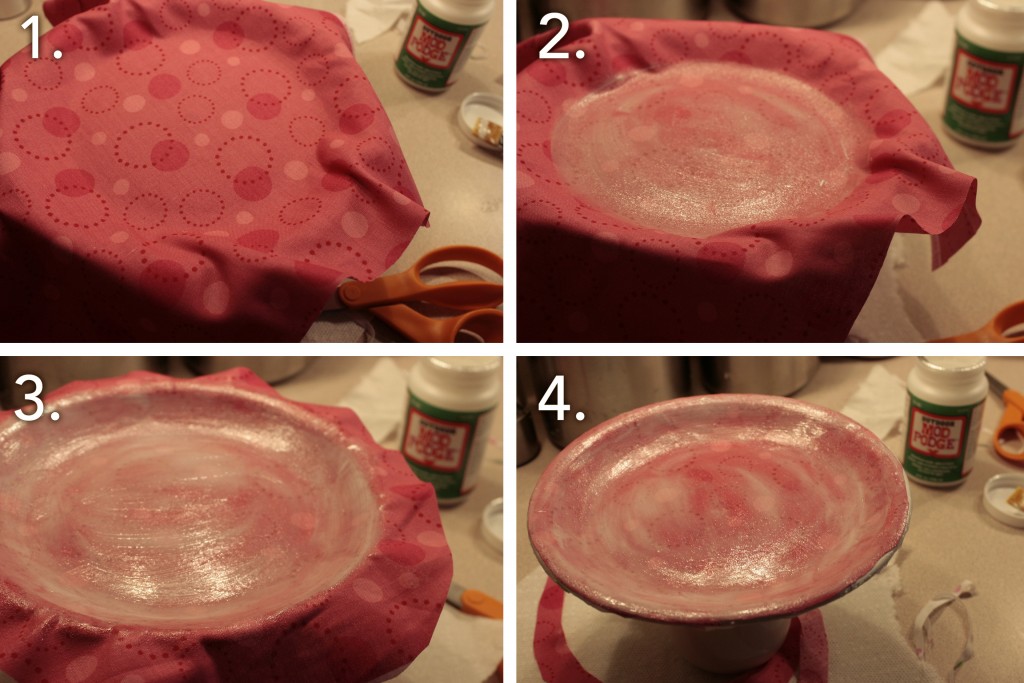
When the bottoms of the plates have dried, flip them over and do the same process on top. For the top two plates 1. Brush the plate with Mod Podge first then place the fabric on top 2. Brush Mod Podge on top of the bottom of the plate 3. Work your way up the sides 4. Trim any excess fabric.
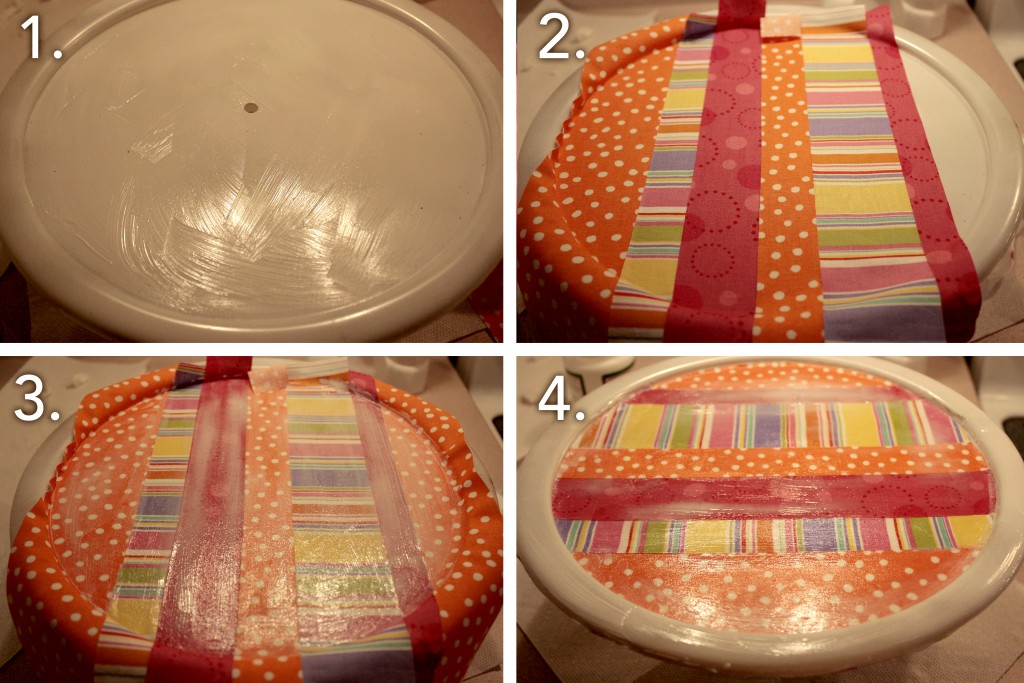
For the bottom plate 1. Brush the bottom of the plate with Mod Podge 2. Position strips of fabric touching but not overlapping 3. Brush on a heavy coat of Mod Podge so you don’t disturb the edges of the fabric and cause them to fray 4. Use an x-acto to trim excess fabric.
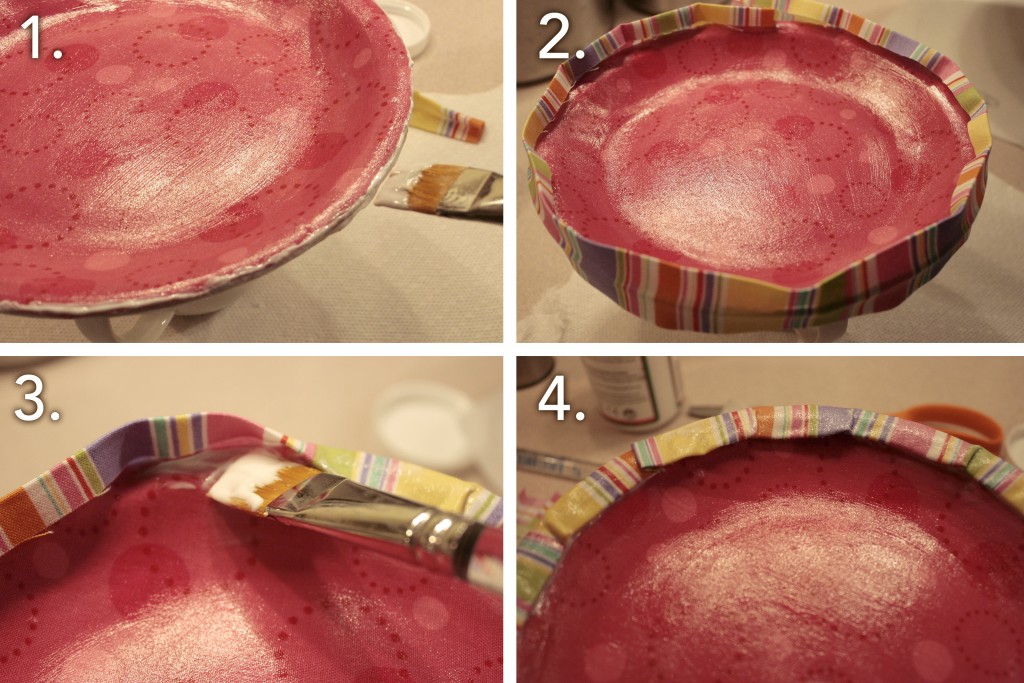
Adding the border to all 3 plates was done the same way just with different widths of fabric. 1. Use a brush to put a line of Mod Podge around the edge of the plate. 2. Attach the fabric. You can choose to fold under the edges or leave the raw edges. I tried both and both ways worked. 3. Mod Podge around the edge of the plate in sections, adding pleats as you go to allow the fabric to lay flat. 4. Cover the edges of the border and inside the pleats with several coats of Mod Podge, allowing it to dry between layers.
Once all your Mod Podge has dried 1. Use white Puffy Paint to add a circle of little white dots just inside the fabric border of each plate and let that dry. 2. Cut the inside of rubber washer so it fits around the T nut. 3. Use an x-acto knife to cut an X over the hole you drilled in the top and bottom layers of the fabric on each plate then put the all thread through the bottom plate and screw the bolt onto the bottom side of the plate Then (not pictured) affix the rubber feet to the bottom of the plate. If necessary, stack up two rubber feet to raise the plate high enough that the bolt isn’t touching the table top. 4. Stack everything up to the top plate then mark the all thread 1/2″ above the top of that plate. Remove it and use a hacksaw to cut it. Then stack everything back up again and screw the ball you prepared in step 2 of this segment on top. Once the ball is tightened everything should be very sturdy.
Now stand back and admire your work!






26 comments
LOVE LOVE LOVE!!! I probably wouldn’t have the patience to make it the hard way. But I LOVE this idea!! Thanks for the inspiration. 🙂
this is really pretty!! such a good idea 😀
Hey there,
Just stumbled upon your blog and this looks fabulous! I love the fabric that you used too! Thank you so much for the inspiration 🙂
https://sweetenedbykagi.blogspot.com/
Love this project! Tfs
This is a darling cake stand, cutest one I have seen. Great tutorial too. winks- Jen- C.O.M.
Yep, this is awesome! I am always looking at dessert stands but they are 1. boring, and 2. expensive. Definitely going to try and at least make the easy version. Thanks for sharing!!
I’ve seen the melamine plates turned into stands, but I love your mod-podged plates! I know that they’re more work, but they have so much more personality!
Yes, it looks like a lot of work. But gosh, the end result is too cute! Great job. I love the mix of colors and prints you used.
These are so cute!! i loved all your colors and fun prints!!
WOW! You went all out! I wanted to make one of these but I was just thinking to buy the plates. Yours turned out so cute!
oooo love it!!!!!!!
How fun and colorful!!!
Easy way or hard way – I love it.
Great stand, love the colors
Mary, Another adorable project! I love the festive colors! I have featured this as well today. Thanks again! ~ Stephanie Lynn
This so creative and beautiful! Great job on the details 🙂 Love it!
awesome! Thanks for linking to Quiltstory!
Love the bright colors!
Would love for you to share at Calling All Crafters, today!
https://allthingsfee.blogspot.com/2011/04/calling-all-crafters-4th-edition.html
Thanks Felicia! Linked up 🙂
why didnt I think of this?
How do you frost your cupcakes like that? What tip do use? They are so cute! Love the stand too!
Thanks Cammie! It’s an Ateco 869 (large French star) tip with a large frosting bag, or I sometimes just cut off the bottom corner of a gallon freezer bag. The top of each cupcake is just one giant squeeze of frosting. Just place the tip in the center of the cupcake and start squeezing, then slowly raise up the tip as you squeeze until the frosting looks good and full, then stop squeezing and raise up the tip and it’ll form a peak. It takes a little practice but now I find this method even easier than using a knife/frosting spatula!
This is adorable! You may have done it the hard way, but I think it’s much more personalized than the easy way – although if I ever did it, I’d go for the easy way 🙂
I was wondering – is it assembled permanently, or can you separate the tiers for storage? I would love one that I can take apart to store.
Hi Molly, the way I did it (the hard way!) it can be taken apart. Everything is held together with the center all thread rod with nuts and bolts so it screws together and comes apart easily.
That is the best one I’ve ever seen, you did an awesome job and lots of patients!!
I have a question about the ModPodge or any type of coating on the surface of the plates – is it food safe? Can you put cookies or brownies without any type of paper lining directly onto the plates? and is it dishwasher safe? or does it have to be hand washed?
Thanks again for the inspiration and wonderful tutorial, it is very well put together and illistrated.
Kimberly
Hi Kimberly, For some reason I just saw the notification about your comment today! So it’s been a few months but here’s my answers. The ModPodge is non-toxic but just to make clean up easier I probably wouldn’t put food directly on it. Even with the ModPodge coating there’s still a bit of fabric texture that could be a pain to wash. I would hand wash everything rather than risking the dishwasher!