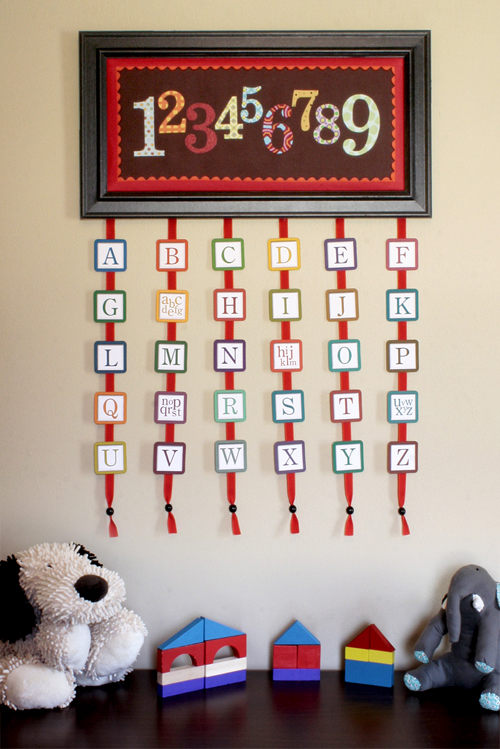
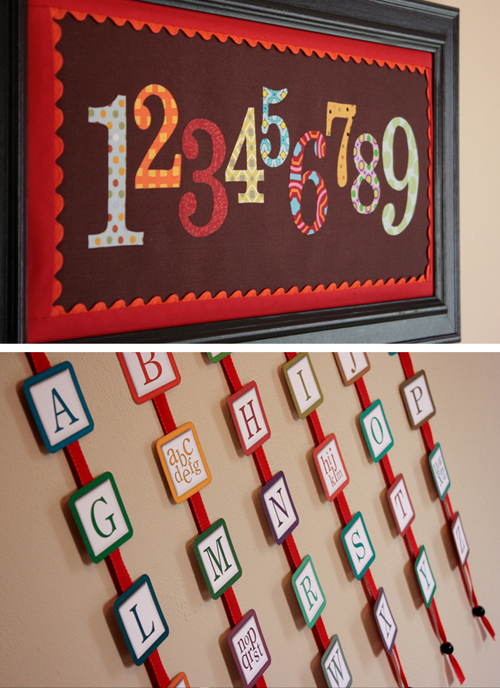
This was my entry for the first week of the One Month to Win It competition where I am currently a contestant! The contest started with 12 contestants and each week 3 are voted off. Luckily, I made it through the first round so below is the tutorial for my project. In other exciting news, I’ve started a shop for my patterns! I’ll still be including free patterns on most posts but the ones that have a more detailed design and need printable pages will be in the shop.
Materials list:
The following supplies are exactly what I used. You could easily modify this design to use a different frame or no frame and just wrap the fabric around a piece of cardboard backing.
- One 14″ tall x 25″ long frame with cardboard backing (glass not necessary) with an opening of
21 1/2″ x 9 3/4″ - One piece of brown fabric 4″ larger than the cardboard backing from the frame (I used 25 1/2″ x 13 3/4″)
- 1/4″ batting the same size as your brown background fabric
- Six strips of red 1/2″ grosgrain ribbon cut to 26″ with optional black wooden beads threaded onto the bottom of each (a total of 13 feet of ribbon)
- One package Wrights® scarlet double fold quilt binding bias tape
- One package Wrights® orange jumbo rick rack
- One roll of 1/4″ fusible web for the border
- Alphabet blocks printed onto cardstock and cut out (pages 6, 7, 8). If printing correctly they should be 2 3/8″ square.
- Number stencils
- Nine fabric scraps for the numbers
- Fusible web for the numbers
- Iron, glue gun, sewing machine (optional), rubber cement (optional)
If you would like to purchase the number blocks that I designed and the alphabet stencils, you can buy them at my new shop here! Your purchase will be delivered instantly as a PDF and will also include printable pages of the instructions provided in this post.
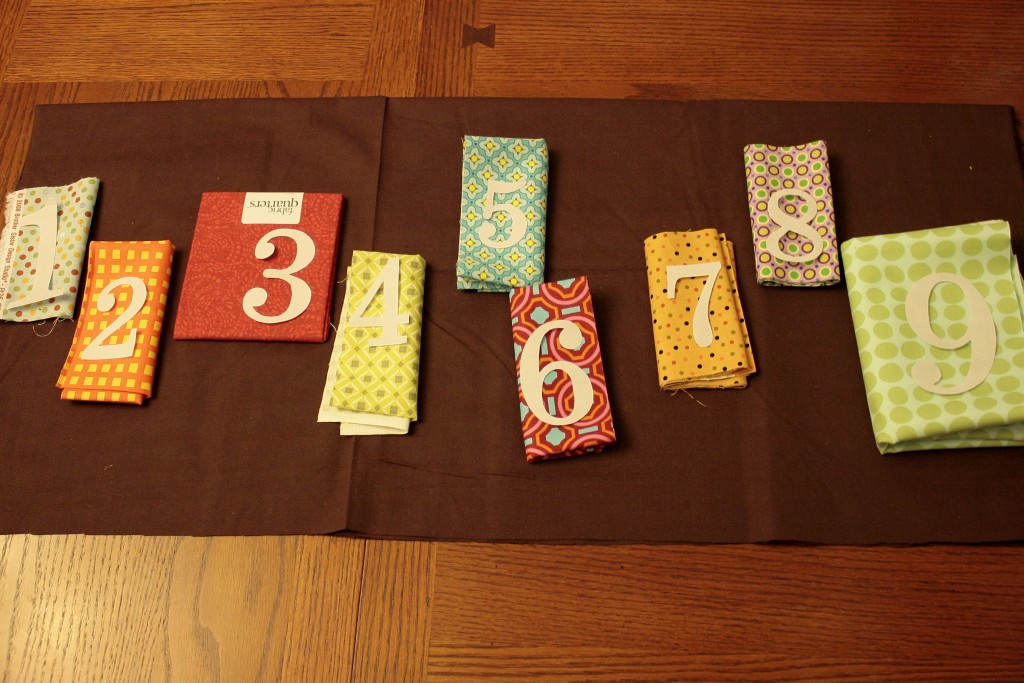
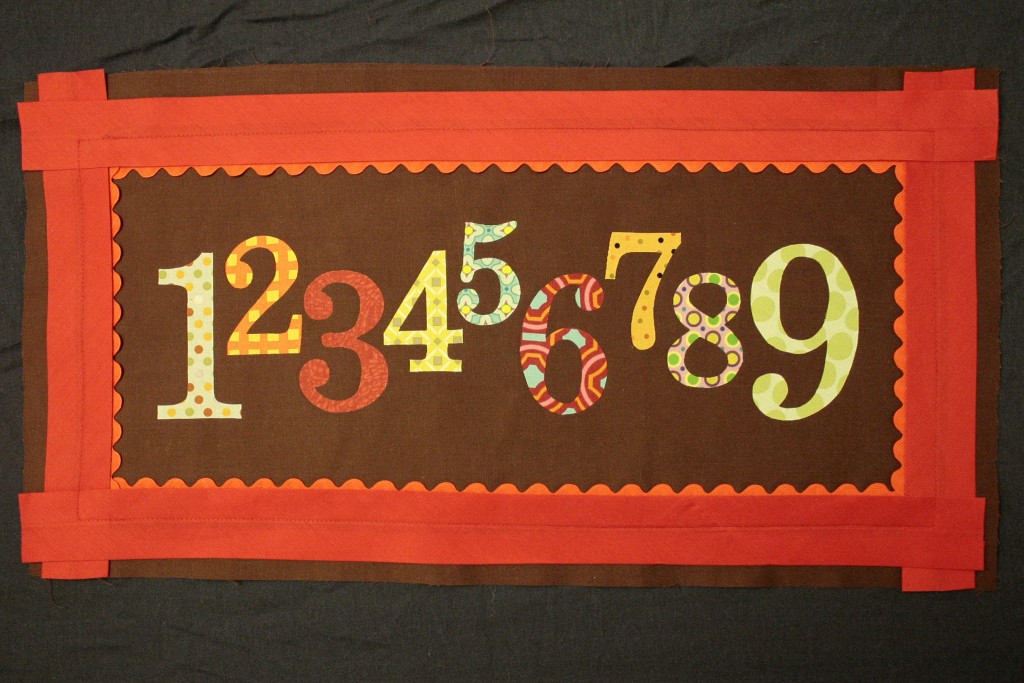
Step 1: Make the applique numbers. First cut out the number stencils and line up your fabrics in order on your background to make sure you like the color choices.
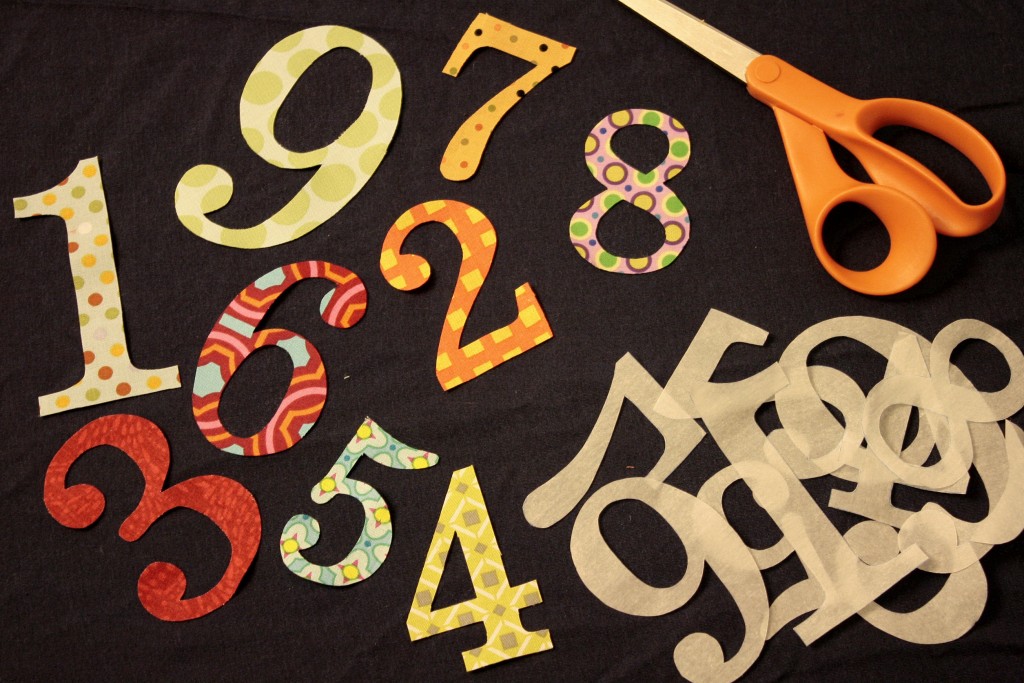
Then cut out rectangles slightly larger than your numbers. Iron your fusible web to the rectangles. I like to first use the tip of my iron to iron down just the center of the rectangles. Then, cut off all the excess fusible web, then iron it down completely. This helps you avoid getting the sticky backing on your iron. If that happens, just wipe it off on a paper towel. Then trace all your number stencils backwards on each rectangle and cut out the numbers.
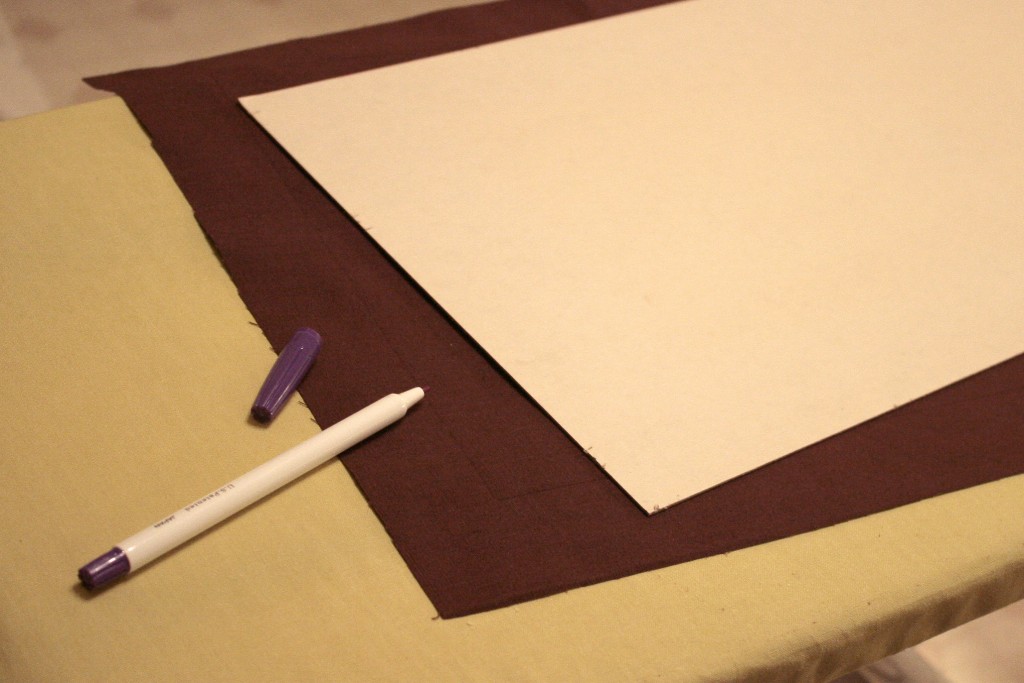
Step 2: Prepare the background and border. First, cut out your background fabric 4″ larger than the piece of cardboard backing from your frame. Next, center that piece of cardboard on the front of your fabric and trace around it. Cut your bias tape so you have two strips the length of the background and two strips the width of the background.
Then iron open your bias tape strips and pin them down so that the center matches up with the line you drew. Either sew along the centers or use fusible web to iron the strips in place. I did it this way because I initially thought I would only be using a piece of cardboard backing and no frame and I wanted the red border to go behind the backing when I wrapped it around. If you choose to use a frame, you don’t necessarily need to open up the bias tape because it’ll all be hidden behind the frame anyway.

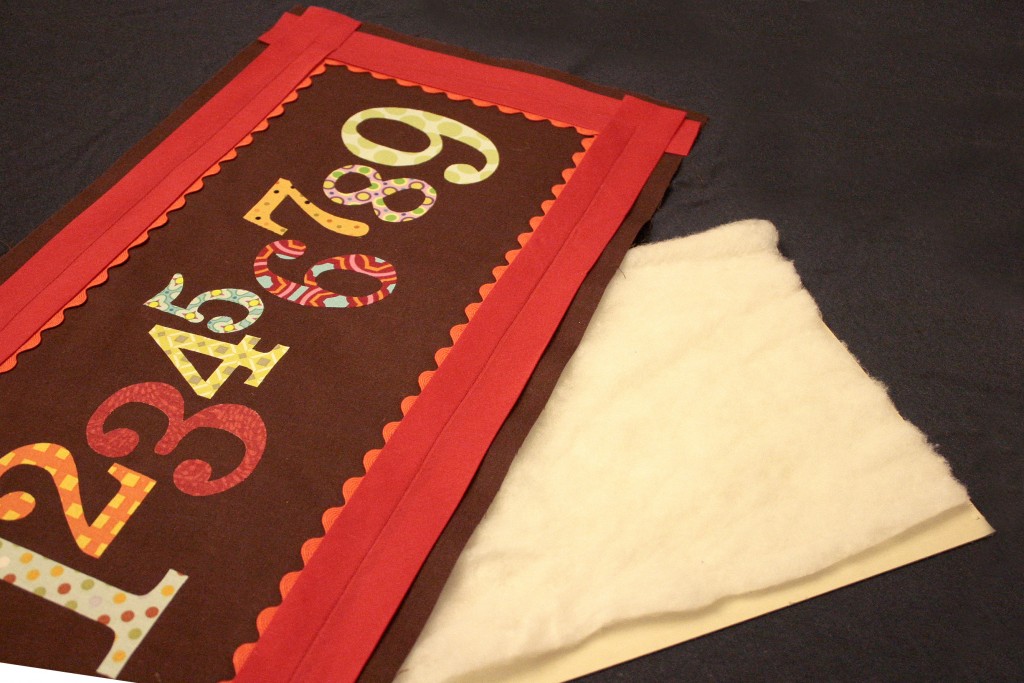
Then stack together the front piece, the layer of batting, and the cardboard backing piece from the frame.
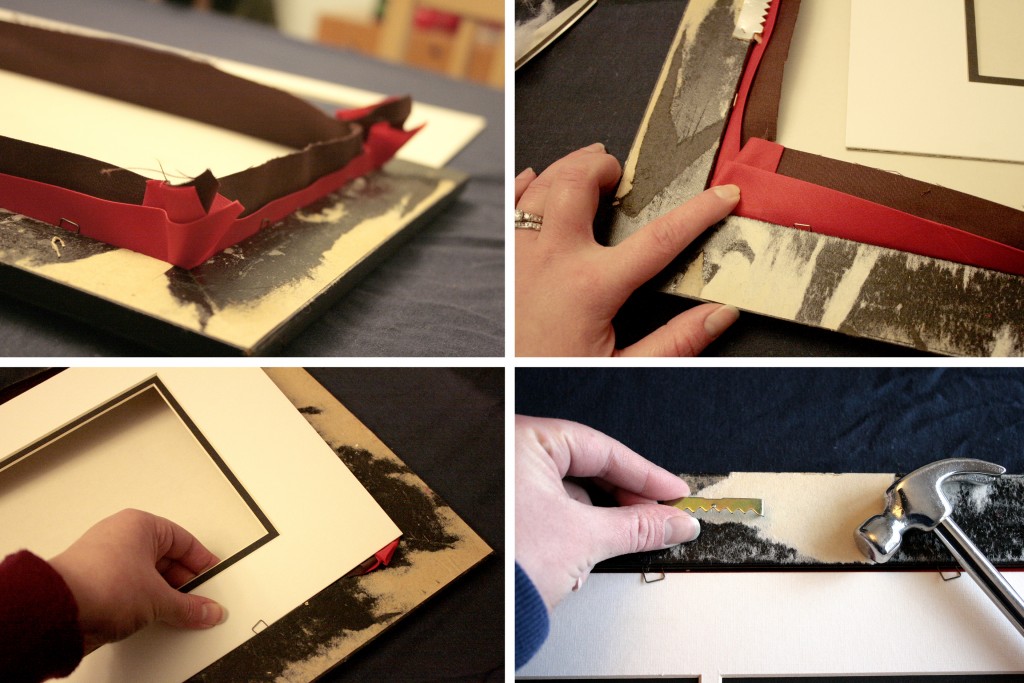
Press your project gently into the frame. Flip it around and make sure everything is lined up correctly. Next, fold down the fabric you have sticking up on the back. Cover it by either cutting a second layer of cardboard, or I just used the mat that came with my frame. If you need a hanging device, hammer in an alligator clip.
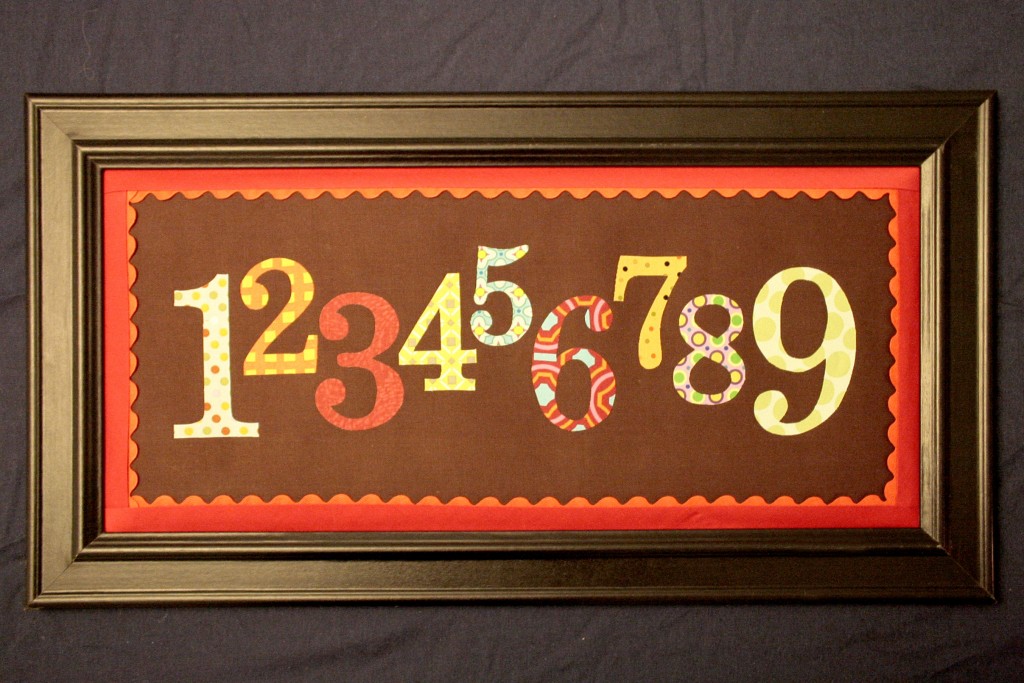
And this is how the framed part should look.
Step 4: Adding the ribbons and letters. Use a hot glue gun and apply strips of glue to each letter and press it into your strips of ribbon. Keep a ruler nearby to measure the same amount of space between each letter block. In the example the amount of space is 1 3/8″ from the frame to the first letter block and between each set of blocks on the ribbon. When the strips of ribbon are finished, apply strips of glue to the frame and attach the ribbons.
Step 5: Finishing the back. To make the back of the frame a little more professional looking I cut a piece of paper to the size of the frame and used rubber cement to glue it to the frame. I chose rubber cement so I could eventually peel off the backing paper if necessary.
And the project is complete! Here’s a couple final shots for inspiration.
I’m also giving away some handmade bias tape to 10 winners!










28 comments
What a great idea. Thanks for sharing! I love the different fabrics you picked for the numbers!
This is very beautiful! I love your idea!
I love this! I’m definitely adding this to my list of things to make for the nursery..
Oh and by the way, Thanks so much for stopping by my blog after the UBP!!
I voted for you this week! I love it! I was really hoping you would share on how you made it, thanks for sharing!
Thanks Sharon! I’m glad you like the project and I’m glad you voted for me!!
thanks for sharing these great ideas!!! I have a 1 year old son and these ideas are great for his nursery.
kathryn
-thedragonsfairytail.blogspot.com
how cool is this? i love it!
That’s a great idea, thanks!
This is wonderful, would be fantastic for my boys playroom! Thanks for the tutorial.
This is awesome! I absolutely love this!
New follower 🙂
Come see me at https://willcookforsmiles.blogspot.com/
I’m a new follower. This looks so professional and finished. Great job!
Great project! Cute and educational! 🙂
Love this! And so would my kids!
this is such a great idea!!! And it is absolutely adorable!! Thanks so much for linking up to Handmade Tuesdays @ Ladybug Blessings. http://www.ladybug-blessings.com
I just found your blog and am your newest follower. This project is lovely AND practical. Thanks for creating such a fun and inspiring blog!
This is such a great idea! I would love for you to come link up to my Sew Crafty Saturday Party this weekend! ~April @ Wildflowers & Whimsy
What a fantastic idea! I found your blog through “Get your craft on” and I’ll definitely be following!
Thanks
Thanks April! We’ll stop by 🙂
I think this is so So cute ! I can’t say that enough !!! So I just did a blog post about your blog ! Here is the link !! https://sailingwithbarefeet.blogspot.com/2011/04/abcs-and-123s.html
Feel free to check it out !!
I absolutely love this project–darling! I want to try to recreate it for a friend’s nursery.
I shared this tutorial on my Friday Favorites post today. Thanks for such a sweet and cute idea! Have a beautiful weekend.
Coming over from Stephanie Lynn’s. Love this idea. What an adorable idea!
LOVING this!
I made an ABC board for my daughter – if you like you can check it out here
https://muffinsnmore.blogspot.com/2011/03/abc-board-thingy-with-tutorial.html
But yours looks so much fun. I might have to make another one … 🙂
Thanks for the idea and tutorial!
Thanks for linking this up! I would really like to make one of these for my kiddos…adding it to the never ending to do list!!!
WOW. SO CUTE!!!! Thanks for linking to Fabric Tuesday 🙂
So Adorable!!
I would love it if you would link it up to our What I Made Wednesday Linky Party!!
Also, stop in for a chance to win our 100 Follower Giveaway {{Beaded Watch & Hobby Lobby Gift Card}}
Alisa
Sweet Peas and Bumblebees
sweetpeasandbb.blogspot.com
Will do Alisa, thanks for the suggestion!
very creative idea! I found you on pinterest while looking for playroom ideas! Thanks!