Art & Craft, DIY ideas and Tutorials – Craftbuds
  • About Us
  • Needlecraft
    • Crochet
    • Knitting
    • Quilting
    • Sewing
    • Embroidery
  • Cricut
  • Jewelry Making
  • Paper Craft
    • Origami
    • Drawing
  • Engraving
  • Collectibles
    • Numismatics
43K Followers
25K Followers
1K Subscribers
Subscribe
Art & Craft, DIY ideas and Tutorials – Craftbuds
  • About Us
  • Needlecraft
    • Crochet
    • Knitting
    • Quilting
    • Sewing
    • Embroidery
  • Cricut
  • Jewelry Making
  • Paper Craft
    • Origami
    • Drawing
  • Engraving
  • Collectibles
    • Numismatics
  • Craft
  • Sewing

Petite Purse + Wallet and Flower Mini Tutorial

  • Mary
  • Posted: April 3, 2011
Total
0
Shares
0
0
0

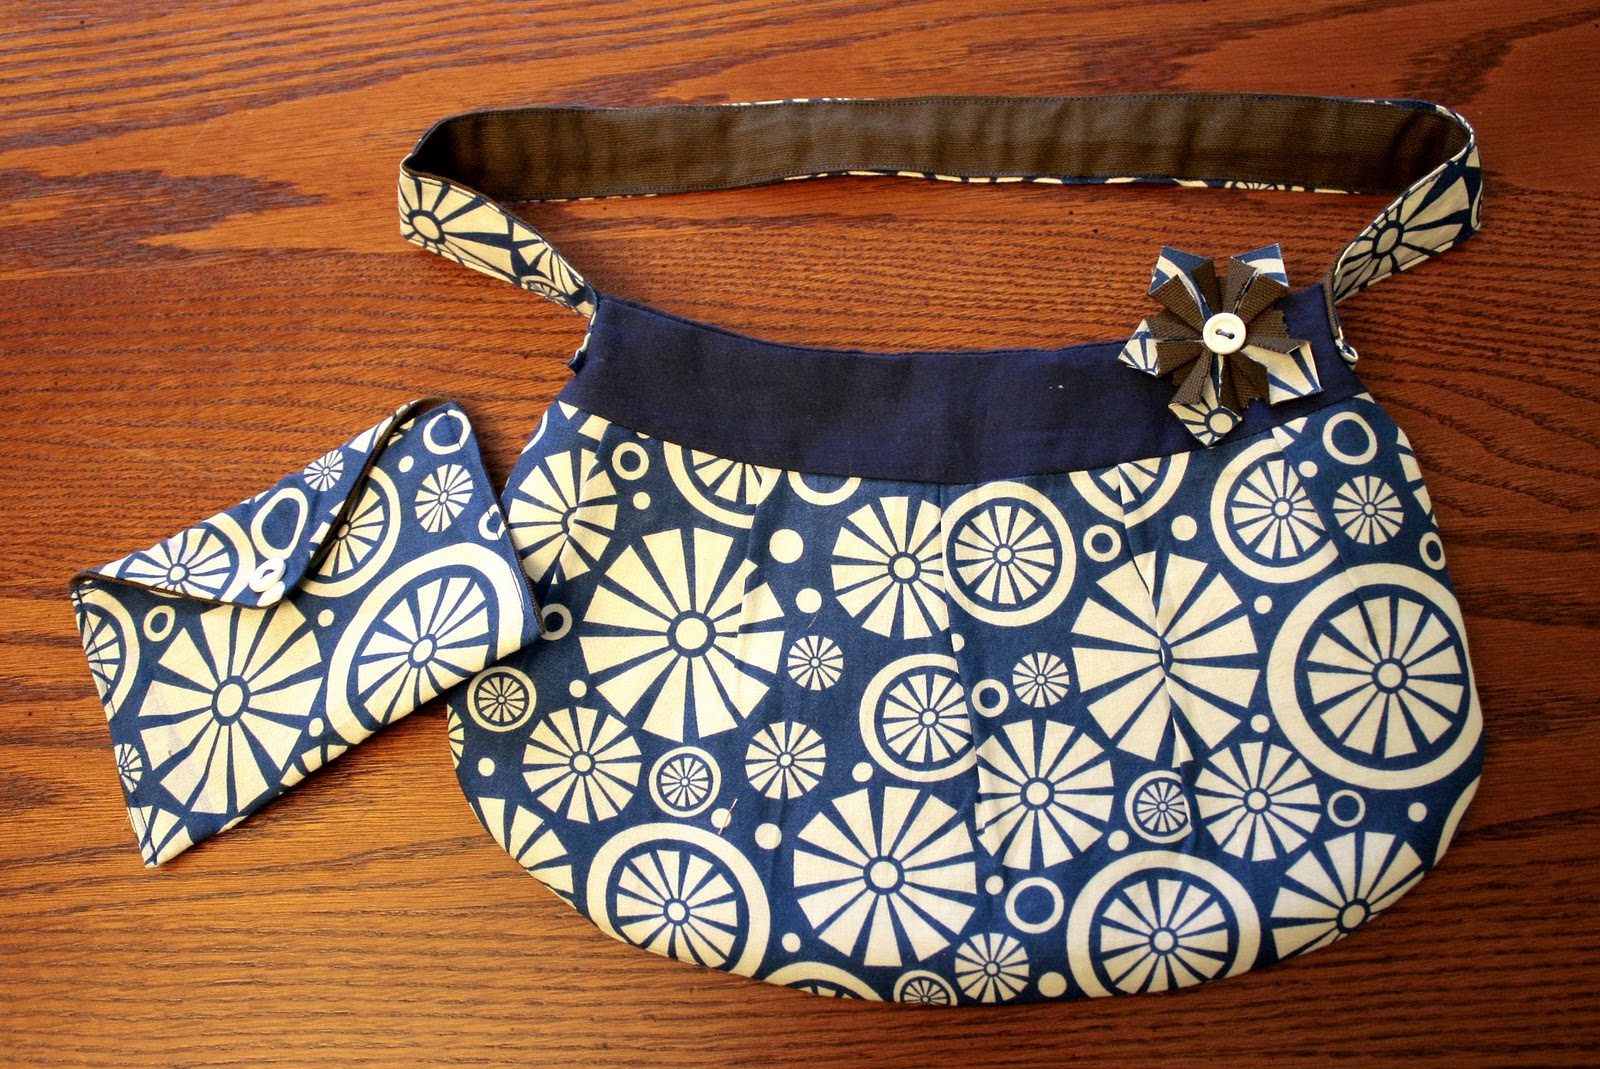
I made this purse, wallet and optional flower for my contribution for a silent auction. The purse is the “Buttercup Bag” sewing pattern that you can get (free!) at the Made by Rae site. If you haven’t found Rae’s site yet, it’s amazing and you should go take a look around! The bag has a magnetic closure and a pocket inside and little pleats around the outside. I’d recommend either using a heavier weight fabric or some fusible fleece between the layers to give it a little weight.

The wallet and flower were both things I made up as I went along. For the flower, I used fusible web and ironed together some of the blue and brown fabrics. Then I cut out five 1″ squares. Then (like origami) I folded the sides in so they met in the middle. I did that to all five squares and ironed them flat. Then I cut out a 1″ circle, stacked everything up and hand stitched it all together with a button in the center. I put a safety pin on the back so the user could put it on the strap, the purse, or choose not to use it at all.

For the wallet, I measured out two strips of fabric 5 1/2″ wide by 9 1/2″ long. Then on one side, I cut the last 2″ of the length into a triangle. Next I put right sides together and stitched all around the wallet, leaving an opening at the bottom and using a 1/4″ seam allowance.

Then snip the corners and turn it right side out and iron it flat.

Stich along the open edge to close it up. Then fold over the bottom to make a pocket and stitch down the sides.

To finish it off I stitched a decorative button to the flap and put a snap underneath which you can see in the second photo from the top of the post.


Total
0
Shares
Share 0
Tweet 0
Pin it 0
Related Topics
  • button
  • flower
  • free pattern
  • made by rae
  • magnetic closure
  • pattern
  • purse
  • wallet
Mary

Previous Article
  • Craft
  • Food
  • Fresh Picks
  • Home
  • Paper Craft
  • Sewing

Fresh Picks for Friday 4.1.11

  • Lindsay
  • Posted: April 1, 2011
View Post
Next Article
  • Craft
  • Craft with Kids
  • Home
  • Paper Craft

ABCs and 123s Wall Hanging

  • Mary
  • Posted: April 8, 2011
View Post
You May Also Like
View Post
  • DIY projects
  • Home

nPhoto – Professional Photo Printing Services for Photographers: Develop Your Brand with Us!

  • Jeremie Berton
  • Posted: January 14, 2025
View Post
  • Craft
  • Outdoor

5 Great Destinations in Costa Rica for Your Next Crafting Retreat

  • Craftbuds Editorial Team
  • Posted: December 16, 2024
Why-Professional-Locksmiths-Are-Essential-for-Home-Security
View Post
  • Home

Avoiding DIY Disasters: Why Professional Locksmiths Are Essential for Home Security

  • Jeremie Berton
  • Posted: April 3, 2024
Putting Together a Wooden Nativity Set for the Holidays
View Post
  • Craft
  • DIY projects
  • Home
  • Outdoor

Putting Together a Wooden Nativity Set for the Holidays

  • Sheila Mae Pedregosa
  • Posted: February 7, 2024
How is AI Impacting Crafting
View Post
  • Craft
  • Tools & Supplies

How is AI Impacting Crafting

  • Craftbuds Editorial Team
  • Posted: December 5, 2023 - Updated at: December 7, 2023
How to Sew Leather
View Post
  • Needlecraft
  • Sewing

Sewing Leather & Faux Leather Made Easy: A Step-by-Step Guide to Perfection

  • Michelle Rowley
  • Posted: October 24, 2023
How Funny Phrases on Shirts Have Transformed
View Post
  • Craft

The Evolution of Humor: How Funny Phrases on Shirts Have Transformed 

  • Craftbuds Editorial Team
  • Posted: October 23, 2023 - Updated at: October 24, 2023
Craft Organizers for Efficient Storage Use
View Post
  • Craft
  • DIY projects

DIY Craft Organizers for Efficient Storage Use

  • Craftbuds Editorial Team
  • Posted: October 23, 2023 - Updated at: October 25, 2023
12 comments
  1. Sara says:
    April 3, 2011 at 12:39 am

    So cute! Thanks for the wallet tutorial!

  2. heather says:
    April 5, 2011 at 12:57 am

    Awesome tutorial! Thanks for sharing, please stop by and say hi sometime.

  3. Jacqueline says:
    April 5, 2011 at 8:52 am

    Thanks for the tute! seems simple BUT I really really really like that fabric!!!! Where is it from?

  4. Mary says:
    April 5, 2011 at 9:01 am

    Thanks Jacqueline! It was a fat quarter I just picked up at JoAnns a couple weeks ago. I used 2 fq’s (navy and the bright blue with white circles) plus some brown scraps I had leftover.

  5. April says:
    April 5, 2011 at 5:02 pm

    Cute! Thanks for stopping by my blog-glad you did! I’m following you now!

  6. Bernadette says:
    April 5, 2011 at 9:30 pm

    So cute, great job. Such a handy little purse.

  7. Rebecca @ My Girlish Whims says:
    April 5, 2011 at 11:03 pm

    These a both adorable!!!! I wish i could sew better and could make them too!

    I’d love for you to link this up to my new link party, Your Whims Wednesday! https://mygirlishwhims.blogspot.com/2011/04/your-whims-wednesday-1.html

  8. Lindsay says:
    April 5, 2011 at 11:08 pm

    Sure thing!

  9. Katie @ Eye Spy DIY says:
    April 6, 2011 at 10:51 am

    How cute! I have that same fabric, may have to make a purse out of it!

  10. Quiltstory says:
    April 11, 2011 at 6:37 pm

    Such a great purse. I really want to make a new purse. Love it!

  11. Linda L. says:
    December 13, 2011 at 8:38 pm

    I used this pattern for a purse for my sister, and she loved it; I did add more pockets to the inside, and hand-embroidered some really cute stuff on the outside to match the lining. I didn’t think of making a matching wallet, though, nor the cute little flower. Maybe I’ll try that next.

  12. myra says:
    June 27, 2012 at 12:16 pm

    this is so cute!

Leave a Reply

Your email address will not be published. Required fields are marked *

Subscribe

Subscribe now to our newsletter

Art & Craft, DIY ideas and Tutorials – Craftbuds
  • About Us
  • Editorial Guidelines
  • Our Experts
  • Privacy Policy
  • Contact Us
Find fun and creative craft ideas and tutorials across various categories such as Knitting, Quilting, Sewing, PaperCraft, Jewelry Making and much more

Input your search keywords and press Enter.