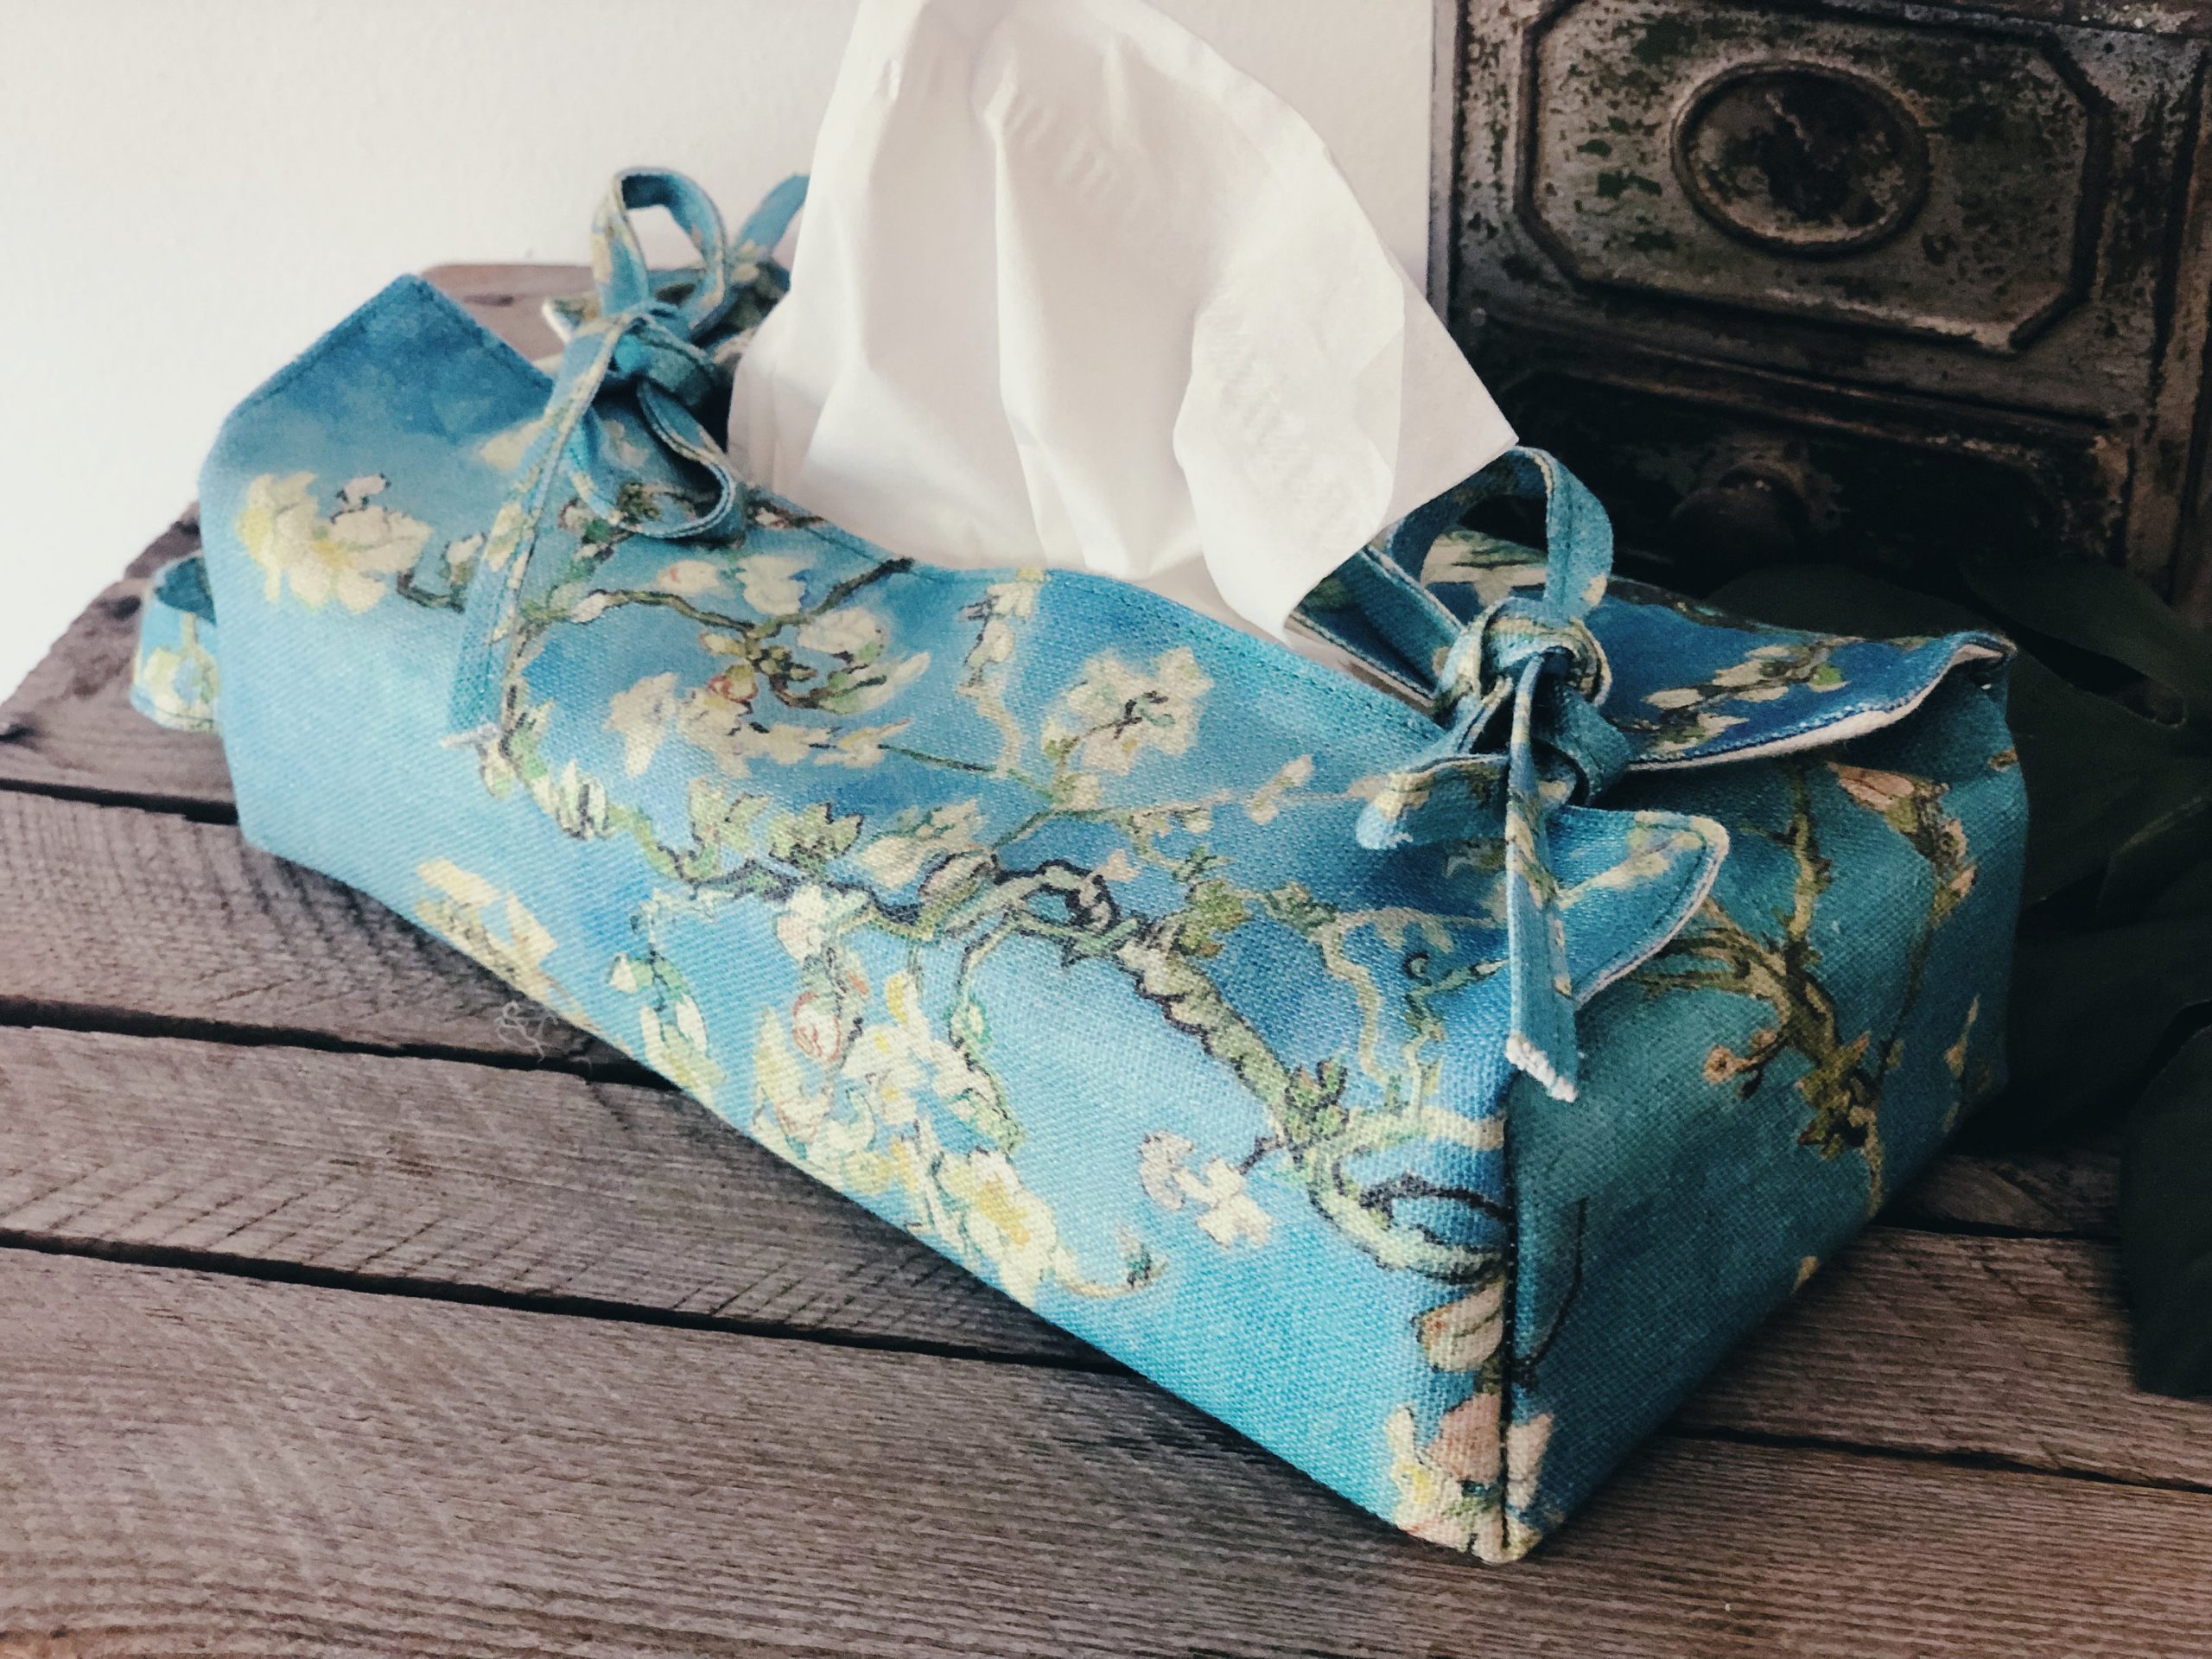

Here’s a great project for that special fabric you’ve been hoarding so you can see it every day! You won’t need much fabric and you can even use a fat quarter. In all you’ll need:
- Exterior fabric, quilt batting or fusible fleece, and interior fabric, approx. 13″ x 17″ each depending on the size of your tissue box
- 1/2″ double fold bias tape (approx. 40″ inches)
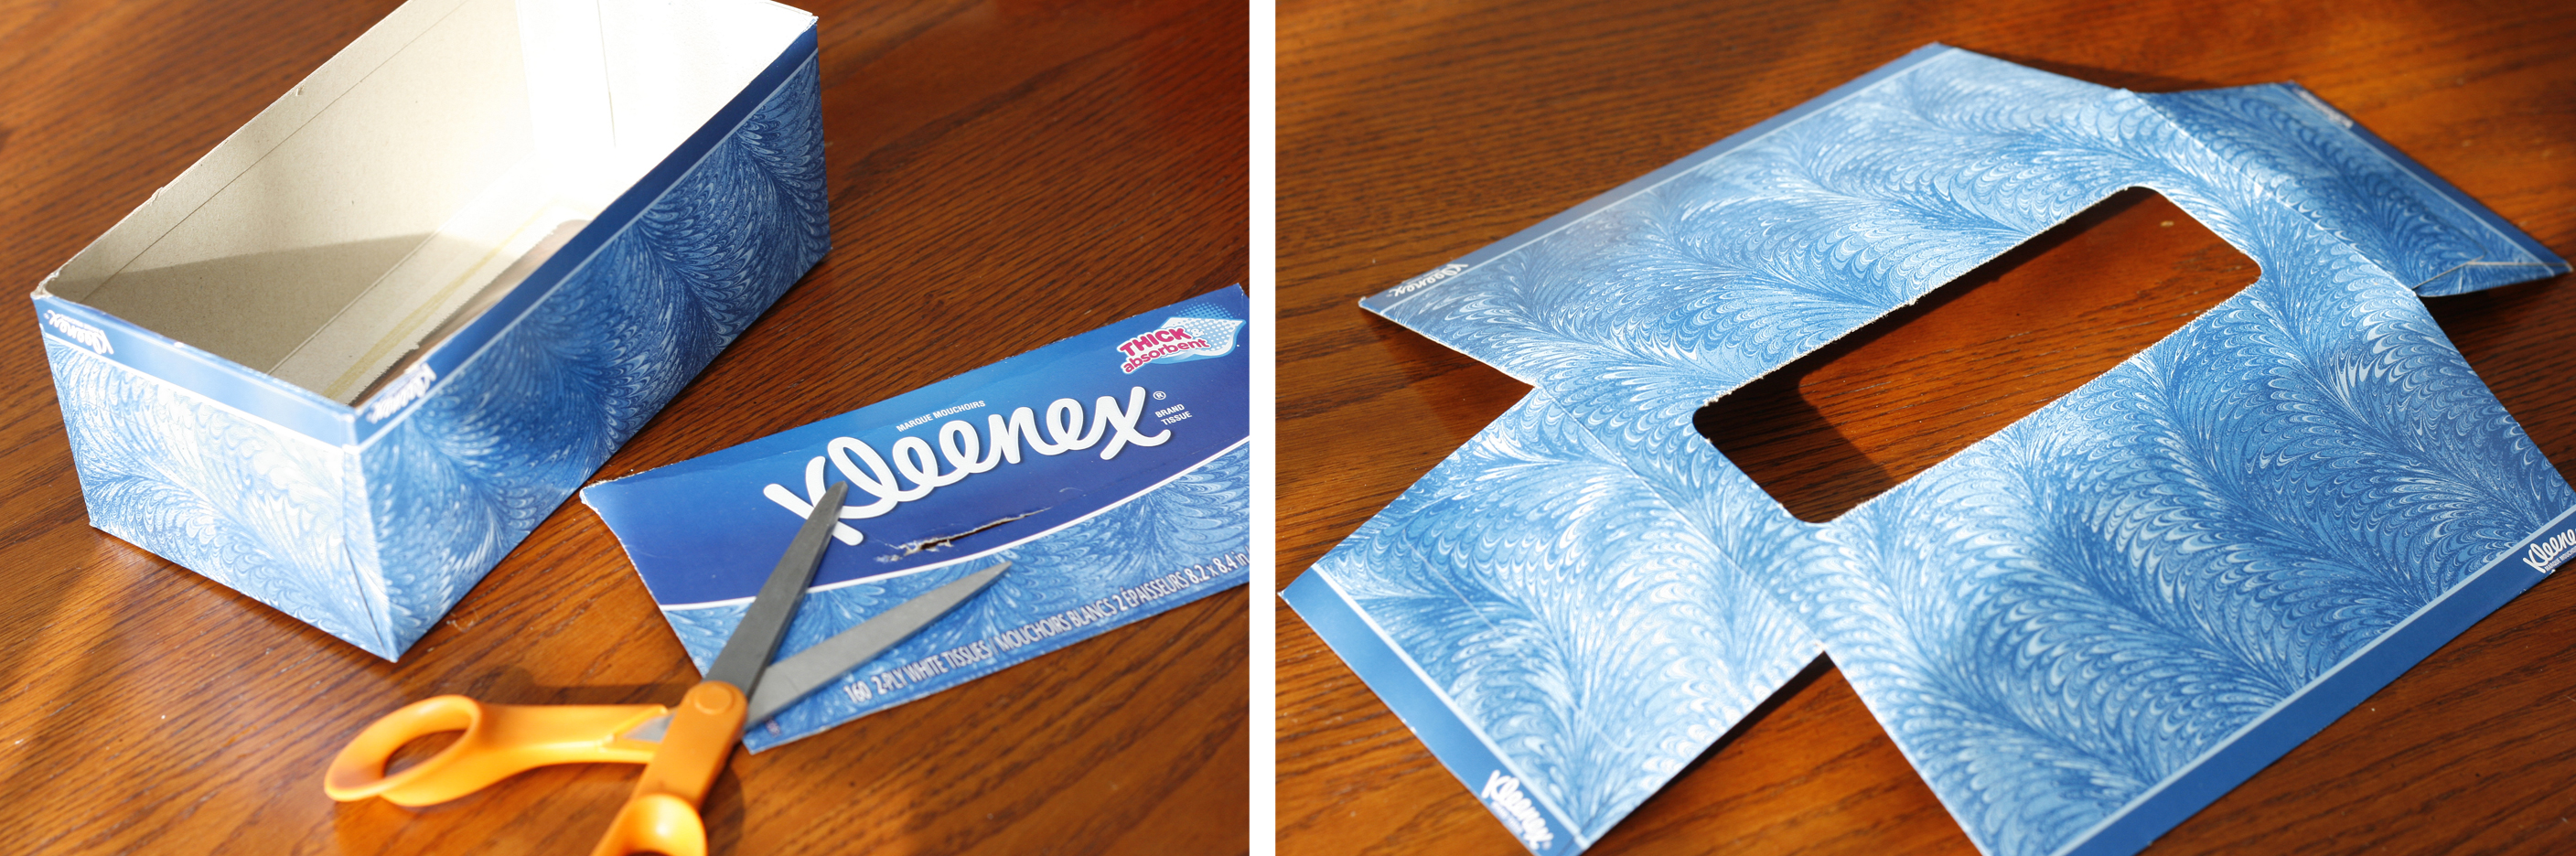
To start, get an empty box of your preferred tissue type.Carefully poke a hole in the bottom with your scissors and cut out the bottom. Then cut each of the 4 corners so it lays flat. Remove plastic from the top where the tissues come out. Now you’ve got your tissue box template!
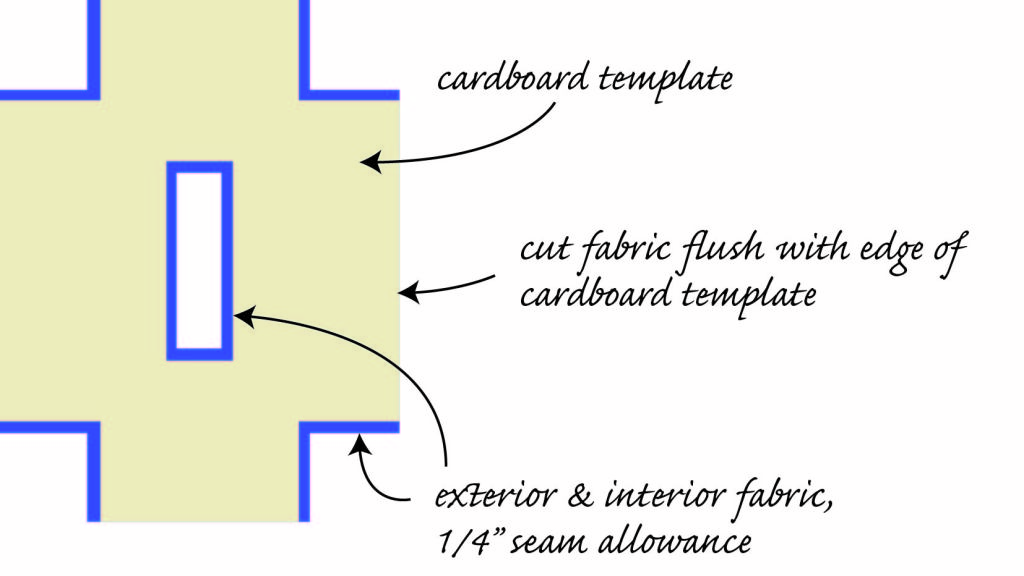
Place the cardboard template on top of your exterior fabric, and fabric for the interior (I used white muslin, this fabric won’t show). You’ll want to cut the 2 fabrics flush with the outer edges of the tissue box (the part that will form the bottom), and leave a 1/4″ seam allowance at each of the 4 corners. For the inside rectangle where the tissues come out, don’t worry about rounded edges and cut a rectangle leaving 1/4″ distance from the edges of the tissue box.
Cut a layer of batting the same way you cut the fabric, except at the 4 corners you’ll want to cut 1/4″ inside the template to reduce bulk in the corner seams. Now you can either cut across the corners of just the batting layer to create 5 separate pieces and allow for sharper corners, or you can leave it together and sew along the fold through all the layers.
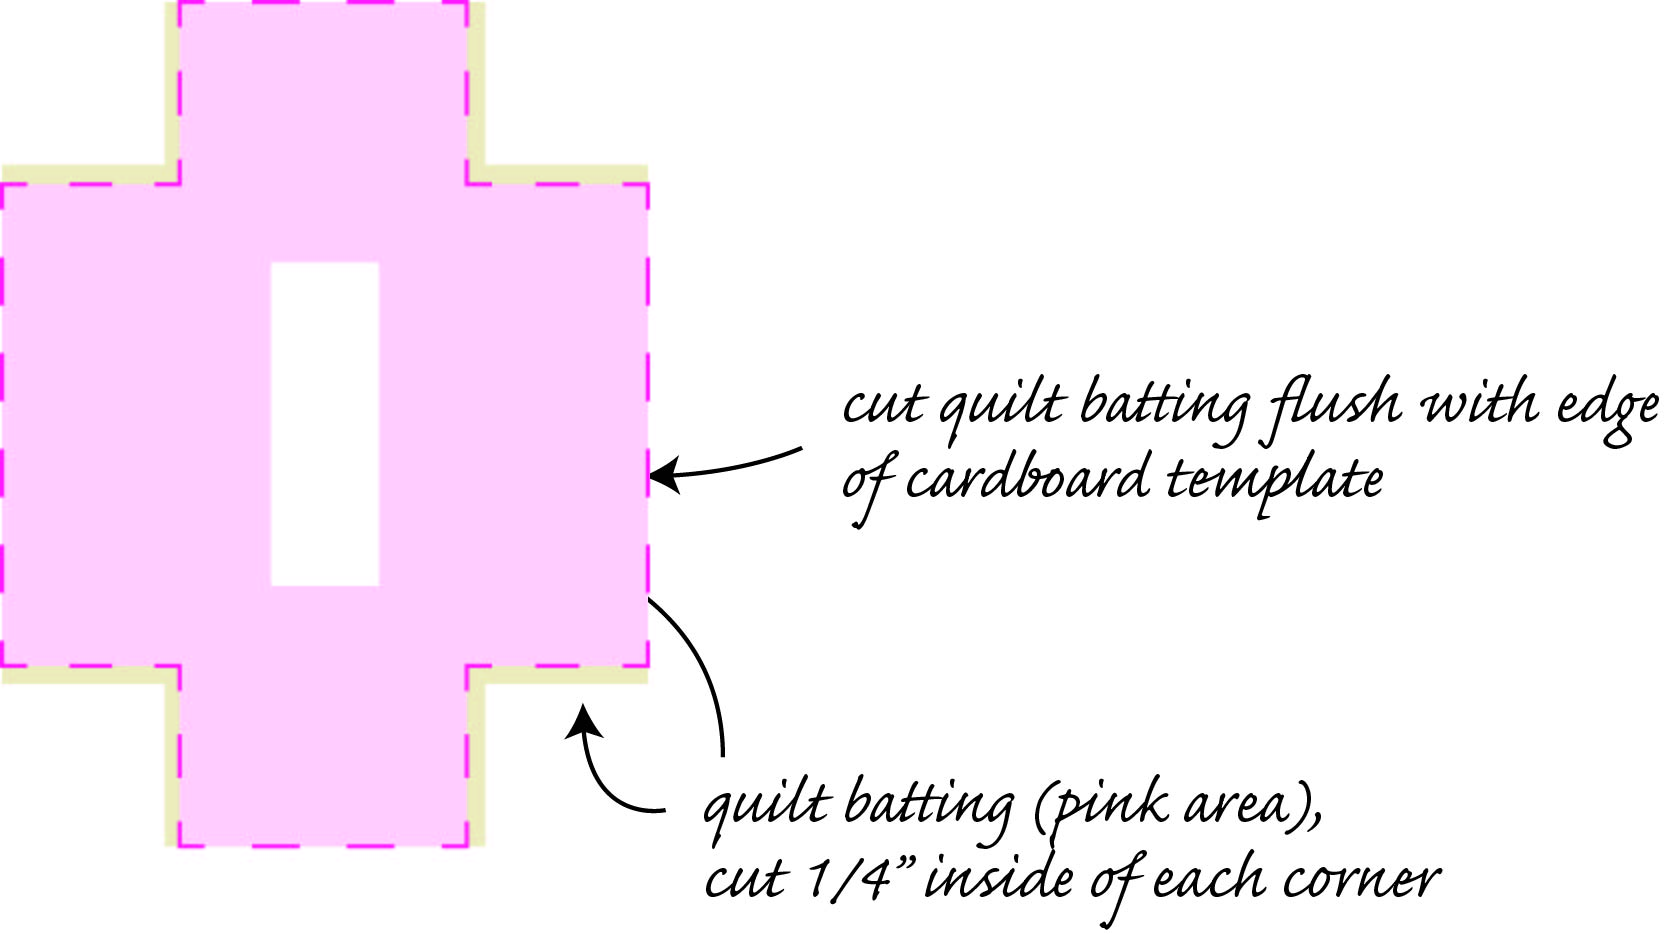
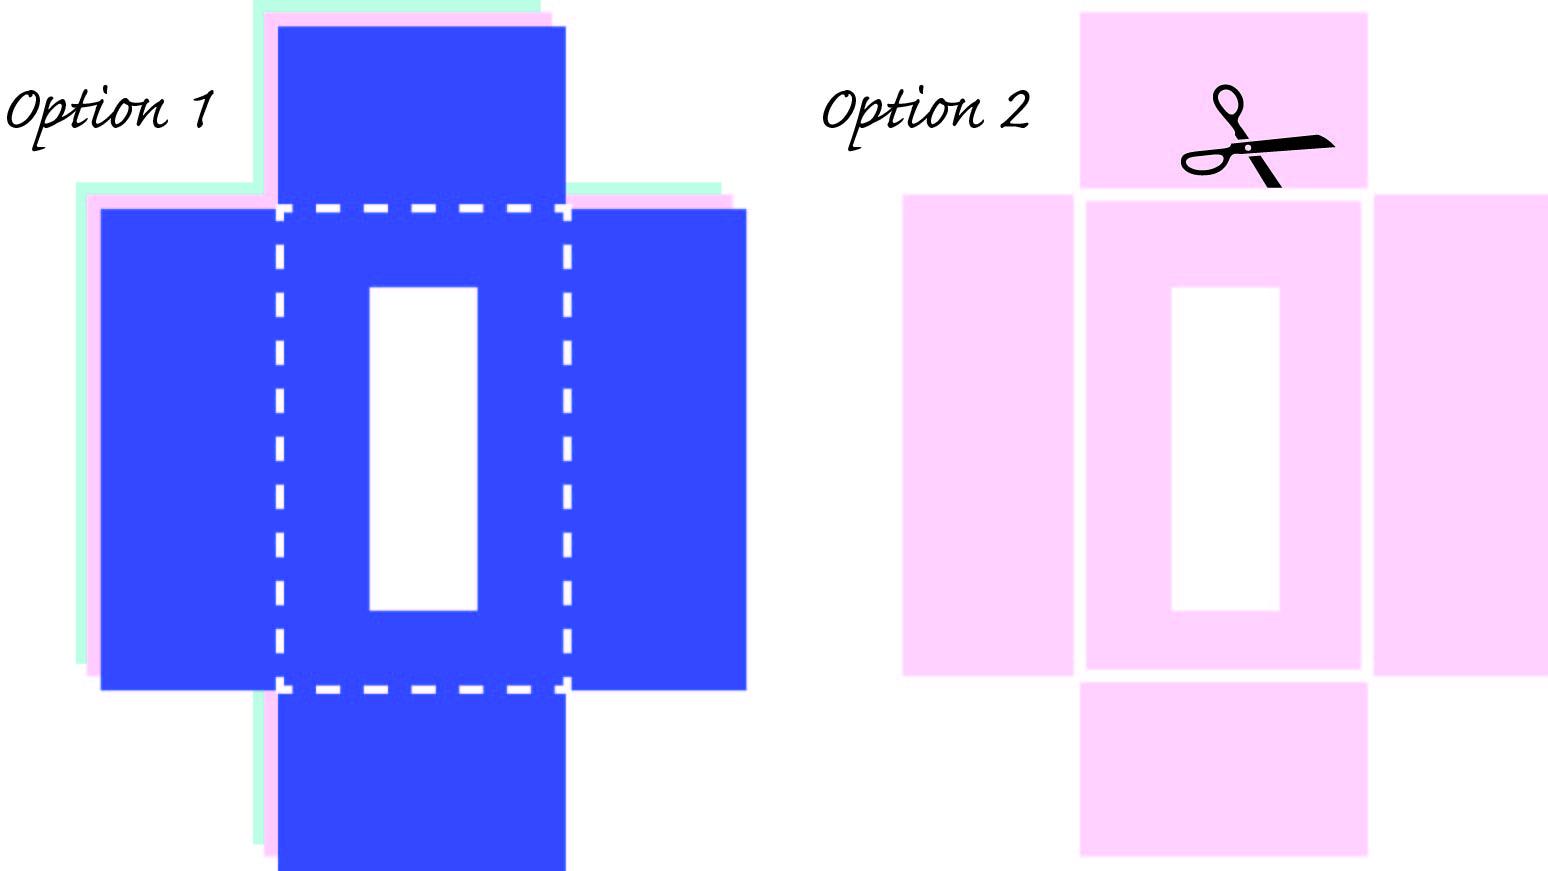
Next, you have two options with your quilt batting or fusible fleece. Option 1: Sandwich the batting between the 2 layers of fabric and sew along the dotted line in the diagram below so the final box cover has nice crisp corners. Option 2: Cut along the white line in the diagram below only on the quilt batting or fleece layer so you have 5 separate pieces. If using fusible fleece, fuse the pieces between your 2 layers of fabric. Cutting these lines will help the fabric fold better.
Snip the 4 corners of the tissue box opening 1/4″ at a 45 degree angle. Fold the edges toward the backing and stitch down or use a glue stick or fusible web to hold it in place.

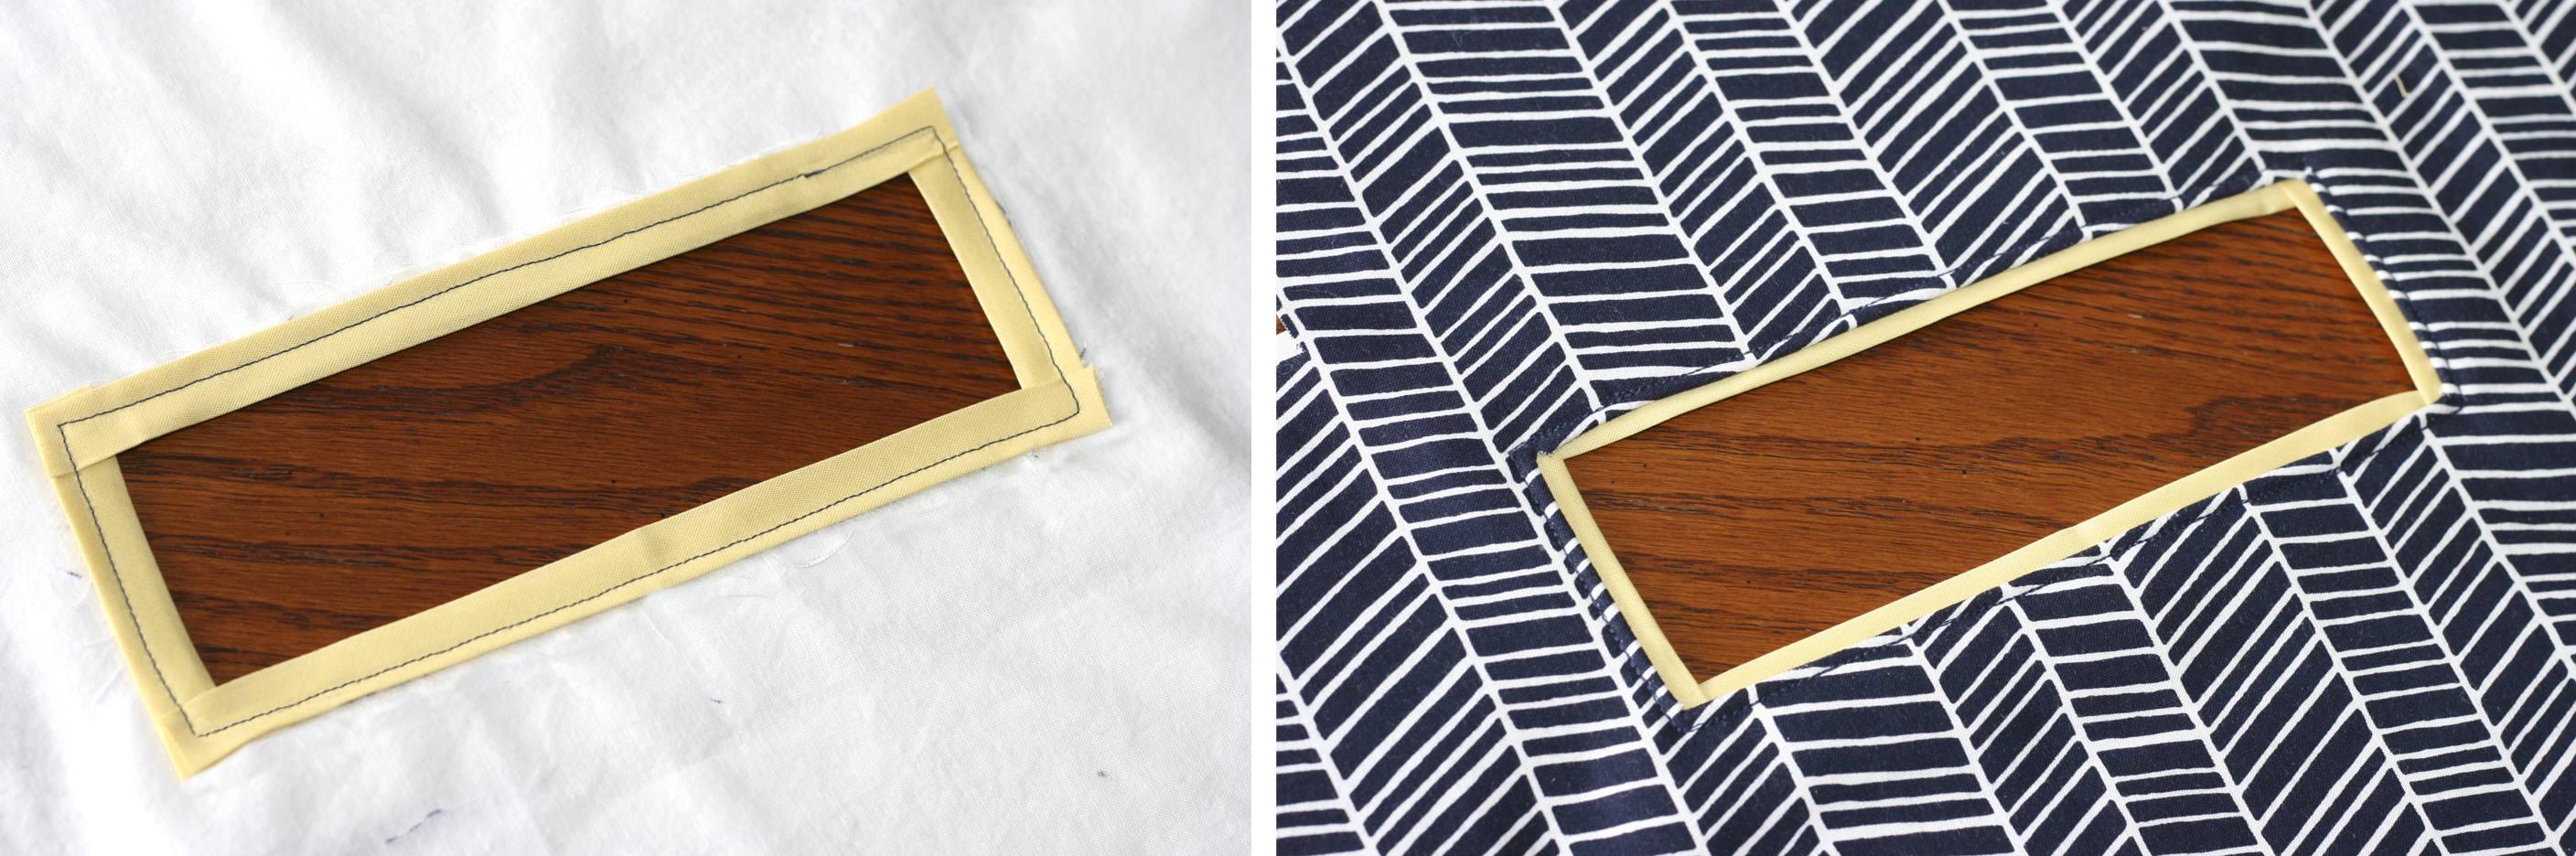
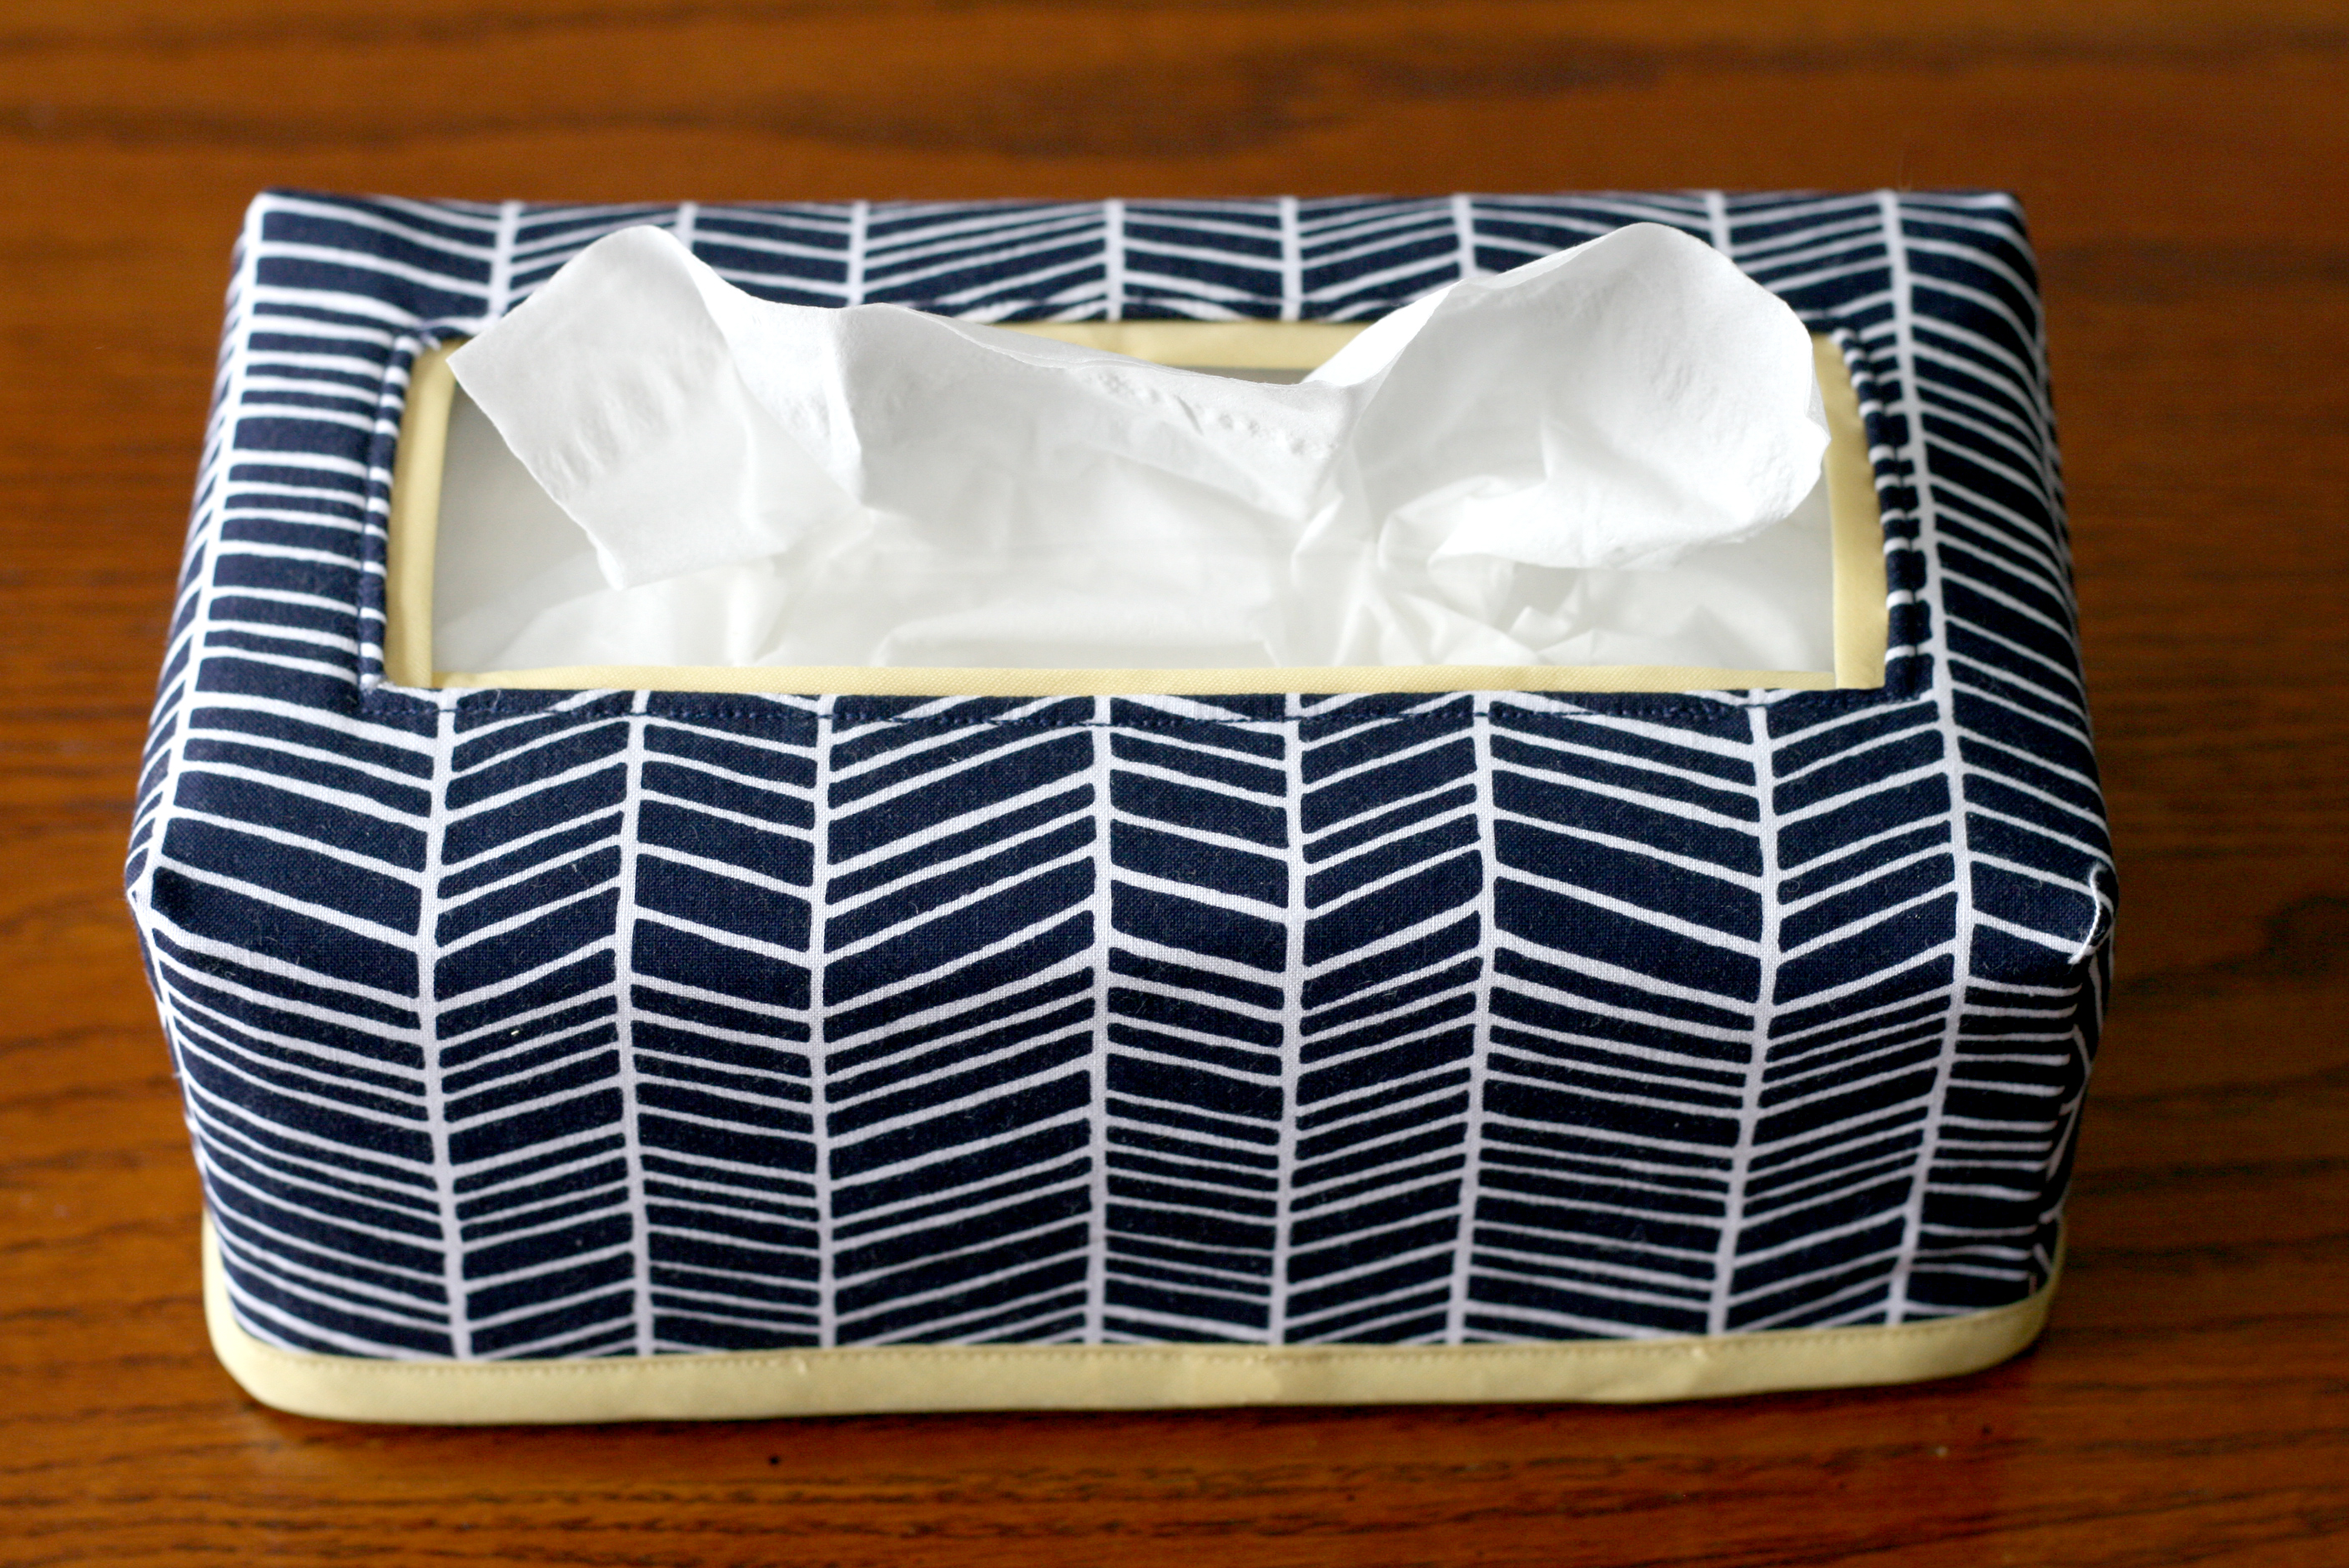
Fold 1/2″ bias tape in a rectangle around the opening with the 2 raw edges ending at a corner, or use 4 separate pieces of bias tape with 1 on each side of the rectangle (what I did below). With either method, place 1/4″ of the biast tape under the tissue box opening and leave 1/4″ sticking out from the top. Sew around the top opening 1/8″ away from the edge of your main box piece, the navy herringbone in my example (click any of the photos for a larger view).
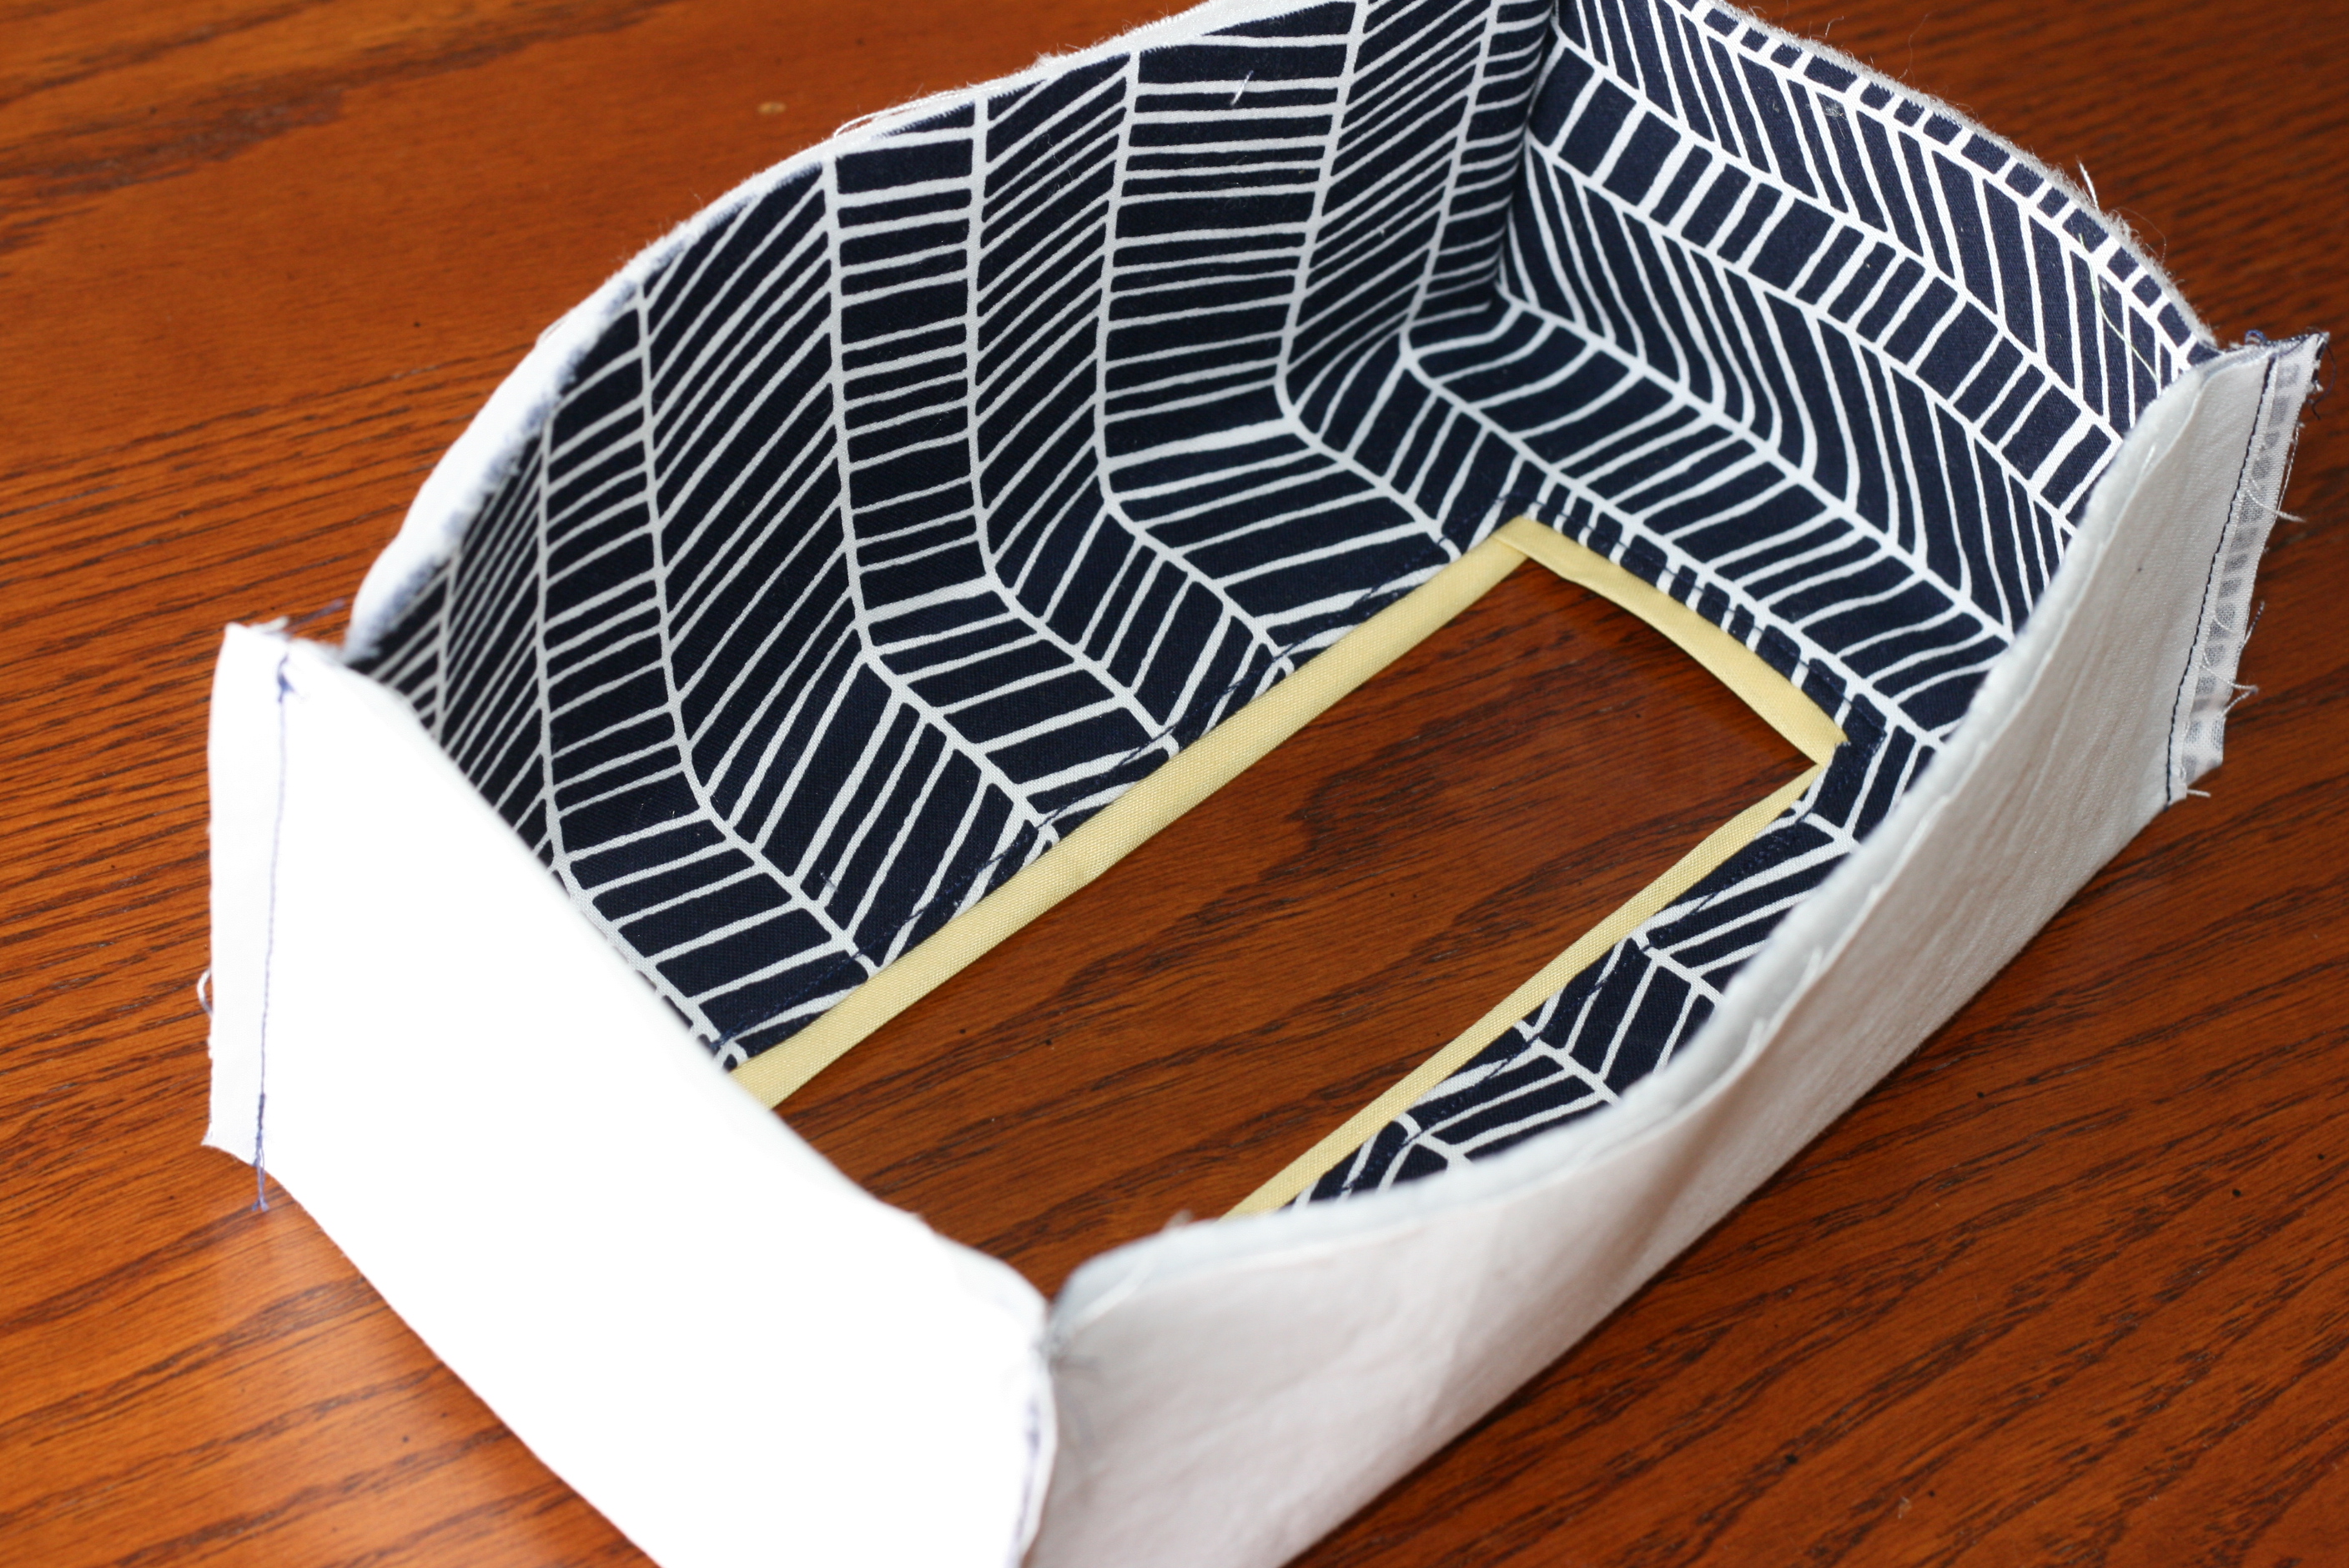
Bring the corners right sides together and sew with a 1/4″ seam allowance. Finger press the seams open.
Sew bias tape around the bottom. Make sure the corners stay open as you sew the bias tape around.
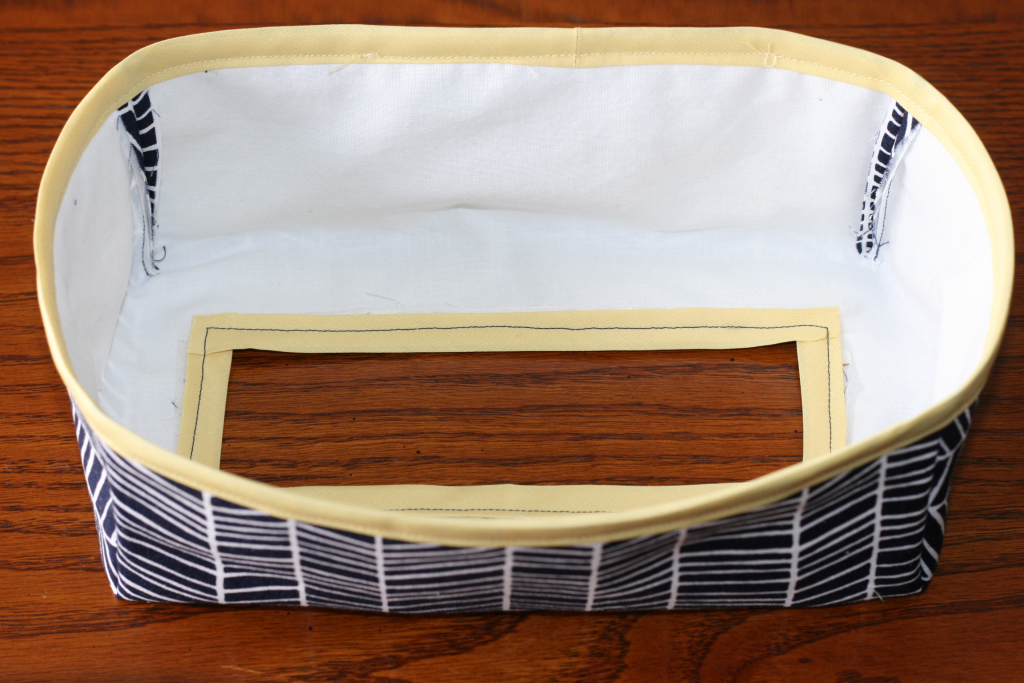
Finished! Now that you’ve got the hang of it, you can make one for every tissue box!


7 comments
Thank you so much for this pattern Mary – it is easy to follow and very good explained. But what would life be without a challenge from time to time ? right – boring. I searched in various department stores and pharmacies for boxes with a rectangled hole for the tissues, but here (Germany) they all have an oval-formed hole !! So I decided to give it a go and stitched a bias binding around it…..and it worked ! So thanks again for this great pattern ! I sure haven’t made the last one 🙂
Pity one can’t attach pictures, otherwise I would .
Thanks for the feedback Marion, I’m so glad it worked well! You’re the first person I’ve heard back from that has used the tutorial!
Thanks, Mary. This project takes so little fabric and time!
My father-in-law passed away recently. I picked two of his shirts and made aprons for his daughters, and also made chicken teapot covers with shirt-plaid feathers. Plenty of fabric left for boutique tissue box covers!