Art & Craft, DIY ideas and Tutorials - Craftbuds
  • All Craft
  • Needlecraft
    • Crochet
    • Knitting
    • Quilting
    • Sewing
    • Embroidery
  • Jewelry Making
  • Paper Craft
  • Engraving
  • Collectibles
43K Followers
24K Followers
357 Subscribers
Subscribe
Art & Craft, DIY ideas and Tutorials – Craftbuds
  • All Craft
  • Needlecraft
    • Crochet
    • Knitting
    • Quilting
    • Sewing
    • Embroidery
  • Jewelry Making
  • Paper Craft
  • Engraving
  • Collectibles
  • Craft
  • Sewing

Tutorial: LOVE Shirt

  • Mary
  • January 30, 2011
Total
0
Shares
0
0
0
My sister visited this weekend and we decided to make her a shirt for Valentine’s Day based on the LOVE statue in Philadelphia. If you need more instruction, I’ll do a more detailed tutorial on how to make an applique later this week so this one will be a bit more brief.
First I ironed Wonder-Under (specifically Pellon 725 Heavy-Duty Wonder-Under Transfer Web) to the back of the fabric we chose. Then I traced the letters onto the fabric using a stencil we had created of each letter. You can download the PDF of the letters for personal use here. Then we cut out each letter, peeled off the Wonder-Under backing, positioned the letters onto the shirt then ironed them down. Then I did a zig zag stitch around each letter and project complete! We found the plain long-sleeved gray shirt at Target in the men’s section. They had a variety of colors and they had a few in the boys section if you need a smaller size.
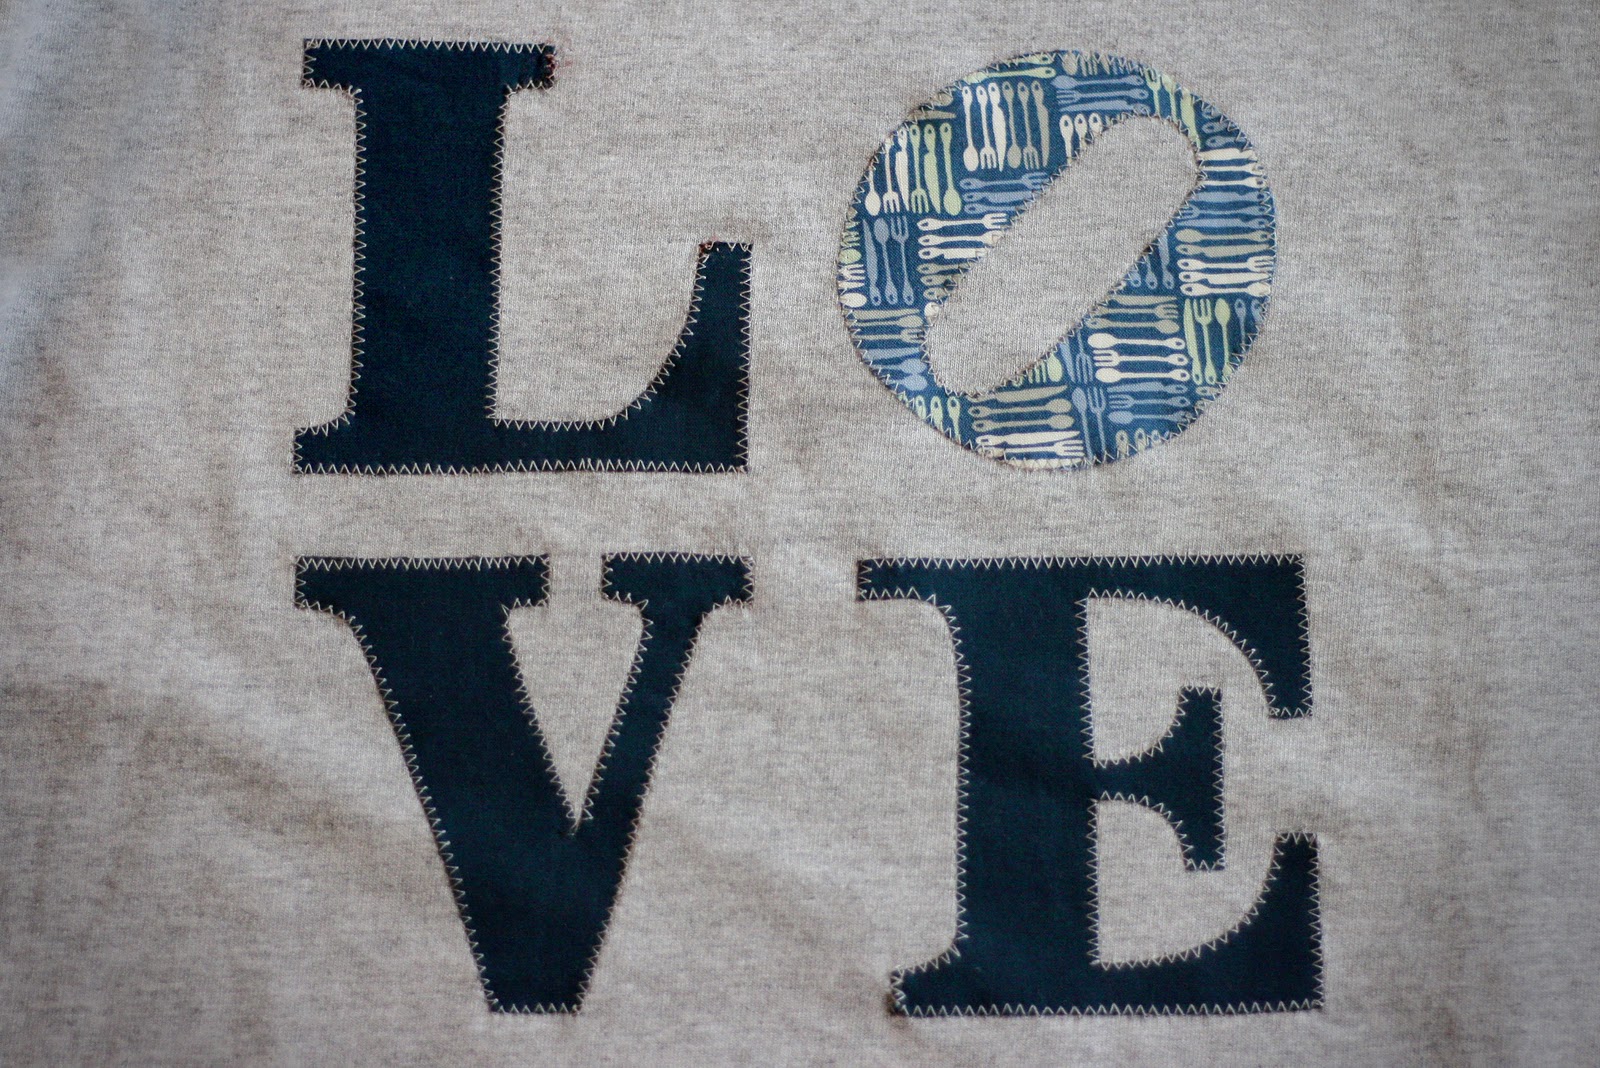
Here’s a close up of the letters. We chose a navy quilting cotton for the L, V, and E. For the O we used a fabric with tiny forks, spoons and knives. My sister is loves to bake (she’s fabulous by the way) and she’s single so this shirt is subtly dedicated to food love.
Total
0
Shares
Share 0
Tweet 0
Pin it 0
Related Topics
  • applique
  • baking
  • LOVE
  • silverware
  • sister
  • t-shirt
  • tee shirt
  • tutorial
  • utensil
  • Valentine's Day
Mary

Previous Article
  • Craft
  • Sewing

Tutorial: Custom Tees

  • Mary
  • January 23, 2011
View Post
Next Article
  • Craft
  • Home
  • Sewing

Tutorial: Plum Peachy Ruffled Pillow

  • Mary
  • February 6, 2011
View Post
You May Also Like
Best Wig Sewing Machine
View Post
  • Needlecraft
  • Sewing

Best Wig Sewing Machine In 2023: Top 6 Picks 

  • Lindsay
  • January 16, 2023
Air-Dry Clay Ideas
View Post
  • Craft
  • Craft with Kids
  • DIY projects

15 Amazing Air-Dry Clay Ideas To Get Started

  • Lindsay
  • December 30, 2022
Best 3D Printers Under $500
View Post
  • Craft
  • Engraving

Best 3D Printer Under $500 – 6 Models to Consider in 2023

  • Sheila Mae Pedregosa
  • November 25, 2022
Best Sewing Machines for Beginners
View Post
  • Product Reviews
  • Sewing

Best Sewing Machines for Beginners – 7 Top Models in 2023

  • Lindsay
  • November 24, 2022
What Can I Make With A Cricut Machine
View Post
  • Craft

What Can I Make With A Cricut Machine? 15 Ideas For All Levels

  • Mahnoor Malik Awan
  • November 23, 2022
Foiled Business Cards
View Post
  • Business
  • Craft

How To Make Business Cards On Cricut? The Complete Guide

  • Mahnoor Malik Awan
  • November 23, 2022
Best Laptop For Cricut Maker
View Post
  • Craft

Best Laptop For Cricut Maker – 5 Top Picks Reviewed

  • Mahnoor Malik Awan
  • November 19, 2022
What Does Flatten Mean On Cricut
View Post
  • Craft

What Does Flatten Mean On Cricut? All The Answers

  • Mahnoor Malik Awan
  • November 19, 2022
3 comments
  1. Lindsay Conner says:
    January 31, 2011 at 2:02 am

    >This turned out cute! I love letter appliques.

    Reply
  2. Stoney Creek Mercantile says:
    February 1, 2011 at 2:43 am

    >You've been busy Mary! I've been so swamped with catering & then preparing for the storm of the century! That I haven't kept up! The shirt looks great, especially adding the stitch around the letters. I'm curious if it gummed up your needle any?

    Reply
  3. Mary says:
    February 1, 2011 at 3:21 am

    >Glad you guys like the shirt! It was a fairly fast and easy project to do. The backing didn't gum up the needle at all. It's heat activated and cools quickly so there was never any stickiness to deal with.

    Reply

Leave a Reply Cancel reply

Your email address will not be published. Required fields are marked *

Social Links
Facebook 43K Followers
Pinterest 24K Followers
YouTube 357 Subscribers

Subscribe

Subscribe now to our newsletter

Art & Craft, DIY ideas and Tutorials – Craftbuds
  • Privacy Policy
  • About
  • Contact
Find fun and creative craft ideas and tutorials across various categories such as Knitting, Quilting, Sewing, PaperCraft, Jewelry Making and much more

Input your search keywords and press Enter.