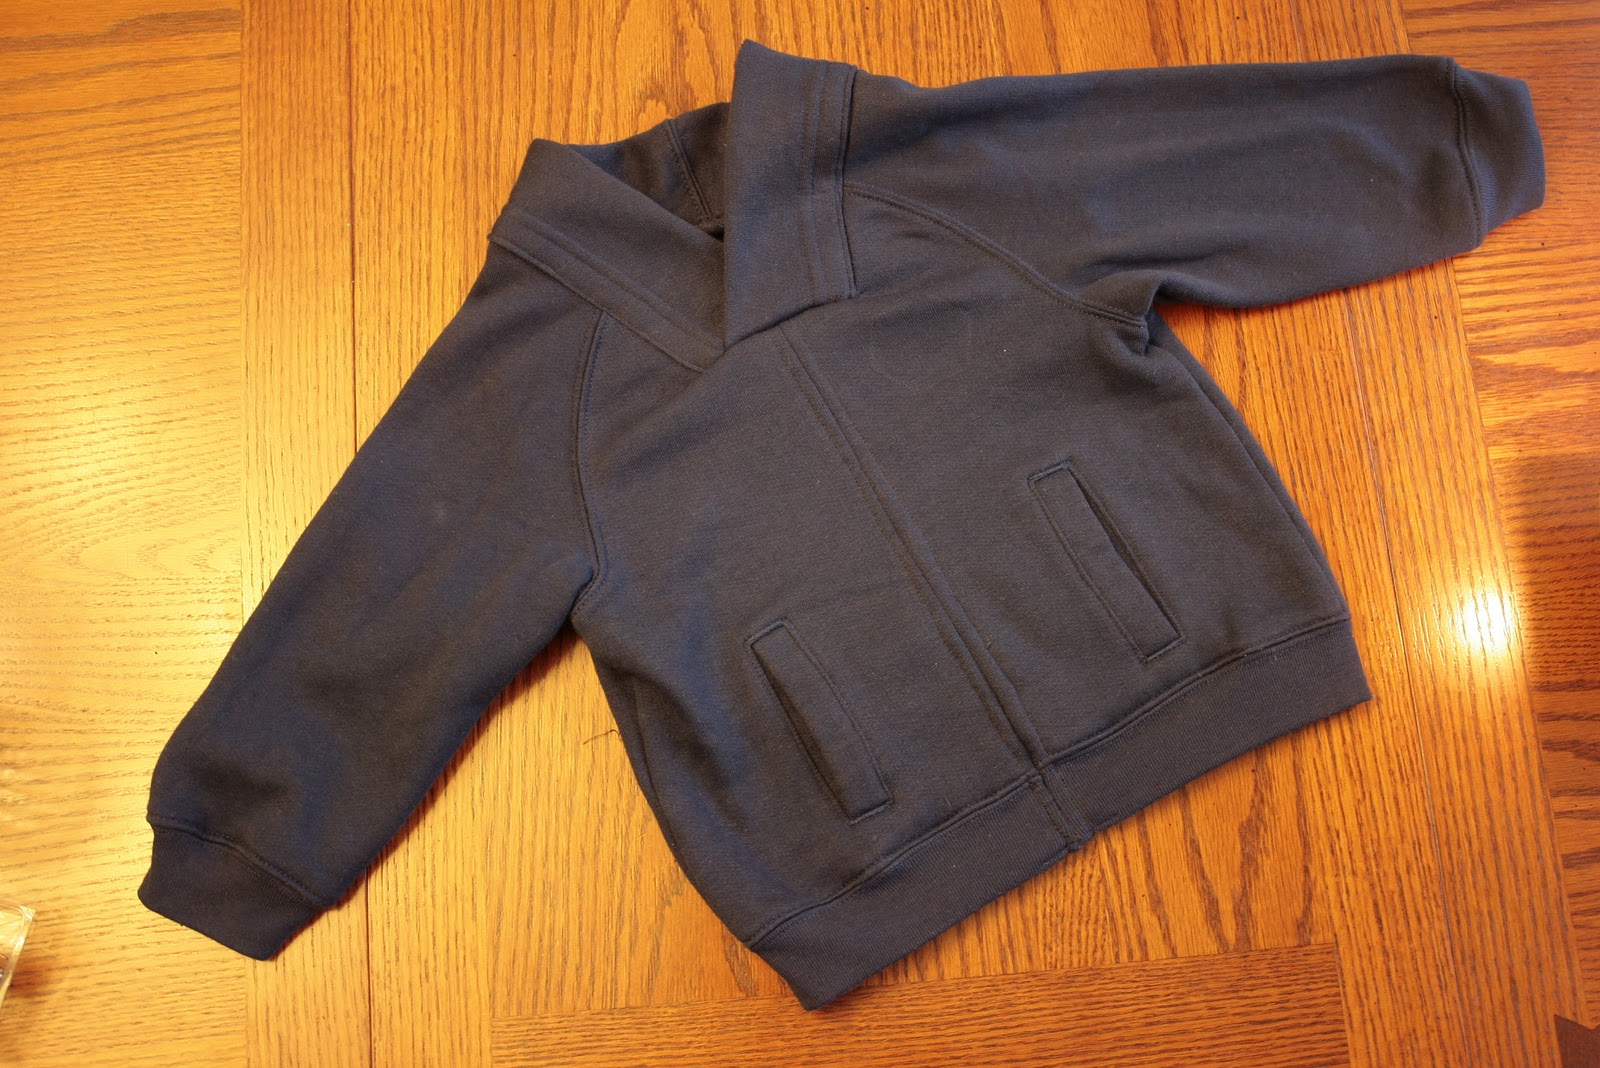
We have a lot of hooded sweatshirts at this house and I’ve always wondered if I could convert them into something else. There’s a boy’s shirt contest going on over at I Am Momma Hear Me Roar so I decided to give it a shot. Here’s a great way to transform those hooded sweatshirts into a cowl neck pullover!
Start out with a sweatshirt that fits your child (or you!) comfortably with a little extra room because you’ll be loosing just a little bit of the width. Make sure the hood fits comfortably over their head. My son normally wears 24 month sized clothes but I used a 2T for this project. *If you are using a different style shirt check out the tips at the bottom of the post.
First you’ll cut out the zipper. It’s easiest to do this from the inside of the sweatshirt and to cut as close to the zipper as you can.

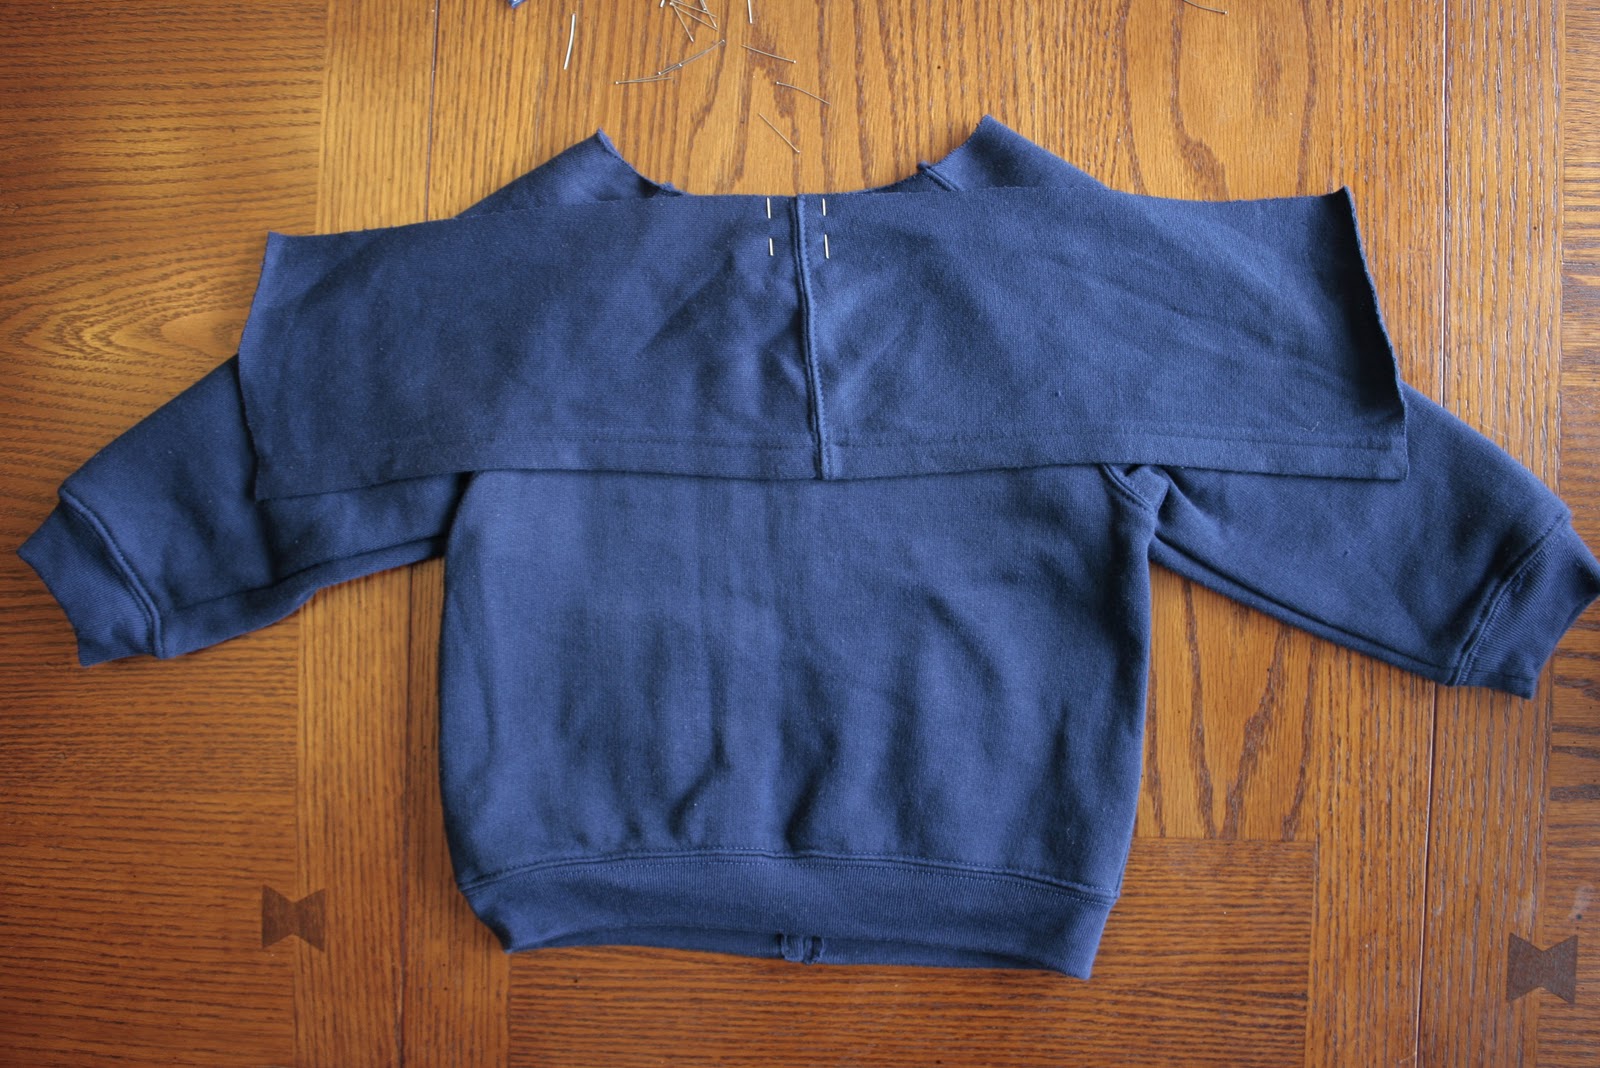
Next cut off the hood and cut off the seam that connected the hood to the rest of the shirt. You may need to use a seam ripper to remove and bits still stuck to the sides.


Your cut up shirt will now look like this:

At this stage you’ll want to remove any embellishments like the basketball patch on my sweatshirt above. Next lay the hood flat. If it is unlined like most hoodies you’ll cut it twice the final desired so you can fold it in half. Add an additional 1/4″ to that measurement for your seam allowance. I cut a strip 4 3/4″ for my son’s 2T size shirt.

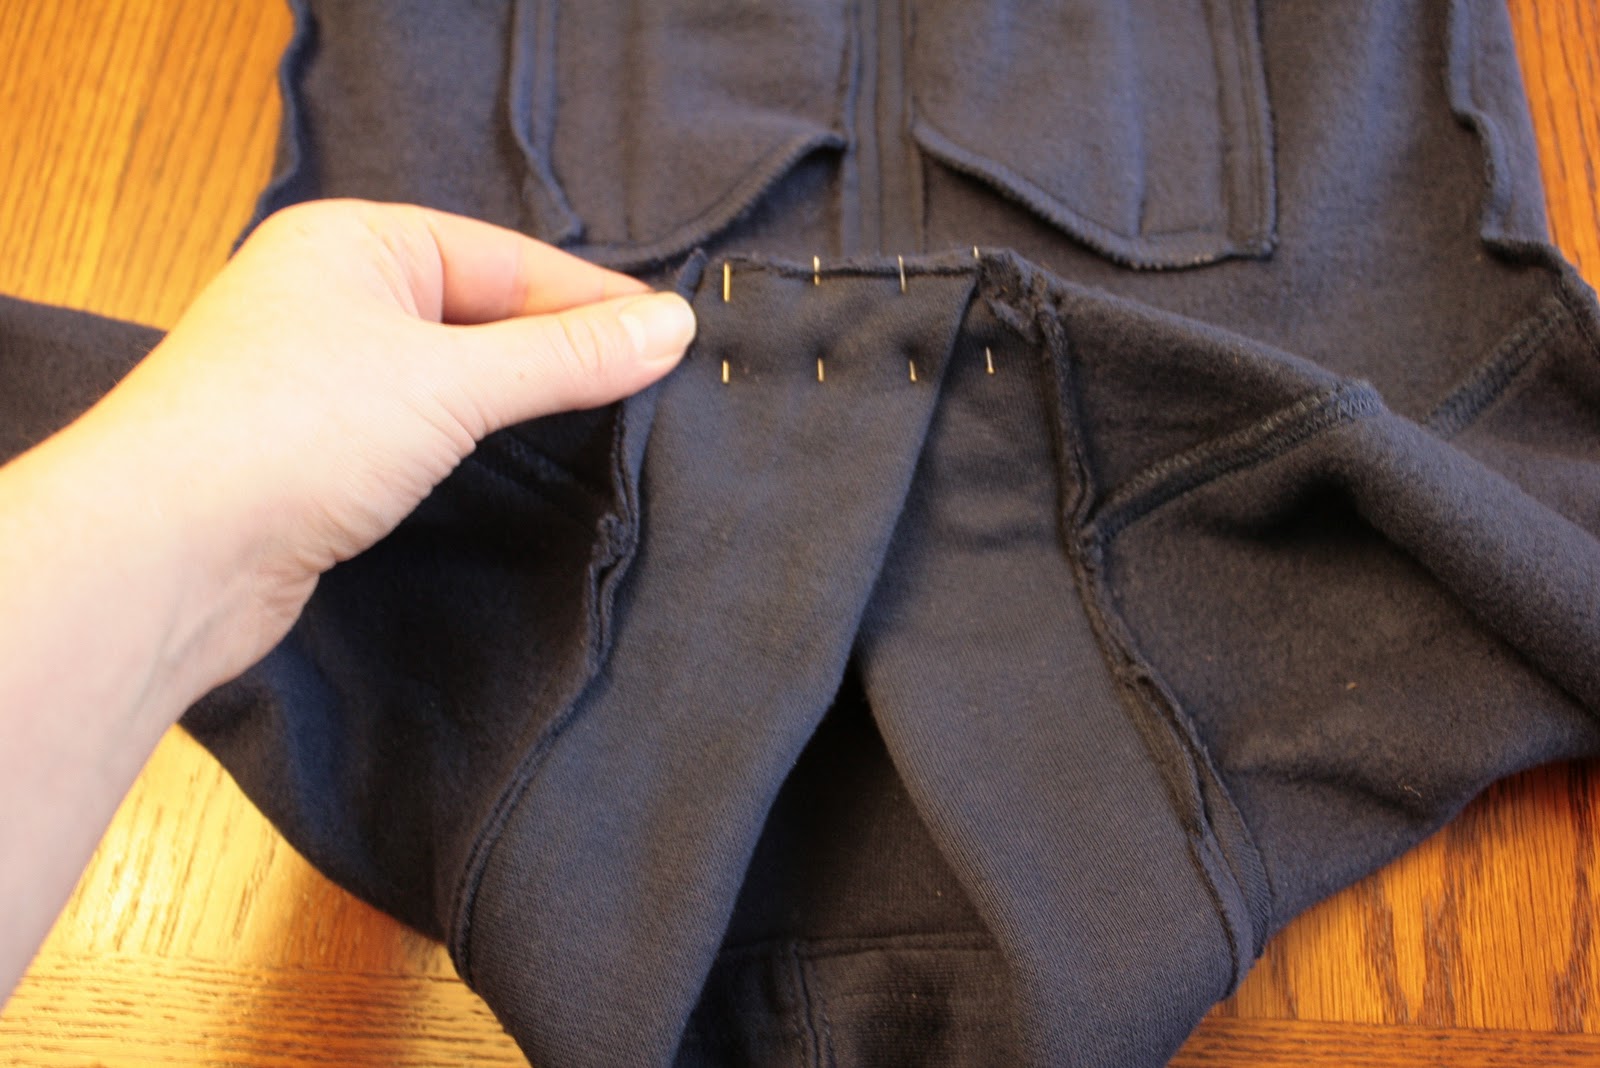
Now you’re ready to start sewing! Fold the sweatshirt inside out and pin the seam together. I cut the pockets so they would be 1/2″ away from the edge of the shirt. Next, sew along the edge with a 3/8″ seam allowance. Start at the bottom so if the shirt shifts at all, at least that part will match up correctly!
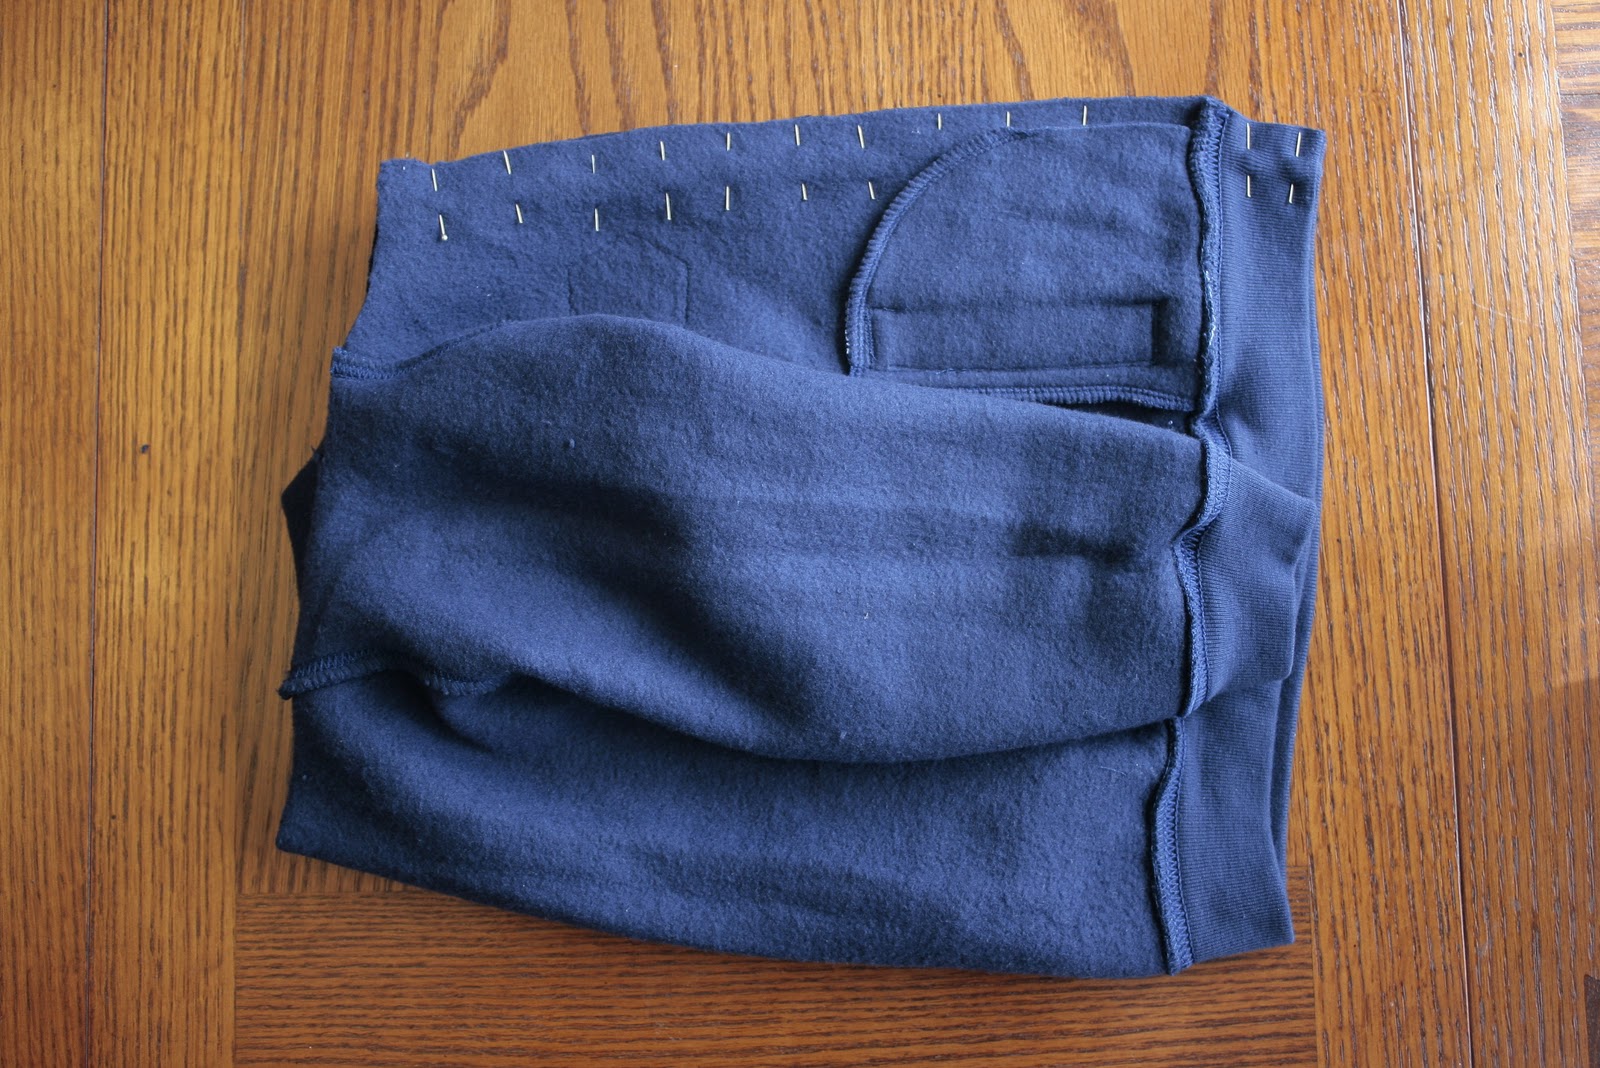
Lay the sweatshirt out and press the seams open. Pin the seams down and sew 1/4″ on each side of the seam. When you do this, fold the edges down over the sides of the pockets so when you stitch it up you’ll close the pockets that you cut open when you removed the zipper.

Turn the sweatshirt right side out and pin the center of the neck strip (the piece cut from the hood) to the center of the neck on the back of the shirt. The right side of the hood should be facing out with the seam at the bottom.
Continue to pin around the curve of the neck.
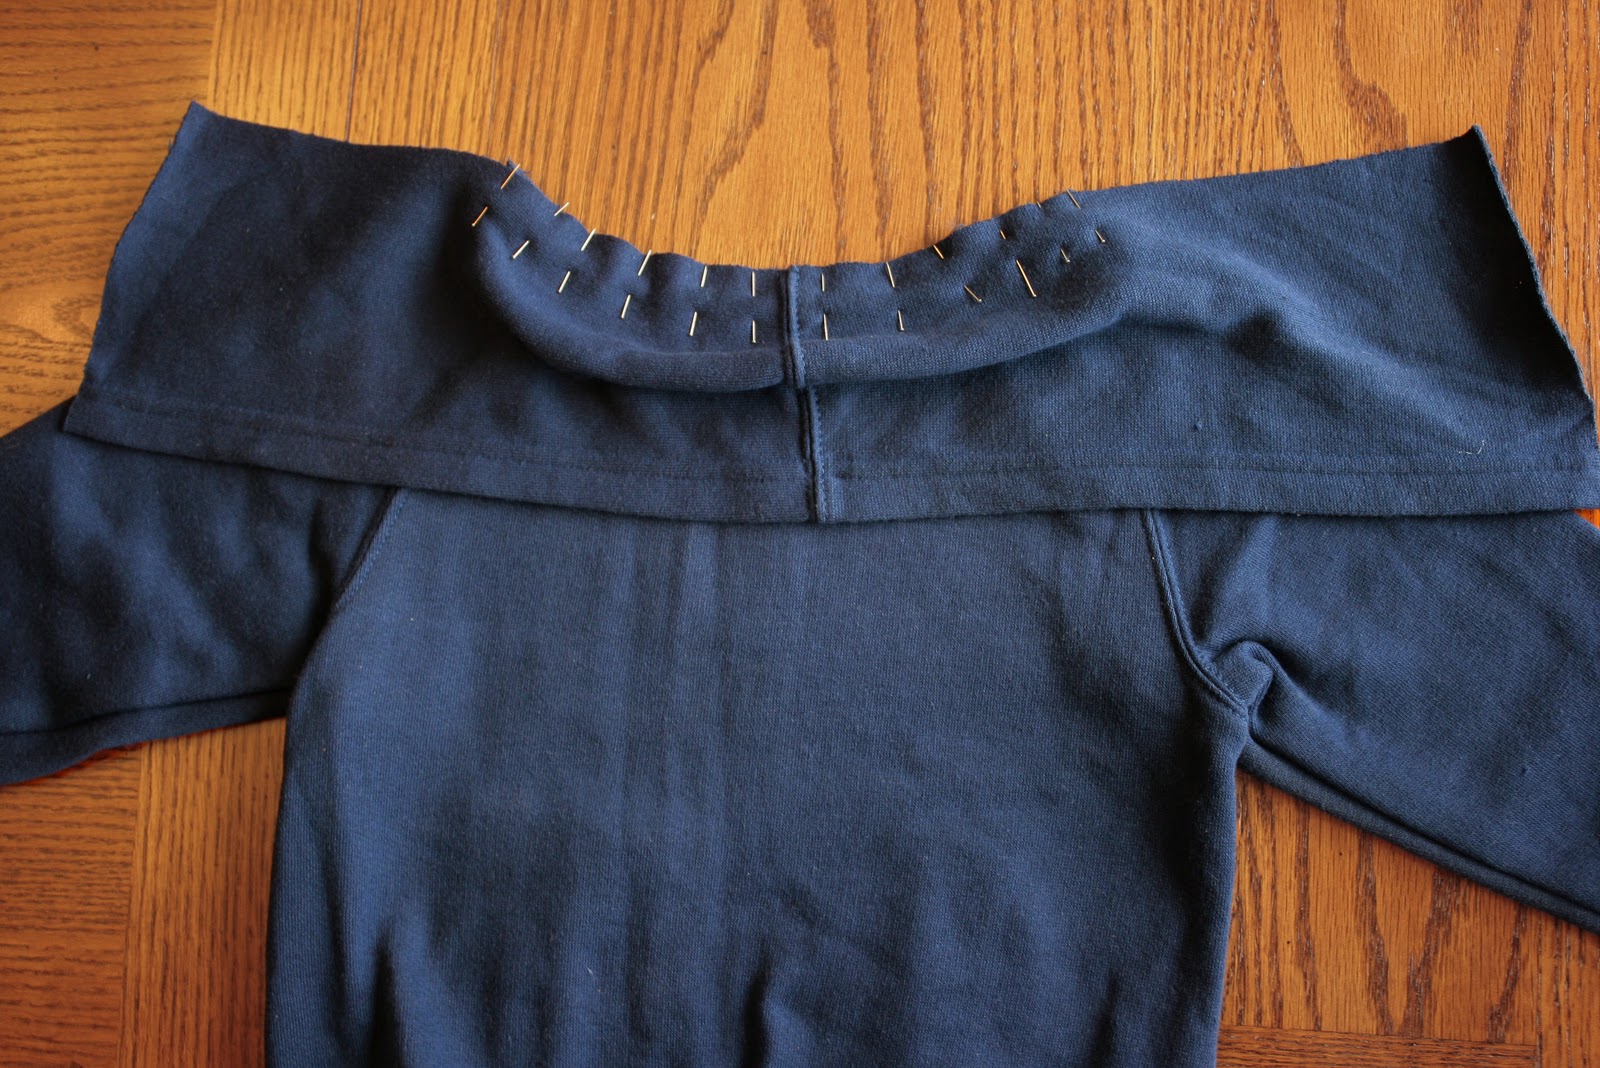
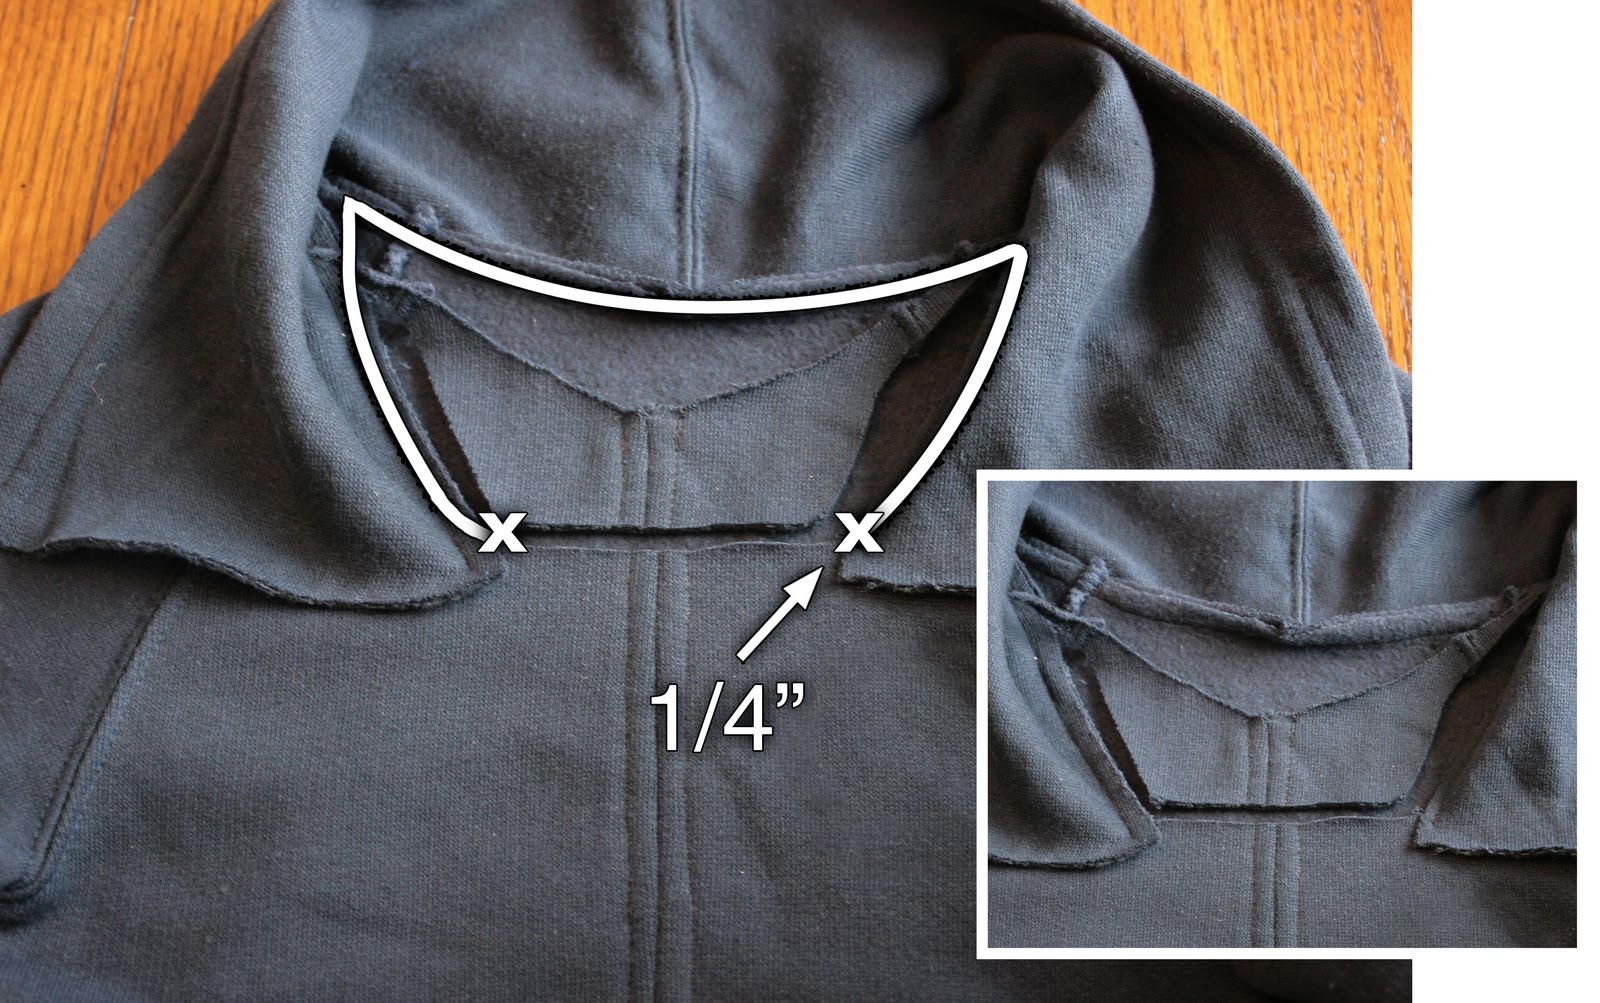
Turn the shirt over and pin down the neck strip leaving a gap slightly larger than the folded width of the neck piece. My neck strip folded in half minus the seam allowance is 2 1/4″ so the gap I left is 2 1/2″. Sew the neck strip down all the way around the shirt. Do not stitch down the 1/4″ at the edge where the Xs are marked below.
Next cut out the V of material between the neck strip. Cut along the edge of the neck strip on both sides and cut across where your stitches stop (1/4″ before the edge of the neck strip). Click on the image below (or any image in the post) for a larger view. The smaller image is the same as the larger one so you can see how mine looked.
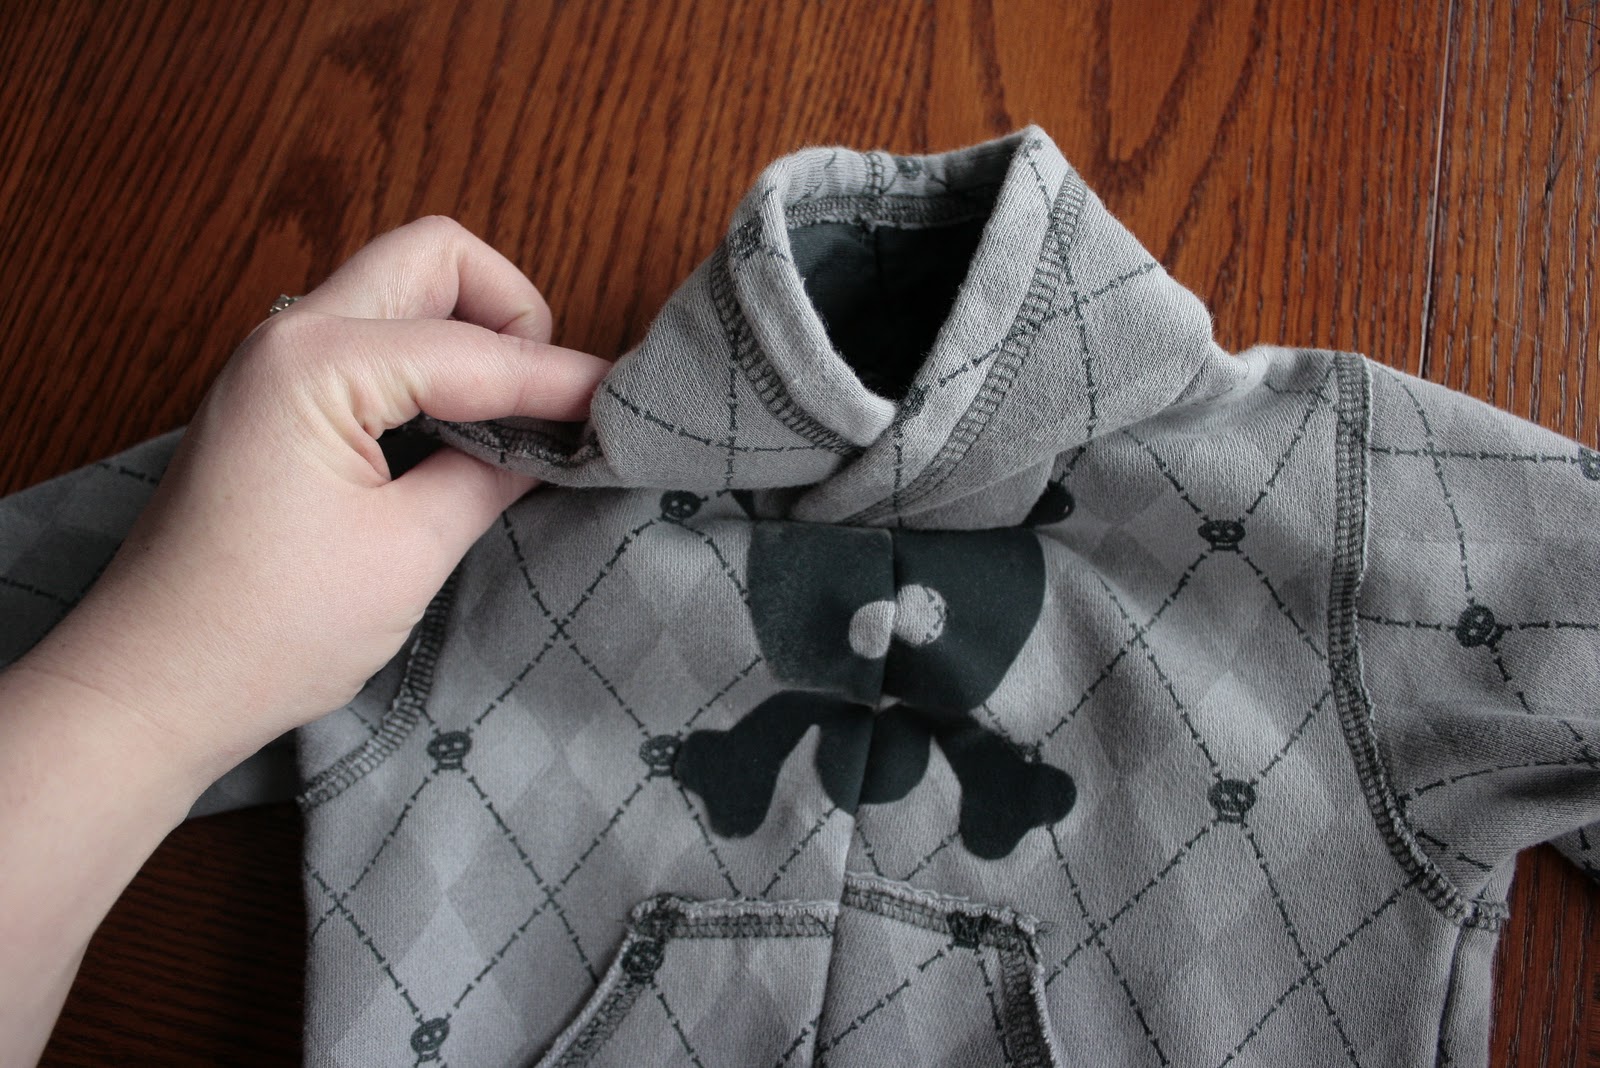
Fold the neck strip over so it resembles a dress shirt collar. Pin down the edges.
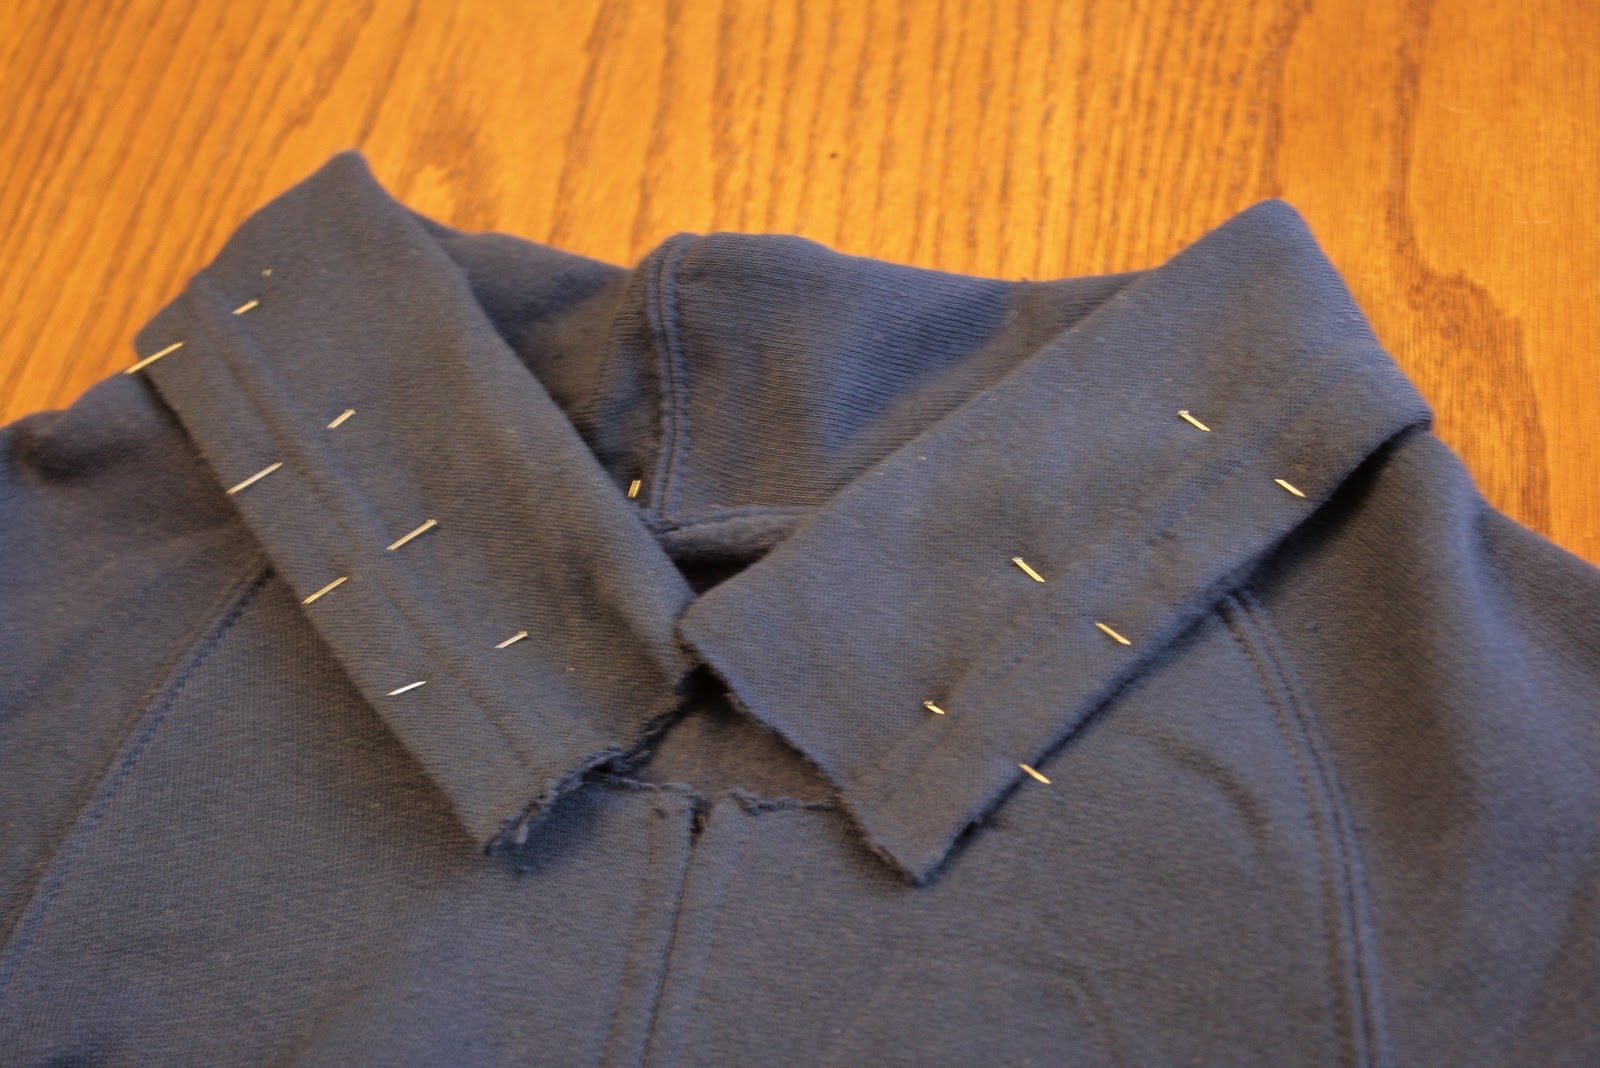
Sew the neck down all the way around as close to the edge as you can. Also, sew the front edge of the neck shut.
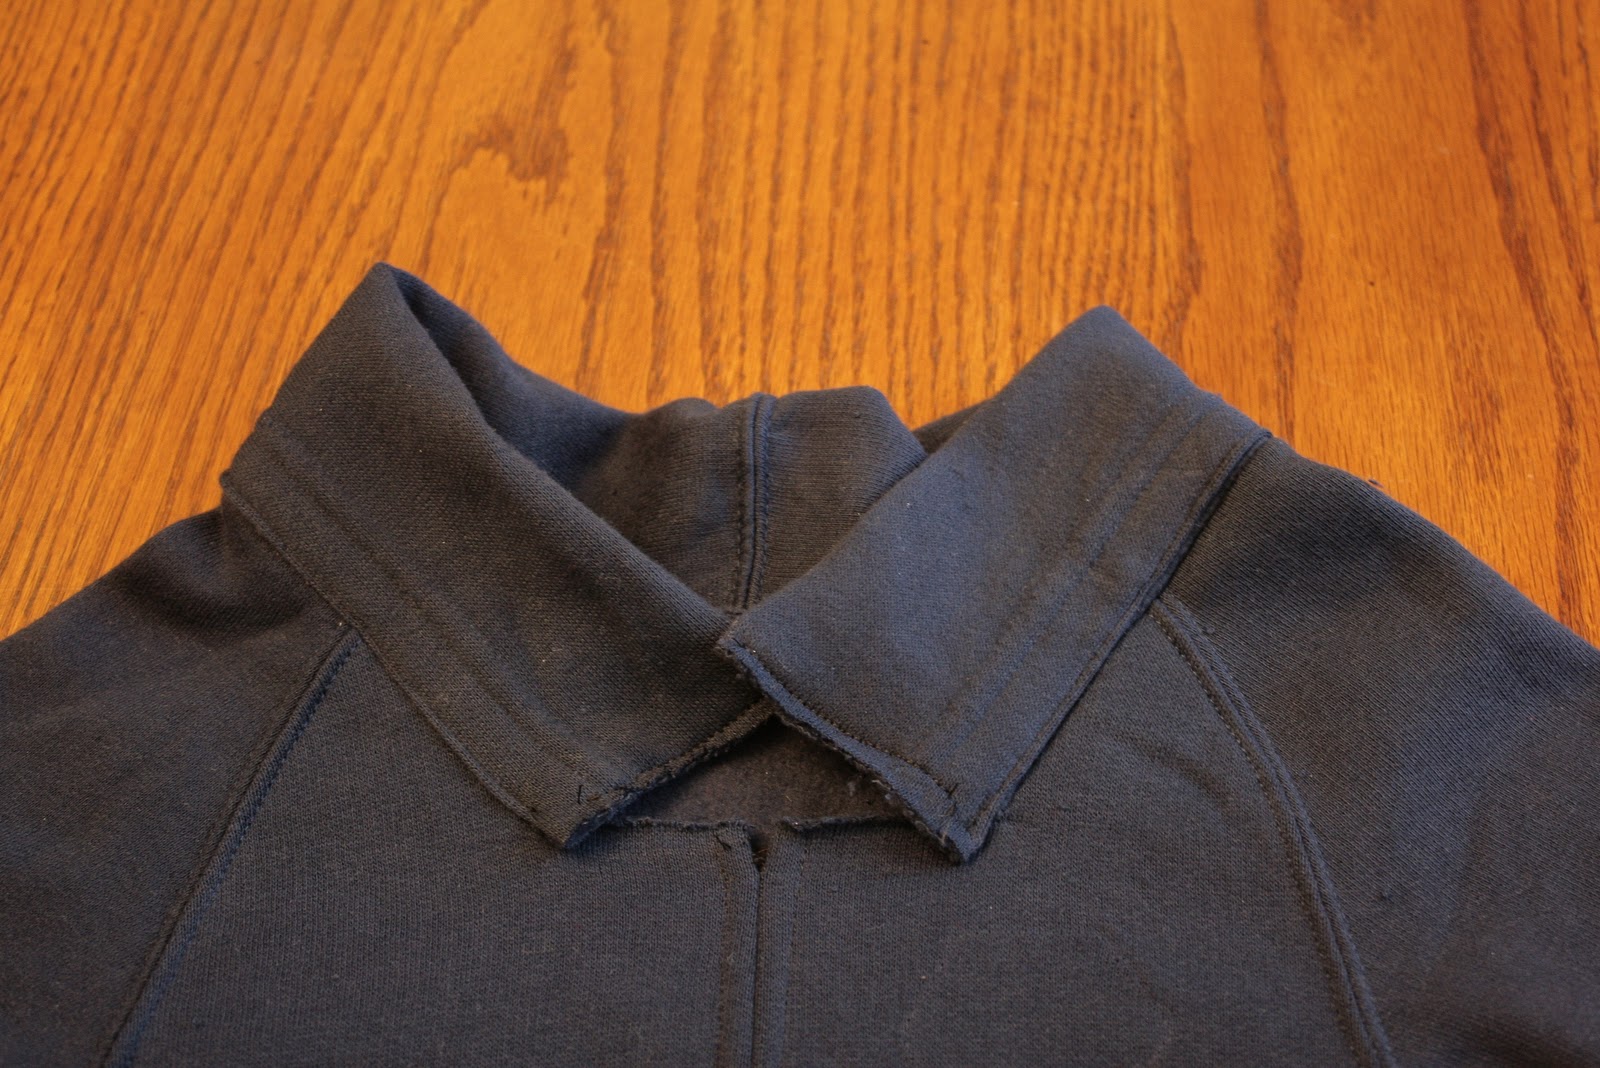
For the final step, turn the shirt inside out and line up the two edges of the collar with the opening. Pin it in place and stitch shut.
Turn right side out and the shirt is complete! You could easily add some extra character with piping around the neck or with contrast stitching.
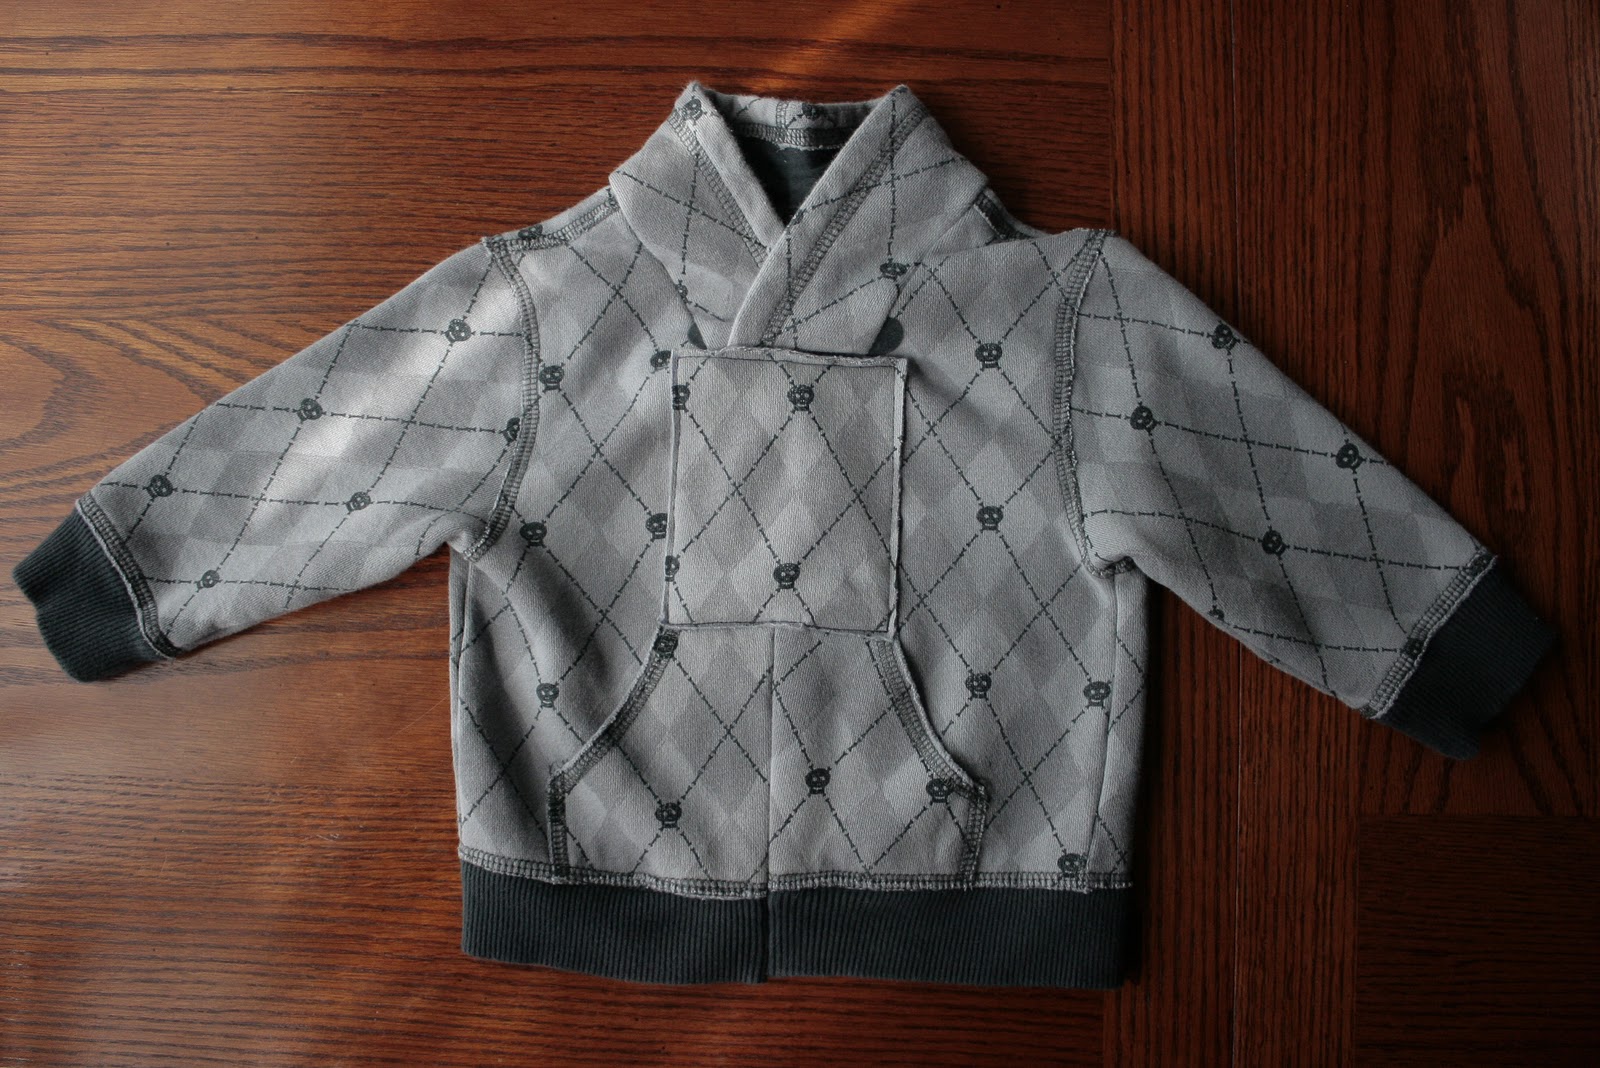
*Tips for other shirt styles: If you’re starting out with a lined hood you won’t have to fold the neck strip in half like the example above. Below, using a 2T shirt, I cut the neck strip 2 3/4″ for a final neck of 2 1/2″ with 1/4″ seam allowance.


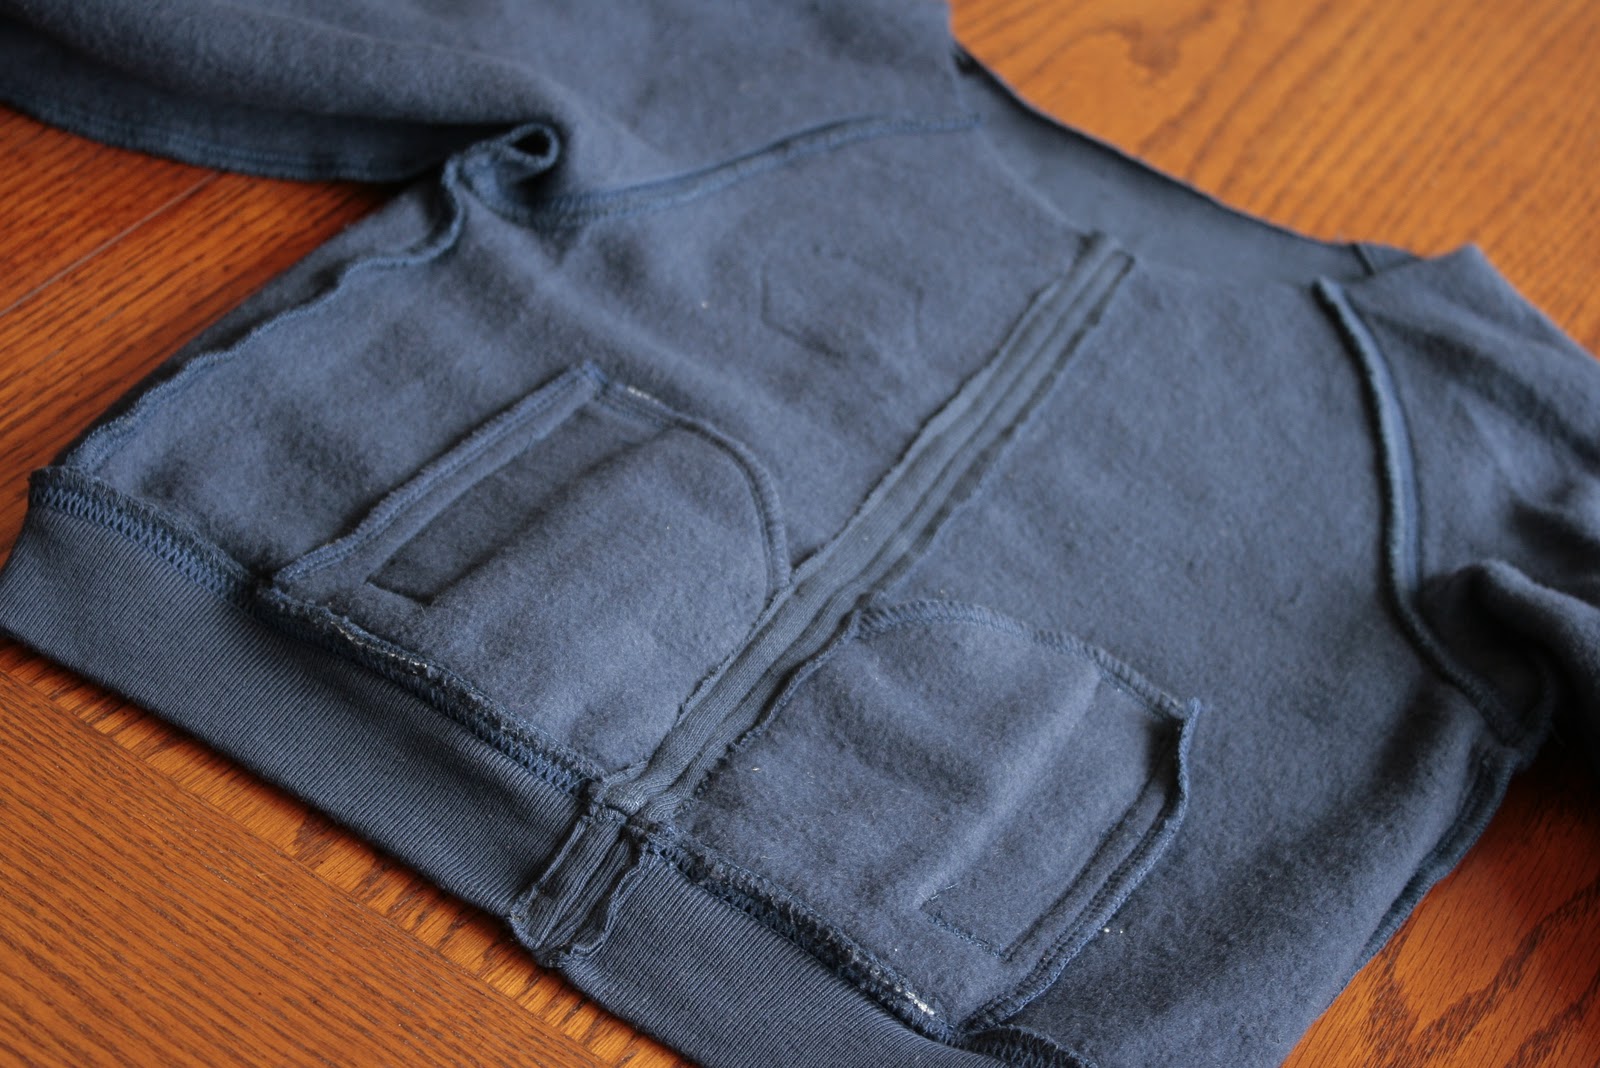
With this style of pockets I was able to do just a single seam down the center and that closed the pockets back up. Because the graphic was misshapen after the cutting and sewing I just cut a patch from the extra hood material to cover it up. That also covered up the top of the pockets that became slightly mismatched after sewing!


33 comments
very nice alteration and a great idea, good job!
Super impressive! Come link it up at my Tuesday Time Out LInk Party that’s still open!
Smiles,
Melanie
Reasons To Skip The Housework
Tuesday Time Out Link Up Party
Will do! Thanks Melanie
Neat Idea! I’m bookmarking this tutorial! Thanks 🙂
Brilliant!! I love the new neckline!! I linked to your tutorial on Craft Gossip Sewing:
https://sewing.craftgossip.com/tutorial-make-a-cowl-pullover-from-a-zippered-hoodie/2011/03/28/
–Anne
Thanks for featuring it Anne! Glad you enjoyed the tutorial :).
Very Cute! I am always on the look out for upcycled sewing crafts!
Very cute!
Thanks for the tutorial – I love the neckline of the new pullover. My daughter hates anything on her head, so this will be perfect to convert some of her hoodies.
That is so stylish! What a great idea.
great idea! I will make it for my kids, they have many hoodies so some neck pullovers will help their wardrobe not much boring
Wow! these are great! thanks for sharing.
Oh my gosh I LOVE what you did with the hoodie!! Super cute!
This is so stinkin’ cute. I love it sooo much. By golly, I think I’m gonna make one myself.
love this idea! How did you come up with the measurement for the neck piece? I’d love to convert one of my hoodies but didn’t quite understand that part. Thanks!
Thanks Katherine! Once I cut the back off of the hood I used that entire strip for the neck piece (it’s the 5th photo down from the top). Other than that I didn’t use a specific measurement. Before I started the project I did make sure that the hood fit comfortably over my son’s head. At least for a toddler if the hood is a little on the small/tight side the neck opening won’t be large enough to fit over their head in the final product. But toddlers tend to have big heads so it may be different for an adult :).
Love this project! I wish I still had little ones. I think I will make one for me. Thanks for sharing! (followed you from foodwineandmodgepodge.com)
I tried this tonight and my neckline came out wonky, can you give a little advice on this final step.
Thanks! Great Idea! Oh and I sewed my strip on backwards, but it looks kinda cool with the outside showing! 🙂
Hi Kelly, glad you tried it out! I’ll e-mail you and we’ll see if we can figure out what happened in the last step.
thanks for stopping by my Reap What You sew Sundays linky, I hope you’ll be by each week, and help me build my collection of great links! Great idea, and so cute, I appreciate it!
I love this idea and am going to have to try it for my little man
I am featuring this tutorial today at seemesew.blogspot.com!
I did mine here
https://embendesigns.blogspot.com/2011/08/hoodie-into-cowl-neck-pullover.html
It turned out great! Thanks for sharing
You did such a great job, thanks for letting us know and sharing your photos!
While the entire hood into cowl part was a bit confusing for me at first… I did it! And I think is super cute. Thanks for posting it!!
Oh and it was for me! I think I might make one for one of my kids now!!
Thanks for letting me know it turned out Michelle! If you get a chance, I’d love to see a photo if you want to add one to our flickr group pool!
That looks really cute!
However, in what universe is that a ‘cowl neck’? Looks more like a surplice neckline or something.
Glad you like it! I wonder if it’s called by different names depending on where you’re from? I’ve seen other similar necklines called a cowl, like this one from Old Navy. It’s good to know that’s not a universal term though!
I, too, think that this is not a cowl-necked style. A cowl is loose, and originally referred to the hood that monks wore. This is a V-neck. Maybe the folks at Old Navy don’t know of what they speak (or write). Still, it’s cute.
Hi I have a regular sweatshirt (no zipper down the front) that I want to make into one of these pullovers. Think I’ll go get one from goodwill and try it on that one before I cut up mine.!!! Lol that way if I mess up I’ve not lost my nice sweatshirt. Hoping I can do it cause I really don’t like the hood!! If I can remember to I’ll post picture on flickr
And remember to come back to let u know.
Nice idea. Got a hoodie that I had to buy as part of my son’s baseball fundraising and it’s not comfortable/not my style, what with the waistband on it. I was thinking of making into a seat cushion cover but figured with all the rain we get in the PNW, it’d just be a heavy, wet load to carry by the end of the games! Think I’ll try this for myself and also reconfigure the hem to a shirttail style. It’ll still have the team logo which I don’t mind. Only three months until practices start!
Waaaaayyyy clever! Thank you so very much. Very inspiring to re-do.
The neckline is called a shawl collar, not a cowl.
It’d sure be nice to know what this looks like, on.