Art & Craft, DIY ideas and Tutorials – Craftbuds
  • About Us
  • Needlecraft
    • Crochet
    • Knitting
    • Quilting
    • Sewing
    • Embroidery
  • Cricut
  • Jewelry Making
  • Paper Craft
    • Origami
    • Drawing
  • Engraving
  • Collectibles
    • Numismatics
43K Followers
25K Followers
1K Subscribers
Subscribe
Art & Craft, DIY ideas and Tutorials – Craftbuds
  • About Us
  • Needlecraft
    • Crochet
    • Knitting
    • Quilting
    • Sewing
    • Embroidery
  • Cricut
  • Jewelry Making
  • Paper Craft
    • Origami
    • Drawing
  • Engraving
  • Collectibles
    • Numismatics
  • Craft
  • Sewing

Nix Bath Toy Clutter with DIY Shower Pockets

  • Lindsay
  • Posted: October 12, 2015 - Updated at: July 14, 2020
Total
2
Shares
0
0
2

I was invited to create a Crafted Experience to make my bathroom a more clean, inviting space! This shop has been compensated by Collective Bias, Inc. and its advertiser. All opinions are mine alone. #CraftedExperience #CollectiveBias

Sew DIY Shower Curtain Pockets - Craft Buds

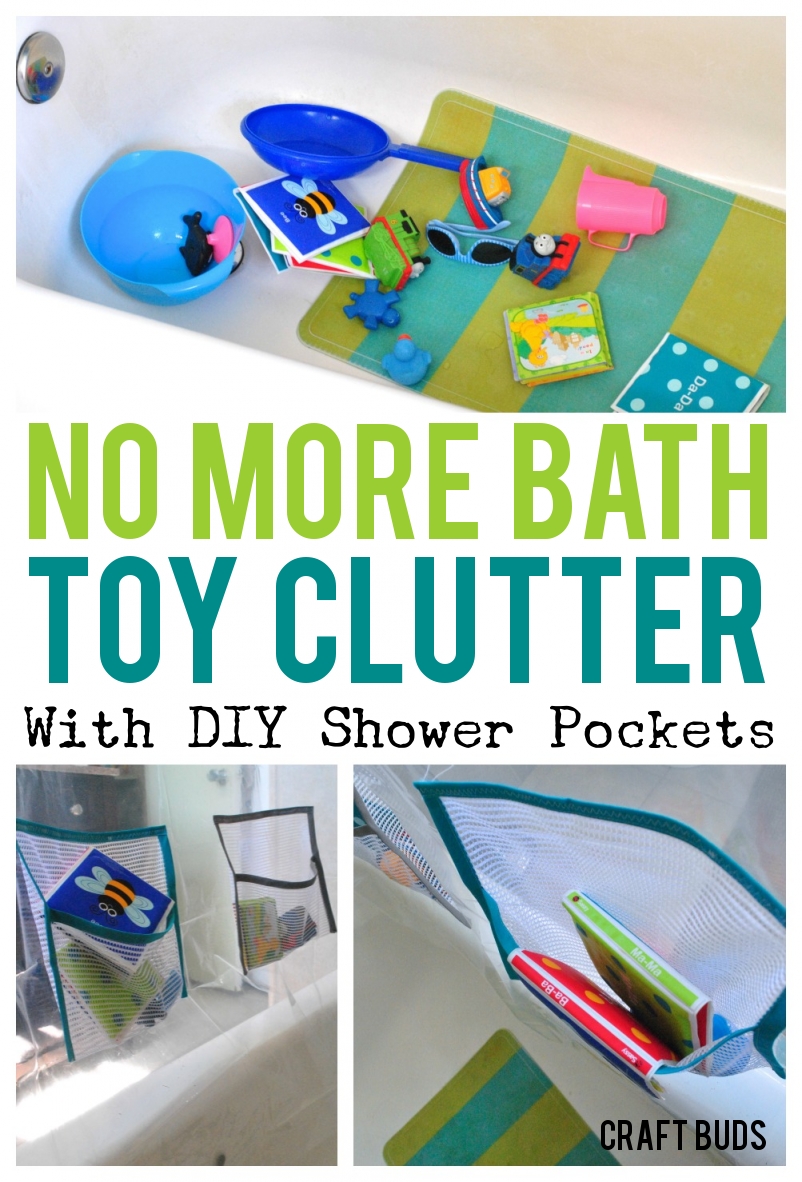
Are you tired of tub toys taking over your bathroom? My son loves to play with all of the trains and all of his bath books at the end of the day. But trying to clean up a sudsy tub full of toys after each bath was not very fun.

Bathroom Curtain

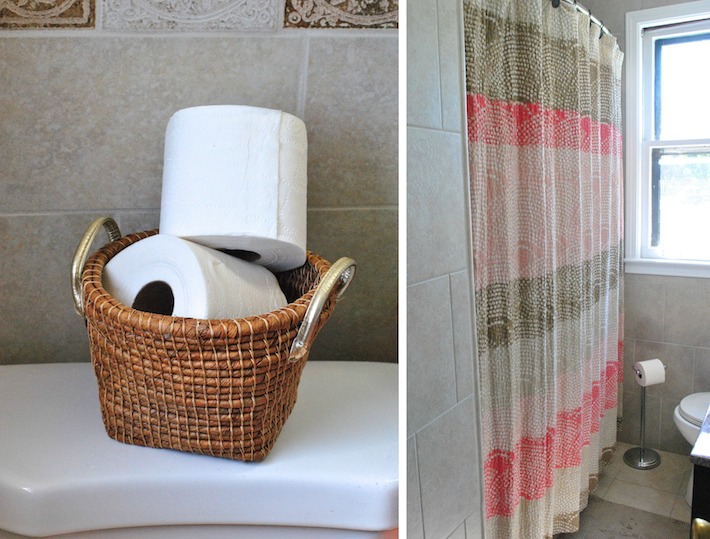
I like to keep my bathroom kind of tranquil and clutter-free! We keep extra rolls of toilet paper in my favorite basket so company doesn’t have to go searching. Other than that, we like to keep the counter surfaces clean. Ideally, I wanted to keep all of the kiddie toys inside that pretty shower curtain.

Bath Toys in Mixing Bowl

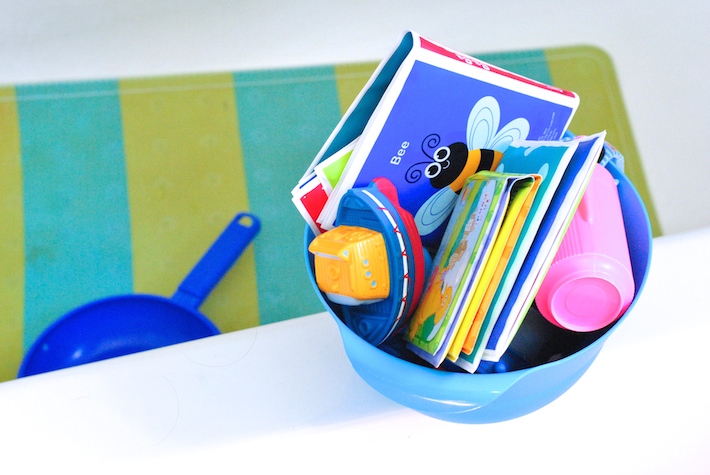
Our previous toy storage system was a kitchen mixing bowl. Not only did it not hold all of the toys, but my son would inevitably dump it from the ledge of the tub onto the floor, dripping leftover toy water all over the rug. Gross!

I needed to come up with an easy way to drain the bath toys and a larger place to store them. I sometimes have a hard time getting suction cups to stay put on our tub and tile, so the typical bath toy holders were out.

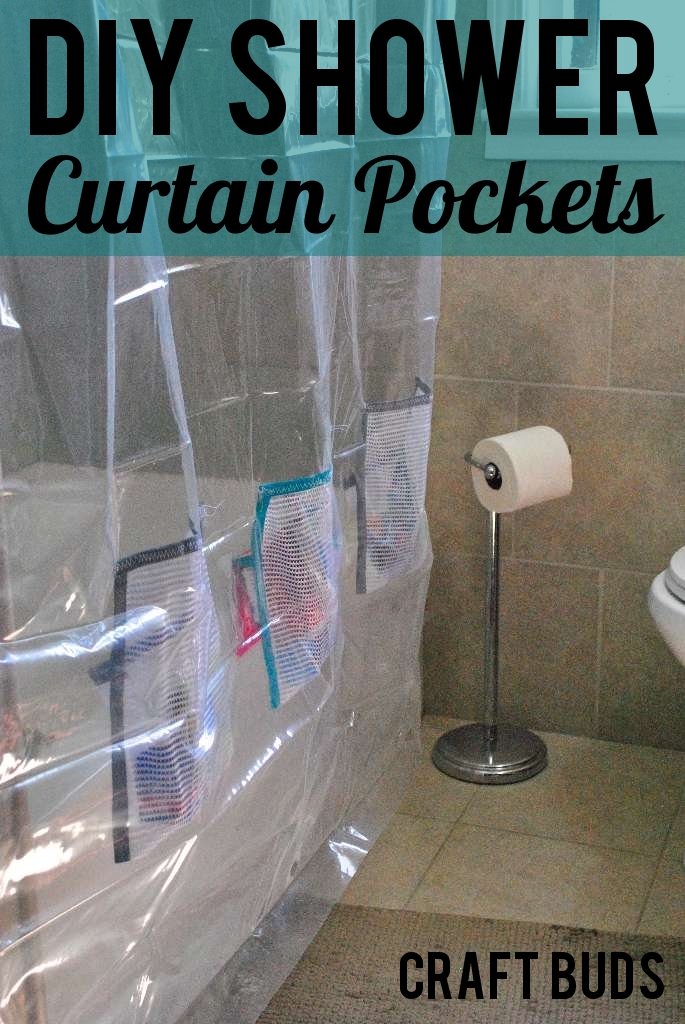
If you’d like to try my toy storage solution, I think you’ll enjoy the possibilities! I know I am going to love using these DIY shower pockets for a long, long time. It’s an inexpensive project, and you can customize the pocket size to fit your needs.
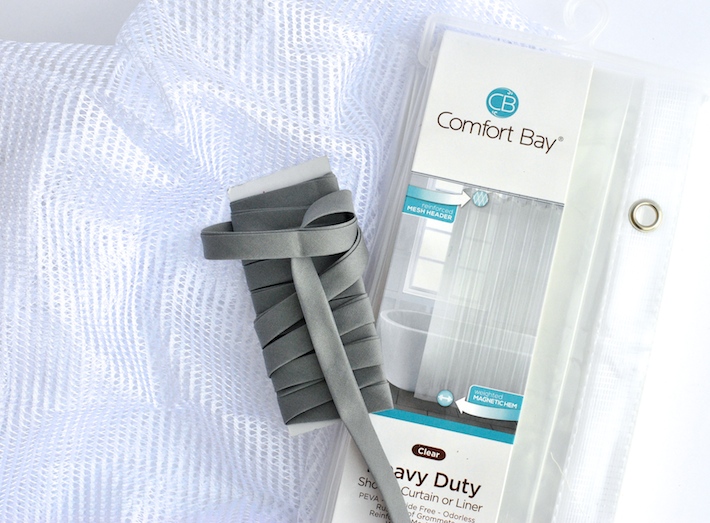
Shower Curtain Pockets Supplies

Supplies:

  • Mesh laundry bag (I picked mine up on clearance for $0.99.)
  • Heavy duty shower curtain (mine was $8)
  • Glue stick (optional)
  • Wrights X-wide double fold bias tape – 3 yards, 1/2″ wide ($2.49)
    • Note: One pack will make 2 pockets, and you’ll have a bit leftover. Pick up another pack or make your own. You’ll need about 42″ of 1/2″-wide bias tape for each pocket.

Shower Curtain Pockets Tutorial

How to Sew the Shower Curtain Pockets:

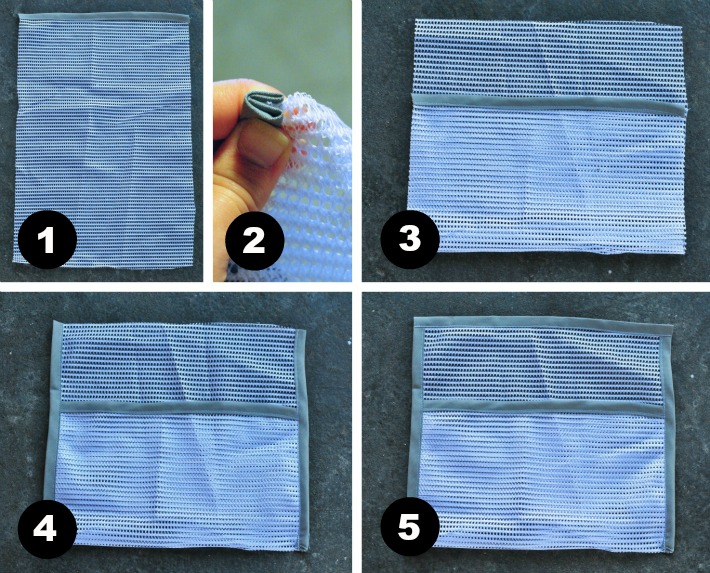
  1. Cut a rectangle 11″ wide x 16″ tall from the mesh laundry bag. Sandwich just one 11″ edge of the mesh between the double-fold bias tape and stitch close to the edge to secure. Check out this tutorial to learn how to make your own bias tape.
  2. If you’d like, you can unfold the bias tape, then press your raw edges of the bias tape under for a smoother finish. If not, just skip this step! This project is meant to be quick and functional… I’m sure you won’t mind any raw edges once it’s sewn up. (Note: The edges from step 1 won’t need this treatment anyway, since they’ll be covered up.)
  3. Fold the short finished edge up by 6″ to form the shape of the pocket.
  4. Sew bias tape on the left and right sides of the pocket, making sure the pocket placement does not shift. Pins or a glue stick works great here!
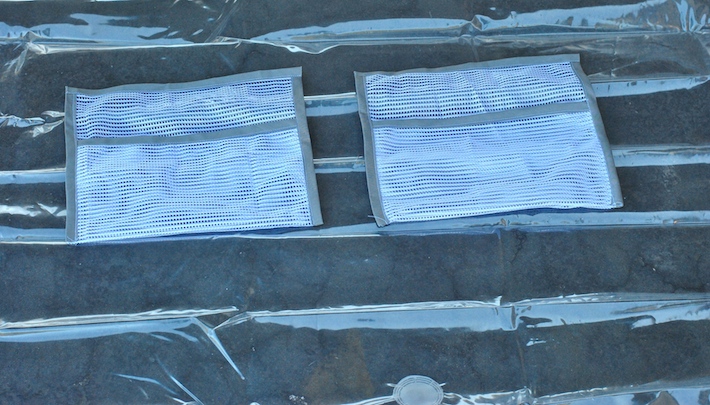
  5. Sew bias tape along the top edge of the pocket. The finished pocket measures 11″ wide x 10″ tall.

Shower Curtain Pockets Tutorial

6. Place the pockets on the shower curtain liner in the position you desire. To determine placement, I held up the shower curtain to my tub, and noted the natural folds of the curtain. Use a dab of glue stick or small pencil mark to note where the top corners of each pocket will be sewn.

Shower Curtain Pockets Tutorial

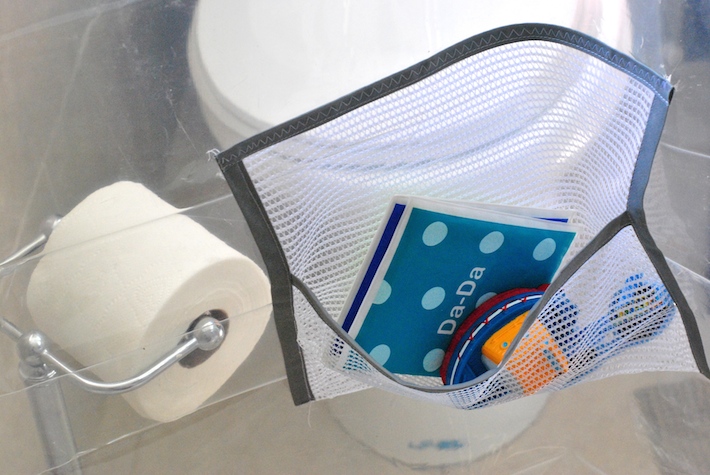
7. Take the curtain to your sewing machine, and use a wide zig-zag stitch to sew the top border only to the shower curtain. The rest of the pocket will hang loosely from the shower curtain liner.

DIY Shower Curtain Pockets - Craft Buds

The next time you change your shower curtain liner, simply use a seam ripper and remove the zig zag stitches. Your pockets are ready to place on the next liner!

Quilted Northern

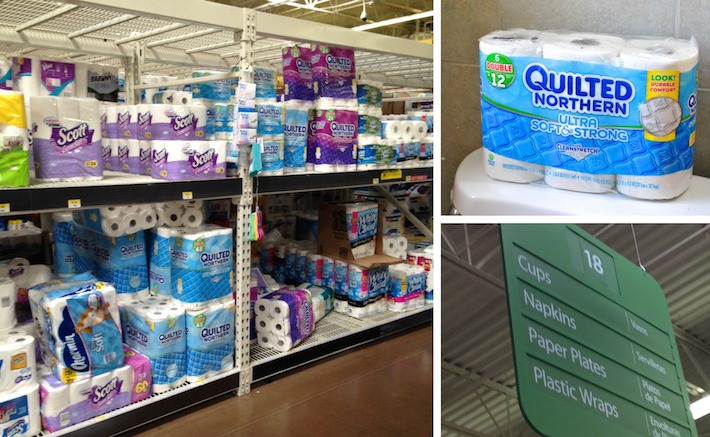
I had so much fun sewing this project, thanks to the challenge from Quilted Northern Ultra Soft & Strong! I love that it’s sewer and septic safe, and I can always pick it up for a good price at my local Wal-Mart.

Keep an eye out for more crafted bathroom experiences inspired by Quilted Northern! I’d love to know… What’s your favorite organizational tip to get rid of toy clutter?

Total
2
Shares
Share 0
Tweet 0
Pin it 2
Related Topics
  • 1 hour sewing
  • bathroom storage
  • diy shower pockets
  • diy storate pockets
  • shower curtain diy
  • storage pocket
  • toy storage
Lindsay

Hi, I’m Lindsay Conner, an author, modern quilter, editor, and founder of the Lindsay Sews blog. I’m a Baby Lock ambassador and Stash Books author who loves writing modern sewing and quilt patterns for beginners and weekend sewists! I live in Indianapolis, Indiana with my husband, son, and two loveable cats, Murph and Chloe. I’ve been crafting for as long as I can remember. As a kid, I saved my dollar bills for trips with my mom to Jo-Ann Fabrics, where I’d find new floss for friendship bracelets or mini cross-stitch kits. Because my mom has always shared my love for crafting, she bought me my first sewing machine, a Hello Kitty Janome.

Previous Article
  • Craft
  • Printable
  • Sewing

FREE Single-Size Cadet Cap Pattern!

  • Mary
  • Posted: October 5, 2015 - Updated at: July 14, 2020
View Post
Next Article
  • Sewing

kraft·tex™ Monogram Pet Stockings + Gift Tags

  • Lindsay
  • Posted: November 2, 2015 - Updated at: July 14, 2020
View Post
You May Also Like
View Post
  • DIY projects
  • Home

nPhoto – Professional Photo Printing Services for Photographers: Develop Your Brand with Us!

  • Jeremie Berton
  • Posted: January 14, 2025
View Post
  • Craft
  • Outdoor

5 Great Destinations in Costa Rica for Your Next Crafting Retreat

  • Craftbuds Editorial Team
  • Posted: December 16, 2024
Why-Professional-Locksmiths-Are-Essential-for-Home-Security
View Post
  • Home

Avoiding DIY Disasters: Why Professional Locksmiths Are Essential for Home Security

  • Jeremie Berton
  • Posted: April 3, 2024
Putting Together a Wooden Nativity Set for the Holidays
View Post
  • Craft
  • DIY projects
  • Home
  • Outdoor

Putting Together a Wooden Nativity Set for the Holidays

  • Sheila Mae Pedregosa
  • Posted: February 7, 2024
How is AI Impacting Crafting
View Post
  • Craft
  • Tools & Supplies

How is AI Impacting Crafting

  • Craftbuds Editorial Team
  • Posted: December 5, 2023 - Updated at: December 7, 2023
How to Sew Leather
View Post
  • Needlecraft
  • Sewing

Sewing Leather & Faux Leather Made Easy: A Step-by-Step Guide to Perfection

  • Michelle Rowley
  • Posted: October 24, 2023
How Funny Phrases on Shirts Have Transformed
View Post
  • Craft

The Evolution of Humor: How Funny Phrases on Shirts Have Transformed 

  • Craftbuds Editorial Team
  • Posted: October 23, 2023 - Updated at: October 24, 2023
Craft Organizers for Efficient Storage Use
View Post
  • Craft
  • DIY projects

DIY Craft Organizers for Efficient Storage Use

  • Craftbuds Editorial Team
  • Posted: October 23, 2023 - Updated at: October 25, 2023
4 comments
  1. Sarah B says:
    October 12, 2015 at 8:48 pm

    Brilliant! Just Brilliant! I’m so tired of our suction cup storage containers falling off the wall. This is the perfect solution! #client

  2. Kristy V says:
    October 18, 2015 at 5:33 pm

    Love this idea! Pure genius!! I wonder if they would be sturdy enough for a shampoo bottle?

  3. Alina says:
    October 20, 2015 at 5:46 am

    1) I LOVE the toilet paper idea. I have a small bathroom with no storage and no lien closet and I HATE clutter. We just moved here so I am going to go ger a cute basket.
    2) I love the net idea and it is something I can actually make even though I am not a crafty.

Leave a Reply

Your email address will not be published. Required fields are marked *

Subscribe

Subscribe now to our newsletter

Art & Craft, DIY ideas and Tutorials – Craftbuds
  • About Us
  • Editorial Guidelines
  • Our Experts
  • Privacy Policy
  • Contact Us
Find fun and creative craft ideas and tutorials across various categories such as Knitting, Quilting, Sewing, PaperCraft, Jewelry Making and much more

Input your search keywords and press Enter.