Welcome to visitors from the 12 Days of Christmas Sampler Quilt Along. For those of you who don’t know, Craft Buds is one of 12 stops on a fun blog hop where you can quilt along with others to make a modern Christmas quilt using a variety of techniques like applique, foundation piecing, and paper piecing.
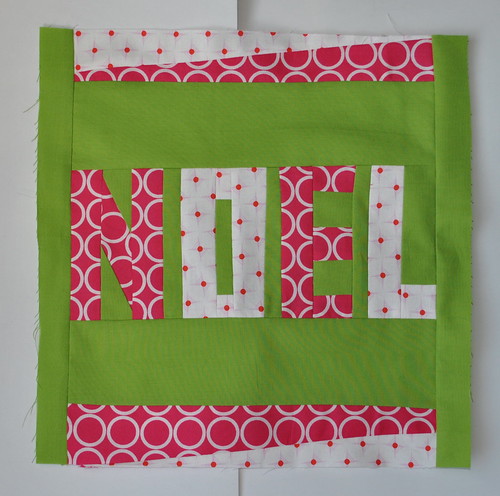
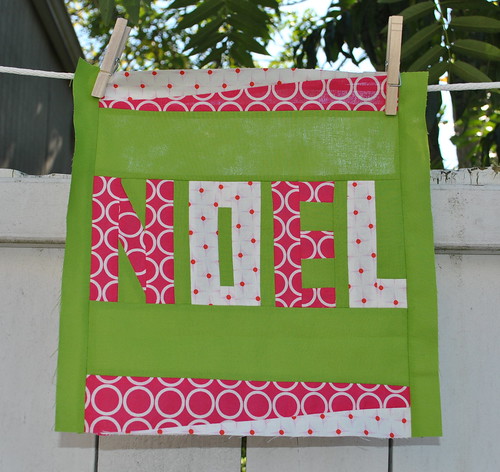
I’ll show you the latter of these today, and we’ll learn how to make this paper-pieced Noel quilt block. Let’s get started!
First, you’ll want to print off the PDF: free Noel quilt block template I’ve created. Save a copy to your computer and then print it out, so it will print to scale. You might want to print two copies: one to cut up, and one to use as a visual reference. You can even color in the letters of the reference copy with your fabric choices.
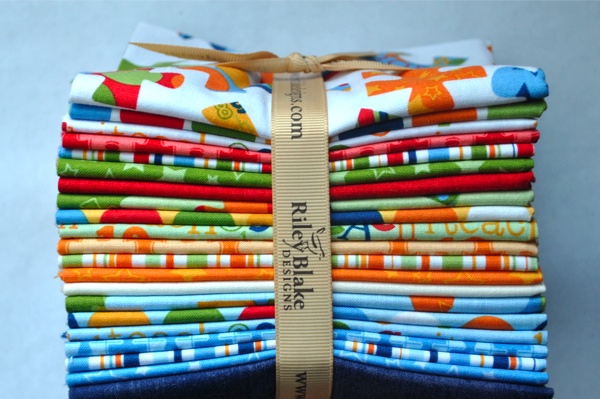
Next, gather your fabrics. I’ve chosen two prints and one solid, and you can get away with a fat quarter or less of each. (Note: If you are using a 10-inch layer cake, you’ll want to adjust the measurements on the border, because my pattern uses some 11-inch strips. Use your imagination, and your block will turn out great! You will want to make sure you have at least a quarter yard of the background fabric.)
Other Supplies:
- Freezer paper >> See how I use it to transfer patterns onto fabric
- Pen or pencil
- Glue stick or double-sided tape
- Clear ruler
- Paper scissors
- Fabric scissors or rotary cutter
Start by cutting out the sections of the N-O-E-L letters with your paper scissors (so you don’t dull the blades of your fabric shears). From the paper, you’ll only need to cut out one of each letter, A through I. Set the rest of the paper template aside for reference.
Note: We will not be flipping any of the shapes backward, so just make sure that your paper templates and the fabric pieces all face the right way when you look at them. How easy is that?! Please ignore the fact that my Noel template is reversed in the first image below. Yours will look normal, spelling Noel from left to right.
Next, tear off a sheet of freezer paper, and put the shiny side down. Use a very small dot of glue from your glue stick to adhere your paper templates A through I to the dull side of the freezer paper. (I say a small dot because you’ll be ironing with this paper later.) Space them out so you’ll have plenty of room for tracing around each piece. If you don’t have freezer paper, you can still carefully trim your pieces using regular paper templates.
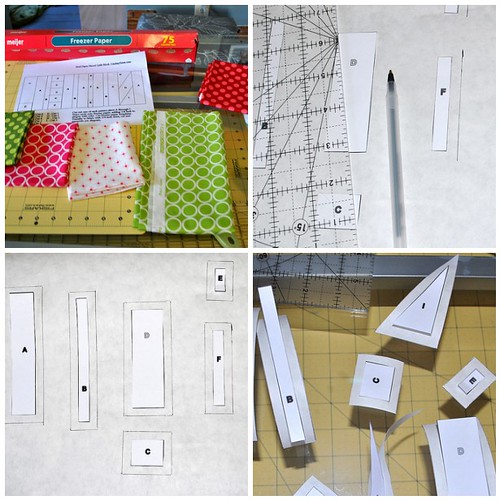
Use your clear ruler and pen or pencil to trace a line a quarter inch from each side of your templates. My friend Jennifer likes to use the Add a Quarter ruler for this step. Once you’ve traced each piece, use your paper scissors to cut along the lines you’ve just drawn.
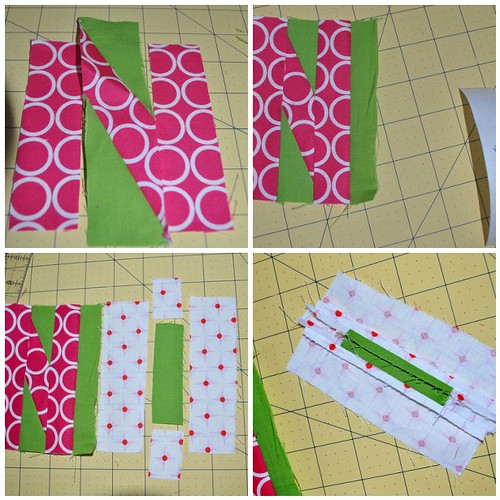
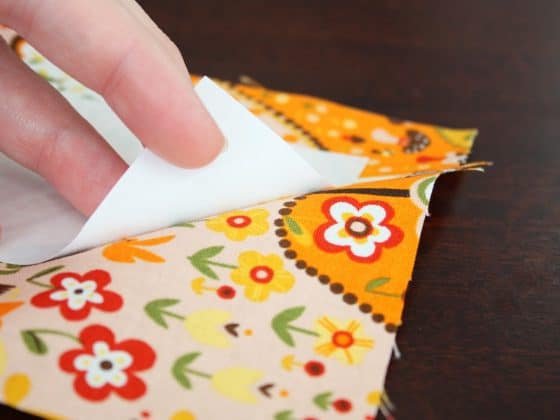
Starting with the letter “N”, take your freezer paper templates for the center section (G, H, and I) and iron the shiny surface to the front/patterned side of your fabric. (At this point, you’ll wish you used as little glue as possible. I left the paper on my freezer paper while ironing, and it was fine.) The templates will adhere to your fabric and can be used several times before they lose their stickiness.

Cut around each template with your fabric shears. Remove the freezer paper for the fabric pieces you are getting ready to sew, joining G, H, and I. Press your seams open.
Next, you’ll stitch on the left and right sides of the letter “N” (cut from pattern piece A) to the section you just made. From your background fabric, cut out pattern piece B and stitch to the right side of your letter “N” (this is the thin, green strip you see below).
Use the same method for creating the letter “O”, always starting with the most complex part of the letter and working outward. Join the letter “O” to your “N” and follow the template for letters “E” and “L” to finish the word.

Press your block, making sure you’ve ironed all the seams open. Trim the top and bottom of your block so all edges are even. Your block will now measure about 4.75 inches x 11 inches. Next, you’ll cut two 3-inch x 11-inch strips from your background fabric and stitch borders to both the top and bottom edges of your “Noel.”

Cut a 2.5-inch x 11-inch strip from each of your other fabrics (I used pink and white, as in my letters). Stack one patterned strip on top of the other, and use your ruler to cut a diagonal line down the center of both pieces, as shown.
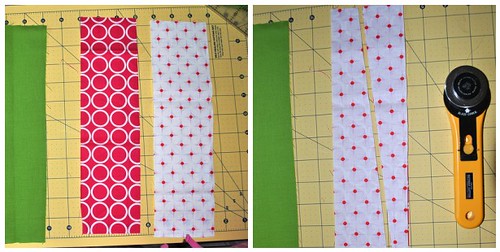
Pair each of your new strips with the opposite color piece that fits and stitch together, pressing open your seams. Add your new “wonky stripes” to both the top and bottom of your block for a fun border.
Trim the top and bottom of your block so it is 12.5 inches tall. Finally, add a 1.5-inch strip of background fabric to each side to widen your block, and trim to 12.5 inches square.
Not in the market for a Christmas quilt? I think this block would look fabulous as a holiday pillow, stocking, or hot pad.
If you make this block, you are welcome to add it to the Flickr group for the quilt-along and the Craft Buds Flickr pool. In fact, look at this awesome and modern Christmas quilt in the making by Marcia, created with the block tutorials posted so far. I’m in love with her color choices!


22 comments
i love this, and can’t wait to get started on it!
That is so pretty!
I tried clicking on the link for the template and it said i don’t have permission to view it.
I am unable to access the template – I keep getting a message that says I don’t have permission to view the document? Is anyone else having this problem?
Does it work now? Fixed!
Does it work now Kim?
this is a fun quilt along – love the truck block too!
I’ve not tried paper piecing, yet. This block is calling to me to try the method.
Yay! Success! 🙂 Can’t wait to get into this one! 🙂
Love the lettering in this :o)
What a cute block. I LOVE the idea of making this as a pot holder too. You could give those as gifts and everyone would be very impressed wanting to know how you did them.
Thank you
Thanks for the pattern! I love it!
Thanks for the shoutout! I can’t wait to add your adorable block to the mix.
Oh, you are welcome–your blocks are awesome!
So cute Lindsay!
This looks awesome!!! I love how even the letters are! 🙂
bellissimo blocco appena terminato,facile anche da fare grazie per il tuo lavoro lory
Really cute block…thanks!
Looks tricky. I will have to try this on a good day 🙂
Lindsay!! Just looking back through some of your posts and found this one from 2011. That’s my partial quilt you showed!!! And now we are real-life friends! You’re awesome. 🙂