Have you mastered a few basic stitches but don’t know how to do an embroidery couching stitch? Then, you’ve come to the right place! This post will help you create unique designs with this versatile stitching technique.
Couching is a type of decorative hand embroidery technique using a thread to attach fiber, ribbon, yarn, chain, thick tread, etc., to the fabric. This decorative material is laid on the fabric and couching means it doesn’t have to penetrate the fabric. The technique creates added texture while the thread is used to secure the additional material of choice.
If you are familiar with the basics of decorative hand embroidery stitches, learning how to couch can be a unique way to step up and develop your embroidery skills.
So, let’s dive in and learn the ins and outs of creating an embroidery couching stitch and its variations.
Table of Contents
What Is a Couching Stitch?
Some embroidery designs need thick fibers, multiple threads, beads, chains, fabric pieces, and more. To attach these to the surface, lay them on the material. Then, stitch a thread over them and anchor it to the fabric. This is called the couching stitch.
The earliest example of this technique is the 4th-century couched fabric found in Egypt. The technique was also used in Mammen (Denmark) and by Asia’s Khitan nomadic people near the end of 1000 AD.
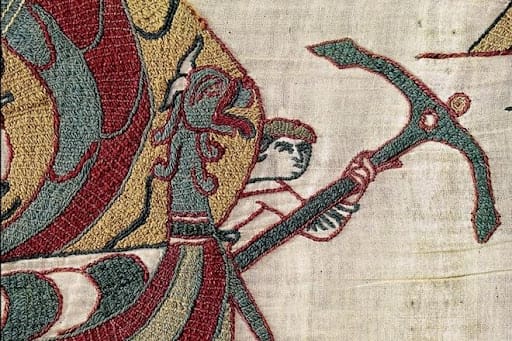
It’s one of the main stitches in the 11th-century Bayeux Tapestry from France. On the other side of the world, couching was used to make Bugaku garments in Japan between the late 14th and 16th centuries.
The stitch is widely used across the world in countries like China, Palestine, Thailand, Ethiopia, and India. This technique and its variants decorate wedding dresses, formal clothes, and religious artwork.
What Is the Couching Stitch Used for?
The couching embroidery stitch and its variants are all decorative applique techniques. The main purpose of couching is to create and add texture to your embroidery design pattern. So, you can use couching stitch variations for different types of ornamental work, outlining designs, or filling in spaces.
Couching Stitch: Materials You Need
The couching stitch is extremely versatile. And, despite its ability to create complex designs, it is quite easy to learn and perform. It can be used on any fabric to decorate blankets, furnishings, clothes, and more. Accordingly, choose your thread and needle.
What Thread Is Used for Couching?
You can use any material, be it yarn, ribbon, silk, beaded chain, metallic thread, or even fabric. And you can experiment with single or multiple threads.
For stitching, you can use any type of thread too. The simple embroidery floss in your embroidery kit is perfect for this purpose. Rayon and polyester can give you strong stitches. You can use other threads like silk if you want a unique effect.
What Is the Best Needle for Couching?
For stitching, you can use a regular embroidery/crewel needle. These needles are sharp and have large eyes to accommodate any number or thickness of thread. The size depends on the stitching thread and the number of strands you use.
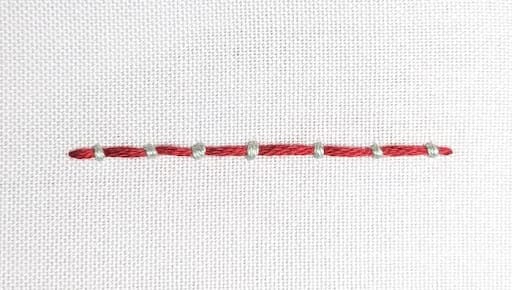
How to Do a Couching Stitch Step-by-Step
You don’t need to be a master embroiderer to learn the couching stitch. Following the steps below, once you have secured the fabric in your hoop and threaded the needle with the stitching thread.
How to Embroider a Couching Stitch in 4 Steps
- Lay the decorative material over the fabric
Start by placing the decorative surface fiber onto the fabric.
- Make the first stitch to anchor the decorative fiber
Pull the threaded needle up through the fabric on one side of the decorative material.
- Secure the decorative element
Then, push the needle back over the decorative thread through the other side of the fabric. The stitch should be placed at a right angle.
- Couch the decorative thread
Continue to make consecutive stitches along the entire fiber to secure it completely while ensuring that they’re spaced evenly.
Easy, right? Here’s a video that can help you understand the process better!
Couching Stitch: Variations
The elementary technique of the couching stitch is pretty simple. But the stitch has many variations. Let’s take a look at the steps to perform the most popular among them.
Bayeux Couching Stitch
We can associate the Bayeux stitch with the Bayeux Tapestry. This historical embroidery style from the 11th century uses the couching stitch as a fundamental stitching technique.
With the Bayeux couching stitch, you can add a historical and textured look to your embroidery projects. It’s a versatile technique that you can adapt to various designs and creative applications.
If you’re looking to achieve a medieval or period embroidery feel in your projects, the Bayeux stitch is the way to go.
Firstly, prepare your materials (embroidery hoop, fabric, stitching, needle, and decorative fiber) and select your design. Don’t forget to experiment with colors and textures, and just follow the steps below:
- Secure the fabric: Tightly place it in the embroidery hoop to keep it taut and stable while stitching.
- Thread the needle: Thread your embroidery needle with the desired stitching thread color. Use one or more strands, depending on the thickness you want.
- Starting to stitch: Make a horizontal straight stitch from one end of the area you want to outline to the other.
- Create the continuous outline: Make a second straight stitch adjacent and parallel to the first one. It should slightly overlap the first stitch’s end slightly for a continuous line.
- Continue stitching: Keep making the overlapping straight horizontal stitches along the outline. The stitches should be close together and overlap to create a textured and continuous border.
- Adjust for curves: Make smaller stitches along the outline to demarcate curved areas. Focus on maintaining the continuous appearance of the outline.
- Fill the area: Fill the designated area with the Bayeux stitch. Adjust the length of the straight stitches to follow the shape and contour of your design.
- Secure the thread: Once done with a section or to change colors, secure the thread by knotting it on the fabric’s back. Or weave it through previous stitches.
- Finishing touches: Finally, remove the fabric from the hoop once your outline is complete. Then, trim any excess thread and ensure the back looks neat.
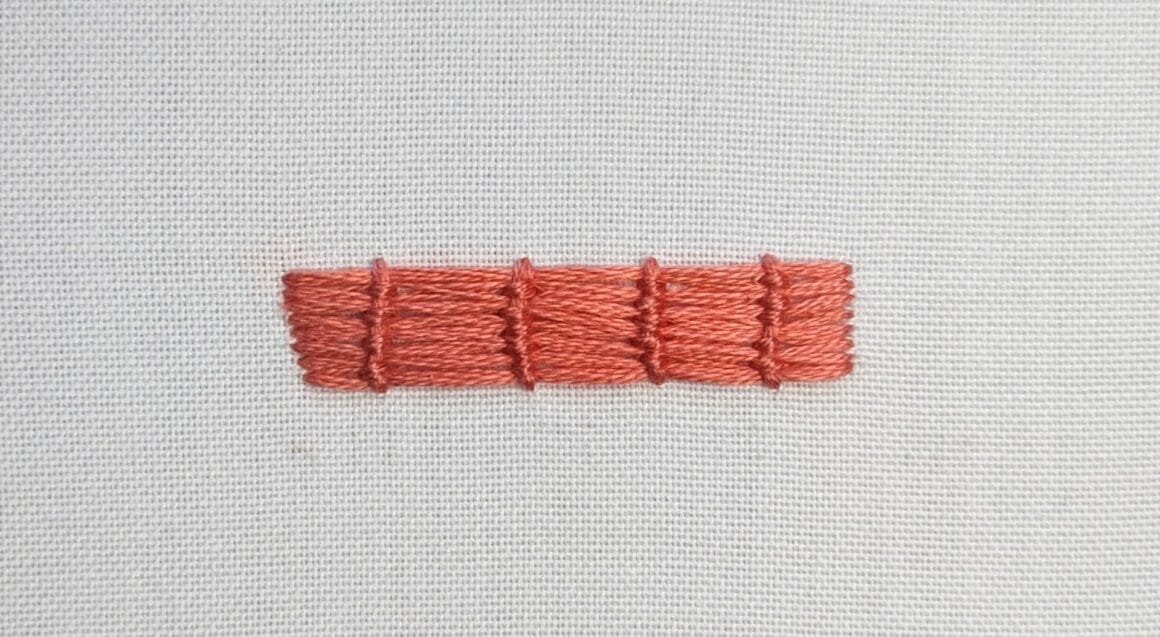
Bunched Couching Stitch

Bunched couching is a variation of the basic couching embroidery technique. It secures a group of threads or fibers onto the fabric surface using a contrasting thread.
You can use it to fill large areas or create textured accents for a bunched appearance. It helps add depth and dimension to your design and makes it look attractive.
Experiment with different thread textures, colors, and patterns for different effects.
Here are the steps to do a bunched couching stitch:
- Prepare your materials: Firstly, gather your embroidery hoop, fabric, stitching thread, needle, and decorative thread or fiber.
- Select the design: Transfer it to the fabric once you have decided on a pattern. Place it where you want to use the stitches to highlight the design.
- Thread the needle: After securing your fabric tightly in the hoop, thread the needle with the stitching thread, preferably in a contrasting color.
- Create the pattern you want to couch: Make the first horizontal stitch and create the pattern of consecutive parallel stitches of your preferred thickness.
- Starting the couching stitch: then, insert your needle, threaded with a contrasting color, through the backside of the fabric. Pass it over the bunched pattern of threads and make a vertical stitch through the fabric to secure it.
- Continue couching: After the first couching stitch, make a series of them along the length of the fiber group. The stitches should be close together, creating a bunched or textured effect.
- Fill the area: Next, continue couching the group of threads in a back-and-forth or random pattern, depending on the desired texture and appearance. Add more groups of threads and couch them as needed to fill the designated area.
- Secure the thread: After finishing a section or changing colors, knot the thread on the backside to secure it. You can also weave it through the previous stitches.
To finish off, remove the fabric from the hoop once you’ve completed the design. Trim the excess thread and tidy up the back.
Patterned Couching Stitch
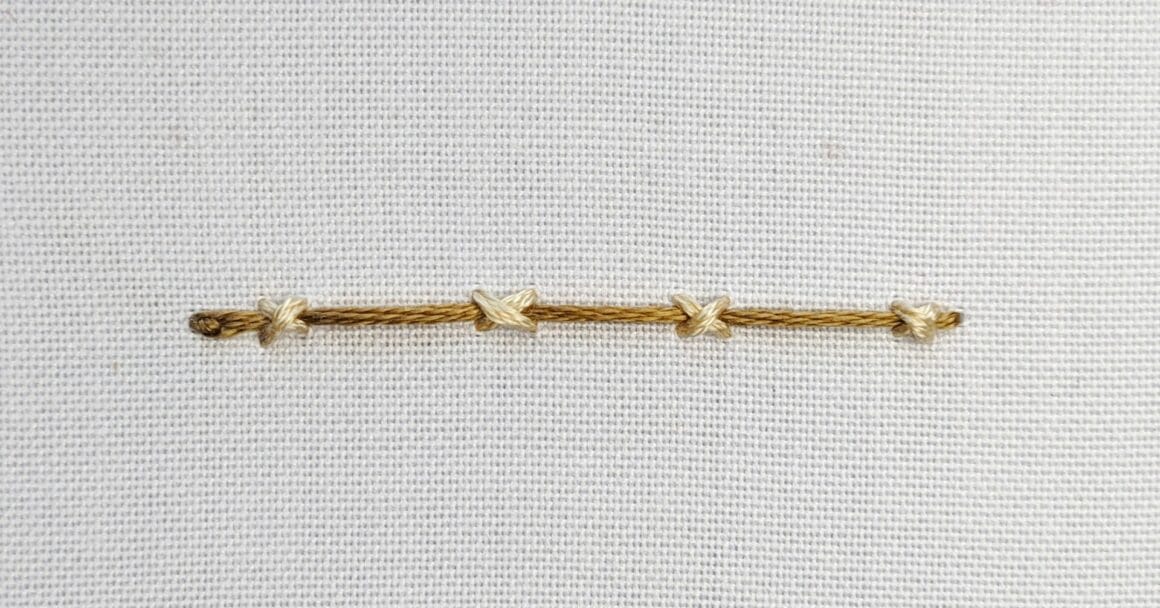
Patterned couching is another variant of the basic couching technique. You have to use a contrasting thread for stitching the surface group of threads or another type of material for your design. By using this technique, you can create intricate patterns.
Play with different colors, materials, and ideas to enhance the design’s visual appeal. The final effects will vary widely.
Here are the steps to follow to create a patterned couching stitch:
- Design your pattern: Once you’ve gathered your materials, it’s time to decide on your design. Just draw it on the fabric where you want it, or use a pre-drawn design as a guide.
- Secure the fabric and thread your needle: Attach the fabric tightly to the hoop and thread your needle with the stitching thread, preferably in a contrasting color.
- Make the stitch you wish to couch: Cut the fiber you want to couch on the fabric so it’s slightly longer than the pattern outline.
- Outline the pattern: Using the threaded needle, outline your design. Make small, evenly-spaced stitches to secure the couching thread to the fabric.
- Couch the thread: After that, pass the threaded needle over it and down through the fabric. Make sure the pattern shows through the stitches.
- Follow the pattern: Continue the couching action along the pattern outline. Make stitches across the pattern when you need to hold the materials in place.
- Fill the design: Fill the pattern area with the couching stitches and secure all the materials as desired.
- Secure the thread: Knot the thread on the backside once you’ve finished the pattern or wish to change colors. Or weave it through the previous stitches.
- Finishing touches: At the end, remove your fabric from the hoop and trim all the extra thread or fiber. Don’t forget to tidy up the back of the fabric.
More Embroidery Tutorials
- The Embroidery Stem Stitch
- The Running Stitch in Embroidery
- The Embroidery Split Stitch
- The Chain Stitch in Embroidery
- The Embroidery French Knot
- How to Do an Embroidery Back Stitch
How to Do an Embroidery Couching Stitch: FAQs
Q: What is another name for couching stitch?
A: The couching stitch is sometimes wrongly referred to as laidwork. That’s because this technique requires a thread or fiber to be laid on the fabric. But the laidwork technique involves laying multiple threads or fibers side-by-side, which is actually the Bayeux stitch.
Q: Why is it called couching stitch?
A: The couching stitch derives its name from the technique itself. In French, the word “coucher” translates to “lay down.” In this technique, you must lay a thread, fiber, or any other surface material on the fabric. Then, you must couch this laid material with stitches.
Q: How many threads do you need for a couching stitch?
A: If you want to create the entire design with two threads, you’ll need two threads. One will be placed on the fabric surface to be couched. The other one is used to secure the first thread. If you want to lay another fiber on the surface, you’ll only need one thread for stitching.
Q: What is the history of the Bayeux stitch?
A: The Bayeux stitch, also called the Bayeux Tapestry stitch, is a variant of the couching stitch. It gets its name from the famous Bayeux Tapestry. This 11th-century embroidered cloth mainly uses two stitches, one of which is the couching stitch embroidery.
Conclusion
If you wish to craft a classic textured pattern in your embroidery project, the couching stitch will come to your rescue. You can use any combination of colors, textures, materials, etc., to create a unique look and feel.
So, try applying the couching stitch technique or its variations and create your embroidery masterpiece to impress friends and family!