Are you an avid embroidery enthusiast and tired of making easy stitches that sit flat on the fabric? Then, maybe you’re up for the challenge of learning how to do an embroidery French knot stitch. It is an exciting technique that has the reputation of being hard. However, this stitch can be rather easy to master with the help of a few handy tips.
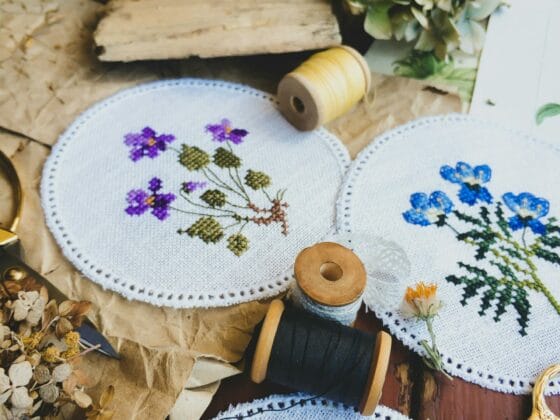
The French knot belongs to the family of decorative knotted stitches, ideal for crafting flowers, eyes, hair, and small elements. It is largely used in various embroidery styles, from China’s Tuan Chen to India’s Aari work.
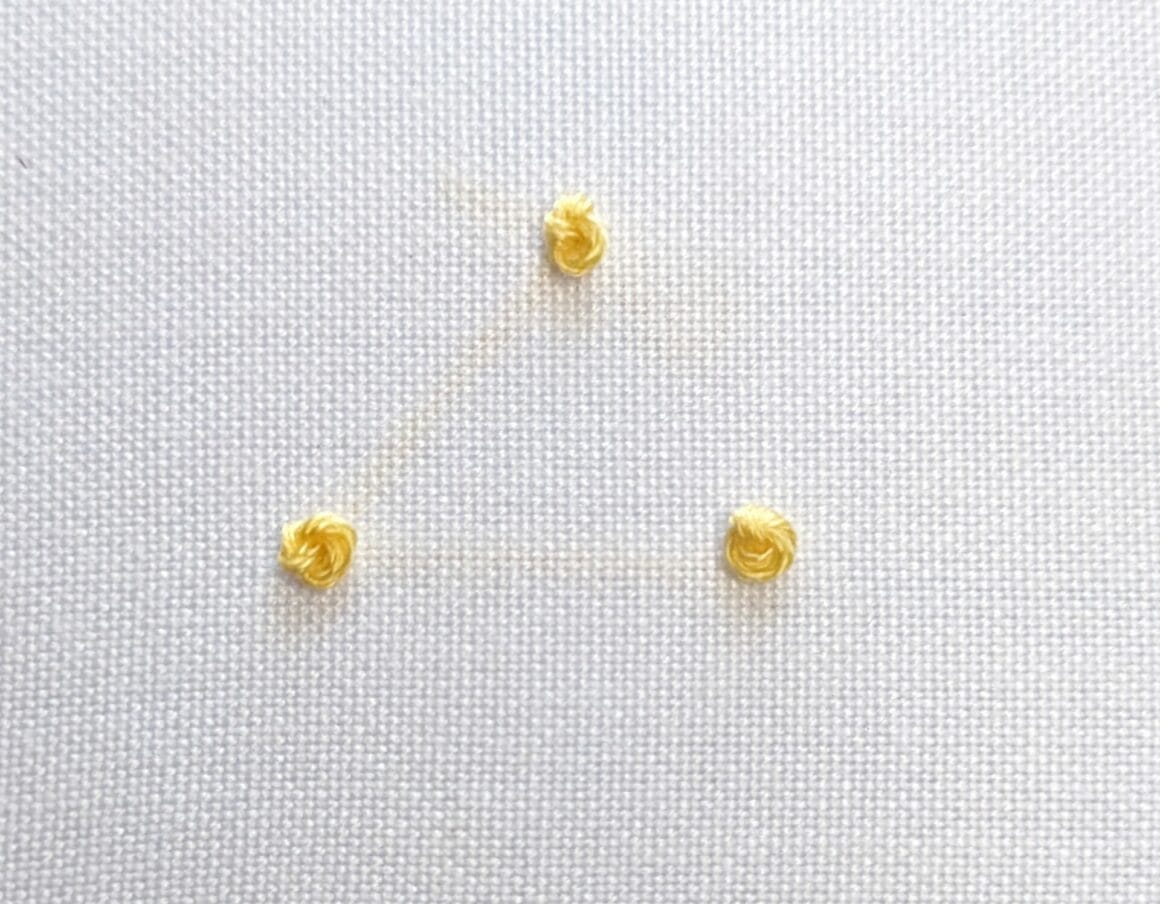
This interesting embroidery technique involves inserting the thread into the fabric from the back, winding it around the needle twice (or more), and pushing it back into the fabric to create a raised “dot” on the fabric.
While many embroiderers struggle to get it right, with our comprehensive guide, you don’t have to. So, keep reading and watch all our step-by-step video tutorials to learn how to do it!
Table of Contents
History of French Knot Stitch

Unlike what the name might suggest, the French knot didn’t originate in France. In fact, its roots can be traced back to Eastern Asia.
Then, why this name? It’s probably because the knot was extensively used in the French royal embroidery and the ecclesiastical embroidery in Switzerland and South Germany.
The name stuck as the stitch became popular in Western Europe. It also gained importance in Britain, Ireland, and Portugal. This decorative stitching technique also reached other Asian countries like India.
Who Invented the French Knot?
The French knot is an ancient technique and is one of the knotted stitches invented by the Chinese in the Warring States period between the 5th and 3rd centuries BC.
The thread is wrapped around the needle at least twice. So, it’s a more raised version of one of the main Chinese stitches, the Peking knot, where the thread is wrapped once.
Where Did French Knot Embroidery Originate?
We can assume that the French knot, often referred to as the Peking knot despite the subtle difference, originated in the Seven Warring States in Ancient China.
The Peking knot was a common stitching technique for embellishing silk clothes in the Han Dynasty on the banks of River Han.
French Knot Stitch: Materials List
The French knot is an intermediate-level hand embroidery technique. It’s best to use dense fabric types, like silk, satin, velvet, linen, etc., to ensure that the knot stays put on the material. In addition, you should pick the right needle and thread.
What Needle Is Best for French Knots?
The best needle for French knots is a Milliner needle, also called the straw needle. This needle’s shaft is as thick as its eye. It’s long and thin with a sharp tip and a round eye.
These are commonly available in sizes 1-10, where #10 is smaller than #1. You can start with #5 and eventually add more sizes to your collection for knots of various sizes.
What Kind of Thread Do You Use for a French Knot?
The ideal thread option for a French knot is the six-stranded embroidery floss. This thread lets you increase or decrease the knot size by using different numbers of strands. For small knots, you must start with a single strand. To make it larger, use up to six strands.
For more elaborate and gorgeous designs and patterns, you can also try your hand at metallic bullion threads. They will create a heavy and elaborate effect, especially on fabrics like silk or velvet, similar to the famous Zardozi embroidery.
Other Materials:
Other materials required for a French knot include:
- Fabric
- Embroidery hoop
- Embroidery scissors
How to Do a French Knot Stitch Step-by-Step
Embroiderers feel that the French knot is a difficult stitch to execute. But, in reality, it’s incredibly easy. Once you have threaded your needle and secured your fabric in the hoop, follow the steps below.
How to do an embroidery French knot in 4 steps:
- Insert the needle from the back
First, bring the threaded needle up through the fabric from the back at the point where you want your French knot.
- Wrap the thread twice
Then, holding the thread taut with your non-dominant hand, wrap it around the needle twice.
- Insert the needle back
Now, hold the wraps in place with one hand and insert the needle back into the fabric through the starting point.
- Pull the needle
Pull the needle and the thread all the way through the wraps.
That’s it! You will find a raised bobble on the working material, which is your single French knot. Check out this video to understand the process better.
French Knot Stitch: Applications & Variations
The French knot can produce different textures and looks. The key to the variations is the number of times you wind the thread around the needle.
You may call the French knot a variation of the Peking knot. The latter produces a flatter look by winding the working thread around the needle only once. On the other hand, you need to wrap the needle with the thread at least twice for French knots.
Another major basis of variation is whether you use a single knot or a group of closely-set knots.
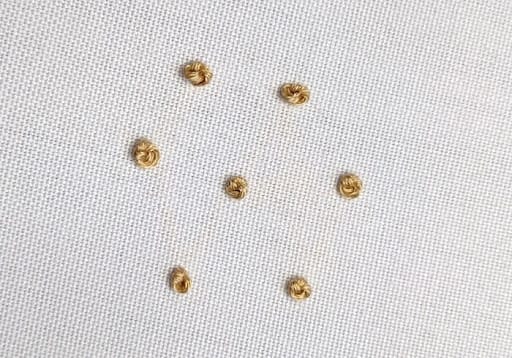
French Knot Cluster
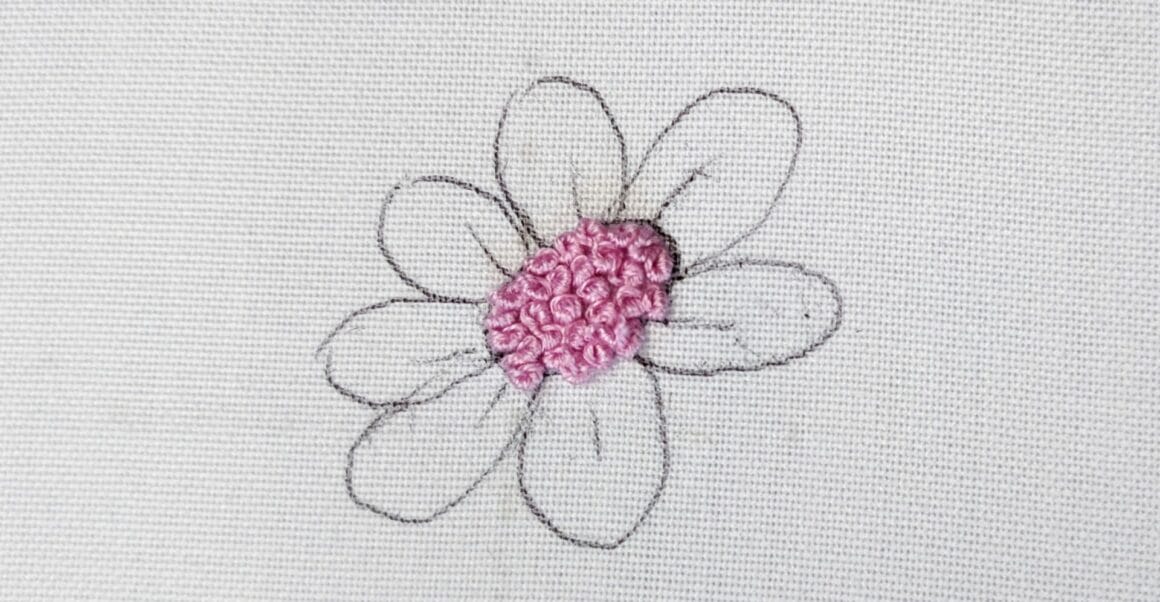
A French knot cluster is a group of French knots. This is a popular variation of the classic knot that you can easily sew for a textured design.
You can experiment with the number of wraps, spacing, and thread color to produce various effects. Here’s how to create a French knot cluster:
- First, insert the threaded needle into the fabric from the back where you want to start the cluster. Then, pull the thread.
- Now, hold the thread tightly with your non-working hand. Then, circle it around the needle multiple times, usually 2-5 times, depending on the desired thickness.
- Next, holding the thread, push the needle back into the fabric close to the starting point. Don’t pull the wraps too tight.
- After that, pull the threaded needle gently all the way through the wraps. Hold them firmly as the thread becomes snug against the fabric to form a cluster.
- Then, insert the needle back down into the fabric, slightly away from the cluster, to secure it.
- Continue with the process to create as many French knots as your cluster design demands.
Double French Knot
A double French knot is a variation of the basic French knot embroidery stitch that creates a larger and more pronounced knot.
Here’s how to make a double French knot:
1. Start by bringing your threaded needle up through the fabric where you want to create the knot.
2. Hold the working thread (the thread attached to your needle) in your non-dominant hand and allow the needle to dangle freely.
3. With your dominant hand, wrap the working thread around the needle twice. This means you pass the thread over the needle, then under, and Over again.
4. Carefully insert the needle back into the fabric close to where you came up, making sure not to pull the wraps too tight.
5. Hold the wraps in place with your non-dominant hand to prevent them from slipping as you pull the needle through to the back of the fabric.
6. Gently pull the working thread through to the back while holding the wraps in place. This forms a double knot on the fabric.
7. You can repeat the prO cess to create more double French knots as needed.
Double French knots are often used in embroidery for added dimension and texture. They are larger and stand out more compared to regular French knots, making them suitable for creating eyes on embroidered animals or other embellishments where a bolder knot is desired.
Pistil Stitch (Elongated French Knot)

The pistil stitch is a versatile embroidery stitch used to create flower stamens, buds, and other delicate details in floral designs. It’s a simple but effective technique. It is also known as an elongated French knot.
Here’s how to do it:
1. Start by bringing your needle up through the fabric where you want to create the pistil.
2. Insert the needle back into the fabric at the same point where you started, creating a small straight stitch.
3. Bring the needle up again just outside the top of the straight stitch, but still within the area of the pistil.
4. Pass the needle back down through the fabric just outside the bottom of the straight stitch.
5. As you pull the thread through, the stitch will form a small loop or coil at the top, resembling a flower stamen.
6. You can create multiple pistil stitches in the same area to form a cluster or fill a flower center.
7. To secure the stitches, make a small stitch on the back of the fabric or weave the thread through nearby stitches.
The pistil stitch is often used in floral and botanical embroidery to add realistic details to flower centers. It’s a great way to create dimension and texture in your embroidery projects.
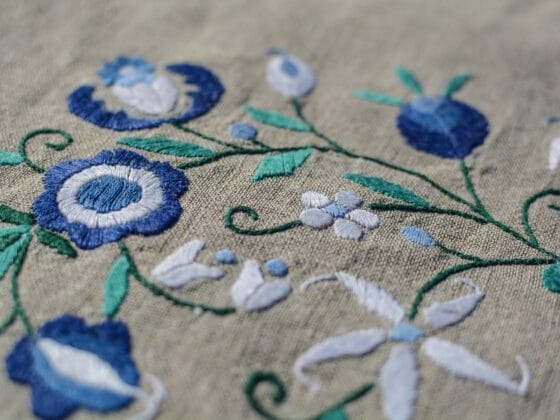
French Knot Stitch: Uses and Design Patterns
The French knot adds a three-dimensional detail to your design. It is a great stitch for intricate patterns, filling gaps and designs, creating gorgeous outlines, or adding small details to a hand embroidery project.
What Is a French Knot Stitch Used for?
Some of the common examples of the uses of the French knot are the following:
- Flowers
- Berries
- Hair curls
- Foliage
- Eyes
- Circles and triangles
- Other detailed motifs
Whether you use single dots or a cluster, French knots can produce a unique weave in every project.
French Knot Stitch Pattern Ideas
French knots, in clusters, can be the base of many wonderful embroidery designs. Before you master the craft to venture into complex Aari work, you can start with simple but beautiful pattern ideas.
Whether you want to make hoop art or handkerchiefs or give new life to an old fabric bag or pillowcase, these designs are perfect! They use some other elementary stitches, too, but the French knot is the star.
Let’s take a quick look at three pattern ideas that use French knot stitches.
Cherry Blossom Tree
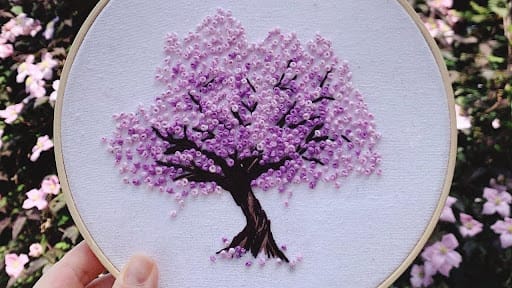
This pattern brings alive the dreamy beauty of Japan’s famous cherry blossom trees in full bloom. It uses different shades of the same color to create a lovely 3D effect. You can also use the same pattern and shades of green to embroider a regular tree.
Cute Sheep
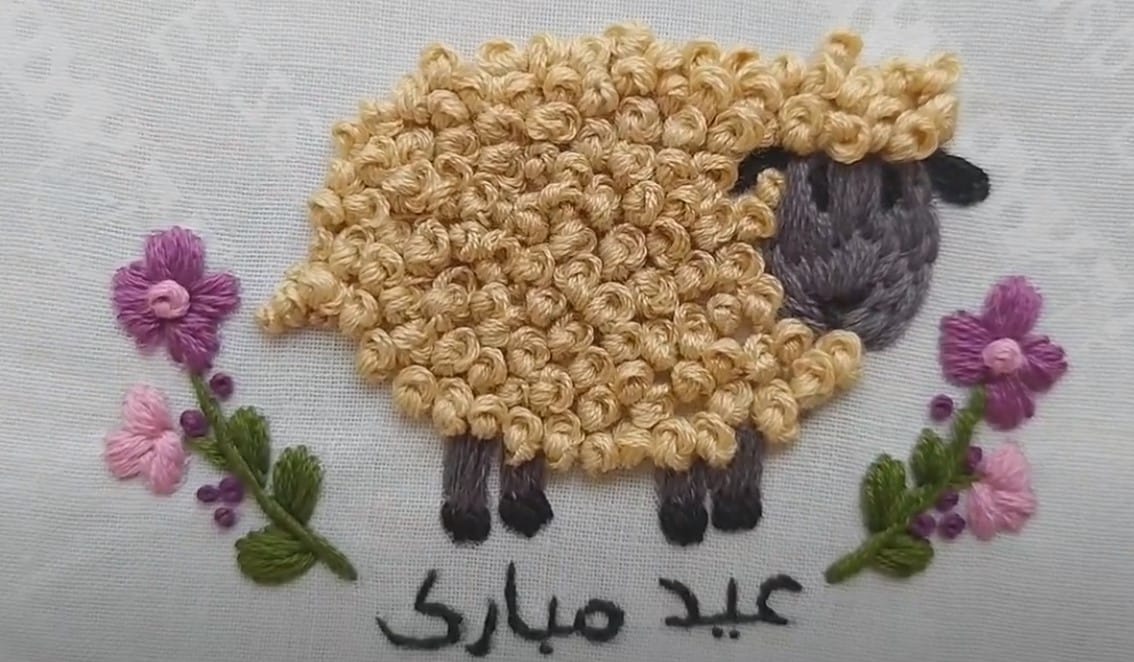
For a young member of your family, a handmade item with this design will be cherished as an adorable gift! It looks great on baby quilts, onesies, bibs, and more. You can also add it to pillowcases, cushion covers, purses, and other items to add a youthful vibe to the object.
More Embroidery Tutorials
- 20 Essential Embroidery Stitches You Should Know
- The Embroidery Stem Stitch
- The Running Stitch in Embroidery
- The Embroidery Split Stitch
- The Chain Stitch in Embroidery
- The Embroidery Back Stitch
- The Embroidery Couching Stitch
How to Do an Embroidery French Knot Stitch: FAQs
A: The number of thread strands you use for French knot embroidery completely depends on the knot size and the design. For larger knots, you can use up to six strands. On the other hand, only a single strand is enough for a small dot. Choose the needle size accordingly.
A: The French knot belongs to the family of knotted stitches and bears close resemblance to many of its brethren. One stitch that closely resembles the French knot is the Peking knot, which is its flatter version. The Colonial knot, too, is similar, though a little smaller.
A: Sometimes, your French knot might disappear when you finish the stitch. It happens when you insert your needle wrapped with the thread through the starting point. You can avoid it by inserting back the needle next to the starting point.
A: The French knot did not originate in France. However, the stitch was very much used by royal French embroiderers.
A: The French knot stitch is a popular embellishment. Since it appears as dots on the fabric, it can add details to patterns to create a three-dimensional effect. It is used for isolated dots or in clusters to decorate outlines, fill empty spaces, and produce a powdered texture.
A: Yes, the French knot is a decorative stitch in hand embroidery. It helps create a knot or dot that remains raised on the ground material’s surface. The French knot can denote flowers, grapes, foliage, clouds, hair, and more. You can use a single knot or a group of these.
Conclusion
After using basic stitches like the running stitch and the chain stitch, French knot stitch embroidery can offer a fresh change of pace. What makes it particularly interesting is how it adds a 3D effect to the fabric.
Moreover, this knot doesn’t need you to be an embroidery master. So, try out this technique with different knot sizes and colors. In no time, you might start “painting” with thread on fabric using French knots.