
Welcome to the first day of the Pleated Boxes Pillow Sew Along! Whether you are joining right in or just lurking, we are happy to have you.
Let’s review the supplies you’ll need to make this pillow:
- 8 assorted fabric strips, 2” wide and 12” long (or strips/scraps of various sizes)
- ½ yard of solid background fabric
- ½ yard of inexpensive muslin fabric, like an upcycled sheet
- 8-10 oz. synthetic fiber fill (buy a small bag, and you can make two pillows)
- Rotary cutter, acrylic ruler and cutting mat
- Thread, sewing pins and iron
When finished, the filled pillow cover measures 17″ long x 12″ tall x 6″ wide, the perfect size for a chair or couch accent.

Table of Contents
Make Accent Squares
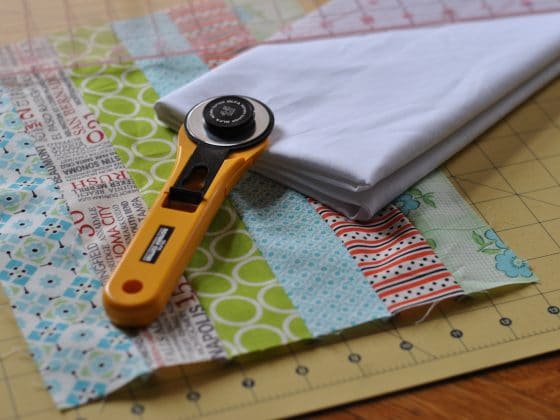
1. Gather eight strips of patterned fabric, each 2” wide and 12” long. (Note that you’ll only see me using 6 strips here, and I’ll explain more on that later.)

Using a 1/4″ seam allowance, stitch fabric strips together along the longest edge with right sides facing. Press and trim block to 12”x12”.
2. Cut pieced block into 3” rows, then 3” columns, so you have 16 pieced 3”x3” squares. Set aside.

Note: For this project, I’ve also cut four solid 3” squares as needed, since my original block only yielded 12 pieced squares. Instead of using my suggested fabric cuts, you may substitute with any number of strips 1” to 3” wide. It’s a fantastic way to use up scraps!
Whichever combination you use for your pillow, just make sure you end up with 16 blocks that measure 3″x3″.

Here are my 12 pieced blocks plus 4 solid blocks, for a total of 16 blocks. You can use all pieced blocks, all solid blocks, wonky pieced 3″ blocks… you get the idea. Don’t be afraid to make this pillow your own!
Background Squares – The Simple Way
Next, you are going to cut your background squares. We can do this in a simple way, or a more textured way, and I’ll explain both methods here. Here’s the simple way:
1. Along the 18” edge of your background fabric (scroll down for diagram), cut two 3”x18” strips. Cut each strip into 3” squares, for a total of 12 squares.

2. Here’s that cutting diagram. You are going to cut your squares out of two rows on the top of the diagram. As I mentioned before, you’ll cut the 18″ rows first, then cut each row into 3″ squares.

Variation – Pieced Background Squares
1. If you want your pillow to have a bit more texture to it, you can choose to piece your background squares. Like earlier with your patterned fabric, you’ll sew together several 1” to 3” strips of background fabric that are 12” long. For example, cut 8 strips of background fabric that are 2” wide and 12” long.
Cutting tips: To make sure you don’t use all of your background fabric early in the game, go ahead and cut out the rest of your background fabric now as listed in the diagram above (three 3″x18″ strips and two 14″x14″ squares), skipping the 3″ squares. You’ll have enough fabric left over to chop the rest into eight 2″x12″ strips. Or you may experiment with different sizes of strips from your scrap basket.
Stitch together strips along long edges with right sides facing. Press your block, and cut into sixteen 3” squares.
Here’s what it looks like when you use pieced instead of solid background squares. See the texture? Pretty!

Arrange Squares
1. Arrange accent squares and background squares in four rows. Start with an accent square, then a background square, alternating until there are 7 blocks in a row. Rearrange until you have a good balance of colors and pieced strips facing different ways. If you used any solid squares, place these on the outside edges, which will not be a focal point of the pillow.
See how I alternated the direction of my pieced blocks? Some face horizontal and some vertical. If you used pieced background blocks instead of the solid white, make sure to flip these every which way for a fun, textured look.

2. Chain stitch fabric right sides together to piece rows. Start with one patterned and one background square. Before cutting your thread, pull the fabric you’ve just sewn a few inches away from machine, away from you. Pick up the next two squares and continue to chain stitch together until only one square is left in that row. You’ll trim your threads later.

This is a photo of my chain-stitched blocks. The right sides of the fabric are facing. Below, you can see one of my stitched pairs opened up.

3. Join together pairs of stitched squares in the original order, until you’ve pieced an entire row of seven squares. Press. Repeat with other three rows.

A reminder here that we’ll use a 1/4″ seam allowance throughout this entire pillow. I stitched 1/4″ from the right edge of my fabric, lined up with the edge of my sewing machine foot.

Trim threads. Trim rows as needed. I hardly needed to trim my rows at all, but make sure you even up any edges that are very rough. Tiny imperfections won’t be visible in your finished pillow!

And that’s a wrap for today’s sew along lesson. You should now have cut out your squares and pieced them together into four rows of seven squares each.
On Monday, I’ll be back with some instructions on how to join together your rows. It’s a much quicker lesson than today’s. You can do it!
Don’t forget to share your fabric choices, in-progress pillows and finished sew along photos in our Flickr group. If you haven’t already, you may download your free PDF pattern here.

And we invited you to come back and link up your creations 3/16 through 3/23 for a chance to win prizes!


2 comments
Thank you Lindsay! So far I’m loving my fabric choices. Janelle @ Emmaline Bags
You’re making this look nice and easy! I can wait to get started.