
Did you check out Lesson One: Cut and Arrange Squares? You are welcome to join us at any time throughout the sew along, and I promise . . . you can do it!
Maybe you’ll use up your scraps to make a pillow that matches your favorite quilt, or work from a friend’s favorite colors and print to make a handmade gift. The sky is the limit!
We’ve loved seeing some of your fabric choices and patchwork squares come to life this weekend in the Craft Buds Flickr group.

Photos: 1. Janelle 2. Javadiva1 3. Bayeaston 4. Cheraldine73
And because it’s Monday, and you’ve got the whole week ahead of you, let’s focus on a short lesson today. It’s time to join together those rows! Cutting and stitching these rows should take you about 15 to 20 minutes, so it’s totally doable.
Join Together Rows
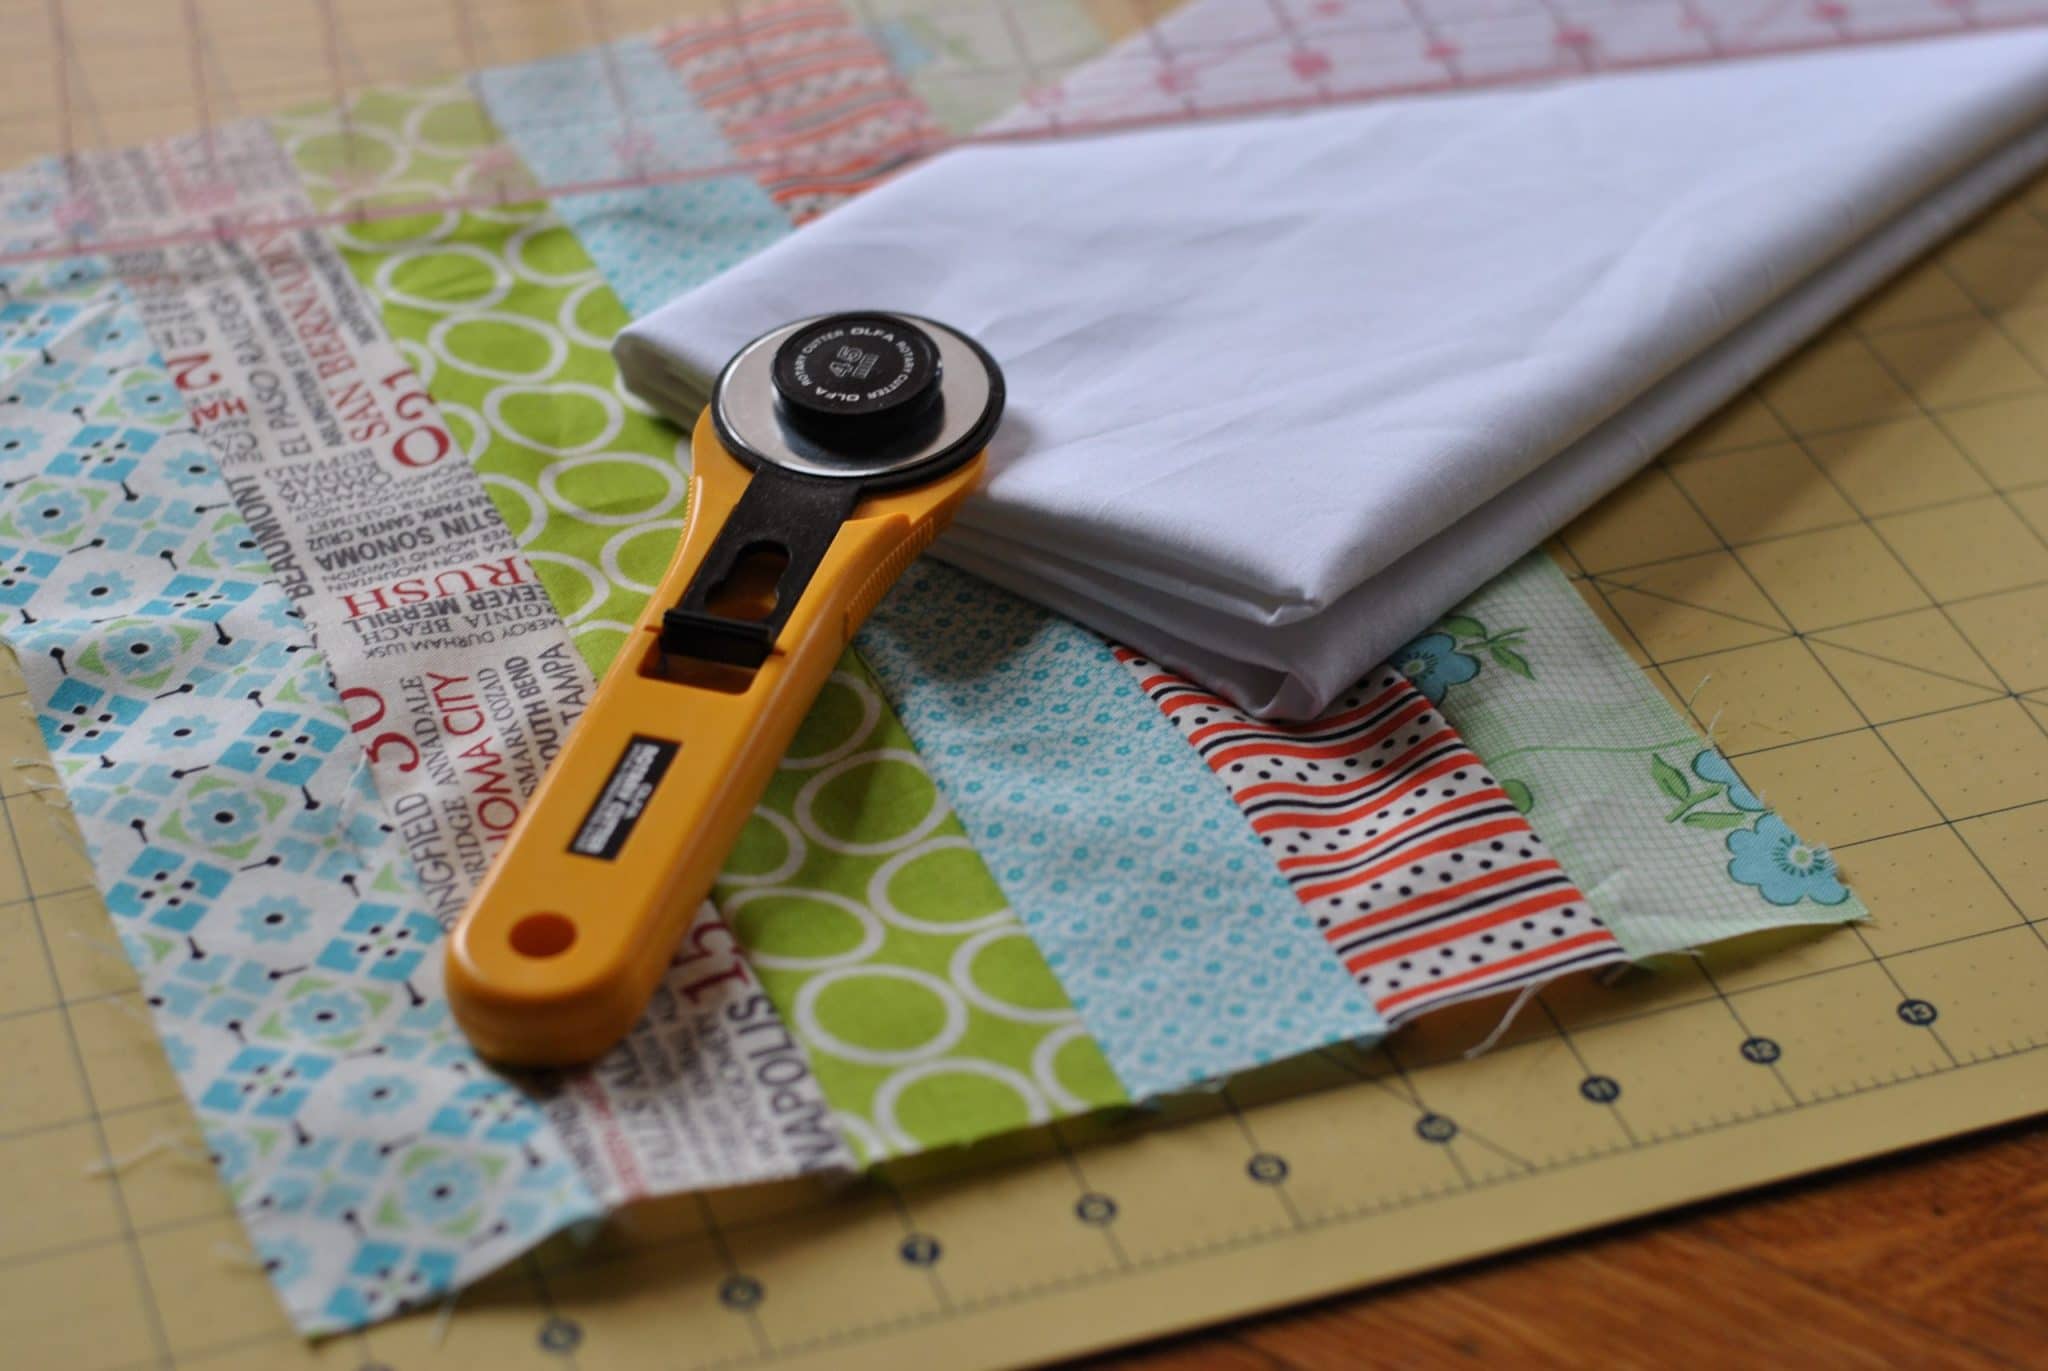
1. From the 18” edge of your fabric, cut three 3”x18” strips. Here’s the cutting diagram again. You should have already removed the 12 small squares from one end, so now you’ll cut the three strips below.

2. Alternate background fabric strips with pieced rows. You’ll notice that my strips are a little longer than my pieced rows, but yours should line up just right.

Pin pieced rows to fabric strips, with the fabric’s right sides together.

Stitch together the pinned edges using a 1/4″ seam allowance. When you get to a patchwork box, make sure it lines up with the previous patchwork box, as shown in the photo below.

3. When all rows have been joined, press your pillow front and trim edges if needed.

Your patchwork block will measure approximately 18”x18”. Those solid rows you just added will be embellished with beautiful pleats in our next lesson!

And it’s that simple! Please join us again on Friday for an easy tutorial on adding the pleating to your pillow front. I can’t wait to share this part with you.
Share your fabric choices, in-progress pillows and finished sew along photos in our Flickr group. If you haven’t already, you may download your free PDF pattern here.
Schedule
- Friday, 2/24: Supplies + Prizes
- Thursday, 3/1: Cut and Arrange Squares
- Monday, 3/5: Join Rows
- Friday, 3/9: How to Pleat
- Monday, 3/12: Envelope Pillow Back + Make Pillow Form
- Friday, 3/16 (through 3/23): Link Up Your Pillows!
- Saturday, 3/24: Sew Along Winners Announced


4 comments
You make it look so simple. I have always admired quilts and quilters but I have never liked to sew and my few sewing project were always mediocre at best. This makes me want to try again.
Amy, I hope you give it another shot! I almost gave up on sewing when couldn’t figure out why my thread was getting tangled in the machine. I’m so glad I didn’t stop there. 🙂
Great tutorial and such clear photos! Can’t wait to see how to add the pleats!
Thanks for linking to a Round Tuit!
Hope you have a fabulous week!
Jill @ Creating my way to Success
https://www.jembellish.blogspot.com/
This is sooo pretty! I just love the pattern! Thanks so much for sharing with the Pink hippo Party.. can’t wait to see what you share next and how the pillow turns out!