
Have you heard of Project Life? I first heard of it when one of my favorite fabric designers, Heather Bailey, announced that she was going to be designing a collection of journaling cards for Project Life, and I headed over to see what the buzz was about. Apparently, I’d been living under a rock, because the photo journaling community is filled with people who are giddy each time PL announces a new collection.

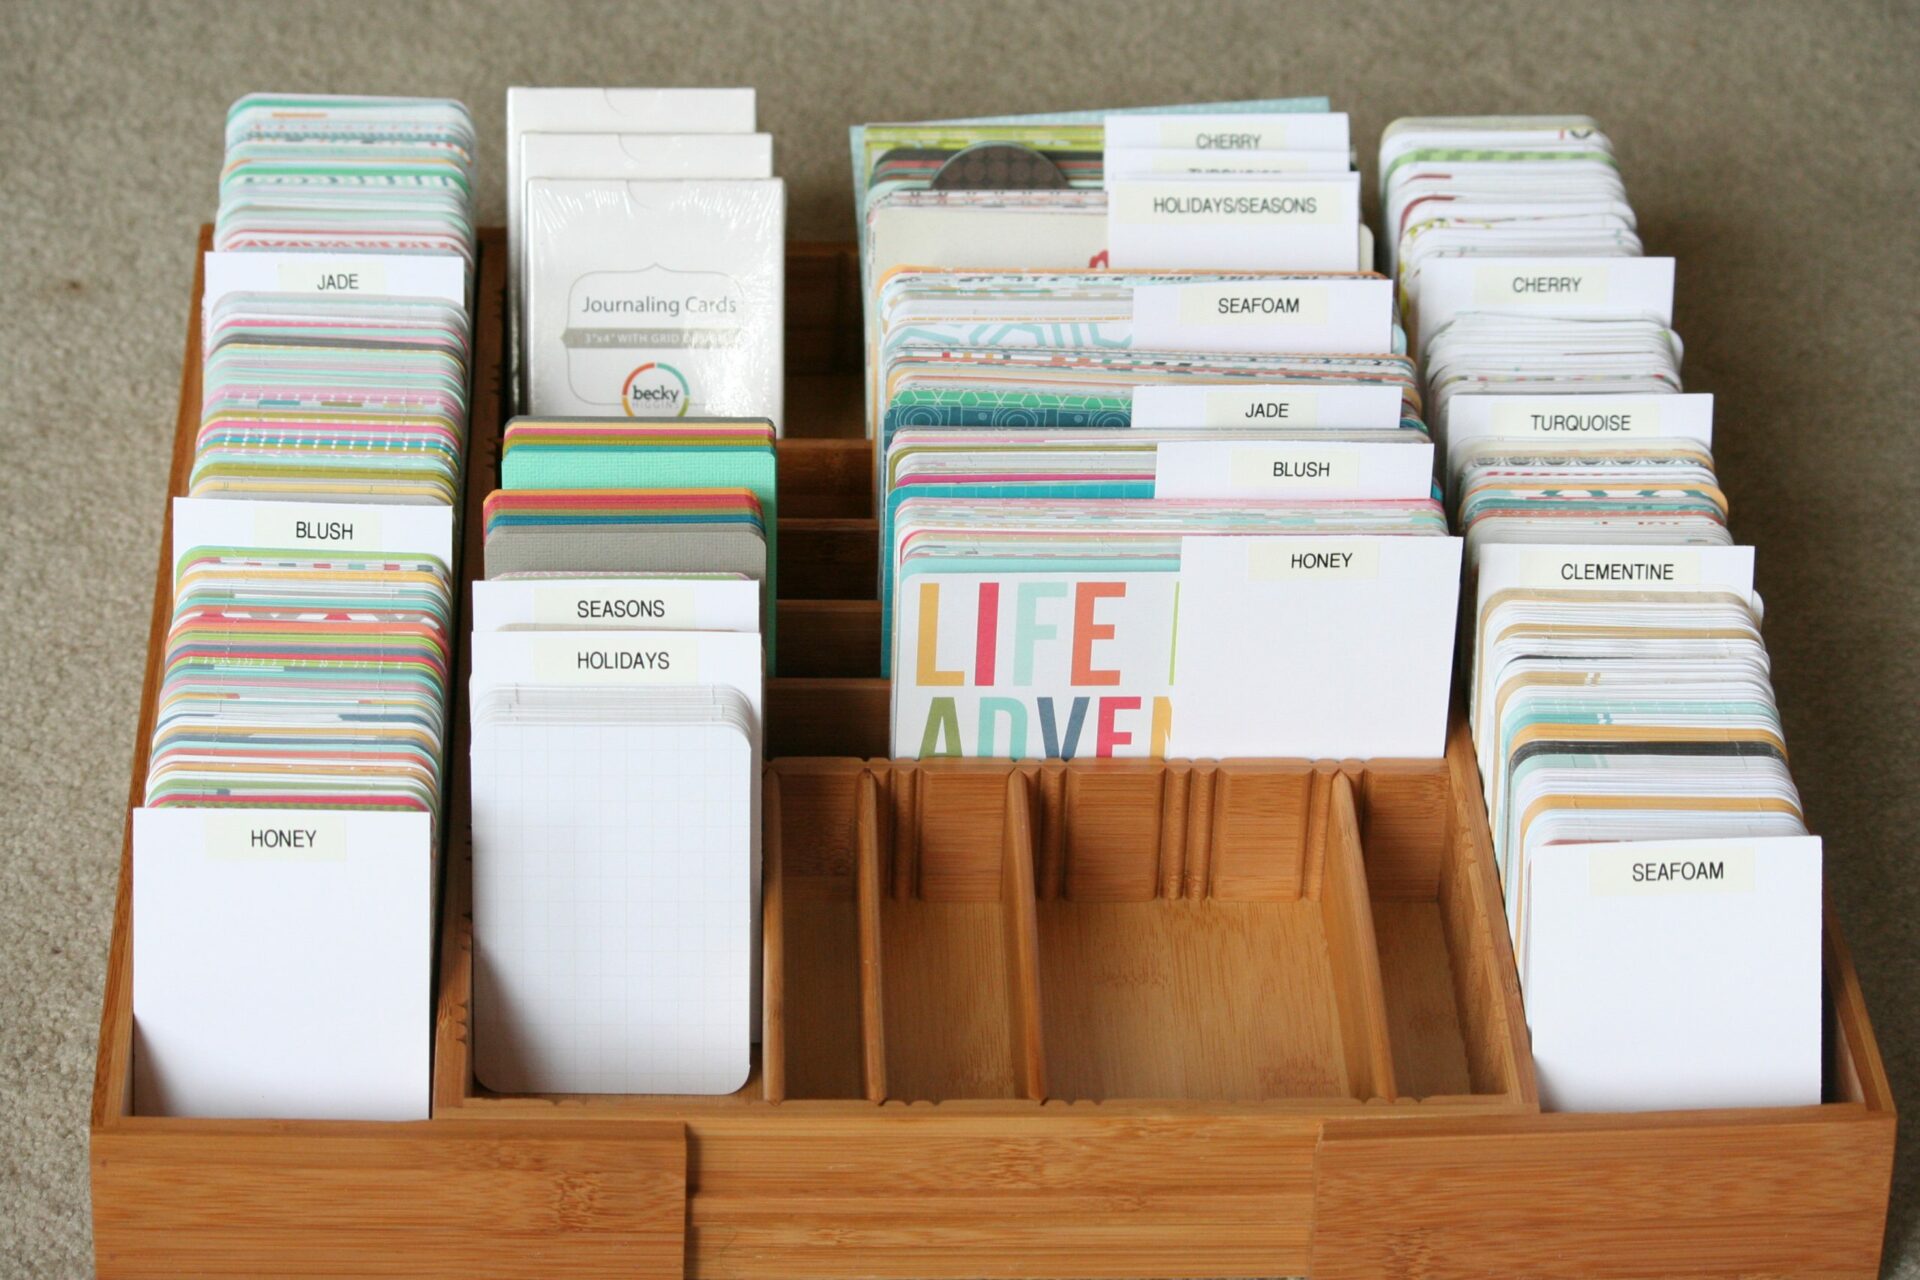
In a nutshell, Project Life offers scrapbooking alternative for busy people! If you are interested in photo journaling but don’t have the time to search for coordinated papers, stickers and embellishments, all you have to do is purchase a Project Life Core Kit, filled with journaling cards, and the specially designed photo sleeves, as well as a 12 x 12 scrapbook binder.
There are also digital Project Life kits, which you can link to your Shutterfly account and use for digital scrapbooking.

The cards have different designs on each side, except for the first page and last page cards. Those have suggested placement diagrams on the back, so it’s very easy to just jump right in with Project Life, even if you don’t have any experience with scrapbooking.

Each kit comes with more than 600 cards. The journaling cards come in two sizes (3 x 4 and 4 x 6), and you can choose an assortment of cards with sentiments and blank space for you to write in your own notes.

The layouts look great just as they are, or you can dress them up by adding your own scrapbooking stickers, stamps or embellishments! Just add them to the cards before you slip them in the photo sleeves.

The only part of this kit that confused me was how to create a “spread” of pages, left and right. Because of the way the sleeves are designed, you can only slip photos into one side of the page. To use both sides, I flipped one of the photo pages upside down, but then I realized I could just leave the page as is and slip the journaling cards in through the back of the page. You can also still use both sides of the photo sleeve, since most of the cards are double-sided. Just slip a colored card (or a second photo) behind each of your photos to hide the back.

Here is a page my mom and I created with photos of a family trip to a log cabin. It was really simple to put together, and since we had more photos than needed to fill the four large slots, we layered some photos on top of the smaller journaling cards.

These playing cards that come with the kit inspired a trip to the new casino near my parent’s house. Can you believe my mom walked out a winner? Look at those Triple 7s!
I really enjoyed Project Life and am excited that I got the opportunity to review it! [I received this product free of charge, but was not otherwise compensated for this review. All opinions are my own.]

If you are looking to get into scrapbooking but don’t have the time or money to buy a lot of supplies, Project Life, really is a good deal, considering you don’t have to have any special punches, cutters, papers or other tools to get started. Before I tried this kit, I wasn’t sure if Project Life was something I’d get into. But putting together these pages is a great family project to do with your kids (no mess!), and the cards are so pretty that it makes you want to take photos and get them printed, just so you can play! It’s all about documenting the little moments of life.
What about you? Have you heard of Project Life, or given it a try? Do you develop or print your photos, or store and share them digitally?


4 comments
It sounds like a lot of fun. I scrapbooked before quilting so I have many albums of photos! Being quite the camera bug, I still have lots of pictures! I have never heard of the product but I am always willing to try new things. I have digital and printed photos. Nice review!
One of the blogs I follow is Julie Fei Fan Balzer and she does art journalling and posts about project life all the time. Her layouts are a little more labor intense since she adds paint and stamping but it’s the same idea. The only issue I have is that even though I take lots of pictures most of them are on my not very great camera phone and I’ve never printed any of them out. I want to make some sort of baby books for my mom and mother in law so this could be a good jumping off point. I love Heather Bailey and didn’t know she had designed anything for PL. That’s cool. Thanks for sharing this!
I actually do Project Life although I am always 20+ weeks behind. I want to start over fresh in 2013 but I have too many things to do. I actually never bought the kits and just use business card baseball card protectors etc and scrap paper from my overflowing craftroom.