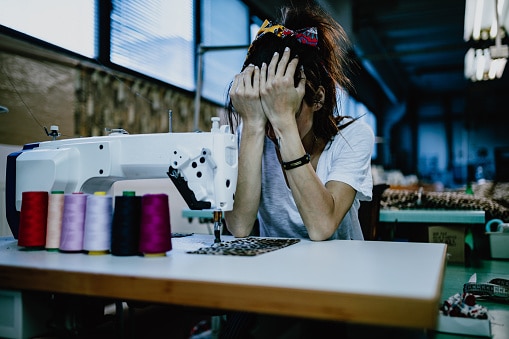
A sewing machine jam is when the machine gets locked up and cannot sew properly. This can be caused by several things, such as a thread getting tangled, the fabric not being fed evenly, or a build-up of lint or dust in the machine. Jams can also be caused by the needle hitting something inside the machine, so always keep an eye on the needle while sewing. If a jam does occur, it is usually relatively easy to fix by following the troubleshooting steps in your sewing machine’s manual or this article. However, if the problem persists, you may need to take your machine to a qualified repair person.
Related: Sewing Machine Tension Chart – The Ultimate Guide
Table of Contents
- 1 List of the reasons why your sewing machine keeps jamming:
- 2 How to Thread a Sewing Machine Properly
- 3 How to fit the bobbin on a sewing machine?
- 4 How to set the thread tension on a sewing machine?
- 5 How to install a foot presser on a sewing machine?
- 6 How to thoroughly clean a sewing machine?
- 7 How do I lubricate my sewing machine?
- 8 Why does my sewing machine keep looping underneath?
- 9 Why does my bobbin thread keep getting stuck?
- 10 Conclusion: The importance of maintenance
List of the reasons why your sewing machine keeps jamming:
1. Incorrect threading: One of the most common reasons your sewing machine might be jamming is that the thread has been incorrectly threaded through the machine. This can cause several problems, including tension issues and skipped stitches.
2. Poorly-fitting bobbin: Another common reason for sewing machine jams is a poorly-fitting bobbin. If the bobbin is not seated correctly in the machine, it can cause many problems, including skipped stitches and tension issues.
3. Dirty needles: Sewing machine needles can become clogged with lint and dust over time, which can cause them to skip stitches or jam the machine. Be sure to clean your needles regularly to prevent this from happening.
4. Thread tension issues: If the thread tension on your sewing machine is too low, it can cause the thread to bunch up and jam the machine. Conversely, if the tension is set too high, it can cause the thread to break or snap. Be sure to adjust the tension according to the fabric you are sewing.
5. Poorly-oiled sewing machine: A machine not oiled correctly can also cause jams. Be sure to oil your machine regularly according to the manufacturer’s instructions.
6. Foreign objects in the feed dogs: The feed dogs are responsible for moving the fabric through the sewing machine. Any foreign objects in the way, such as lint or thread, can cause the feed dogs to jam. Be sure to clean the feed dogs regularly to prevent this from happening.
7. Improperly installed presser foot: The presser foot is responsible for holding the fabric in place as you sew. If it is not correctly installed, it can cause the fabric to shift and jam the machine. Be sure to follow the manufacturer’s instructions when installing the presser foot.
8. Dirty or dusty sewing machine: A dirty or dusty sewing machine can also cause jams. Be sure to clean your machine regularly according to the manufacturer’s instructions.
9. Sewing on too thick of a layer: If you are sewing on multiple layers of fabric, ensure each layer is thin enough to fit under the presser foot. If not, it can cause the machine to jam. If you are sewing thick/tough fabric, you may often want to upgrade your equipment to a heavy-duty machine.
10. Defective sewing machine: A defective sewing machine can cause jams. If you are having frequent issues with your machine, take it to a qualified repair person for diagnosis and repairs.
How to Thread a Sewing Machine Properly
Most sewing machines come with a manual with diagrams and instructions on threading the machine. Some online tutorials and videos can be helpful. Here is a brief overview of the steps involved in threading a sewing machine:
1. Start by winding the bobbin. It is typically done by inserting the empty bobbin onto the spindle, then holding the end of the thread and turning the handwheel to wind it around the bobbin.
2. Once the bobbin is wound, insert it into the bobbin case.
3. Pull the thread through the tension disks and then through the take-up lever.
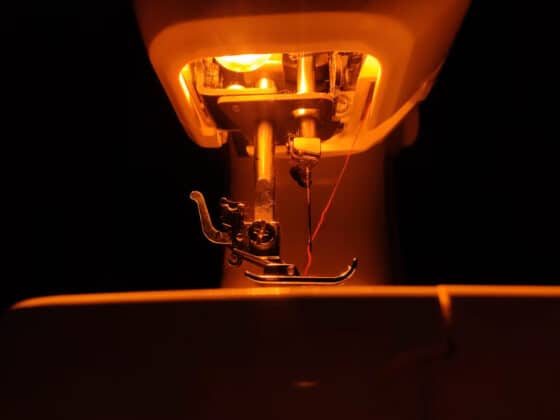
4. Continue pulling the thread down and around the needle bar, then insert it into the needle from back to front.
5. Draw the thread up by turning the handwheel until the needle reaches its highest point. At this point, you should see a loop of thread on the machine’s underside.
6. Finally, press on the foot pedal to start sewing!
How to fit the bobbin on a sewing machine?
Most sewing machines will have a specific place to put the bobbin. You usually need a cover to open to access the bobbin. Once you have found the correct spot for the bobbin, you must thread it through the machine. Many sewing machines will have a diagram near the bobbin area to show you how to thread the bobbin correctly.
After the bobbin is threaded, you need to wind it with thread. To do this, you will need to hold on to the end of the thread and turn the wheel on the side of the machine. Once the bobbin is full, you can cut off the excess thread and replace the cover.
How to set the thread tension on a sewing machine?
You need to consider a few things when setting the thread tension on your sewing machine. The type of fabric you are sewing, the thickness of the thread, and the stitch you are using all play a role in determining the correct tension. In general, you want the tension to be loose enough that the thread can flow smoothly through the machine but not so loose that it causes the stitches to be uneven or sloppy.
Try tightening the tension if you have trouble with your stitches being uneven or coming out too loose. If the stitches are too tight or gathering the fabric, loosen the tension. It may take a bit of trial and error to find the perfect tension for your project, but it will be a breeze once you get the hang of it!
How to install a foot presser on a sewing machine?
A foot presser on your sewing machine is imperative because it helps keep the fabric in place while you sew. Different foot pressers are available, but the snap-on type is the most common. You can also find other types that screw on or clamp onto the sewing machine.
Most sewing machines come with a foot presser already installed. You will need to purchase one and install it yourself if yours doesn’t. Here are the steps on how to install a foot presser on a sewing machine:
1. Unplug the sewing machine from the power source.
2. Raise the needle and press the foot lever to its highest position.
3. Remove the sewing machine’s throat plate by unscrewing the screws that hold it.
4. Place the foot presser onto the shaft of the sewing machine, making sure that the teeth of the presser are facing downwards.
5. Screw-on or snap on the foot presser securely into place.
6. Replace the throat plate and screw it back in place.
7. Plug the sewing machine back into the power source and test the presser by sewing on a piece of scrap fabric.
How to thoroughly clean a sewing machine?
Sewing machines are necessary for any sewer, but they can quickly become dirty and cluttered. A sewing machine that is not correctly cared for will not work as efficiently and can even break down completely. Fortunately, cleaning a sewing machine is relatively easy and only requires simple steps.
First, unplug the sewing machine and remove any attachments or accessories. Next, brush remove any lint or fabric pieces from the device. Be sure to reach into all nooks and crannies, including under the needle plate.
After removing the visible debris, it’s time to clean the machine’s interior. Sewing machines typically have a small door to access the bobbin area. Use a soft cloth to wipe away any dirt or dust accumulated inside.
Finally, reassemble your sewing machine and give it a test run. Your sewing machine should now be clean and ready to use!
How do I lubricate my sewing machine?
If your sewing machine is starting to make strange noises or isn’t running as smoothly as it used to, it might be time to lubricate it. Lubricating your sewing machine regularly can help keep it in good condition, avoid jamming and prevent costly repairs down the road.
To lubricate your sewing machine, you’ll need to purchase a sewing machine oil specifically designed for the purpose. You can find this type of oil at most craft stores or online. Once you have the oil, apply a few drops to your machine’s moving parts. Be sure to wipe away any excess oil with a clean cloth before using your machine again.
With just a little care, you can keep your sewing machine running like new for years to come.
Why does my sewing machine keep looping underneath?
If your sewing machine is looping underneath the fabric, it is most likely because the tension on the machine is not set correctly. The tension on a sewing machine controls how much and how tight the thread is pulled through the fabric. If the tension is too loose, the thread will not be pulled through evenly and will loop underneath.
To fix this problem, you must adjust the tension on your sewing machine. Consult your manual for specific instructions on how to do this, as it will vary depending on the model of machine you have. Once you have adjusted the tension, try sewing a few test stitches to see if the problem has been resolved. If the problem persists, you may need to take your sewing machine in for service.
Why does my bobbin thread keep getting stuck?
There are a few reasons why your bobbin thread might keep getting stuck. The first reason could be that the tension on your machine is too tight. This can cause the thread to break or get tangled. The second reason could be that the bobbin case is not inserted correctly. Make sure that the case is inserted all the way and that it is locked in place. The third reason could be that the needle is not inserted correctly. Make sure that the needle is down and that it is in the correct position. If none of these solutions fix the problem, take your machine to a qualified technician for further diagnosis.
Conclusion: The importance of maintenance
My Sewing machine is a vital part of my business. It allows me to create beautiful garments, home decor items, and other valuable items. However, like any machine, they require regular maintenance to keep them running smoothly.
Cleaning the machine is one of the most critical aspects of sewing machine maintenance. Lint and dust can build up inside the machine and cause problems with the moving parts. It’s important to vacuum out the lint trap regularly and clean the outside of the machine with a soft cloth.
Another important aspect of sewing machine maintenance is oiling the moving parts. It helps to keep them running smoothly and prevents them from wearing out prematurely. Consult your sewing machine’s manual to determine which parts need to be oiled and how often.
If you use your sewing machine regularly, it’s good to have it serviced by a professional every few years. It will help keep it in good working order and prevent any significant problems from developing.
By following these simple tips, you can help ensure that your sewing machine remains in good condition for many years. Regular maintenance is the key to running your machine smoothly and ensuring that it provides years of trouble-free service.






1 comment