We all know that pumpkin is a super nutritious vegetable, but can it be used as a decorative piece? Whether Halloween or a themed party, subtly painted pumpkins make it super exciting.
It’s fun painting pumpkins as they bring a fun element. And it doesn’t take much to let out your creativity on a pumpkin. Any acrylic paint(s) you choose is necessary to transform them into something eye-catching.
Are you looking for fun-filled pumpkin painting ideas to adorn your house? Or do your kids have a pumpkin painting activity at school, and you’re looking for some cool ideas?
Don’t worry; here, I’ve rounded up 8 cool pumpkin painting ideas that will inspire you to create something special with your family. So, let’s look into some fantastic ideas to paint a boring pumpkin.
But before that, here’s a quick guide to painting a pumpkin shape.
Related: Fabric Pumpkins Tutorial – Step By Step
Table of Contents
How Do You Paint A Pumpkin Shape?
Below is the step-by-step process to paint a pumpkin shape.
- Take a pumpkin of your choice that’s smooth with an even surface with no bruises. Any unevenness will affect the finish!
- Clean thoroughly and dry your pumpkin using a dampened paper towel or a baby wipe. I recommend the former due to its easy availability at home.
- Next, select a design of your choice before you start painting.
- Using acrylic paint, paint the entire pumpkin with a base coat (solid color). Let it dry.
- Now, trace your design lightly onto the pumpkin using a permanent marker and a stencil.
- Paint your design using acrylic paints onto your pumpkin. You can use paintbrushes, cotton swabs, sponges, or cotton balls.
- Add decorations to make your design even more fun and exciting.
Your painted pumpkin is ready!
Let’s now discuss some fantastic ideas.
Related: Last-Minute Halloween Costumes for Kids
8 Cool Pumpkin Painting Ideas – You Gotta Love These!
You’ll find your next pumpkin painting idea from the following list.
-
DIY Monstera Leaf Pumpkin
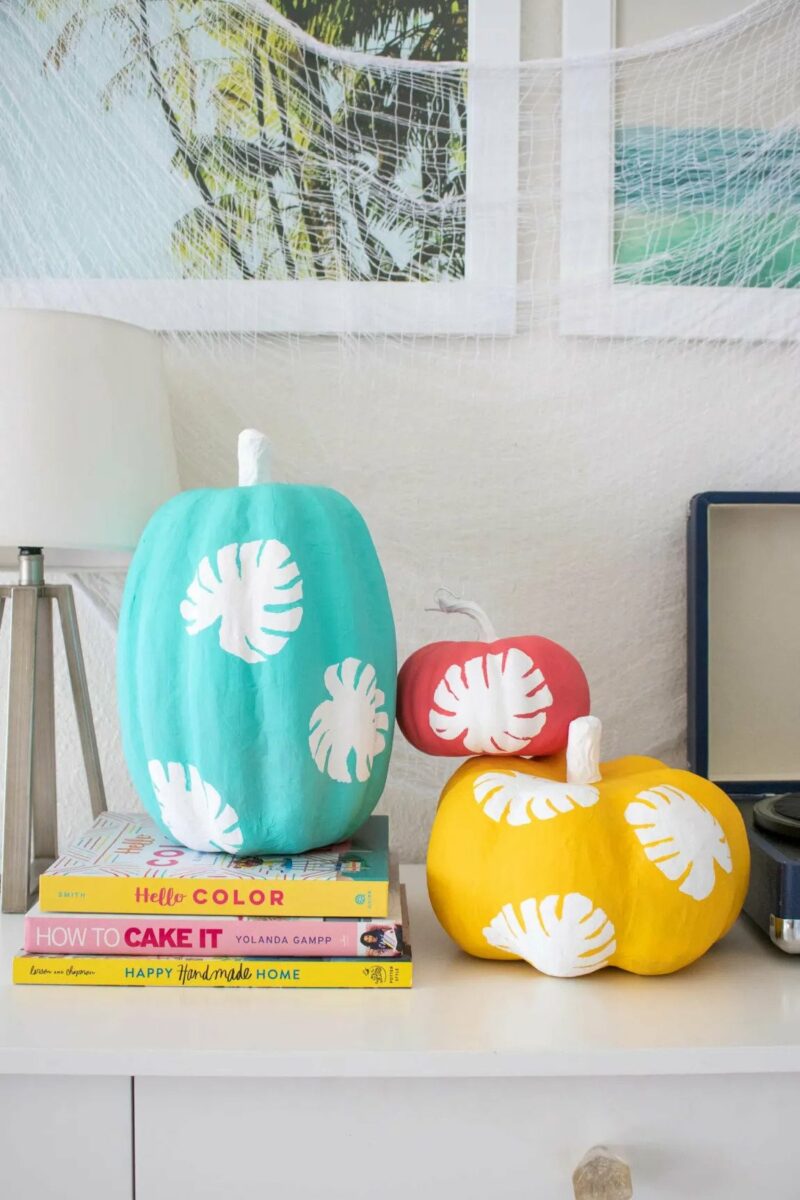
Source: Sarahhearts
This Monstera leaf design is perfect if you wish to create a fusion of spring and fall. For this idea, you can use brighter colors to break the monotony of usual yellow pumpkin designs.
Once done, these pumpkins can be adorned on the tabletop or at the doorstep. If you want, you can even gift it to someone close.
Get your kids on board and collect the following stuff to proceed.
- Sponge brush
- Paint brushes
- Different color paints (white paint is essential)
- Fake pumpkins
- Monstera leaf stencil
Next, follow the given steps.
- Paint the whole pumpkin in a base color of your choice. Let it dry, and apply another coat of paint for a nice finish.
- Once the paint is completely dried, put the Monstera leaf stencil on the pumpkin.
- Dab the white paint using a sponge brush onto the stencil.
- Wipe off the excess paint and repeat the same process with another Monstera leaf stencil at a different angle on the pumpkin.
- To finish off, color the pumpkin’s stem with your favorite color. This step, however, is optional.
Your Monstera leaf pumpkin is ready for display.
2. Spooky “Wicked” Pumpkin
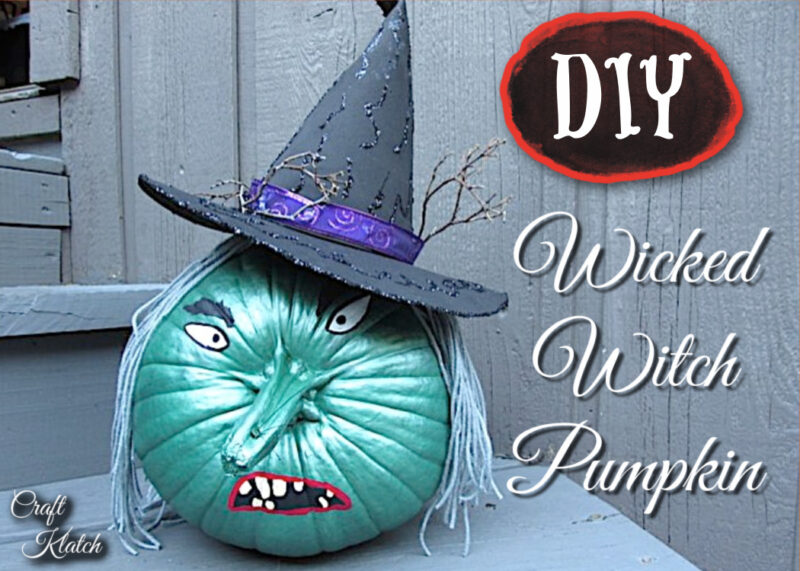
Source: Craftklatch
What’s Halloween without a spooky wicked pumpkin? So, I’ve got you this neat creepy-looking pumpkin painting idea you can employ. The painted pumpkin looks like a creepy dungeon coming straight out of horror comics, and it’s super easy to create.
And guess what? You can also get your kids and other family members to do it with you.
To make this spooky pumpkin, you will need the following.
- Matte black paint
- Foam letter stickers
- Pumpkin (fake or real)
- Paintbrush
- Paper towel
- Gold metallic craft paint
Once you’ve arranged the supplies, follow these steps.
- Clean the pumpkin and stick the foam letters on it. You can add extra glue if the sticker’s glue isn’t enough.
- Paint the pumpkin and the words in black color. Apply at least two coats and let them dry completely. Use a hairdryer if the paint is taking time to dry.
- Dip the paper towel into the metallic gold paint and rub it into the words. Wipe off the excess paint as you move forward.
- To achieve the desired effect, fade the gold paint around the pumpkin. Use a tiny amount of paint for this.
And your spooky pumpkin is ready to dazzle your Halloween party.
3. Galaxy Theme Pumpkin
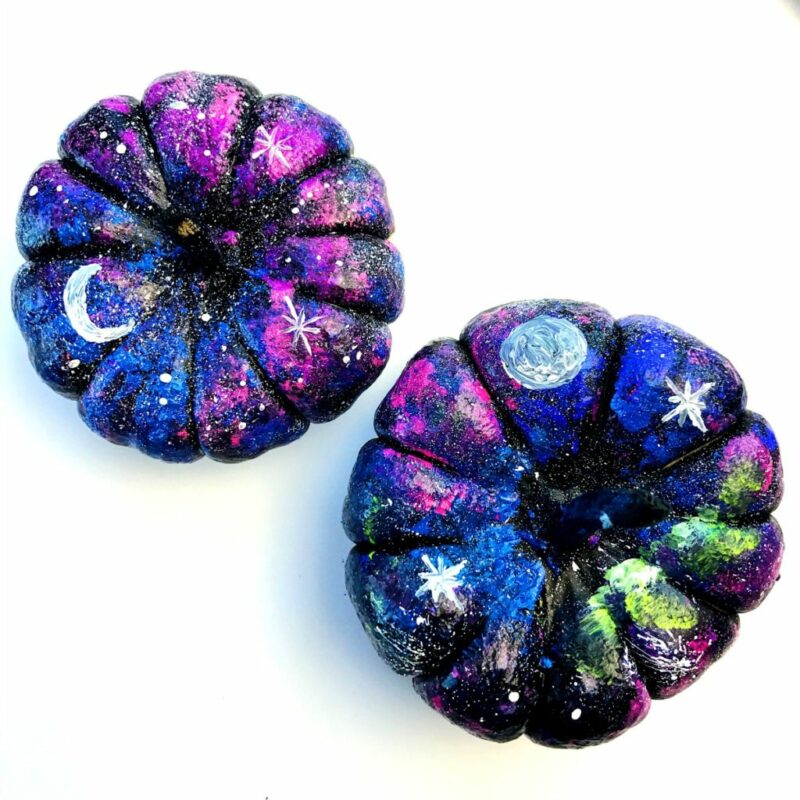
Source: Colormadehappy
I know you’re fond of colorful pumpkins; thus, adding a galaxy-painted pumpkin to your decor is a great idea. Isn’t it?
You can take inspiration from outer space and add it to the pumpkin. This pumpkin craft is for all age groups, from kids to adults. This pumpkin can be a great setup throughout the house and looks excellent, especially at night.
Note: You can apply this idea to all-sized pumpkins.
For this project, the prerequisites are:
- Craft paints
- Power drill and various bits
- Black pumpkin (fake)
- Christmas lights
Now, let’s dive into the steps to create this galaxy pumpkin.
- Start with a fake black pumpkin or paint the pumpkin with black acrylic paint. But I recommend the former to save time and effort.
- On the side, make a color palette of blue, teal, purple, and pink.
- Brush the shades of blue on the pumpkin, but don’t make it opaque. Use an old brush for this.
- Dab black paint here and there on the blue using a paper towel. Try to dull the blue shade without covering it.
- Make galaxies around the pumpkin by dabbing shades of blue onto each other. Let it dry completely.
- Now, use shades of purple to pink to dab them over the dried paint and let them dry completely.
- Pick the sponge brush and create a gold texture on the top of your pumpkin.
- Using a stiff paint brush, thin out a small amount of white paint and flick it onto the pumpkin to create stars. Let it dry.
Tip: Add sparkles onto the top to give a shiny effect.
Your galaxy pumpkin is ready to shine at night.
4. 3D Painted Pumpkin
Source: Heymishka
3D pumpkins look intimidating, but carving their intricate design can be daunting. If you’re looking for something different to design for your pumpkin this Halloween, here is an easy idea you can try.
To make this exciting 3D pumpkin, pick large pumpkins and get some chalk paint or matte spray paint and brushes.
Check out the steps to create a 3D look on your pumpkin.
- Clean the pumpkin thoroughly with water and use a napkin or tissue paper to dry it.
- Draw any design of your choice on the pumpkin.
- Using the puff paint, go over the pumpkin and let it dry completely.
- After the paint gets dried, cover the stem using masking tape and paint matte spray paint over the entire pumpkin. Let it dry.
- Apply another coat if required.
- Remove the masking tape.
Your 3D Pumpkin is ready to slay the Halloween party.
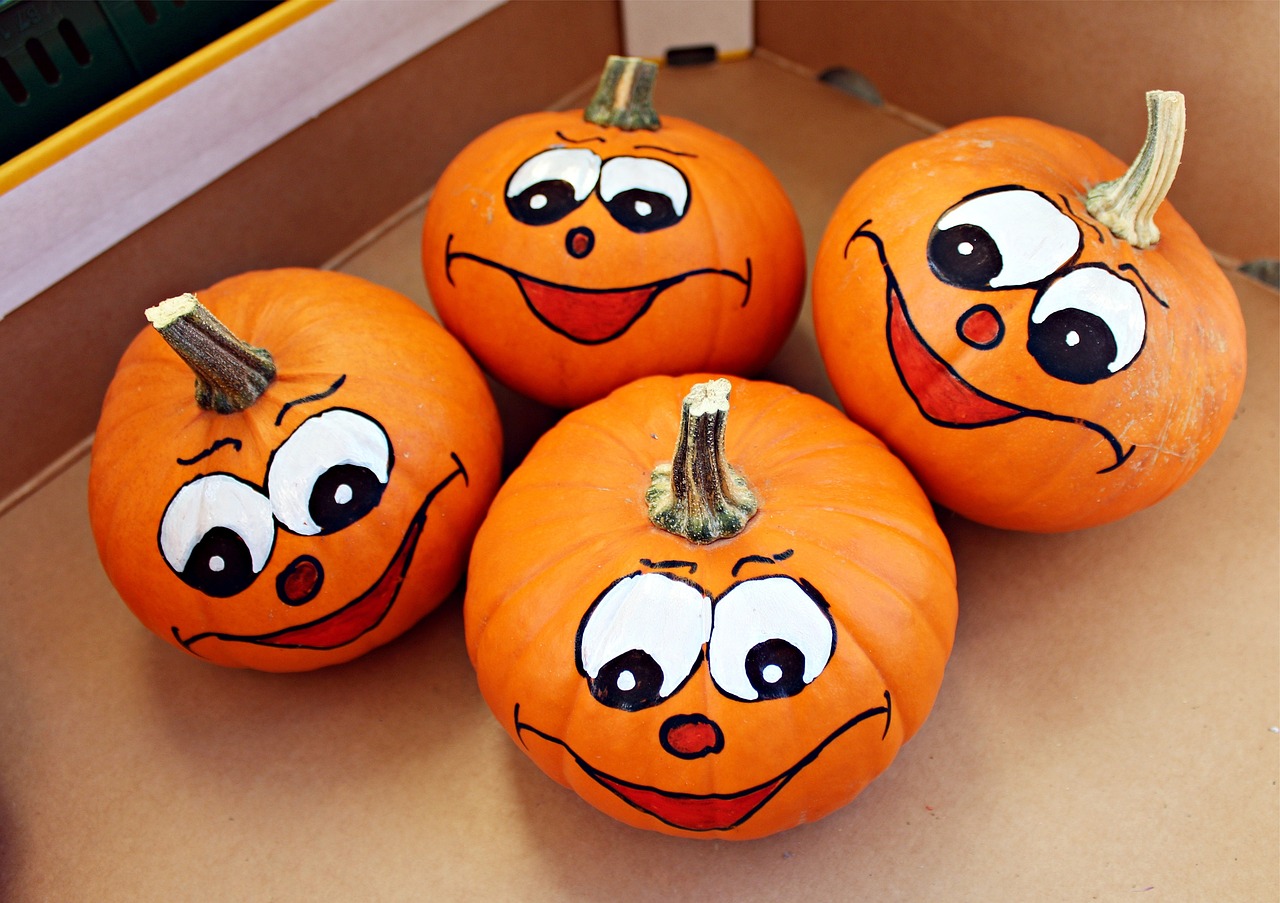
5. Goofy Faces Halloween Special Pumpkin
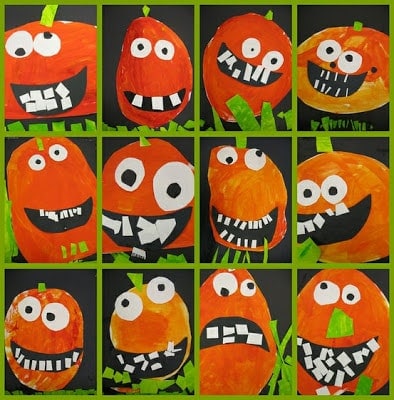
Source: Iheartcraftings
Kids like colorful things at their Halloween parties, so you can create these colorful pumpkins for them. You can draw goofy faces on the regular pumpkin, which looks like a clown.
For this pumpkin painting idea, you will only need a little stuff, except for many different colors and pumpkins.
The steps to follow are:
- Take a pumpkin and clean it thoroughly.
- Now, paint with the color of your choice. Apply two coats if required.
- Decide on a facial structure you want on the pumpkin and draw it using a sharp pencil.
- Use a black marker to go over the pencil.
- Lastly, fill the shape using different colors.
Tip: You can also stick artificial eyes and noses onto the pumpkin if you’re good at drawing them.
Your goofy face pumpkin is ready!
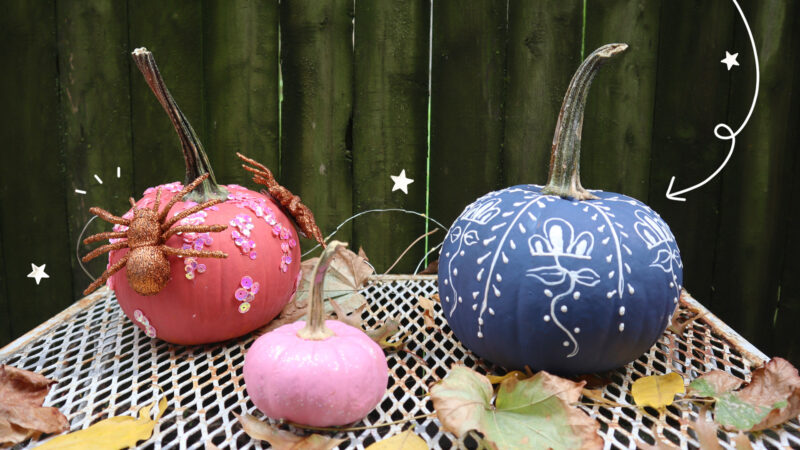
6. Metallic Two-Toned Pumpkin
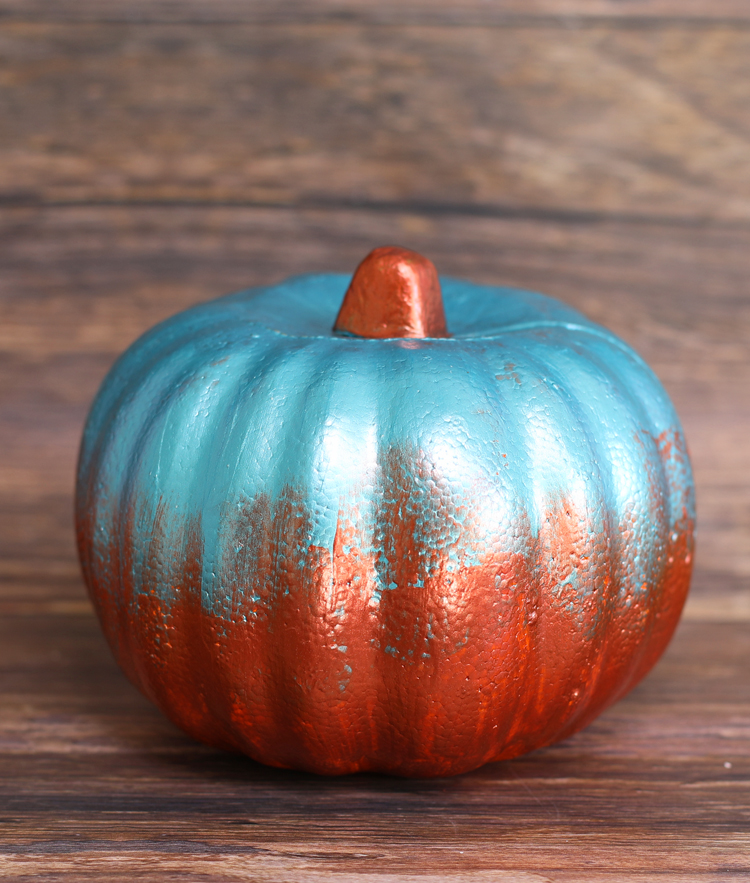
Source: Thecraftpatchblog
Metallic pumpkins look sophisticated and super glam but are super easy to make. The mix of a simple shade with a metallic color makes it shiny and rich.
You can try it with different color combos based on your home decor and even top it up with sparkle. These metallic two-toned pumpkins will serve as beautiful thanksgiving decor.
Note: This has a little finishing work; children might mess up with two colors. So, please do this on your own.
The prerequisites for this classy pumpkin are:
- Pumpkins
- Paintbrushes
- Metallic craft paint in two colors
After you get these things, follow the below-mentioned steps.
- Paint the upper half of the pumpkin using one of the metallic colors. Apply two or more coats to give it even coverage. Allow it to dry completely.
- Now, paint the below half of the pumpkin with another metallic paint. Feather the paint upwards at the intersection point of the two paints to give them a soft edge.
And it’s done. Your shiny metallic pumpkin is ready to dazzle.
7. Unicorn Pumpkin
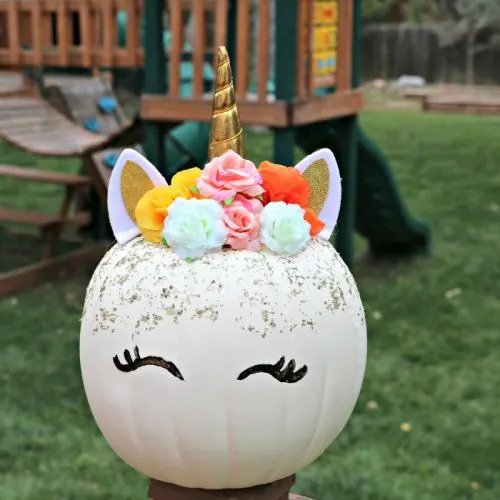
Source: Thedenverhousewife
Thanks to those childhood fairy tale stories, unicorns are an obsession for kids. From cake to dress and whatnot, everywhere you can find a unicorn.
So, why should we exclude them on Halloween?
I’ve got a classic mini-unicorn pumpkin painting DIY for you. You can add rosy cheeks, gold horns, eyelashes, or whatever you wish to make your pumpkin look cute in a unicorn look.
Moreover, these unicorn pumpkins can also be used as decoration after Halloween gets over as a little vase. You can fill them with fresh flowers and enjoy them as an evergreen decorative piece.
Unlike the last pumpkin painting idea, your kids will love to make these unicorn pumpkins, so get them along with you for this fun DIY.
To create this unicorn pumpkin, you have to gather the following.
- 3-4 mini/medium pumpkins
- Black & gold sharpies (or permanent pens)
- Fresh flowers of choice
- One medium-tip paintbrush
- Bobby pins or paper clips
- Pink & gold acrylic paint
- Model magic clay or similar
Once you gather this stuff, follow these steps.
- Pour the paint tube on the top of the pumpkin to create a dripping effect.
- Pull the dripped paint downwards using a paintbrush until completely coated. Allow it to dry, and apply a few more coats if necessary.
- Cut the opening in the center of the pumpkin around the stem and scoop out some seeds.
- Draw eyelashes on the pumpkin using a black sharpie.
- Use pink to brush a rosy cheek.
- Make a nose using a gold pen in the center of the pumpkin.
- Now, make a roll using clay to make a 4 inches long and a half-inch wide unicorn horn.
- Paint the horn with a golden color and let it dry for 30 minutes.
- After drying, insert a paper clip into the center of the horn.
- Trim the flowers and insert the center of the pumpkin to create the mane.
- Put the horn in the center of the flower using a bobby pin.
Your unicorn pumpkin is ready to fly!
8. Polka Dot Pumpkin
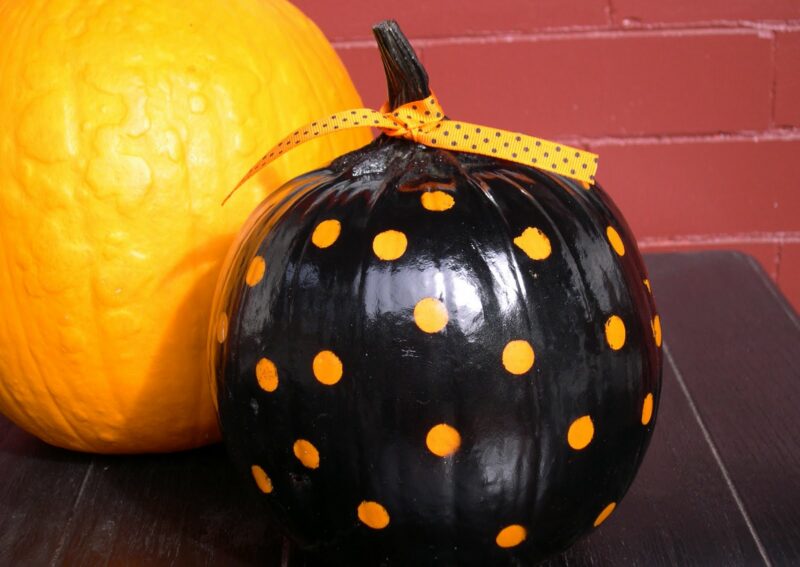
Source: Homestoriesatoz
The polka dot design looks super cool and adds fun to the decor. So why not get it on your pumpkin this Halloween? Polka dot pumpkin is fun to make, and you don’t need a lot of stuff.
You can try polka dots with different colored markers and make them match your decor. Kids love polka dot designs, and they will happily assist you in creating this.
All you need to create a polka dot pumpkin is:
- Paint colors
- Paint brushes
- Different color markers
- Pumpkin
Follow these steps after the supplies are ready.
- Paint the base of the pumpkin using the color of your choice. You can use spray paint or brush as per your choice and let it dry completely. I recommend spray painting here.
- Now, using a paint pen, draw equal-sized dots onto the pumpkin.
- Cover the entire pumpkin with dots, and don’t worry if they are all not perfect.
- Draw lines of different thicknesses and shapes along the lines divided in the section.
- Paint the stem in a brown shade.
- Lastly, go over the black lines again to give a finishing touch if necessary.
Enjoy your polka-dot pumpkin!
Tip: In all these pumpkin painting ideas, always use varnish at the end to protect the paint from fading or attracting dust.
Pumpkin Painting Ideas FAQs
-
What Kind Of Paint Do You Use To Paint A Pumpkin?
Ans: The best-suited and most durable paint is acrylic instead of oil paint. Acrylic paint is easy to use, dries up quickly, and is water-based, so you can easily wipe it off if it gets messy.
-
What Color Do You Paint A Pumpkin?
Ans: The choice of color will depend on the look you have decided to give your pumpkin.
-
Does Acrylic Paint Stick To Pumpkin?
Ans: Yes, acrylic paint sticks to pumpkins. It’s the best paint you can use to cover your pumpkin. This is because acrylic paints dry up quickly and stay longer.
-
What Are Some Easy Scary Pumpkin Painting Ideas?
Ans: With Halloween around the corner, here are some easy and scary pumpkin painting ideas you should try out.
- Spooky pumpkin kittens
- Punny painted pumpkin
- DIY faux bois pumpkin
- Starry galaxy pumpkin
- Batty pumpkin
- Black feathered pumpkin
- Triple eyed pumpkin
These are my top recommendations for scary pumpkin painting ideas.
Conclusion
There you go, art-fanatic peeps. Painting pumpkins is a fun DIY that excites kids and is equally appreciated by adults. You can decorate your regular pumpkin using different styles and designs, as I demonstrated above. The best part is that the pumpkin can also be complemented with flowers, unicorn horns, different facial structures, etc.
It’s easy and fun to do crafts that can serve as an exciting decorative pieces during parties, celebrations, or even a typical day.