How often have you picked a bracelet but could not wear it due to fit issues? The struggle to find the perfect bracelet size for your wrist is common. Hence, making your own adjustable bracelet is the best solution to the problem.
An adjustable bracelet allows you to create a comfortable fit that sits perfectly on your wrist. Besides, making your own bracelet is also a fun way to express your creativity.
So here is a step-by-step guide where you’ll learn how to make an adjustable bracelet that is stylish and functional. I’ll also share additional information about the tools you’ll need, mistakes to avoid, and more that make following the guide easy for beginners and advanced crafters. So let’s get started and make a beautiful adjustable bracelet that fits you perfectly.
Table of Contents
- 1 How Do Adjustable Bracelets Work?
- 2 How Do You Make An Adjustable Cord For A Bracelet?
- 3 Tools & Materials You’ll Need To Make An Adjustable Bracelet
- 4 How Do You Make Your Bracelet Adjustable Step By Step?
- 5 Mistakes To Avoid While Making Adjustable Bracelets?
- 6 Making Adjustable Bracelets FAQs
- 7 Conclusion
How Do Adjustable Bracelets Work?
Usually, adjustable bracelets work by using a sliding knot mechanism. An adjustable bracelet has two sliding knots, one at each end of the bracelet, which can be moved back and forth to adjust the size of the bracelet. When you pull the knots closer to each other, the bracelet becomes smaller, and when you pull them apart, the bracelet gets bigger, letting you fit the bracelet as per your wrist size.
Some adjustable bracelets have clasps that allow you to adjust the size according to wrist size.
Related: How to Make Pura Vida Bracelets? Video Tutorial
How Do You Make An Adjustable Cord For A Bracelet?
There are two best ways to make an adjustable cord for bracelets: with a double knot or with a sliding knot. I’ll explain both procedures in detail in the upcoming section, so keep an eye on that.
Tools & Materials You’ll Need To Make An Adjustable Bracelet
You need very simple tools to make an adjustable bracelet. Here is the list of all the things you’ll require:
- Thread of your choice (spandex is usually the best to make adjustable bracelets)
- Scissors
- Beads & charms of your preference
That’s all you need to make an adjustable bracelet. All the things are easily available in any craft store, or you’ll find them online as well.
Related: String Bracelet Patterns for All Levels and Their Meaning
How Do You Make Your Bracelet Adjustable Step By Step?
I’ll share two ways to make an adjustable bracelet. Let’s learn both easy procedures.
Method One: Making An Adjustable Bracelet With Sliding Knots
Step One: Prepare & Measure The Cord
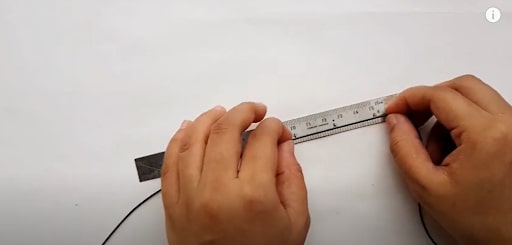
Take the thread roll and wrap it around your wrist four to five times or you can use a ruler to measure the thread length. You can wrap it a couple of times more if you want your bracelet to be thicker. Cut the cord but make sure to leave at least 10 inches extra than the wrist size. You want to have enough threads left while tying the knots at the end.
Step Two: Insert The Beads
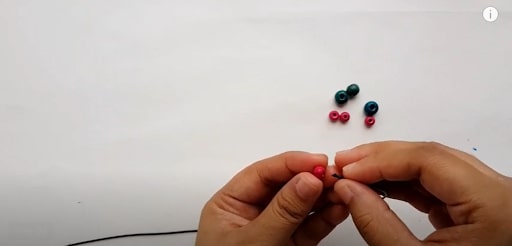
Take decorative beads of your choice (wooden or metal) and insert them into the cord. Don’t overfill with beads. You should leave enough space toward the end of the strings.
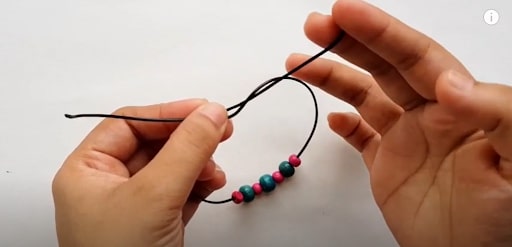
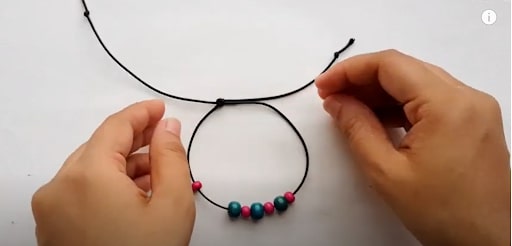
Step Three: Make A Large Circle & Form A Loop
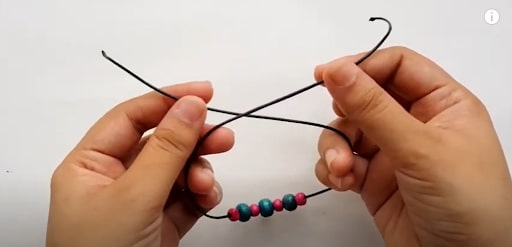
Form a large circle by crossing both ends of the thread. The circle should be bigger than your wrist size. Also, leave enough thread on both ends of the threads.
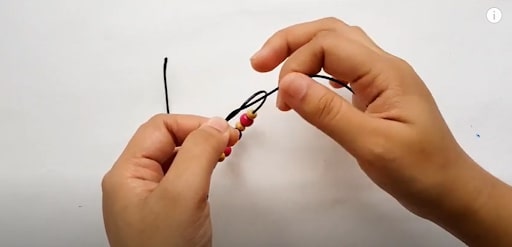
Secure the knot by holding it firmly with your thumb and index finger of one hand while supporting the thread with the index finger of the other hand.
Hold the overlapping point firmly, take any one end of the thread, and wrap it around your fingertip to make a loop. Now pull the looped end of the string through the main or larger ring you made earlier.
Now pull the looped end of the string through the main or larger ring you made earlier.
Related: 10 Cool Friendship Bracelet Patterns – For Beginner To Advanced Crafters
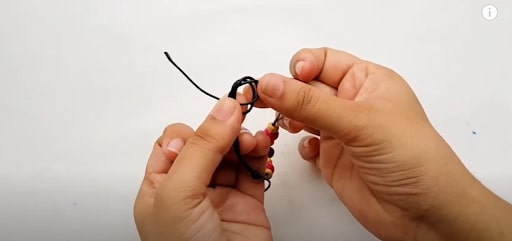
Step Four: Make The Second Loop And Tie A Knot
Make another loop with the same string and in the same manner. But this time, you’ll pull the open end of the string through the loop from left to right.
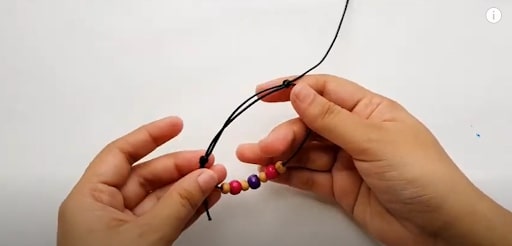
Step Five: Pull Both Ends & Finish Up The Bracelet
Pull both ends of the thread to tighten the knot. When you tighten the knot, you’ll see that one end of the string is adjustable. You can pull it closer or apart to make the bracelet small or big. Tie knots at the end of both open ends of the string to finish up the bracelet. And you now have your adjustable string bracelet ready.
Related: 8 Amazing Clay Bead Bracelet Ideas You Must Try
Method Two: Making An Adjustable Bracelet With Double Knot
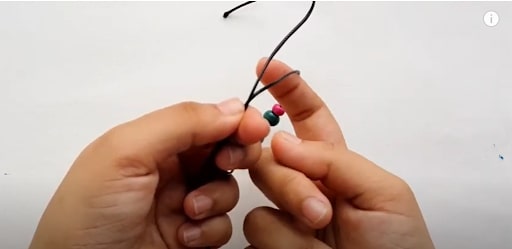
Step One: Measure The Cord & Insert Beads/ Charms
The first two steps of measuring the thread and inserting beads will be the same as the previous method. Make sure to push the charms to the center of the cord.
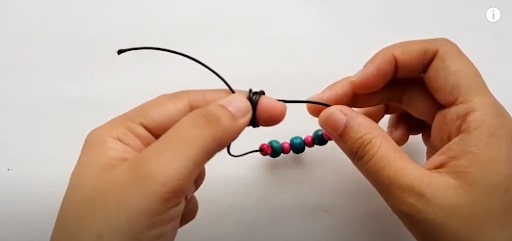
Step Two: Make A Large Circle & Tie The First Knot
This step is also similar to the previous method. You have to make a large circle with the thread, which is bigger than your wrist size. Make the circle in a way that both ends of the thread crosses or have open ends. It’s time to make the first knot following the same loop technique I mentioned earlier. But this time, you should have a closed end on the right side and an open end on the other side, as shown in the picture below.

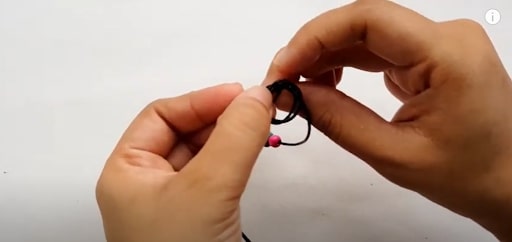
Step Three: Make The Second Knot
Take the open end of the string to tie the second knot on the left side. Please note that you’ll follow the same knotting technique for all knots.
Both knots are adjustable, and you can make the bracelet smaller or bigger by pulling the open ends of the strings. Trim the open ends of the strings if they are too long and tie knots to secure them.
If reading the tutorial seems a little confusing, you can watch this video tutorial on making adjustable bracelets.
Related: Matching Bracelets Ideas & Meanings: All You Need To Know
Mistakes To Avoid While Making Adjustable Bracelets?
Here are some common mistakes to avoid, so you can ensure your adjustable bracelet turns out perfect:
- Don’t start making the bracelet without measuring the cord. It’ll create issues with the right fitting. You should have a clear idea of how much cord you need.
- Make sure to practice the knots before you start making the final bracelet. This will save you time and make you more comfortable in the craft.
- Not choosing the appropriate cord is a common mistake crafters make. To make an adjustable sliding knot, you should choose a thread that is a little stretchy to make the knots easily and while it is strong enough to hold the weight of the beads.
- Don’t pull the knots too tight because it makes adjusting the bracelet size difficult. There should be enough space for the knots to be adjusted later on.
Making Adjustable Bracelets FAQs
- What Is The Best Material to Use for Adjustable Bracelet Strings?
Spandex or elastic cords are the thread materials to use for adjustable bracelets. These threads are durable and smoothly pass through beads.
- What Is A Sliding Clasp & How Does It Work?
A sliding clasp has two metal tubes. One of the tubes passes through the other and clips it into place. It’s a common closure used for bracelets and necklaces.
- Can I Use The Same Sliding Knot Technique to Make An Adjustable Necklace?
Yes, you can use the same technique to make an adjustable necklace as well.
Conclusion
Making an adjustable bracelet is super easy once you learn the right knotting technique. Make sure you use the right cord, use some beads or charms for a stylish design, and take time to tie the knot well. By paying attention to these details, even beginners can make beautiful adjustable bracelets!