A few years ago, I moved from a larger home to a smaller space, so I had a challenge in front of me when trying to find how to organize my craft supplies in a small space. I thought I’d share some tips if you are dealing with a craft space that also serves another purpose (bedroom, guest room, office, or nursery). I also have a dedicated article on the best sewing tables for small spaces.
I was very overwhelmed at first with all of the miscellaneous boxes of craft supplies. Those of you who have moved can probably relate! My craft supplies storage has to share the space with my coats and shoes in my new apartment. The bedroom doubles as a guest bedroom and my office, so I had a challenge when it came to organizing. But I am here to tell you, it can be done!
Craft supplies can quickly take over a room if not organized properly. Here are some tips for organizing craft supplies in a small space:
- Create designated storage areas for each type of craft supply. It will make it easy to find what you need when you need it.
- Invest in sturdy storage containers or boxes that can be easily moved around.
- Use vertical space to store supplies by mounting shelves on the walls or hanging racks.
- Label everything, so you know what is stored where.
Craft Room Organization Tip #1: Utilize Vertical Space
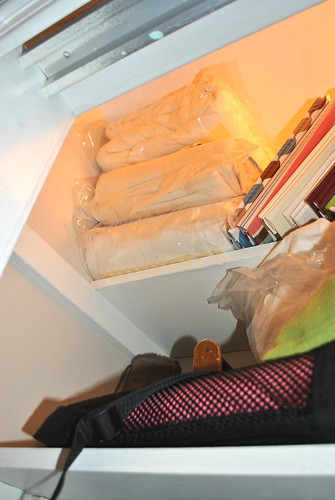
Store items as high as possible to use all of your vertical space, specifically for items you don’t need to use daily. As you can see here, I stored several packages of quilt batting and some scrapbook albums on the top shelf of my closet until they touched the ceiling.
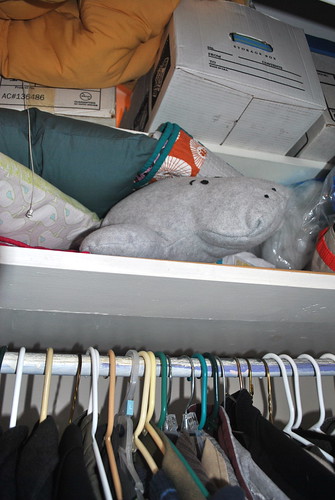
If your closet doesn’t have shelving above the hanging racks, see if you can add some. They are great for storing boxes of supplies or handmade items that you don’t need to have in easy reach.
Craft Room Organization Tip #2: Use Hanging Storage

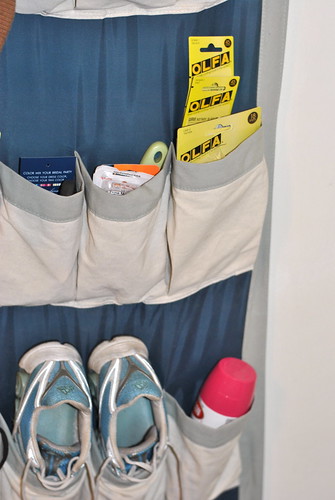
The back of a door is a great space to use a hanging shoe rack for shoes (if you need it) and small sewing or craft notions like replacement rotary blades or sewing needles.
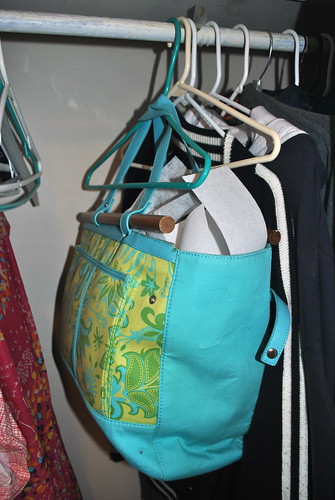
I happen to keep all of my interfacings in this bag. Since my cats like to lick the adhesive side, I now hang the bag on a sturdy plastic hanger in the closet, so it doesn’t take up precious floor or desk space. And also, the cats don’t mess with it here!
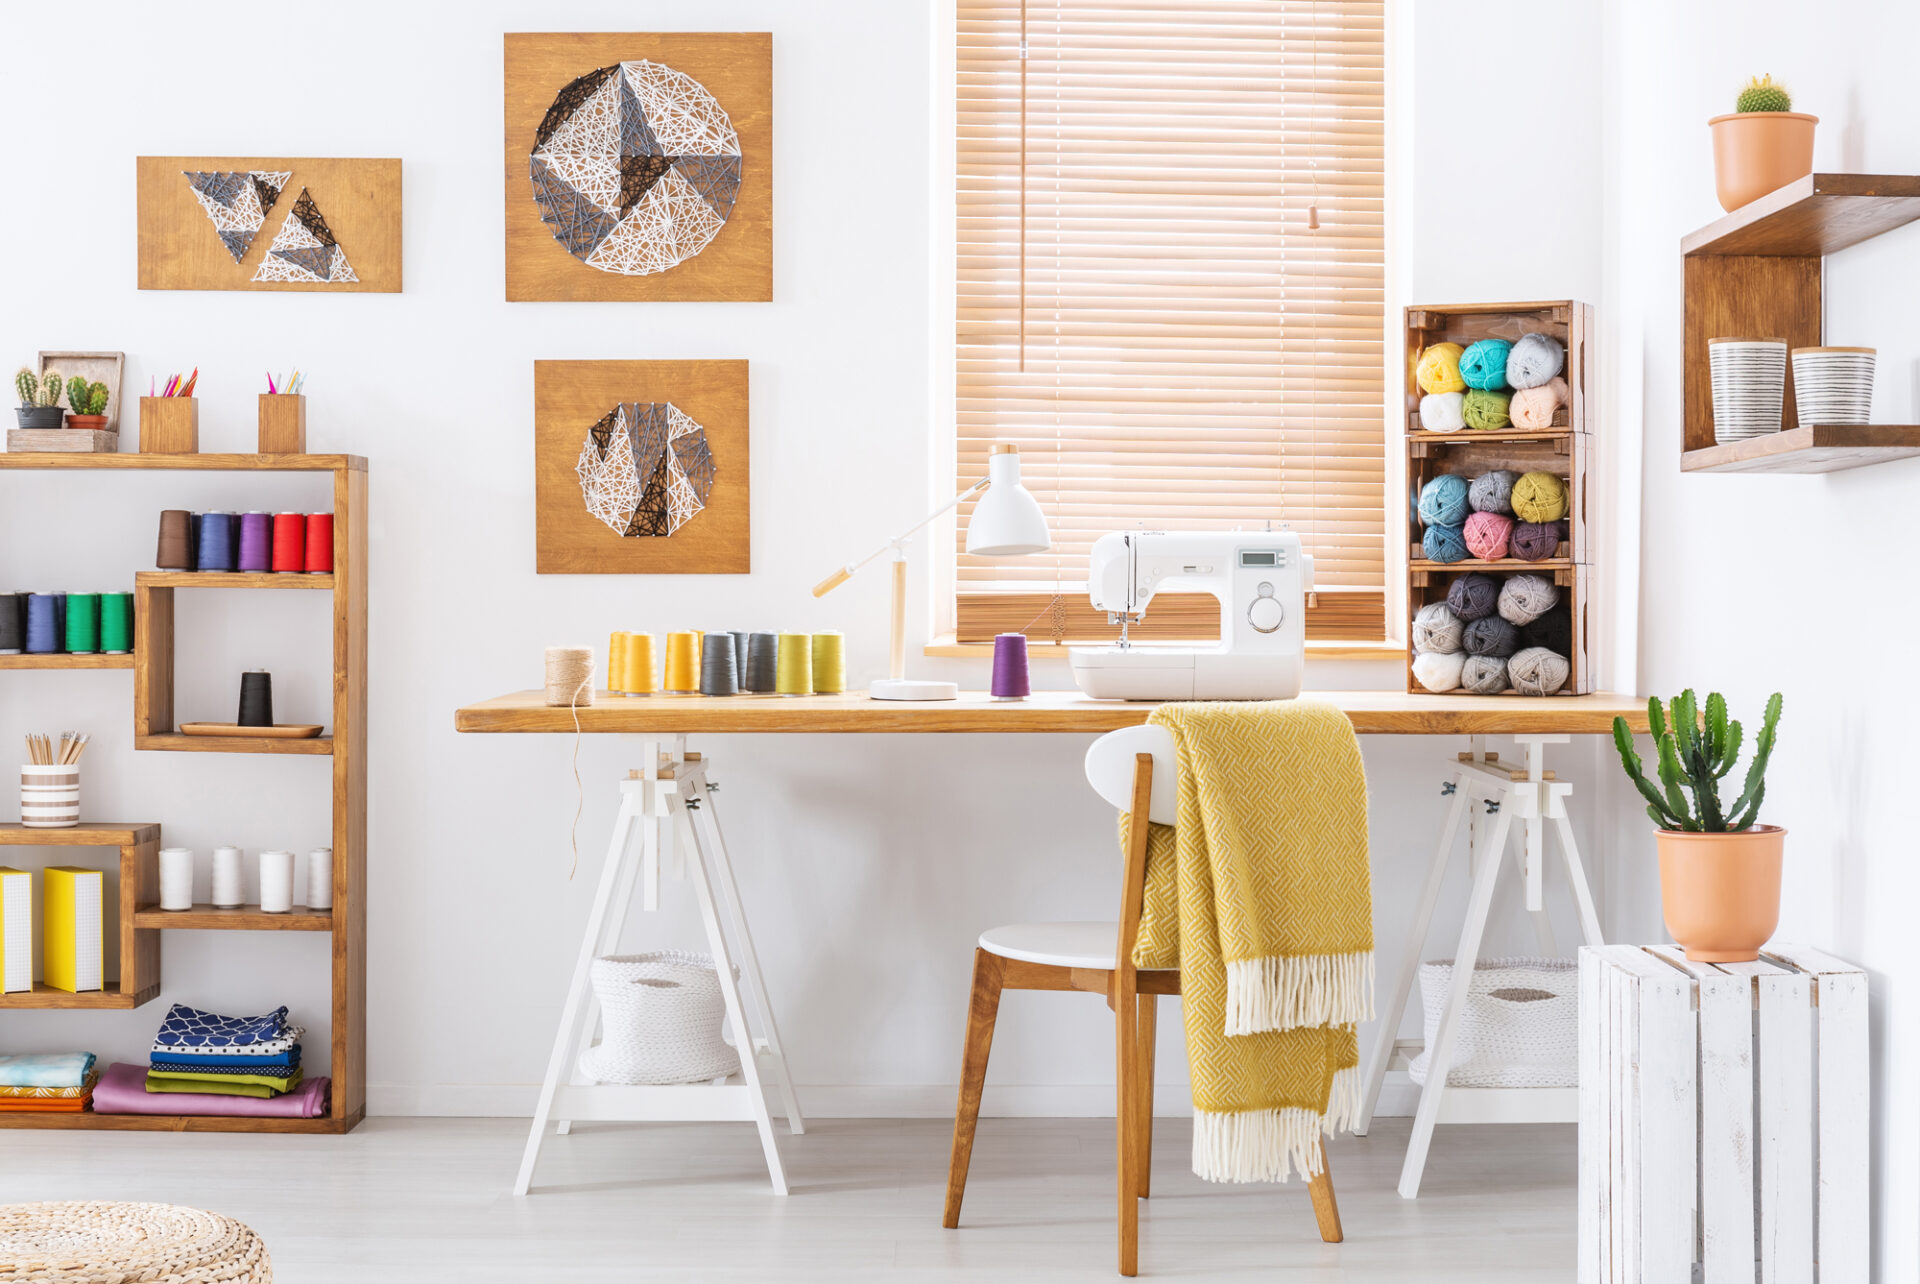
Craft Room Organization Tip #3: Finding the Right Desk(s)
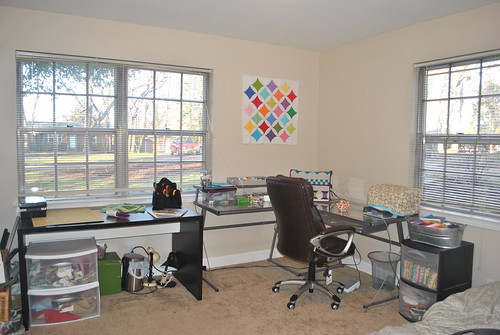
My husband decided he didn’t want to use his office desk anymore, so I inherited it as a lovely cutting table (left). I also have an L-shaped desk that is great for my sewing machine and thread collection. I can easily swivel my chair from one side of the desk to the other, so it’s great for multitasking.
When you choose a chair and desk for your craft room, think about what you will be doing the most and try to find a workspace to accommodate your biggest needs, whether that’s storage, surface area, or both.
Craft Room Organization Tip #4: Put It Away

I know this will make me sound crazy, but I am a quilter who doesn’t own an ironing board. I mostly just use this portable ironing station, made from an ottoman cushion that I recovered. You can toss it right on top of your cutting station or use it on the floor, and it takes up much less space than an ironing board! It’s easy to pull out of the closet along with my iron when I need it.
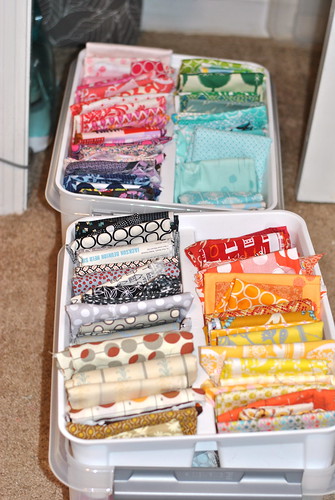
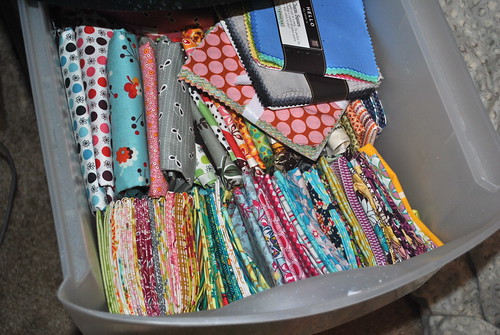
Since I don’t have a large cabinet for fabric storage, I opted for these plastic tubs that I can easily slide in or out of the closet. My fat quarters and large scraps are all on the top layer, and smaller scraps are separated by color in the bottoms of the tubs. It’s really helpful to put them away when we need to use the room as a guest bedroom.
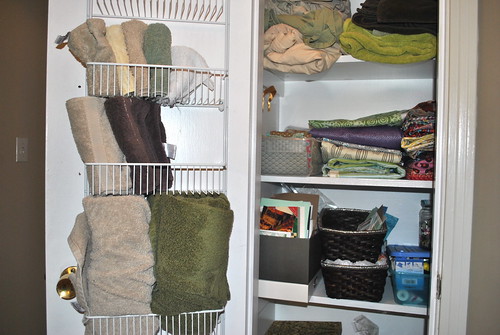
Our linen closet was originally filled with towels and sheets, but then I realized I could clear up a few shelves by rolling the towels and storing them in the door. (Again, gotta love back-of-door storage solutions!) I stored my large cuts of fabric, scrapbooking, and jewelry-making supplies in the linen closet, just around the corner from the craft room.
Plastic storage drawers are an excellent bang for your buck for storing fabric, yarn, or other craft supplies. The bins with wheels on the bottom are great for creating a portable workstation if you like to work out of more than one room. Also, look for under-bed storage boxes if you can use them.
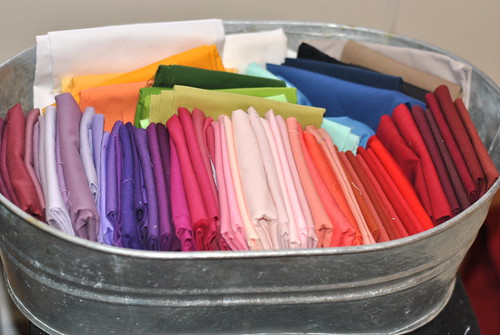
You can also raid your garage or tool closet for storage solutions, like this excellent aluminum basket I picked up at a garage sale for 50 cents.
Craft Room Organization Tip #5: Cover It Up
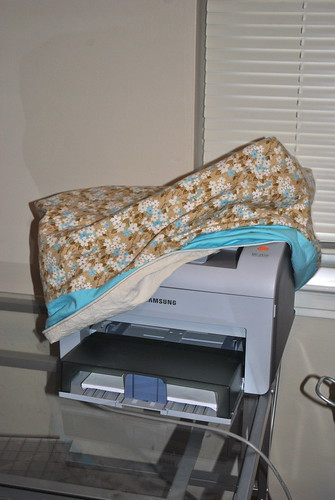
I covered our computer printer with this handmade cover, so it’s less obvious that this room doubles as an office. If your craft room is a multi-purpose room or office, consider covering more oversized items (like a computer monitor) and storing smaller items (like pens and paper clips) in storage bins.
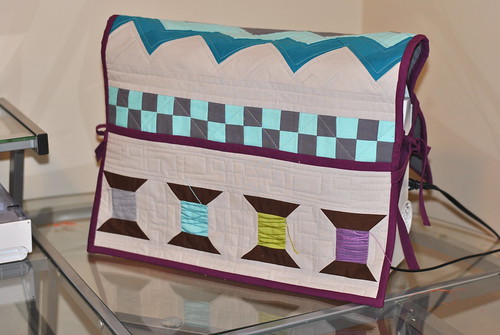
Here’s my sewing machine cover, which I received in a swap and absolutely love! It’s incredible how covering up your machine can make a room look much more “pulled together.”
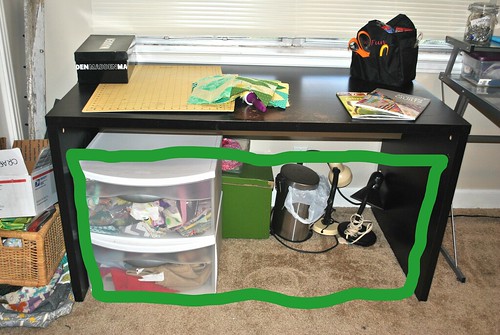
Finally, consider adding a curtain under a desk to hide miscellaneous craft supplies. Use a tension rod and add some fabric to make a hiding place for your works in progress! It is my plan for the bottom of my cutting table.


8 comments
I don’t quilt, but I do sew quite a bit and I don’t own an ironing board either! We’ve never had the space for one. I made an ironing mat that I use on the dining room table or floor. It is a hassle sometimes, but sometimes it’s nice to not have to wrestle with a huge board.
Great topic. Label your containers. I think I’ll remember where stuff is, but I don’t. And when things are opaque, it is trouble. I use masking tape and a sharpie. It saves digging when you are looking for that little pack of something. I also use lots of zip lock baggies to store things inside my tubs.
Aww, bless, I love what you think is a small space, the UK would kill you lol I have tons under my desk and under my cutting table, and my walking space is not even 1 yard by 3 (and some of that real estate is actually taken up with an ironing board that I can’t be bothered to put away ;o) ) I used one of the tall DVD racks from Ikea for my fat quarter storage, they’re the perfect size space for FQs, I can see what I have, and it doesn’t look too out of place next to the ones containing DVDs!
Can’t wait to show you my new storage area once it’s complete. It will be separate from my sewing space with shelves to hold bolts of fabric and organized yards.
I’m so excited about it. Hopefully in the next 2 weeks it’s done.
Great tips! My sewing room happens to be in the family room of our house, so no closet storage or a door to close it off as a separate room. The other challenge this room presents was a wall with floor length windows on each side of an ugly brick fireplace. I went for using as much vertical storage as possible on the 2 walls available. I was able to find various second hand IKEA cabinets and shelving units that are keeping my stash organized. I have see-through plastic lidded containers (some are rubbermaid… many are recycled salad greens containers) that hold assorted notions as well as scraps. A homemade design wall now covers the brickwork and makes that wall useful to me (since we never use the fireplace, it’s great to have it usable for my sewing ideas). My sewing room is the best organized it’s ever been and that makes a huge difference in productivity! lol
I think it’s worth being patient to determine what needs you have in your sewing room and to know that you can have a great space without spending big bucks.
Here’s the link to my sewing room update:
https://sewmesomethinggood.blogspot.ca/2013/02/my-sewing-room.html
One of the best organizational ideas I have is to sort my supplies by color. My colored pens, markers and pencils are sorted by color into various white coffee mugs I purchase at the thrift store for five cents each. Things like ribbon, embroidery floss, glitter, paint, and other supplies are stored in plastic shoe and sweater boxes with white tops–again sorted by color. I use a heart punched out of a scrap of colored cardstock taped to the outside so I can quickly tell the contents. The same with my scrapbook papers and cardstock. They are sorted into plastic sleeves by color–full sheets, scraps and patterned. Other supplies and tools are also in plastic boxes and I use a dry erase marker to label them.
My second “secret weapon” is five 6 feet by 30 inch five shelf bookcases purchased from Walmart. The craft supplies and craft how-to books are stacked on three bookcases in my bedroom. When I am not working I have white eyelet curtains I draw across the shelves to hide them. I have two more bookcases in the living room and my scrap book supplies and photos are on the bottom two shelves of each. I made curtains to hide these too.
My fabrics are sorted into cardboard banker’s boxes with lids. I’ve sorted them this way: neutrals, darks, whites, and interfacings and battings. They “live” on my laundry closet shelves.
I have my sewing machine on a small folding table and when I’m not working on a project the table folds down and the machine itself “hides underneath my treadle machine cabinet behind a quilt that drapes the top of the cabinet.
When I need to work standing up, I have a bridge table that I set up and place bed risers underneath to bring it up to a comfortable working height.
Because I’ve had double knee replacements and can’t get down on my hands and knees, everything I use on a regular basis in stored at waist height or above. Seldom used items are stored below waist level.
Because space is tight, my laptop lives on a rolling cart that can move between my bedroom and living room. I have a narrow granite table that sits in front of my bedroom window. To the right sit three black two drawer filing cabinets.
My next goal is to scan many of the articles I’ve clipped from magazines to eliminate as many of those cabinets as I can. PinInterest is helping me with that goal. I gave myself a Kindle Fire for Christmas 2012 and whenever appropriate I download new book purchases instead of buying the books. Living in a small apartment digitizing information is a blessing for me.
Most of my organizers come from Walmart, The Dollar Tree, and thrift stores. I sometimes receive free stuff from friends too. I keep a running list of what I need so I can be on the lookout for things I need at the best possible price.
I recently moved myself…I only have one more box to unpack. I’ll share pictures when I get out for a camera battery.
What killer tips! Thank you, Fran!
I have a sewing room with 4 windows, I bought a few tension rods at my local goodwill store and use them on my windows to hold ribbon. I also purchased some circle hooks with a clasp and hang the pattern that I’m working on clipped to it. I made some adorable little fabric baskets with a button loop and hole and of course a button, to hand on the rods and store my threads, small scissors and notions in them. Hope this helps.