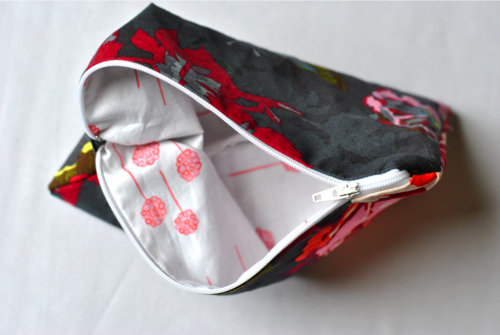
Have no fear of the zipper! This lined zipper pouch tutorial will show you just how easy it is to sew a zip-bag to store your goodies. When you don’t need to carry everything with you, replace your purse with a simple zipper clutch and store your keys, cards, and cash! When you are done, you can use this same method to create a zipper pouch in various sizes based on your needs.

Table of Contents
What do you need to make a zipper pouch?
– 2 fat quarters (18”x22”) of cotton quilting fabric — buy it here
– 9″ zipper — buy it here
– Sewing machine with a zipper foot — buy it here
– Optional: medium-weight fusible interfacing — buy it here
Also, make sure to check out my new tutorial > Reversible Sewing Machine Cover

Zipper pouch Finished Size
9-1/2″ long x 6-1/2″ tall
All seam allowances are 1/4″ unless otherwise noted.
Cutting
From outer fabric, cut (2) rectangles 10″ x 7″ and (2) zipper tabs 1-1/2” x 3”.
From lining fabric, cut (2) rectangles 10″ x 7″.
Assembly
Fold zipper tabs in half widthwise to make a square shape. On the right side of the zipper, position the fold of one zipper tab so it just overlaps the metal end of the zipper—Center and pin in place.

Position the other folded zipper tab, so the fold just overlaps the edge of the zipper pull. Again, center and pin in place. Note: Turn the sewing machine slowly with your hand when sewing close to metal parts so as not to break a needle.

Using the zipper foot, stitch zipper tabs in place with a horizontal line along the folded edge, about 1/8” from the fold. Avoid metal parts as you sew. Test zipper to make sure tabs do not interfere with zipping.

Your zipper should look like this with both of the tags attached.
Center zipper edge to pouch front, so right sides of pouch and zipper are facing. Pin edge of the zipper to the raw edge of the top flap.

With the zipper on top, stitch 1/4” from the pinned edge.

Stack the clutch back on the clutch front, right sides facing, and pin the raw edge of the clutch back to the free edge of the zipper and repeat stitching.

This is what your pouch front should look like when opened.
Now, it’s time to attach the lining!

Layout the zipper pouch with the fabric wrong side up. (In the picture above, one outer fabric panel is folded back.) With the wrong side of the lining facing up, pin the right side of the lining to the exposed zipper edge, as pictured.

When you fold back the lining, you should see: the right side of the lining fabric. Stitch 1/4” from pinned edge to attach the first lining panel.

Now, repeat this process to attach the second lining panel to the exposed zipper edge. Pin the lining right side down against the raw edge of the zipper, and then stitch 1/4″ from the edge.

This is what the lining panels will look like when they are sewn. You should see the back of the zipper and the right sides of both lining panels.

Leave zipper unzipped, and pin together with the right sides of the clutch body, making sure to align the top strips. Pin together the right sides of the lining pieces.

Stitch 1/4” around the perimeter of both body and lining, leaving 4” open at the bottom of lining for turning.

Through the opening you left earlier, carefully turn the bag inside out. Push the lining inside of the bag and smooth out the corners. Press the pouch and hand-stitch the lining closed.

Enjoy your new lined zipper pouch! Wasn’t that easy? If you make this pattern, we’d love to see it on Facebook

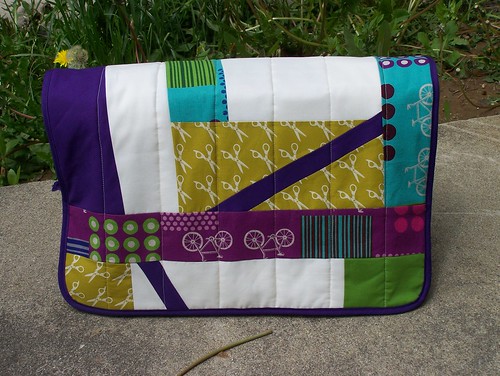
Once you are comfortable with this simple zippered pouch, try out the quilted version: e-Reader Sleeves: iPad or Kindle Cover Pattern.


30 comments
I made this in 15 min. with scrap and a bargain bin zipper. Awesome little tote for my little buddy’s yoys.
So glad to hear it, Nickol! We’d love to see your pouch if you have a photo… glad you found it so easy and quick to make!
What a great pouch and tutorial! Thanks so much for posting 🙂
This is so cute Lindsay! I’m still slightly terrified of zippers, but this tutorial makes me feel more confident. I need to make a few this week!
I love this pouch it was so easy to make thank you for teaching us how to do it
you can do this much faster and easier by attaching the lining and outer face that are on the same side of the zipper, at the same time. rather than sewing first the outside and then the lining, you just sew twice, and do one piece of lining and one piece of outside at the same time. hope that makes some sense…
Thanks for this great tutorial, I have used it to aid me in creating a couple of printable pencil case patterns on Spoonflower and have mentioned your blog in the description which can be seen here (https://www.spoonflower.com/designs/2301183). I hope this is ok,
All the best,
Candy
Yes, that’s great! I found the correct link: https://www.spoonflower.com/fabric/2286150
Do you have any tips on how to deal with the tabs when you are sewing the sides together? I am having trouble making the top corners with the tabs “look” right. How much space between the side edge and the stitch line should there be? Thanks!
I second that–I was thinking the same thing.
Thanks for the instructions, Lindsay. I just made this in a Marimekko fabric and lined it with flannel. I posted my photos but I’m not sure how to link them to this page.
photos here: https://www.flickr.com/photos/108906874@N02/
I did it!! I only used some muslin and fleece for the lining, but I made it and it works (zipper that is). Sure doesn’t look like anything fancy but I now understand the technique involved. I’d like to get some nice fabric and try again. Main reason I tried this project is to see how the zipper pouch is made and then see if I can transfer the technique to other bags I plan to make.
Thank you for a good “beginner” project.
Mt_Top
(60+ y.o. male, learning to sew)
That’s awesome! So glad you found the tutorial helpful. Stay warm and you could always consider reusing some clothing as fabric (plaid shirts, for instance, make great bags!).
Thanks for the tutorial. I made two of different sizes and rounded bottom edges.
Thanks for the great instructions. I have a whole tub of oriental fabrics and want to make slightly smaller pouches to give with the super “Flexi-clips ” I am selling!! Many thanks! Might sell the pouches to others too, if I get good at it :>)
Love this tutorial. Can’t wait to make these as gifts for my daughters and their friends. What is the beautiful fabric you used? Just love the pop of the flowers against the grey background!!
Melissa, it’s Anna Maria Horner Loulouthi.
What brand is the butterfly fabric? Adorable pouch and beautiful fabric!!!
Anna Maria Horner Loulouthi
Perfect basic pattern! I would like to topstitch the zipper. Would that be a problem?
That would work great!
Love it! Just finished one made with strips of fabric that I had left over from a project. I have lots of strips I am going to sew together to make some more. Thank you.
Thank you Lindsay for a very helpful tutorial. I’ve been looking for a simple instructions on how to sew lined zipper bag for awhile already.. and I managed to make one pouch tonite from your easy to follow instructions. Thanks again!