One of the first of many embroidery stitches that a needlework enthusiast learns is the chain stitch. That’s because it’s a simple stitching technique with a beautiful effect. It’s an ancient embroidery technique that has remained relevant even in contemporary fashion. So, if you want to learn how to do an embroidery chain stitch, you’ve come to the right place!
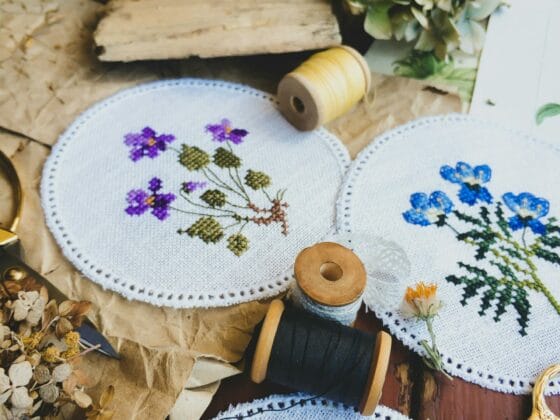
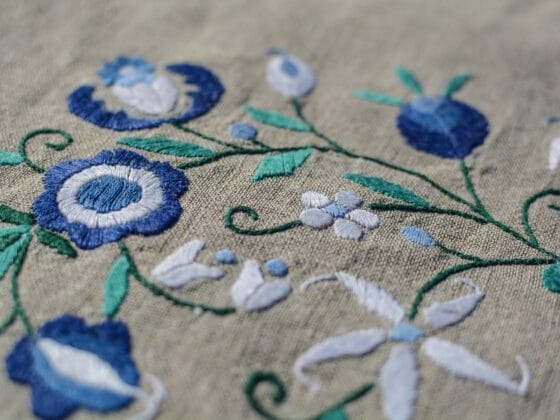
As the name suggests, chain stitch embroidery creates a chain-like look with interconnected loops. It makes outlines and borders appear fancy. But you can also use the chain stitch and its variations creatively for curves and to fill large design areas for a unique texture.
What’s interesting about chain stitches is that they create a rather intricate look and texture, even though they’re elementary stitches. Now, let’s find out about this functional decorative embroidery technique.
Table of Contents
History and Origin of the Chain Stitch
Chain stitch embroidery’s history dates back to the 14th century BC. It was found on textiles in Pharaoh Tutankhamun’s tomb in Egypt. Later, traces of this stitch were also discovered in Pazyryk’s tombs in Siberia. Believed to have originated in China, this sample dates back to 3rd-4th century BC.
The technique was likely in use during the Warring States period (3-5th century BC). Archaeologists have found evidence of chain stitch embroidery using silk in China dating back to 1100 BC.
Experts have found evidence that this stitch was widely in use in China till the T’ang dynasty near the end of 1000 AD.
From there, chain stitch embroidery reached Iran through the Silk Road.
Archeologists and researchers have found that this embroidery style was popular in Berenike in Egypt (4th century) and Mammen in Denmark (10th century). In the medieval period, it was used in embroidery whitework in German lands.
The chain stitch features in the 14th century Syon Cope, the luxury embroideries hand-made in England.
Between the early 16th and mid-19th centuries, the Mochi community of Gujarat in India used the chain stitch extensively. The designs were so elegant and luxurious that even the members of the Mughal court wanted to wear them.
Even the East India Company exported the Gujarati chain stitch work to the West between the 16th and 18th centuries.
The technique became a part of the 17th-century Jacobean crewel work. By the 18th century, it was heavily used in the American Candlewick embroidery.
Where Is Chain Stitch Mostly Used?
Chain stitch embroidery is a technique for decorating the fabric surface. It’s useful in creating outline stitches near the seam. It can also effectively form curved designs, which is why it’s used for “drawing” designs.
You can use chain stitches in many ways, like filling designs and making flowers and petals. Chain stitch is an excellent choice for embroidering tambour and needle laces. It is also used in other types of crafts, outside embroidery, such as macrame and crochet.
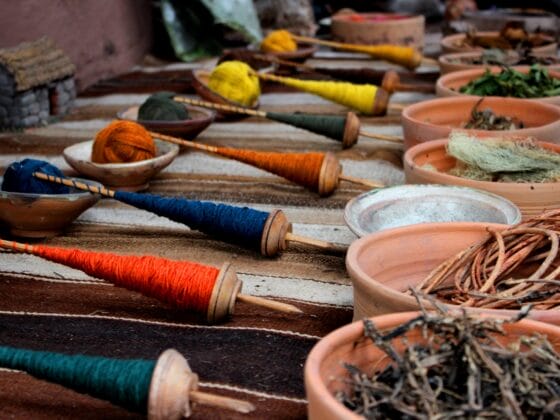
Materials You Need to Chain Stitch
To make your chain stitches, you need a few basic supplies – needle, thread, and fabric. Since this stitch is extremely easy and versatile, you will hardly need any specialized tools or materials.
Selection of Needles for Chain Stitch
Chain stitch embroidery involves one of the elementary stitching techniques. You can use an embroidery needle, also known as a crewel needle. These needles come in sizes ranging from #1 to #12 – #1 being the largest and #12 being the smallest needle.
The thicker the fabric, the larger the needle should be. As a beginner, a variety pack with needles of 3-9 sizes is sufficient. You’ll need a tambour hook to try tambour lace embroidery – or a ballpoint or tapestry needle for needle lace embroidery.
What Is the Best Thread for Chain Stitch Embroidery?
Employ any thread commonly used in hand embroidery for your chain stitches. Six-stranded cotton thread, also known as embroidery floss, is quite popular for this stitch. You can also use Perle cotton thread for a slightly raised texture.
For an even more dramatic effect, you can go with wool embroidery threads for chain stitches. Even silk or metallic threads can be used, especially for tambour lace embroidery. Increase the number of strands, depending on the look and effect you want.
How to Do a Chain Stitch Step-by-Step
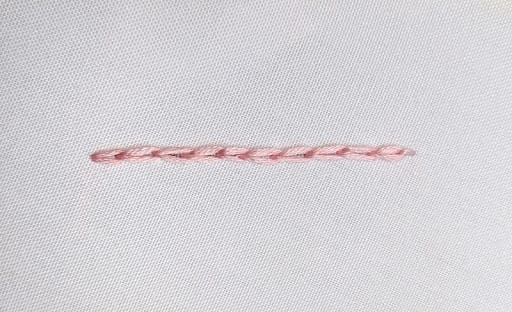
Chain stitch embroidery owes its popularity to its simplicity as a technique.
Here are the steps you must follow to do a chain stitch:
- Start by inserting the needle up through the fabric at the point of beginning the design. This is point A.
- Create a loop by pushing the needle down through point A.
- Now, for the second loop, insert the needle up through a point a little ahead of point A. This is point B. Pass the needle through the first loop.
- Now, pull the needle up all the way to tighten the stitch.
- Then, insert the needle down through point B to form a loop.
- Repeat the steps above to continue making a series of linked loops.
That’s all you need to do to make chain stitches! Simple, right? You can also check out this video.
Variations of the Chain Stitch
Chain stitch is an elementary technique that, over the years, has evolved into many other stitches. Let’s take a quick look at some variations of the chain stitch.
Open Chain Stitch

The open stitch, also known as the ladder stitch or long-tailed chain stitch, creates an open, lacy effect. It’s an excellent choice for hand-embroidering decorative borders, lacy designs, and edging.
Here are the steps to do this stitch:
- Bring the needle up through the fabric at the starting point of your design.
- Next, insert the needle down at a point close to the first point. Push the needle with the thread all the way through – but leave a small loop on the surface.
- Now, bring the needle back up through the center of this loop – and catch the loop with your needle on the way.
- Pull the thread and tighten the loop around the needle to form your first chain link.
- After that, repeat the steps above by inserting the needle back into the fabric at a point near the previous stitch.
- As you bring the needle up again through the center of the second loop, tighten it around the needle.
- Now, continue the steps along your design to form a series of open loops of any length you want.
- Finish the stitch by passing the needle through the last loop and making a small stitch behind the fabric to secure the loop.
Twisted Chain Stitch
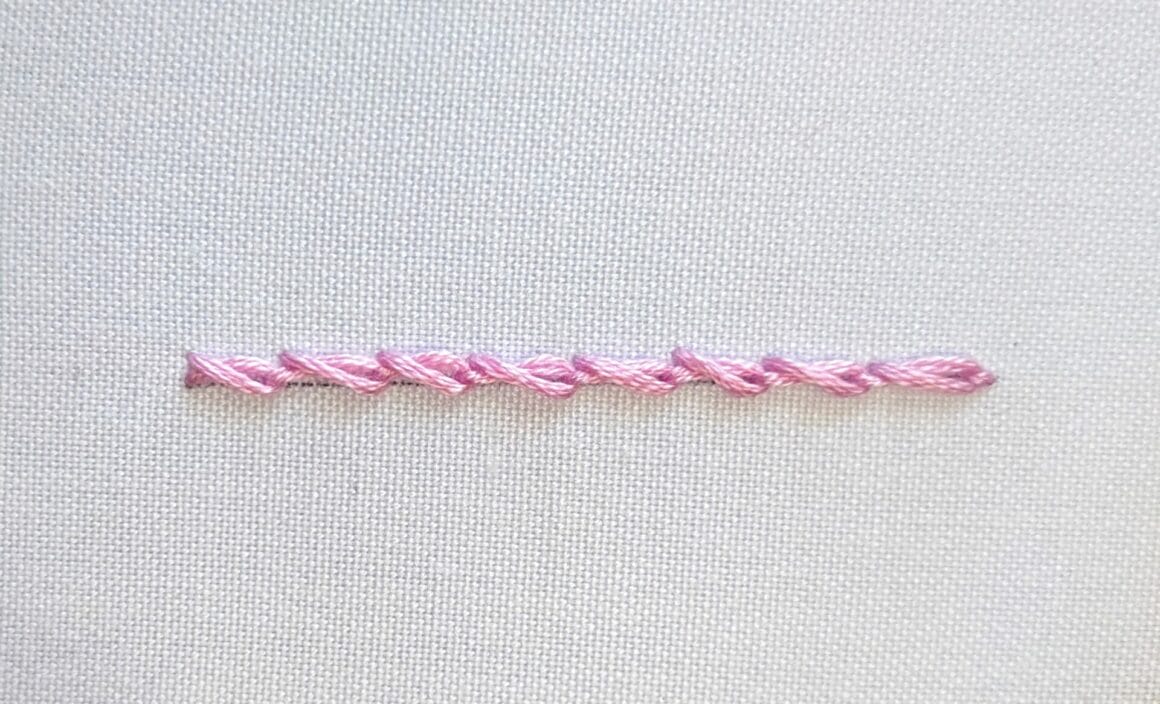
Another popular variation of the chain stitch is the twisted chain stitch. As the name suggests, it creates a twisted texture along the line of embroidery for a unique look. It can enhance outlines or be used for decorative purposes.
Here’s how to do it:
- Bring the needle up through the fabric at the starting point of the design.
- After that, push the needle back into the fabric at a point close to the starting point. Push it through, leaving a small thread loop on the surface.
- Twist the needle around the working thread that goes from the needle to the thread supply. Don’t catch the loop like you would in a regular chain stitch.
- Next, bring the needle back through the center of the twisted loop and catch the twist with the needle.
- Then, pull the thread and tighten the twisted loop around the needle. This will form the first chain link.
- Now, insert the needle back into the fabric at a point close to the previous chain link.
- Twist the needle around the working thread once again and bring it back up through the loop’s center for the next chain link.
- Continue the sequence for a series of twisted loops of any length your design demands.
- Finally, pass the needle through the last twisted loop and make a small stitch on the fabric’s back to secure the loop and finish the stitch.
Zig Zag Chain Stitch
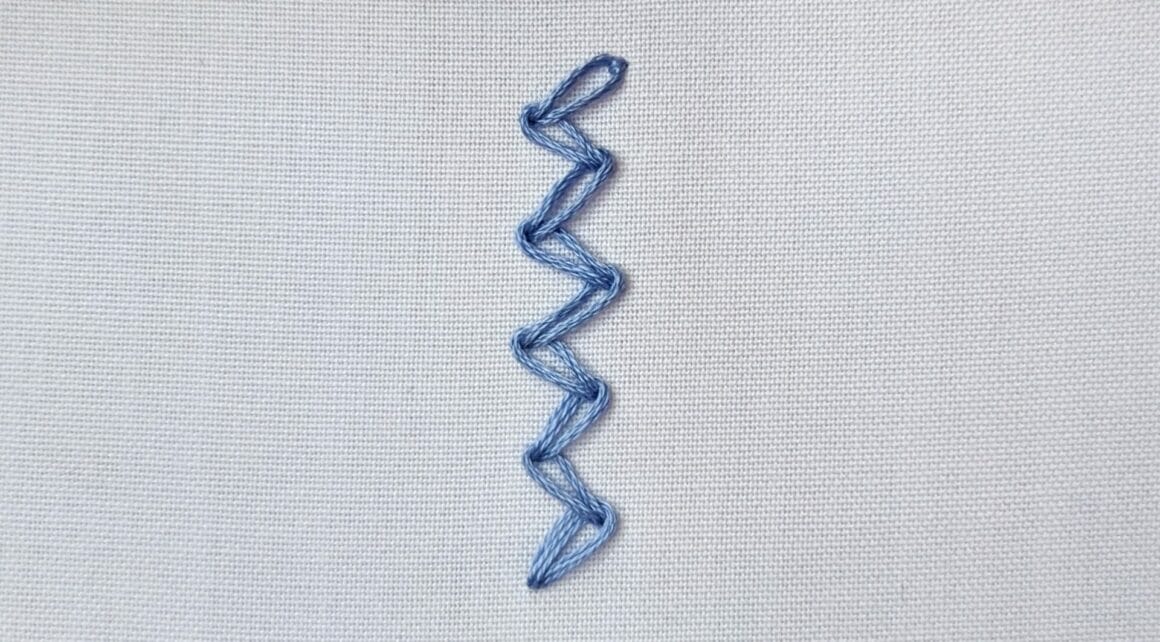
Zigzag chain stitch is a decorative hand embroidery stitch that combines elements of both chain stitch and zigzag stitching.
To create this stitch, follow these steps:
- Bring your needle up from the back of the fabric at the starting point.
- Insert the needle back down into the fabric, creating a small stitch diagonally to the right.
- Bring the needle up again just below the starting point, and pass it under the diagonal stitch you just made.
- Continue this process, creating a series of diagonal stitches that overlap and form a zigzag pattern.
- To finish the stitch, make a small anchoring stitch at the end.
Zigzag chain stitch can be used to create interesting borders, outlines, or decorative patterns in embroidery. Experiment with different thread colors and spacing to achieve various effects.
Other Variations of Chain Stitch
In addition to the two popular variations mentioned above, chain stitch has other variations. These include the following –
- Back-stitched chain
- Braided chain
- Cable chain
- Feathered chain
- Heavy chain
- Knotted chain
- Magic chain
- Petal chain
- Rosette chain
- Singalese chain
- Threaded chain
- Wheat-ear
- Whipped chain
- Whipped double chain
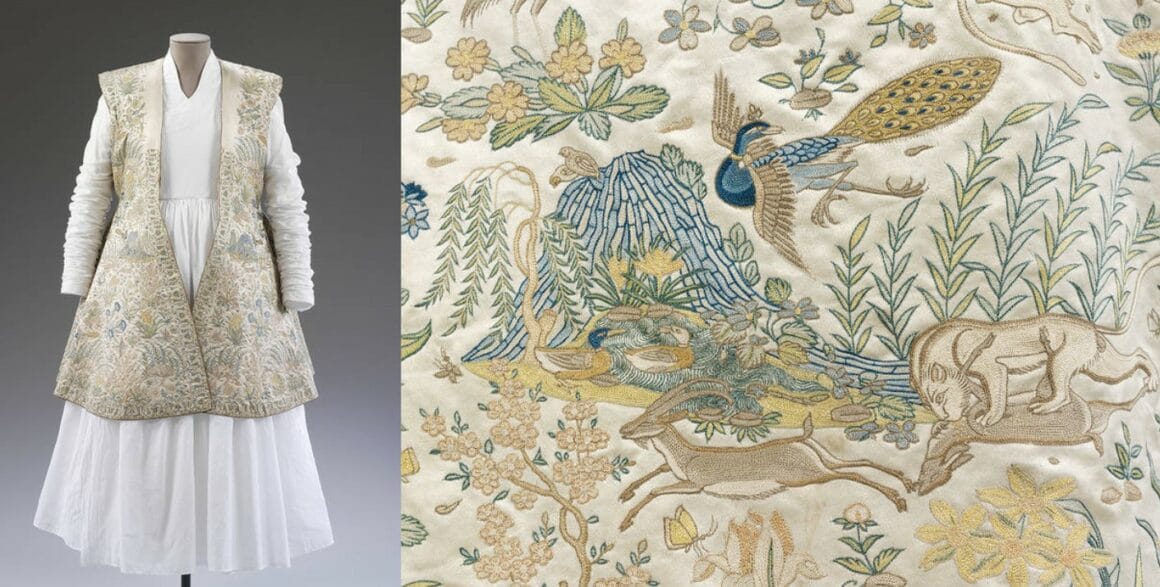
Chain Stitch: Contemporary Embroidery Designs
The chain stitch technique dates back to the 14th century BC but has not lost its relevance. Over the centuries, it has been used worldwide in various decorative pieces.
Bed hangings, rugs, shoes, hunting coats, skirts – examples of exotic items using the chain stitch are many.
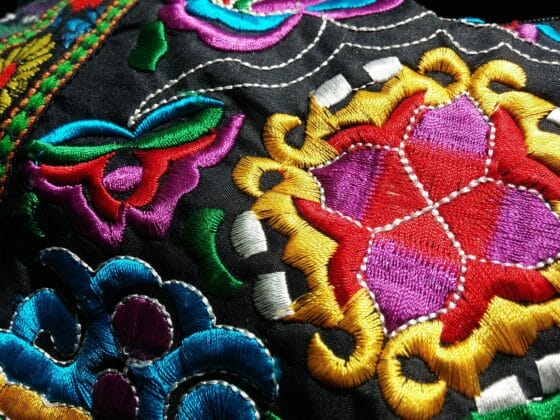
This technique and its variations are still used in culturally significant products. Kashmiri Namda, Central Asian suzani, Hungarian folk embroidery Kalotaszeg, Iranian Rasht embroidery, Jacobean crewelwork, and Gujarati Ari work clothes are a few examples.
Contemporary fashion designers love to use the chain stitch and its variations to create 3D designs.
Perhaps the most common use of chain stitches in modern fashion is in the hems of jeans. However, this application uses embroidery machines instead of hand embroidery.
More Embroidery Articles
- Top 5 Embroidery Machines For Hats And Shirts
- Top 5 Embroidery Machines for Home Business
- 20 Essential Embroidery Stitches You Should Know
- The Embroidery Stem Stitch
- The Running Stitch in Embroidery
- The Embroidery Split Stitch
- The Embroidery French Knot
- The Embroidery Back Stitch
- The Embroidery Couching Stitch
How to Do an Embroidery Chain Stitch: FAQs
Q: Which is the best fabric for chain stitch by hand?
A: As a highly flexible embroidery technique, chain stitches can be used on any fabric, from silk to denim. Embroiderers prefer open weave fabrics like net, mesh, bolting cloth, etc., for decorative applications of this stitch, such as making laces.
Q: What is the purpose of a chain stitch?
A: Chain stitching is traditionally used for hems and outlines. Because of the rope-like effect, it is significant as a decorative embroidery technique. Hence, it is commonly used for surface decorations. It is also a popular technique for making needle and tambour lace embroidery.
Q: What is the chain stitch also known as?
A: The chain stitch is also called the Point de chainette, meaning “point of chain,” as it has a series of chain links. It is also called the Tambour stitch. “Tambour” means “drum” in French. And this stitching technique needs you to hold the fabric tautly, like a drum.
Q: What is the difference between a lock stitch and a chain stitch?
A: Lock stitches appear the same on both sides of the fabric. But chain stitches appear like lock stitches on one side and chains on the other. They are also stronger and more extensible than lock stitches. However, chain stitch embroidery requires more thread.
Conclusion
A versatile and beautiful stitching technique, chain stitch embroidery is easy to learn. Once you master this stitch and its variations, you can experiment with complex designs and textures.