Have you recently started your embroidery journey? Then, one of the first steps towards mastering this craft is learning how to do an embroidery running stitch. You can use it to create magic on your fabric, much like the women of India and Bangladesh have done for centuries.
The running stitch is a series of straight stitches and is an elementary hand embroidery technique used mainly for decorative purposes. This age-old stitch can be both decorative and functional, primarily used for outlines, hems, seams, patchwork, pattern darning, etc.
Whether you want to create beautiful designs or simply mend a hole in a piece of clothing – you can use running stitches. It’s extremely easy to learn, too. So, let’s find out a little about this versatile stitching technique as part of our embroidery stitches series.
Table of Contents
History of the Running Stitch
Experts trace the use of the running stitch back to 1500 BCE, i.e., the pre-Vedic period in the Indian subcontinent. Many believe the stitch evolved from Buddhist monks’ technique to craft patched robes.
Irrespective of its origin, the running stitch was used in the sub-continent to put together old rags to make them new and reusable. And colored threads breathe new life into designs.
It was used in the Edo period between 1603 and 1867 for Sashiko embroidery to strengthen homespun clothes.
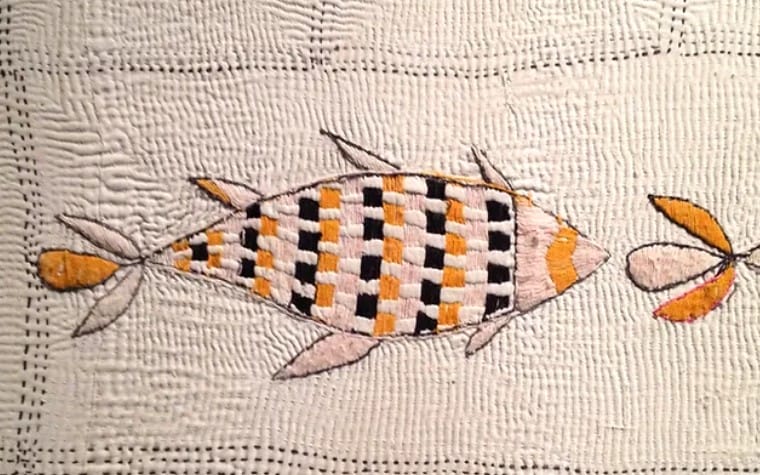
Furthermore, the running stitch became synonymous with Kantha stitch. Its earliest record is in a 500-year-old book, Sri Sri Chaitanya Charitamrita. There, Krishnadas Kaviraj mentions a homemade kantha sent by a mother to her son during his pilgrimage.
Where Did the Running Stitch Come From?
The running stitch is believed to have come from the ancient Bengal region. It includes Bangladesh and India’s West Bengal. Women used the “Kantha” stitch to layer old pieces of cloth and make quilts. It was also used to make uniforms for British soldiers.
This stitching variant traditionally served as the base stitch for the Sashiko embroidery style in Japan. Also, this technique was used for making patched clothes, quilts, etc. Eventually, it became popular in other parts of the world. But its roots can be traced back to Asia.
What Materials Do You Need for a Running Stitch?
As one of the oldest stitching techniques used for patching old fabrics, running stitch embroidery is truly versatile. So, it can work with any thread, needle, and fabric, though it’s best to avoid slippery or stretchy materials.
What Hand Needles to Use for a Running Stitch?
For running stitches, you can use an embroidery needle or crewel needle. An all-purpose sharp needle is sufficient if you want to sew seams using running stitches or embroider straight stitches. You can also use darning needles for pattern darning.
What Thread Is Best for Running Stitch?
A regular polyester/cotton thread can be used for running stitches to sew simple seams. You can use thick thread varieties to strengthen the seams or for heavy fabrics. For quilting or decorative purposes, embroidery floss is a great choice for this stitch.
Other Materials:
The other obvious material required is your fabric, of course. In addition, you may find the following needlework supplies helpful:
- Embroidery hoops
- Fabric marking pen
- Scissors
- Needle organizer
- Floss organizer
- Floss ring
How to Do a Running Stitch Step-by-Step
Doing a running stitch involves passing the needle in and out of the fabric along a line or shape. Before you start your embroidery project, here are the preparatory steps:
- Prepare the materials: Gather the fabric, embroidery floss, embroidery needle, and embroidery hoop.
- Choose your design: Decide where you want the design and transfer the chosen design onto the fabric.
- Secure the fabric: Place your fabric in the embroidery hoop. Hold the fabric taut and tighten the hoop to keep it stable while working.
- Thread the needle: Thread your embroidery needle with the embroidery floss.
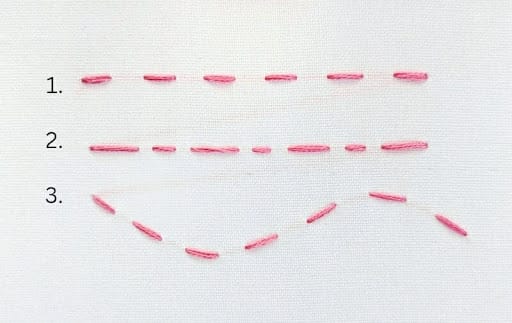
Next, it’s time to embroider the running stitch. It is a simple technique described in the steps below:
- Start the first straight stitch by pushing the needle up through the fabric at point A and inserting it back a short distance away from point A at point B.
- Next, bring the needle up at point C. The distance between points B and C should be the same as between points A and B.
- Now, insert the needle at point D to form the second straight stitch. The length of the second stitch should be the same as the first one.
- Continue like this for the rest of the pattern.
- Once your running stitch filling is complete, remove the fabric from the hoop. Trim any excess thread and ensure the back is neat.
That’s all you need to do to complete your running stitches. You can follow the same pattern along a curved design. You may also experiment with the length of each straight stitch. Here’s a quick video to help you.
Variations & Applications of a Running Stitch
The running stitch is a basic embroidery technique. And over the centuries, many variations of this stitch have been created. So, let’s look at how to implement some of the most popular variants of the running stitch.
Dashed Running Stitch
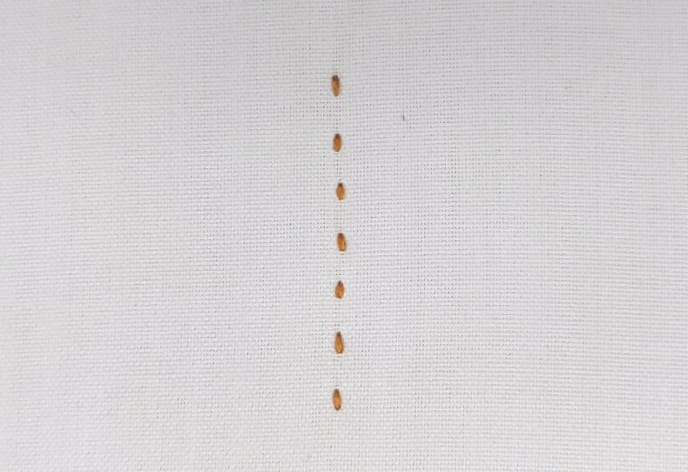
The dashed running stitch is a decorative embroidery technique using short, straight stitches that look like dots or dashes on the fabric. Thus, this simple technique can add a unique texture to designs. It is used for borders and outlines or to fill design elements.
Here’s how to create the dashed running stitch:
- Start by bringing your threaded needle up through the fabric from the back at the beginning of the design or line, i.e., point A.
- Next, insert the needle back down at point B, which should be just a short distance from point A, leaving a gap between the two points.
- Now, bring the needle up again a little further along the line at point C to start your next small stitch.
- Insert the needle back down at point D at a distance similar to the gap between points A and B.
- Continue the same process as you insert the needle up and down through the fabric. Create a series of short, evenly spaced, straight stitches.
- Adjust the spacing between these dot- or dash-like stitches for different effects. Closely spaced dots give a dense line, while wide spacing gives a lighter look.
- Finish it by making a small anchoring stitch on the backside of the fabric to secure the thread.
Double Running Stitch
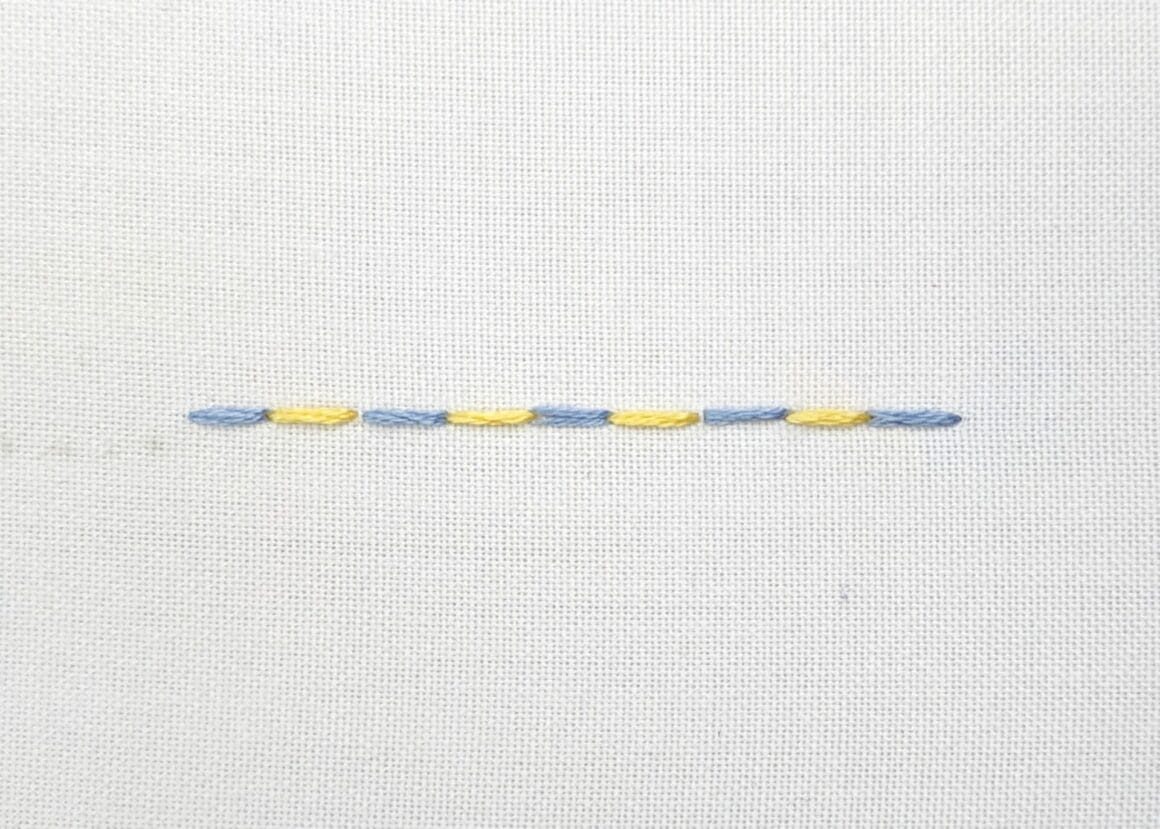
The double or Holbein running stitch involves filling the space in the first row of running stitches with a second row of a contrasting color. It is a great way to add visual interest and dimension to your embroidery. It creates a textured and decorative effect.
For this stitch, you will need embroidery floss in two contrasting colors for a textured and visually appealing effect. Plan for the first row of running stitches in one color and the second row in the other. Using a contrasting color is a creative way to add depth and dimension to your project.
Here are the steps to do the stitch:
- First, thread the needle with the floss color you want in the first row.
- Bring your threaded needle up through the fabric from the back and insert it back into the fabric after a small gap to create a straight stitch.
- For the first row, make evenly-spaced running stitches from the start of the area you want to fill to its end. The straight stitches should be of equal length.
- Secure the thread by knotting it on the back of the fabric. You can also weave it through the previous stitches before stitching the color.
- Next, thread the needle with the thread of the other color you want to use in the second row.
- For the second row, make a new set of running stitches in the new color on the first row. But the stitches will cover the gaps between the first series of stitches.
- Continue with the second row of stitches to fill the gaps in the entire area.
- Finally, secure the thread on the back of the fabric once you have finished the second row with a knot.
Whipped Running Stitch
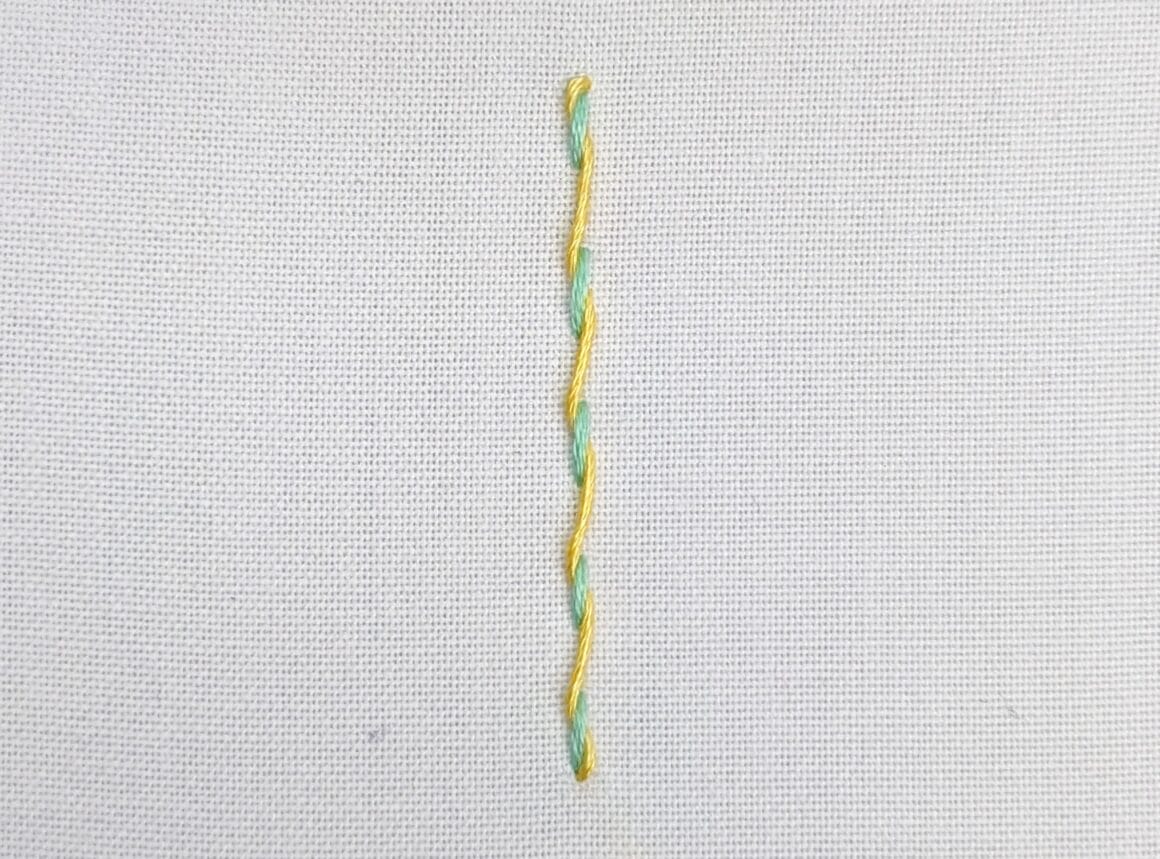
The whipped or cordonnet running stitch is a decorative embroidery technique. It lets you add a contrasting thread to a basic running stitch for a textured or colorful appearance. It also adds dimension to the design.
You can use it for outlining or filling in design elements. Don’t forget to experiment with different thread colors and thicknesses to create exciting visual effects.
Here’s how to create a whipped running stitch:
- Make the first straight stitch by bringing the threaded needle up through the fabric from the back and pushing it at a point ahead of the start of the stitch.
- Then, create a series of such stitches for your first row of running stitches on the fabric’s surface. The stitches should be evenly spaced and equal in length.
- After completing the first row of running stitches, switch to a contrasting thread color for “whipping.” You can also use the same color.
- Now, bring the needle with the second thread up through the fabric from the back at the starting point of the running stitch.
- Next, pass the needle around the running stitch you’ve made. Keep wrapping the thread along the way for the entire line length.
- Once you’ve “whipped” the entire row of running stitches, secure the end of the second thread by inserting the needle back down into the fabric.
Other Variations of Running Stitch
Apart from the above, you can also try other variations of the running stitch as embellishments. Some of the most popular ones are the following –
- Checkerboard running stitch
- Eskimo lace ending
- Fairy lights running stitch
- Japanese darning stitch
- Interlaced running stitch
- Laced/threaded running stitch
- Looped running stitch
- Meandering running stitch
- Seed stitch
- Stepped running stitch
Running Stitch: Uses in Fashion and Embroidery Designs
Over centuries, the running stitch, a sequence of straight stitches, has come a long way. From the basic stitch to give a new life to old and discarded fabric pieces to creative motifs being used worldwide, this stitch is every embroiderer’s favorite.
The Kantha is synonymous with quilts in Bengal, where craft folks call it the Nakshi Kantha. The stitch has been reinvented over time to design sarees, the traditional drape worn by women in Bengal, Orissa, and Tripura.
Japan’s Sashiko embroidery, too, has evolved into complex designs, especially Kamon crests, i.e., natural objects. From kimonos and everyday wear to futon covers and sandwich quilts, everything gets a new life with the humble running stitch.
Furthermore, the Western world, too, has caught up with this stitch’s use as an embellishment. One of the best-known examples is the American redwork embroidery. It was developed in the 19th century and is popularly done with red thread to decorate household items.
More Embroidery Tutorials
- 20 Essential Embroidery Stitches You Should Know
- The Embroidery Stem Stitch
- The Embroidery Chain Stitch
- The Embroidery Split Stitch
- The Embroidery French Knot
- The Embroidery Back Stitch
- Best Embroidery machines for beginners
- The Embroidery Couching Stitch
How to Do an Embroidery Running Stitch: FAQs
Q: Which embroidery is done with a running stitch?
A: The running stitch uses a continuous series of straight stitches. It serves as the base of two famous embroidery styles – the Kantha stitch from Bangladesh and India and the Sashiko embroidery from Japan. It is also used for pattern darning and redwork.
Q: Is a running stitch strong?
A: The running stitch is not the strongest. It can hold fabric layers together temporarily but may break under too much tension. So, you can use polyester thread to make it stronger. But it is a strong stitch when it comes to flat surfaces, especially with multiple short, straight stitches.
Q: What is another name for running stitch?
A: The running stitch is often referred to as the straight stitch. Technically, a straight stitch is a single stitch, while a running stitch includes a series of them. Thus, the straight stitch is the foundation of the running stitch, which is why the names are interchangeably used.
Q: What is the difference between a seed stitch and a running stitch?
A: The seed stitch is a variation of the running stitch. Both use the same straight stitches with the threaded needle going up and down through the fabric. While a running stitch is a continuous series of stitches, the seed stitch uses small dashed lines to fill an empty space.
Q: What are the disadvantages of a running stitch?
A: The main disadvantage of a running stitch is that it is not particularly strong and can break if the tension is too strong. That’s why it is not a tailor’s first choice in projects that need strong stitches, like two surfaces meeting at a seam.
Conclusion
The running stitch has a humble origin story and simple technique. And these attributes make it a favorite among embroiderers. It weaves the tale of the traditions of Bengal and Japan on the fabric surface.
So, as you learn this stitch, remember to explore Kantha and Sashiko stitches and get inspired by their magic.