Understanding the Cricut Mat
It may not be the most fun part of using your Cricut, but keeping your cutting mats clean is one of the most important things you can do to ensure your Cricut projects go smoothly. If your Cricut mat is not clean or has lost its stickiness, your materials may shift around during cutting which can lead to imperfect cuts or, worse, materials tangling around the rollers and blades and damaging your Cricut machine.
Regular cleaning also prolongs the life of your Cricut mats, which saves you money as they don’t need to be replaced as often. Today I’m going to take you through the different mats and how to keep them at their best.
Ensuring that you use the right mat for the right material helps prolong the life of your Cricut mats, so it’s important to know what the difference is between the different colored mats and what they’re used for.
Table of Contents
- 1 Cricut Joy Mats
- 2 Cricut Explore, Cricut Explore 3, Cricut Maker, and Cricut Maker 3 Mats
- 3 How to Clean Your Cricut Mat Step-By-Step
- 4 Wet Cleaning Methods for Your Cricut Cutting Mats
- 5 Things to Avoid When Cleaning Your Cricut Mat
- 6 Can You Make a Cricut Mat Sticky Again?
- 7 How to Prolong the Life of Your Cricut Mat
- 8 Key Takeaways for Prolonging the Life of Your Cricut Mats
Cricut Joy Mats
The Cricut Joy currently has three different types of cutting mats:
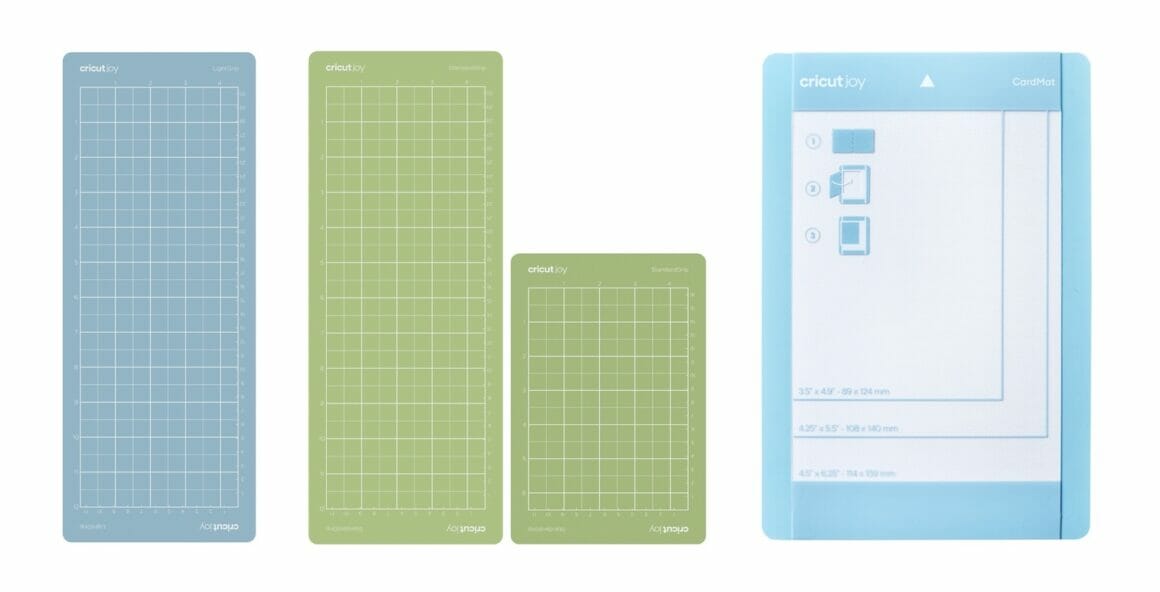
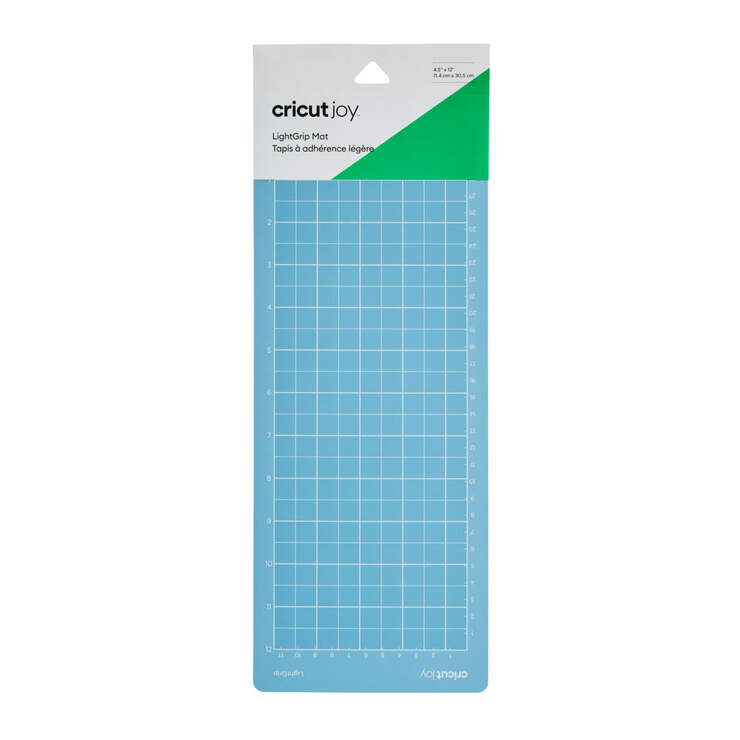
The Light Grip Mat for Cricut Joy is blue, and the adhesive area measures 4.5” x 12” (11.4cm x 30.4cm). It’s ideal for use with light and medium-weight paper, medium cardstock, and vinyl.
Light Grip Mat For Cricut Joy Latest prices on Cricut or Amazon
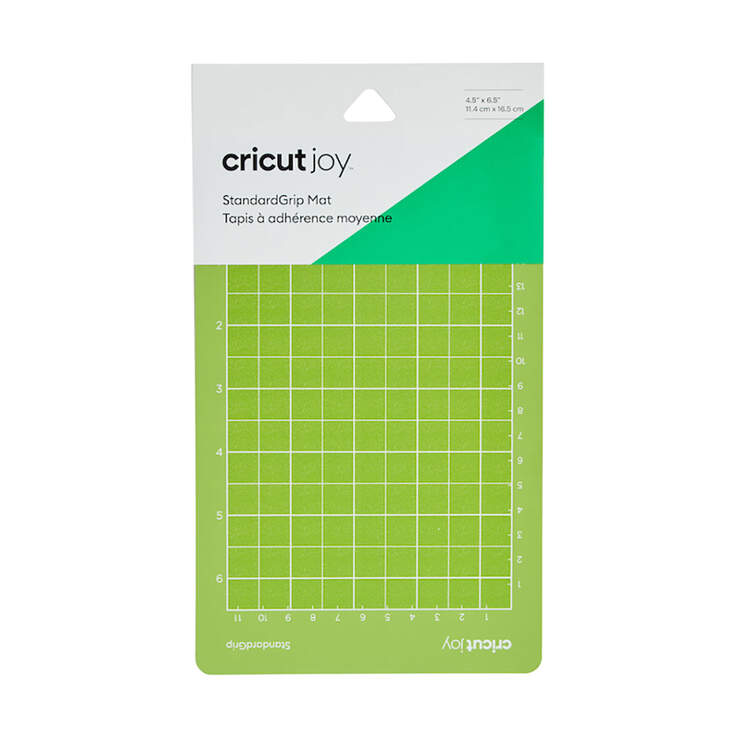
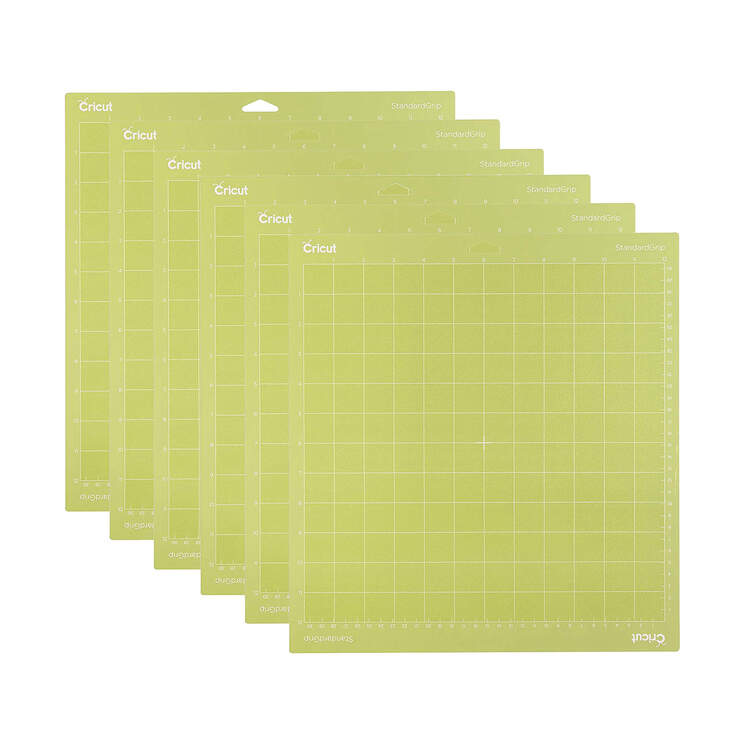
The Standard Grip Mat for Cricut Joy is green and comes in two sizes: 4.5” x 6.5” (11.4cm x 16.5cm) and 4.5” x 12” (11.4cm x 30.4cm). It’s ideal for use with heavy cardstock, poster board, vinyl, and iron-on, including Smart Material scraps that are too small to feed through the machine without a mat.
Standard Grip Mat For Cricut Joy Latest prices on Cricut or Amazon
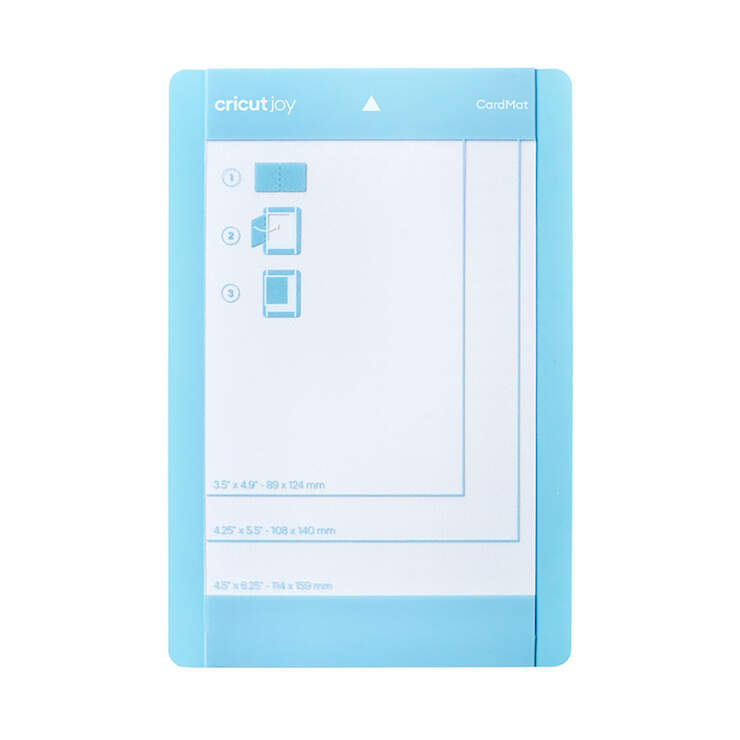
The Card Mat for Cricut Joy is blue, and the adhesive area measures 4.5” x 6.25” (11.4cm x 15.8cm). It features a plastic divider that allows you to cut only the front of a card and is used for Insert Cards and Cutaway Cards. It can also be used to hold a card in place while your Cricut draws, writes, or applies foil.
Card Mat For Cricut Joy Latest prices on Cricut or Amazon
Cricut Explore, Cricut Explore 3, Cricut Maker, and Cricut Maker 3 Mats
The larger Cricut models currently have five different types of cutting mats:
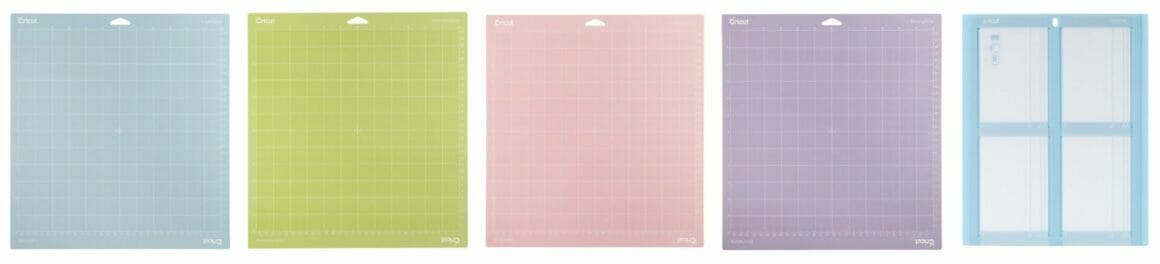
The Light Grip Cricut Mat is blue and comes in two sizes: 12” x 12” (30.4 cm x 30.4 cm) and 12” x 24” (30.4 cm x 60.9 cm). It’s ideal for use with light and medium-weight paper, medium cardstock, vellum, and much more!
Light Grip Mat Latest prices on Cricut or Amazon

The Standard Grip Cricut Mat is green and comes in two sizes: 12” x 12” (30.4 cm x 30.4 cm) and 12” x 24” (30.4 cm x 60.9 cm). It’s ideal for use with heavy cardstock, poster board, vinyl, and iron-on, including Smart Material scraps that are too small to feed through the machine without a mat.
Standard Grip Mat Latest prices on Cricut or Amazon
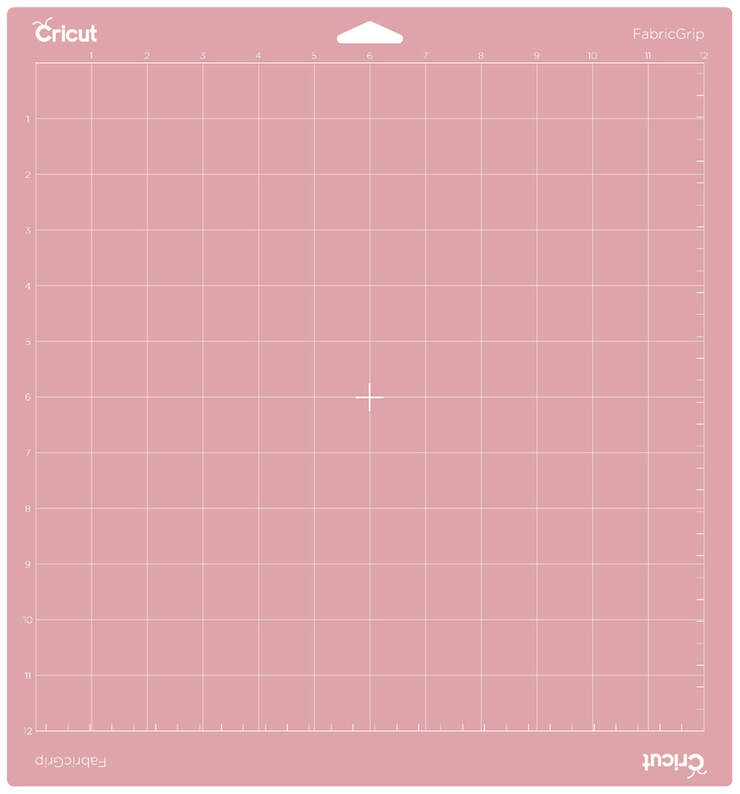
The Fabric Grip Cricut Mat is pink and comes in two sizes: 12” x 12” (30.4 cm x 30.4 cm) and 12” x 24” (30.4 cm x 60.9 cm). It works with a variety of bonded and unbonded fabrics.
Fabric Grip Latest prices on Cricut or Amazon
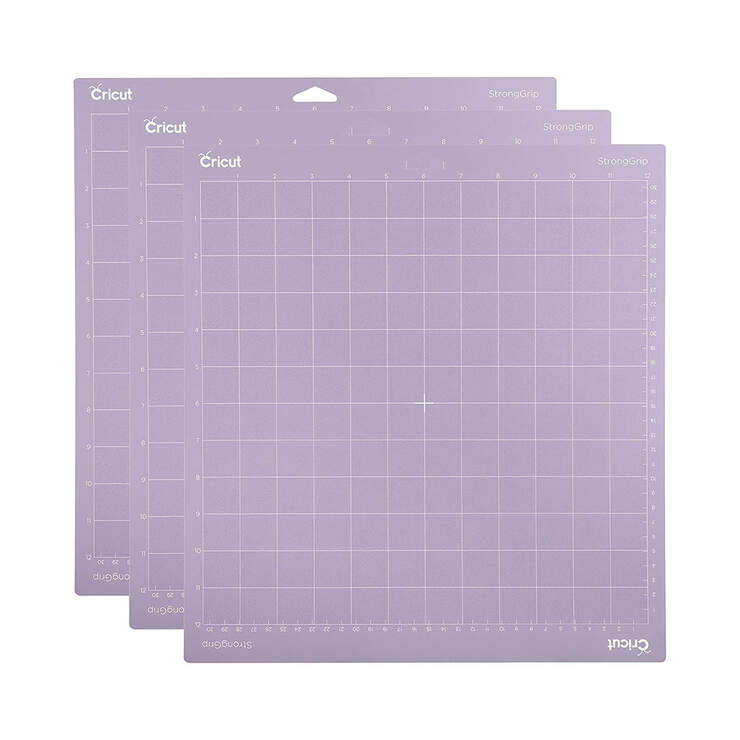
The Strong Grip Cricut Mat is purple and comes in two sizes: 12” x 12” (30.4 cm x 30.4 cm) and 12” x 24” (30.4 cm x 60.9 cm). It’s perfect for securing heavyweight materials such as chipboard, thicker cardstock, and even balsa wood.
Strong Grip Latest prices on Cricut or Amazon
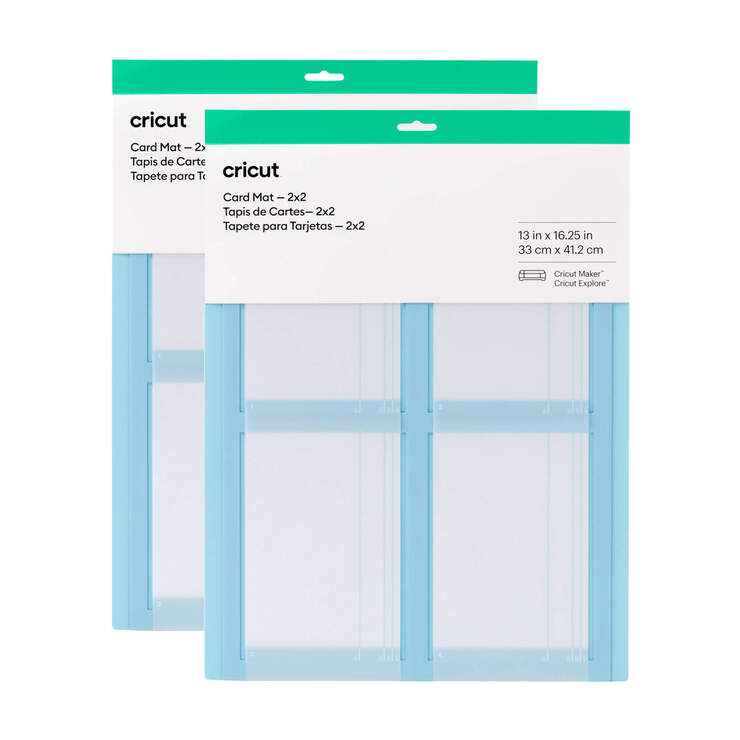
The Cricut Card Mat 2 x 2 is blue and features the same plastic divider as the Cricut Joy Card Mat, allowing you to cut only the front section of a card or hold it in place while your Cricut draws or applies foil.
Card Mat Latest prices on Cricut or Amazon
Related: Cricut Maker Vs. Cricut Maker 3 – A Detailed Comparison
How to Clean Your Cricut Mat Step-By-Step
Dry Cleaning Methods for Your Cricut Mats
You will need the following:
- Cricut scraper, spatula, or a plastic gift card
- Tweezers
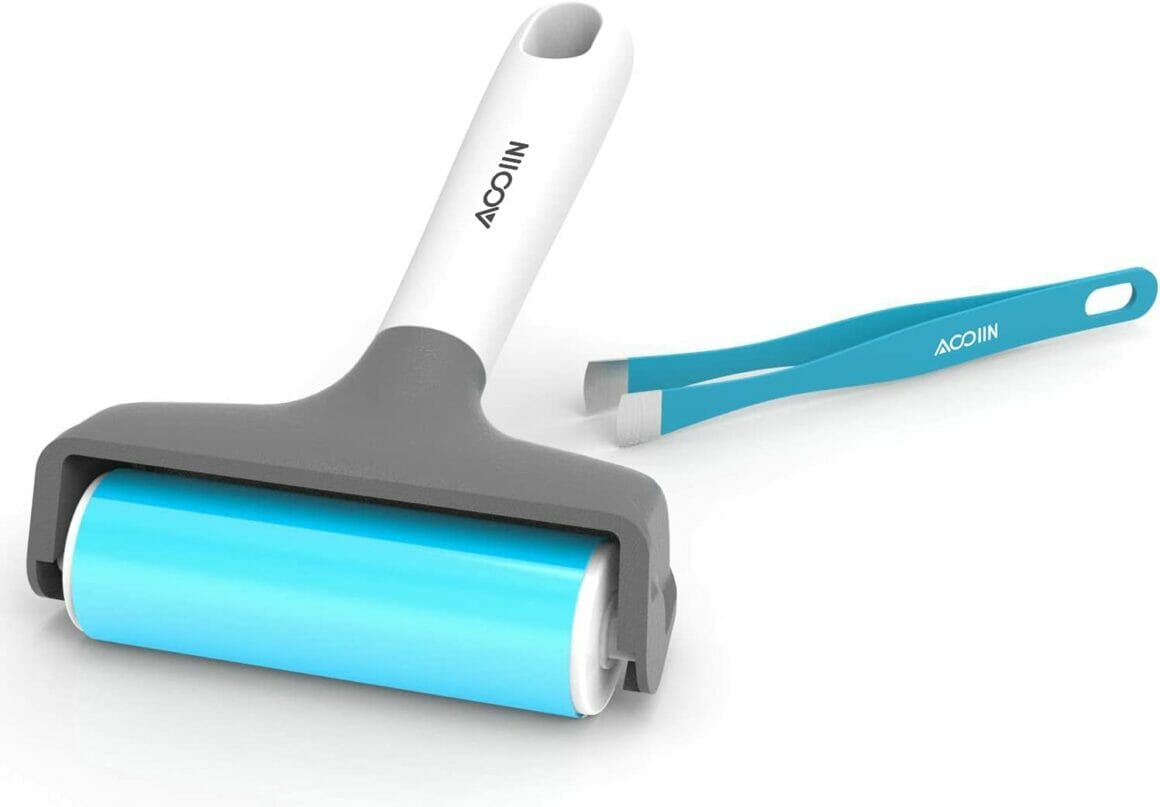
- Lint roller
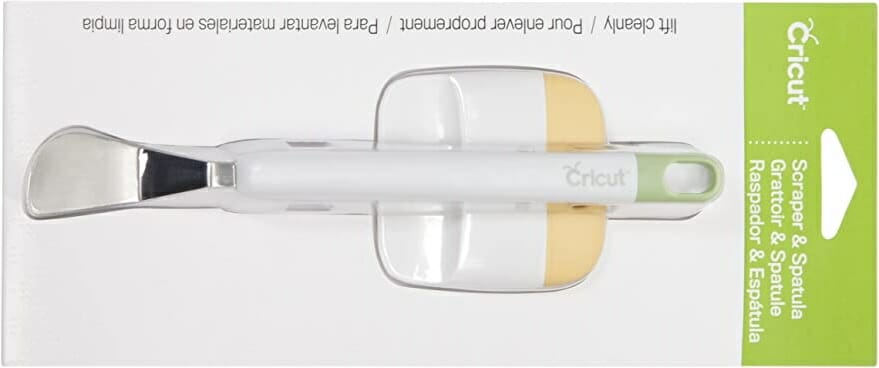
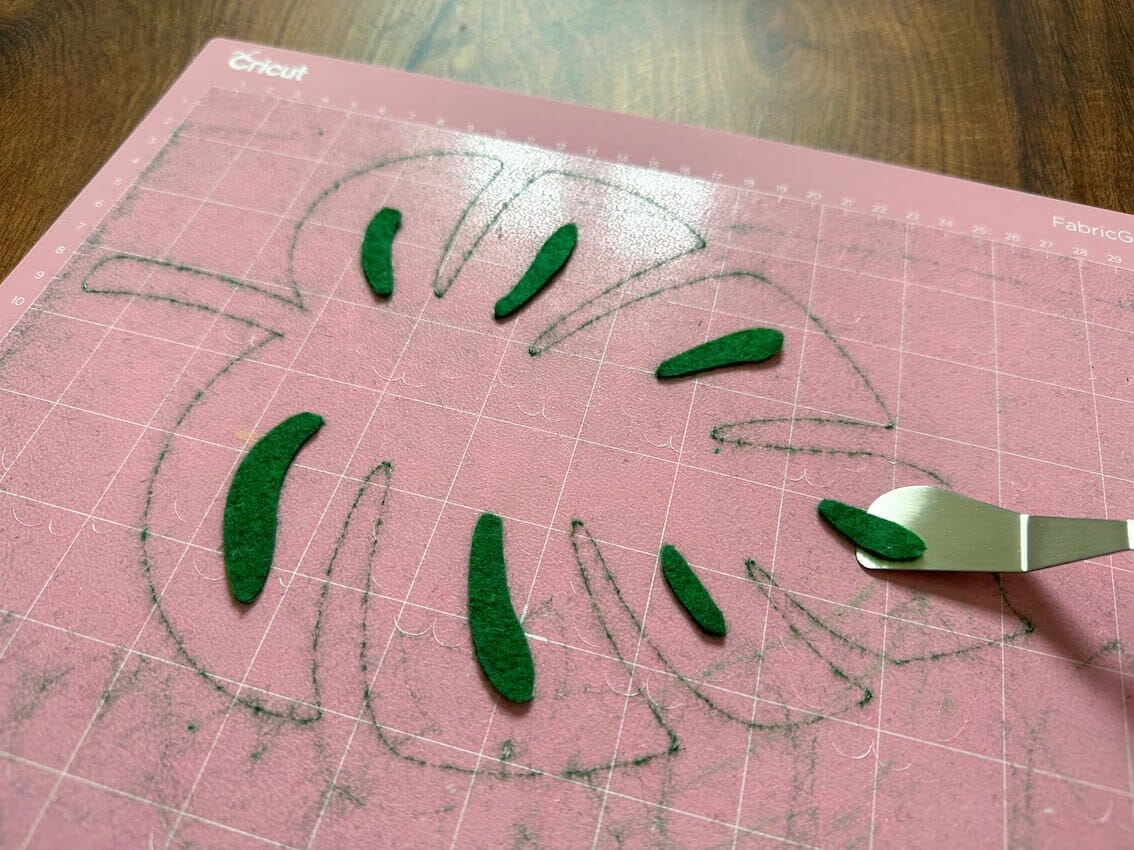
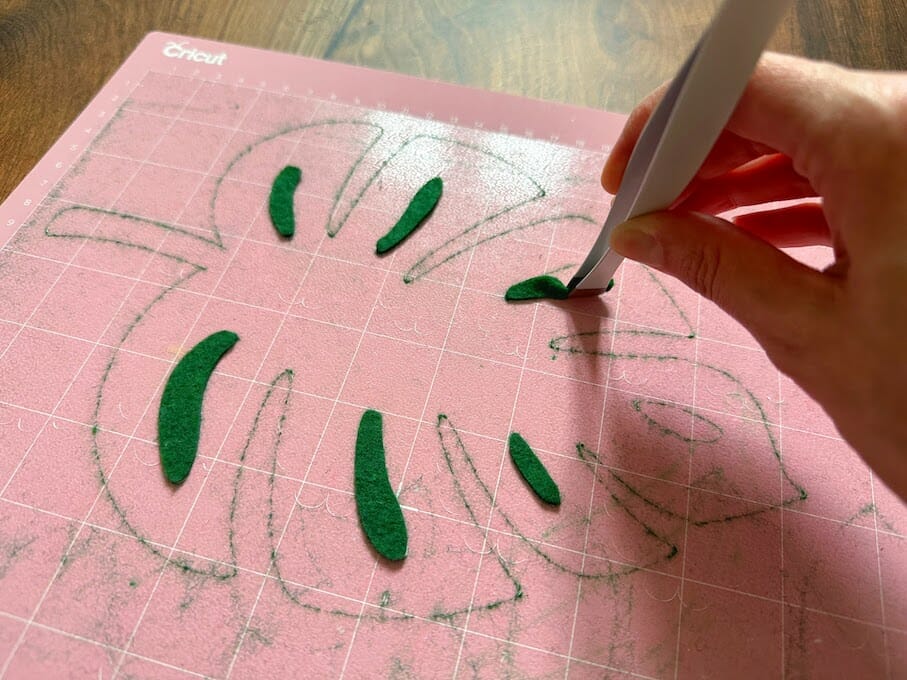
As with many cleaning tasks, you can do a quick clean or more thorough clean when it comes to your Cricut mats. I like to perform a “dry” clean after every cut. You can remove large pieces of debris with a pair of tweezers or a Cricut scraper or spatula.
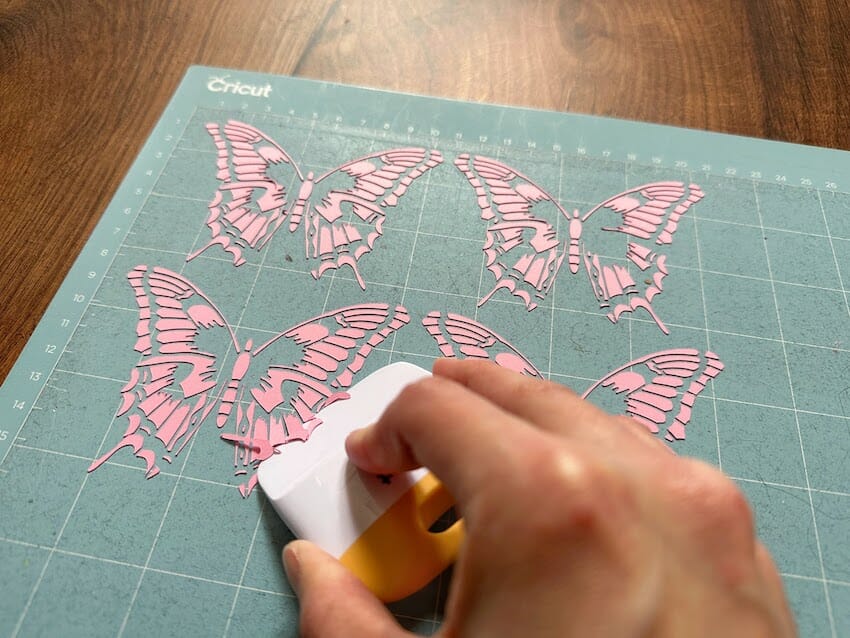
If you don’t have the Cricut tools, a plastic gift card works in a pinch. I don’t recommend using your debit or credit card in case it gets damaged! The most important thing to remember at this stage is to be gentle: You want to remove the materials and not the adhesive layer! The adhesive on the pink Fabric Grip Mat is not as strong as the other mats and requires extra care.
Next, I use a lint roller to remove smaller pieces. I also ensure that I put the plastic cover straight back on my mat to avoid it collecting dust, hair, and other debris.
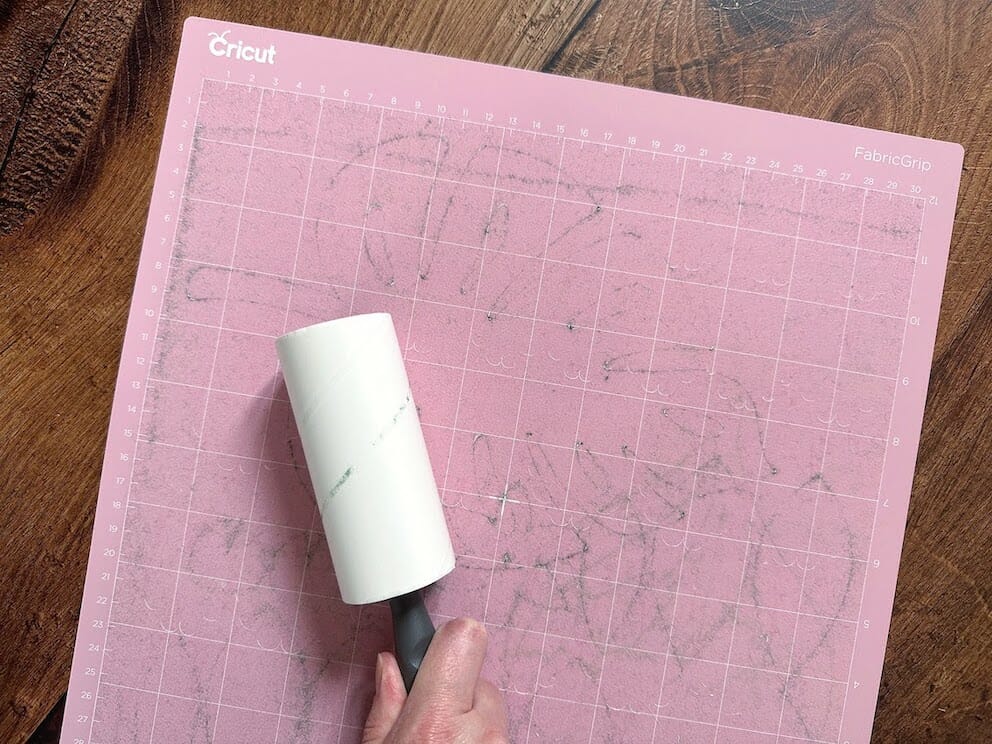
Even if you regularly remove debris and return your Cricut’s mat protective cover after every use, your mats will start to lose their stickiness over time. The frequency with which you’ll need to give your mats a more thorough clean depends on how often you use them, how many Cricut mats you have in rotation, and which materials you cut. Some materials leave more debris than others, for example, glitter cardstock and felt.
Cricut Lint Roller & Tweezer Combo

Prevention is better than a cure when it comes to Cricut mats, and I try to assess the stickiness of my mats after each craft session so that they’re primed and ready to go the next time I want to use them. There’s nothing worse than setting your Cricut up to cut, only to realize that your mat isn’t sticky enough, your material has moved, and you’ve now got to wash your mats and wait for them to dry before you can try again!
Wet Cleaning Methods for Your Cricut Cutting Mats
You will need the following:
- Alcohol-free baby wipes or wet wipes
- Mild washing up liquid/dish detergent
If you’ve used the dry cleaning methods above and your Cricut mat still isn’t sticky enough, there are a couple of wet cleaning methods you can try before replacing them.
Wet Cleaning Method One
Take an alcohol-free baby wipe or wet wipe and wipe in a circular motion over the entire mat. Depending on how much debris is on your mat, you may need to use several wipes to clean it. Once all debris has been removed, leave your mat to air-dry completely before returning its clear plastic cover. It’s best to dry it inside, out of the reach of pets, or anything else that could cause further debris to adhere.
There’s a lot of contradictory advice online about whether you should use baby wipes to clean the pink Fabric Grip Mat. I’ve personally cleaned my pink Fabric Grip Mats with baby wipes several times and find this the most effective method for removing felt build-up. The ingredients in wipes vary, so I recommended performing a small patch test on your mat and ensuring that it remains sticky after it’s dried.
Wet Cleaning Method Two
If none of the above methods have removed all of the debris on your Cricut mat and it’s still not regained its stickiness, it’s time to give your Cricut mats a bath! This method works best in a large sink or bath so you can fully submerge your Cricut mats.
Run a shallow bath or sink of warm (not hot) water, and add a small amount of gentle washing-up liquid (dish detergent). Allow your mats to soak for 10 – 20 minutes, gently easing away any remaining debris with clean fingertips. Avoid using a scrubbing brush or scouring pad, as this can remove or damage the adhesive.
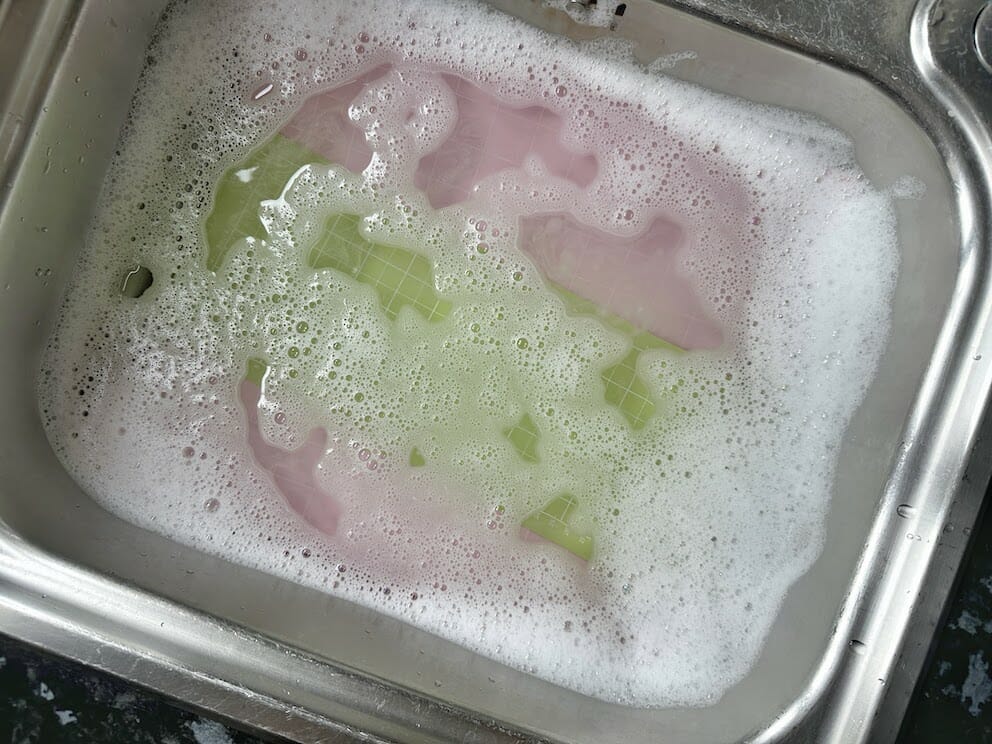
Remove your mats from the bath, giving them a gentle rinse with running water if any suds remain, and allow them to dry thoroughly before returning their clear plastic covers. Don’t be alarmed if your Cricut mat doesn’t feel sticky after you’ve washed it, as the stickiness should return as it dries.
Things to Avoid When Cleaning Your Cricut Mat
- Avoid touching the adhesive area as much as possible, as the natural oils from your fingertips can reduce the effectiveness of the adhesive. I’d only advise using your fingers when your Cricut mat is submerged in the water. Ensure your hands are clean and free of moisturizers, nail oils, etc.
- Don’t use harsh chemicals, cleaning sprays, or anything containing alcohol to clean your Cricut mat, as this can damage and remove the adhesive.
- Don’t use abrasive brushes or scouring pads, and don’t scrape too hard with a Cricut scraper or spatula, as this damages the adhesive.
Can You Make a Cricut Mat Sticky Again?
If you’ve tried all of the above methods and your Cricut mat is still not sticky enough, it’s almost certainly time to replace it. While a properly cared-for Cricut mat will last you for many projects, it’s still a consumable item, and it’s important to replace it when necessary.
While there are plenty of suggestions online of “miracle” spray adhesives that can be applied to your Cricut mat to rejuvenate it, this is absolutely not recommended by Cricut themselves.
As well as invalidating your warranty, the excess adhesive can jam your Cricut machine, which is a lot more expensive to replace than a cutting mat! Similarly, I recommended only using Cricut-branded mats with your machine, as compatible mats have not been through the same rigorous testing and may cause problems further down the line.
How to Prolong the Life of Your Cricut Mat
As well as staying on top of cleaning your Cricut mats, there are a few other ways that you can prolong their life of them:
- Use tools to apply and remove materials to reduce touching your Cricut mat with your fingers.
- Use a Cricut Brayer to adhere your material to your Cricut mat as this will ensure it stuck firmly, even as the adhesive reduces over time.
- Rotate your Cricut mat by 180 degrees periodically before applying your materials to ensure you use both ends of the mat.
- Move your projects into the center of the mat before sending them to cut, and remember to put your material in the same place. This reduces the pressure on the ends of the mat, which are used most often.
I hope you’ve found this blog post helpful in determining which Cricut mat to use and how to clean your Cricut mats to prolong their life. If you’ve learned something from it, why not bookmark it to refer to later or send it to a crafty friend who may enjoy it too?
I’ll leave you with the key points to keep in mind when it comes to caring for your Cricut mats:
Key Takeaways for Prolonging the Life of Your Cricut Mats
- Remove large pieces of debris after every cut
- Return the plastic cover to your Cricut mat after every use
- Check your mats for loss of stickiness before returning to storage, and stay on top of giving them a more thorough clean when needed.