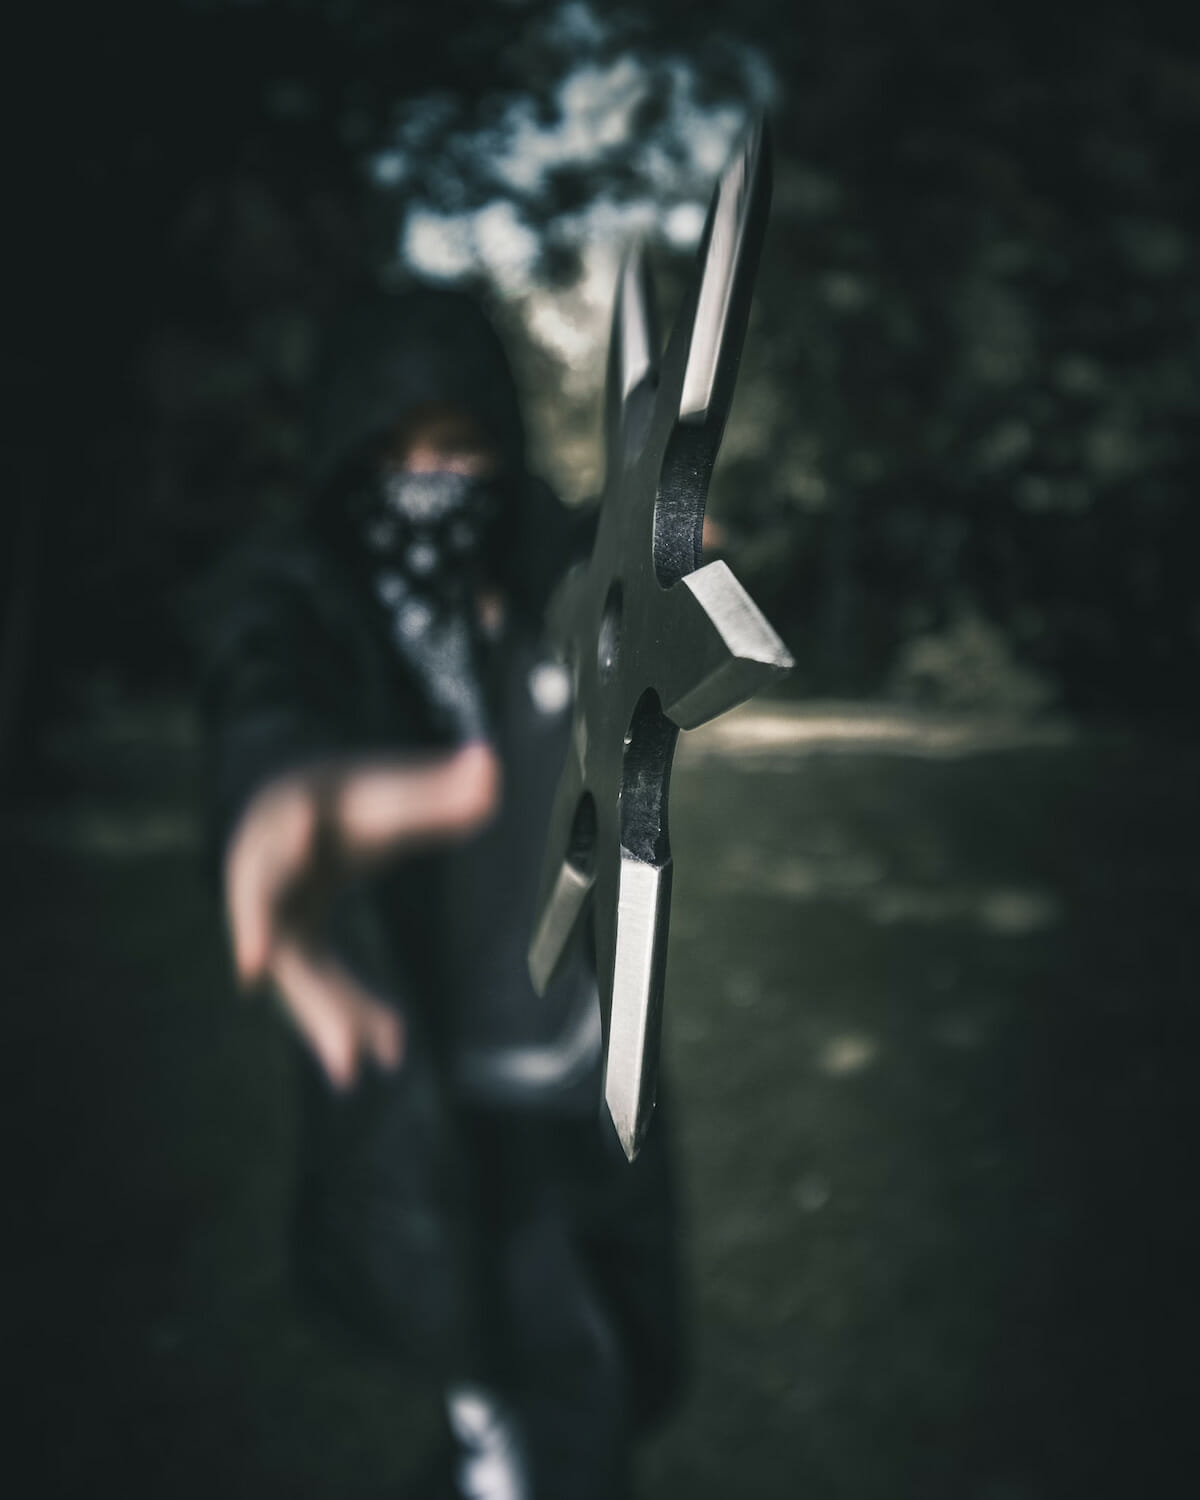
Ever wanted to craft your own origami ninja star? Not only is it a fun project, but it’s also a fantastic introduction to the intricate world of origami. Whether you’re an aspiring ninja or just looking for a cool project to tackle, our step-by-step guide has you covered.
Table of Contents
- 1 Paper Ninja Star Step-by-Step Instructions
- 1.1 1. Prepare Your Paper
- 1.2 2. Fold the Bottom Right Corner
- 1.3 3. Fold the Top Left Corner
- 1.4 4. Fold the Right Corner to the Left
- 1.5 5. Fold the Bottom Left Corner to the Right
- 1.6 6. Rotate Your Craft
- 1.7 7. Combine the Two Shapes
- 1.8 8. Tuck the Edges
- 1.9 9. Flip It Over
- 1.10 10. Secure the Final Tucks
- 1.11 More Origami Tutorials
- 2 How to Throw a Paper Ninja Star Properly: A Mini Guide
Paper Ninja Star Step-by-Step Instructions
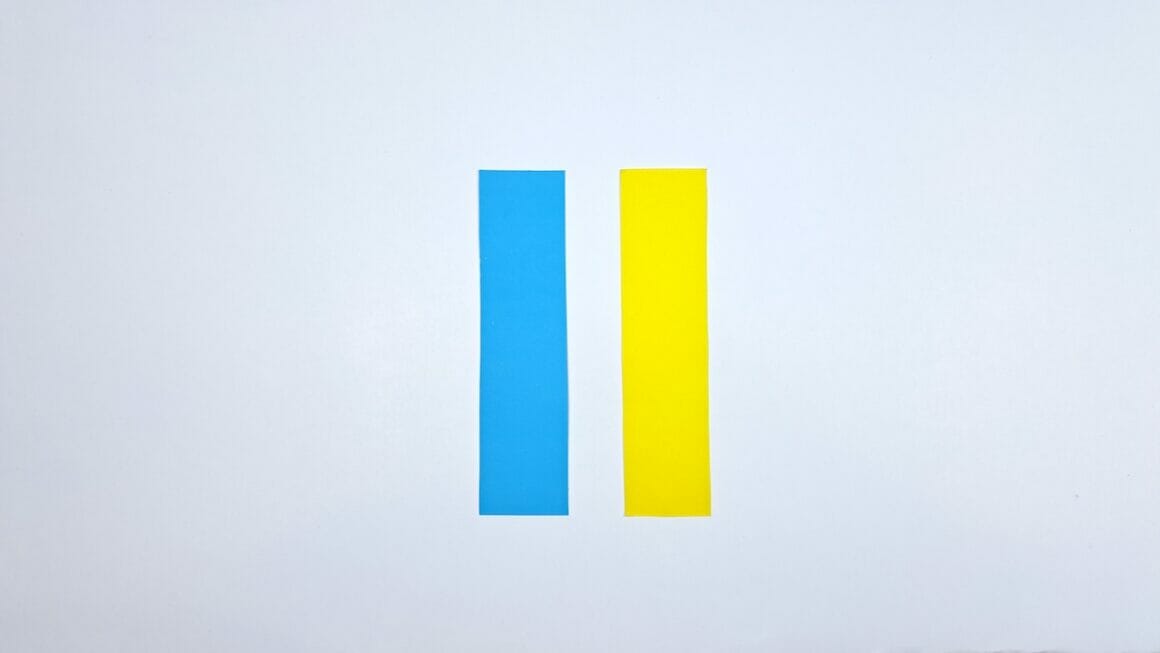
1. Prepare Your Paper
Begin with a 4x16cm rectangular piece of paper. Ensure it’s a good quality paper that will hold the creases well.
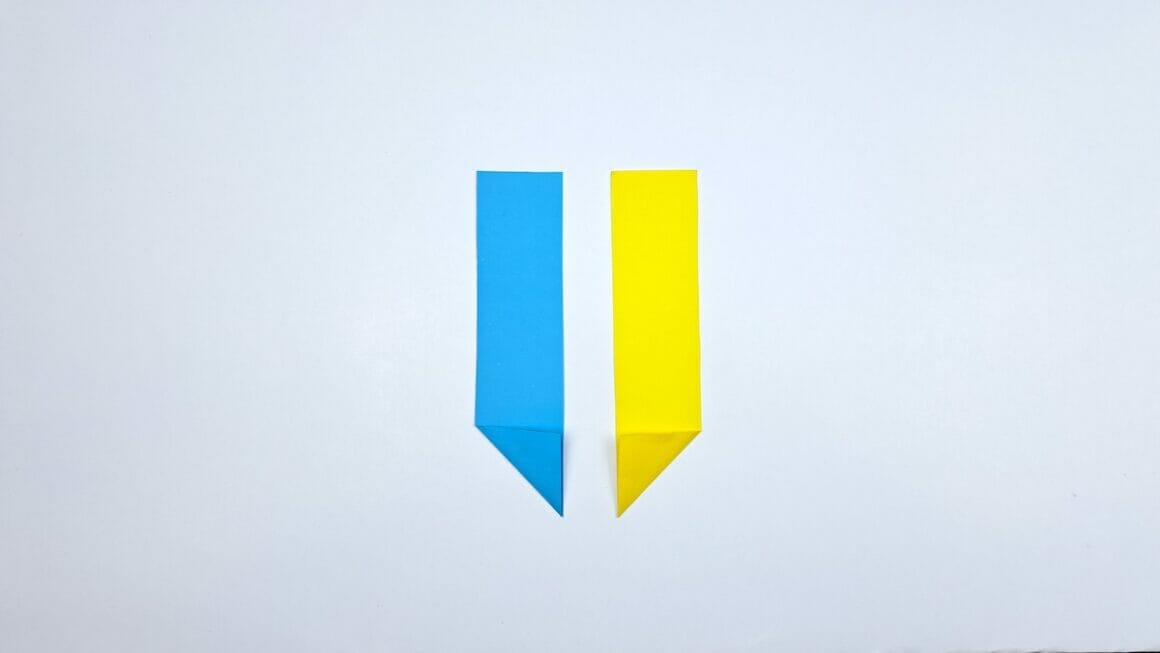
2. Fold the Bottom Right Corner
Take the bottom right corner of the paper and fold it towards the left side. This will start to give your paper a parallelogram shape.
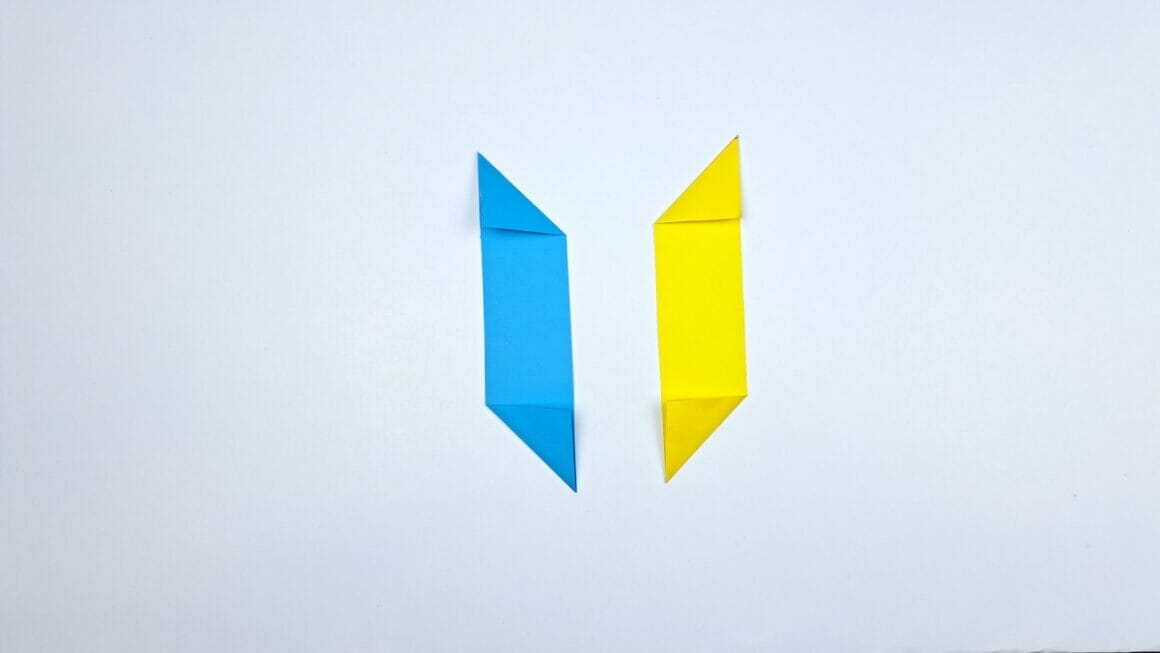
3. Fold the Top Left Corner
Now, fold the top left corner towards the right side of your paper, further accentuating the parallelogram shape.
4. Fold the Right Corner to the Left
Take the newly formed right corner of your paper and fold it towards the left, ensuring the edge lines up perfectly.
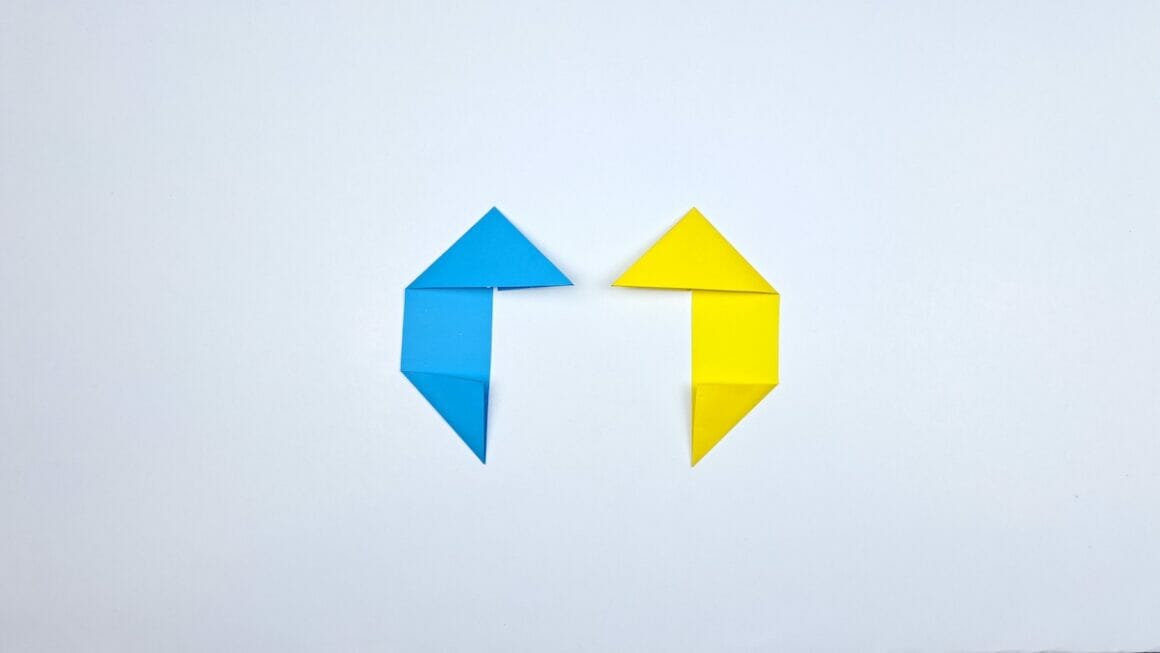
5. Fold the Bottom Left Corner to the Right
Next, fold the bottom left corner to the right side of your paper. This is the last major fold to create the desired shape.

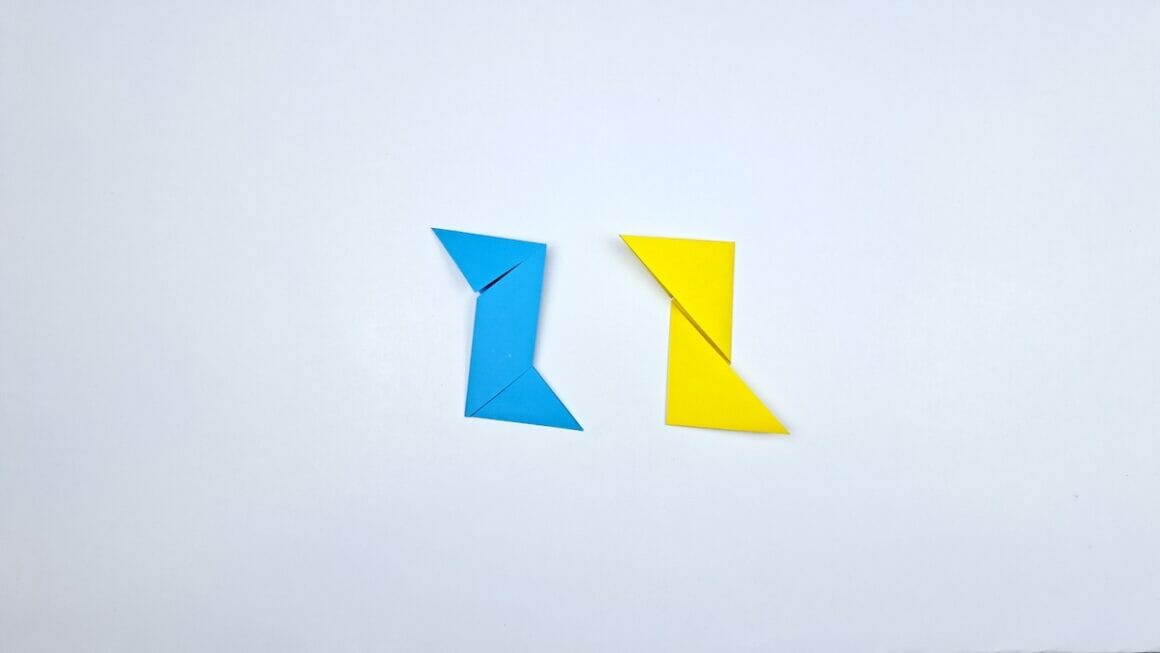
6. Rotate Your Craft
Rotate your paper. This will prepare it to merge with the ninja star’s other half.
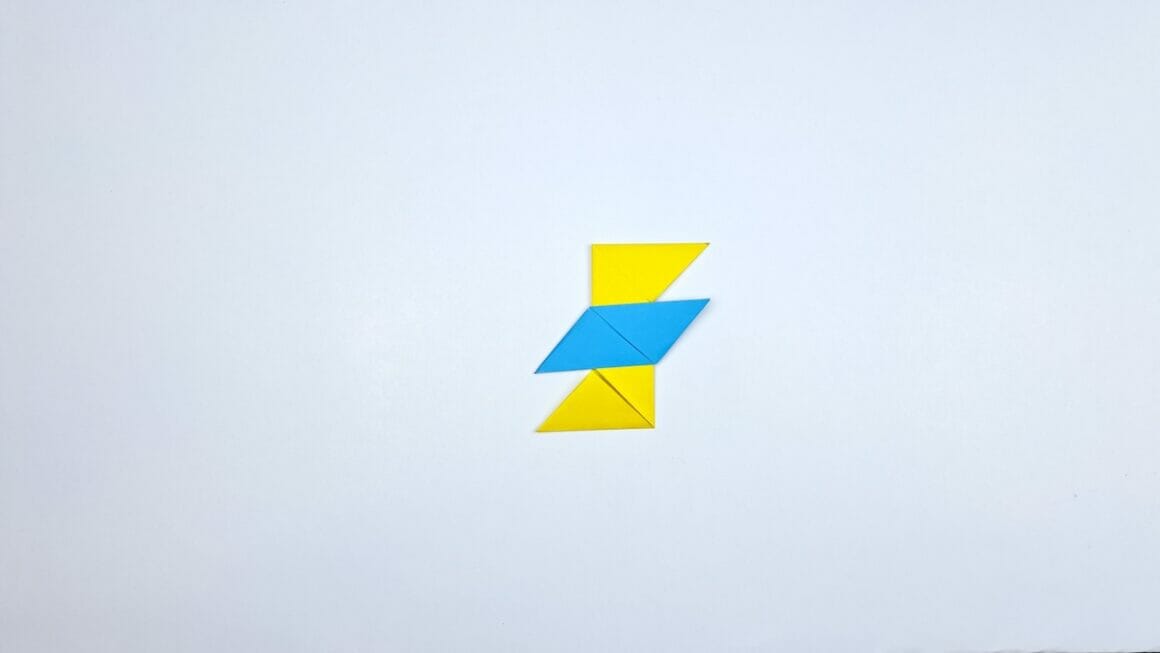
7. Combine the Two Shapes
You’ll need to fold another piece into the same shape as your first. Lay one over the other so that their folds interlock, preparing them for the final steps.

8. Tuck the Edges
Tuck the protruding edges of one figure into the pockets formed in the other. This might take a bit of finagling, so be patient.

9. Flip It Over
Turn your almost-complete ninja star over to the other side.
10. Secure the Final Tucks
Tuck any remaining edges into the available pockets to secure your ninja star’s shape. Congratulations, your origami ninja star is now complete!

Now that you’ve mastered this, you’re one step closer to becoming an origami ninja yourself! Have fun, and remember, practice makes perfect.

More Origami Tutorials
- How To Make An Envelop
- Origami Owl
- Origami Butterfly
- Origami Crane
- How To Make A Fortune Teller
- How To Make a Paper Dragon
- How To Make An Origami Frog
- Origami Paper Box
How to Throw a Paper Ninja Star Properly: A Mini Guide
Safety First
Before we dive in, remember that even a paper ninja star can cause harm if thrown recklessly. Always ensure you are in a safe space away from people and fragile items.
Step 1: Find the Right Grip
Hold the ninja star between your thumb and index finger, ensuring balance. The thumb should be on one of the star’s “blades,” while the index finger should rest against the opposite side. The other fingers should loosely curl into your palm.
Step 2: Assume the Stance
Stand with your feet shoulder-width apart, aligning your body with your target. Keep your eye on the target for better accuracy.
Step 3: Prepare Your Arm
Extend the arm holding the ninja star backward, creating a line from your hand to your shoulder. Keep your other arm forward, pointing towards the target. This helps you maintain balance and aim accurately.
Step 4: Focus on Your Wrist Action
A good throw comes from the wrist, not just the arm. As you prepare to throw, cock your wrist back, getting ready to snap it forward upon release.
Step 5: The Throw
In a swift motion, swing your arm forward while simultaneously snapping your wrist. Aim to release the star when your hand is about even with your head for an optimal flight path.
Step 6: Follow Through
Continue the movement of your arm even after the ninja star has left your hand. A good follow-through ensures better distance and accuracy.
Step 7: Practice Makes Perfect
As with any skill, practice is the key to mastering the art of throwing a paper ninja star. Remember to adjust your grip, stance, and throwing power as you go along.
And there you have it! Follow these steps to become proficient in throwing a paper ninja star. Happy throwing!