Single crochet (SC for short) is a fundamental stitch in crochet. It is known for its simplicity and versatility, making it a go-to stitch for both beginners and experienced crocheters alike. It serves as the foundation for many other crochet stitches and techniques, allowing you to create a wide variety of projects. Here are a few examples of its versatility:
- Basic Fabric Creation: Single crochet is commonly used to create solid, dense fabrics. By working rows of single crochet stitches, you can create blankets, scarves, hats, and other items with a sturdy and warm texture.
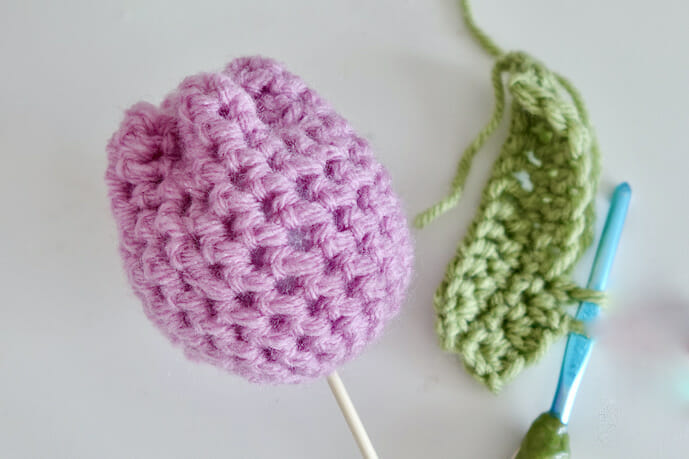
- Amigurumi: Single crochet is often employed in the art of amigurumi, which involves making stuffed toys and characters using crochet. The tight stitches of single crochet produce a tight fabric, perfect for forming small, three-dimensional shapes.
- Textured Patterns: Single crochet can be combined with other stitches to create intricate and textured patterns. You can achieve various textures, ribbing, and interesting designs in your crochet work by alternating single crochet stitches with different stitches like double crochet or slip stitch.
- Edging and Finishing: Single crochet is frequently used to add borders, edging, or finishing touches to crochet projects. Whether it’s a neat edge on a blanket, a decorative trim on a garment, or a sturdy handle on a bag, Single crochet provides a clean and compact finish.
- Lacework: Although single crochet is known for its density, it can also be used to create delicate lacework. You can produce intricate lace patterns using single crochet stitches, incorporating chain stitches and strategic increases and decreases.
Table of Contents
- 1 Importance Of Learning Basic Crochet Stitches
- 2 Overview Of My Single Crochet Tutorial
- 3 Materials Needed
- 4 How to Single Crochet Step-By-Step Instructions
- 5 Reverse Single Crochet
- 6 Single Crochet Decrease
- 7 Single Crochet Increase
- 8 Extended Single Crochet
- 9 Tips For Beginner Crocheters
- 10 Making A Slip Knot
- 11 Single Crochet Troubleshooting Tips
- 12 Crochet Finishing and Fastening Off
- 13 Tips for Practicing and Improving
- 14 Conclusion
Importance Of Learning Basic Crochet Stitches
Single crochet is the foundation of many other crochet stitches and techniques. It provides a solid base upon which you can build your crochet skills. Once you have mastered single crochet, you can easily progress to learning more complex stitches like double crochet, half double crochet, and beyond.
Related: 6 Best Beginner Crochet Kits in 2023
Overview Of My Single Crochet Tutorial
In this tutorial, you’ll learn what materials you need to start making Single crochets, follow step-by-step instructions (with pictures), and learn the different techniques that use Single crochet stitches in your projects.
Related: Learn How To Crochet A Heart With My Step-by-Step Video Guide
Materials Needed
List of materials required for single crochet
To start crocheting a single crochet stitch, here’s a list of essential materials you’ll need:
Crochet Hooks
These are the primary tools used for crocheting. Crochet hooks come in various sizes, each designated by a letter or number to indicate the diameter of the hook. The sizes are also used to achieve different stitch sizes and tension. Your crochet hook choice depends on the weight of the yarn you’re using.
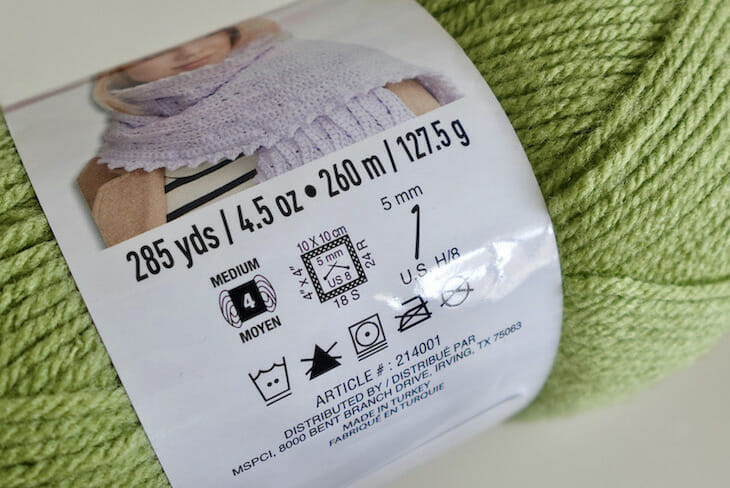
Yarn
There are numerous types of yarn available, each with different fibers, thicknesses (also known as yarn weight), and colors. Most yarn skeins have labels that detail the weight of the yarn, the recommended knitting needle, and the crochet hook size.
Scissors
A pair of sharp scissors is essential for cutting your yarn.
Yarn Needle & Threader
Also known as a darning needle, a yarn needle is used for weaving in loose ends and sewing pieces of your crochet project together. A needle threader is useful for pulling yarn through the eye of the needle.
Stitch Markers
This small tool is useful for marking specific stitches or sections of your work, such as the beginning of a round or a particular stitch pattern. They can be removable or fixed, and you can use commercial stitch markers found at your local craft store or use a contrasting piece of yarn, safety pin, or bobby pin.
Related Tutorials:
- Single Crochet Three Together – sc3tog – Video Tutorial
- Half Double Crochet Step-by-Step Video Tutorial
- How to Tie Off Crochet? With & Without Knot – Video
- Half Double Crochet Two Together – hdc2tog – Video Tutorial
- Single Crochet Two Together (SC2TOG) Video Tutorial
- How to Count Rows in Crochet? Photo & Video Tutorial
How to Single Crochet Step-By-Step Instructions
Basic Single Crochet Stitch
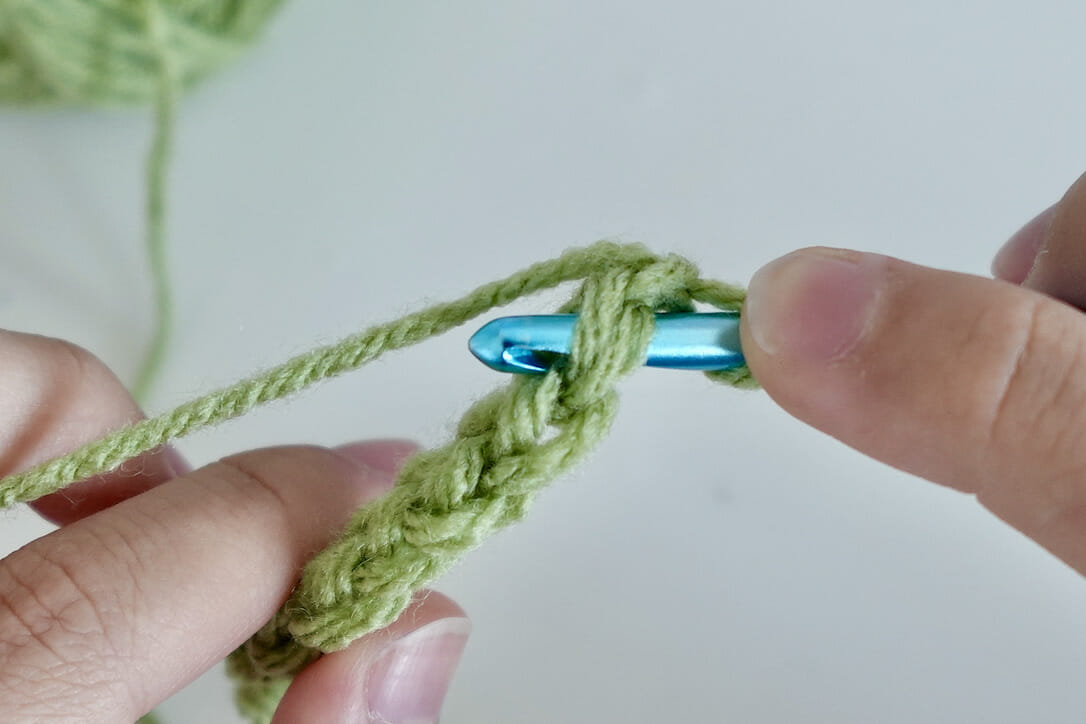
To create a single crochet stitch, you start by inserting the hook into the designated stitch or space, then yarn over and pull through a loop.

This step leaves two loops on the hook.
Finally, yarn over again and pull through both loops on the hook, completing the single crochet stitch.
Foundation Single Crochet
The foundation single crochet stitch, often abbreviated as FSC, is a technique that combines the functions of creating a foundation chain and working single crochet stitches in one step. The foundation single crochet stitch offers several advantages. It creates a stretchy and flexible foundation row, making it ideal for projects like hats, cuffs, and other items that require a snug fit.
Additionally, it eliminates the need for a separate foundation chain, saving time and creating a more consistent and even edge.
To create a foundation single crochet stitch, follow these steps:
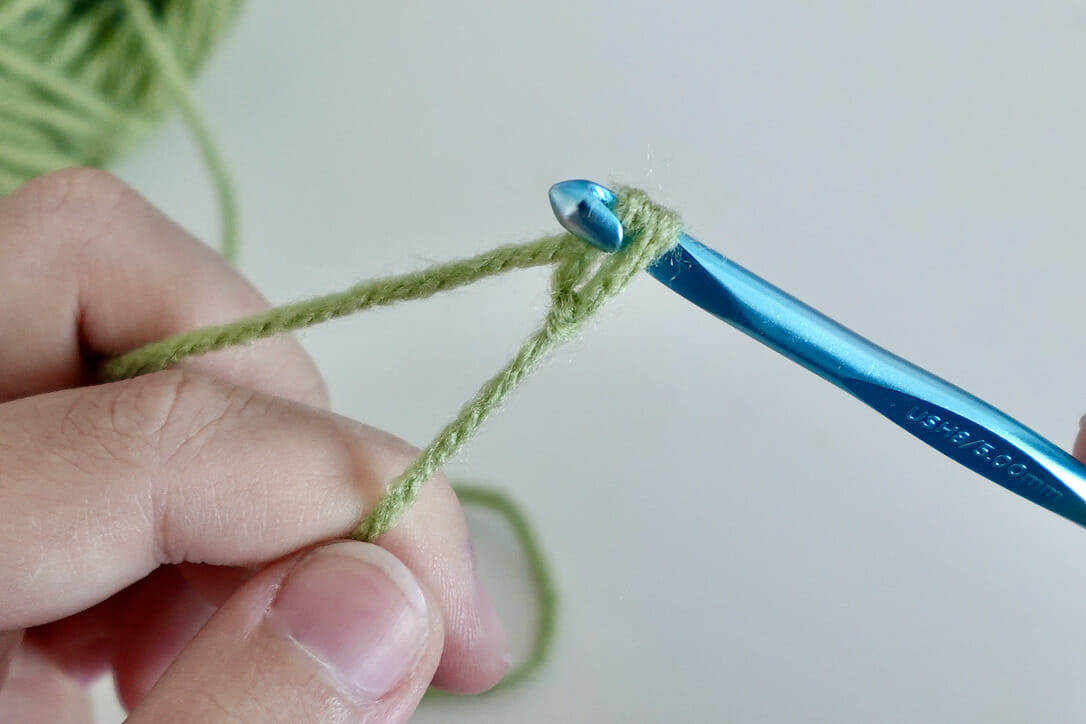
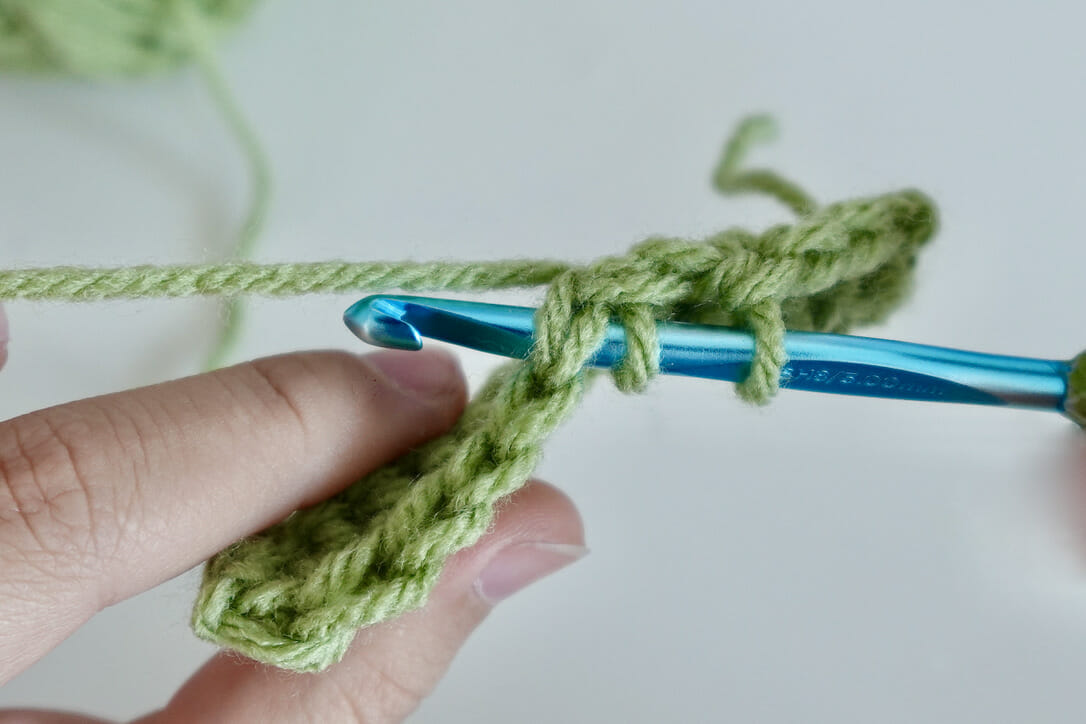
Step 1: Begin by making a slip knot on your crochet hook.

Step 2: Yarn over your hook and pull through the loop to create a chain. Repeat again until there are two chains.
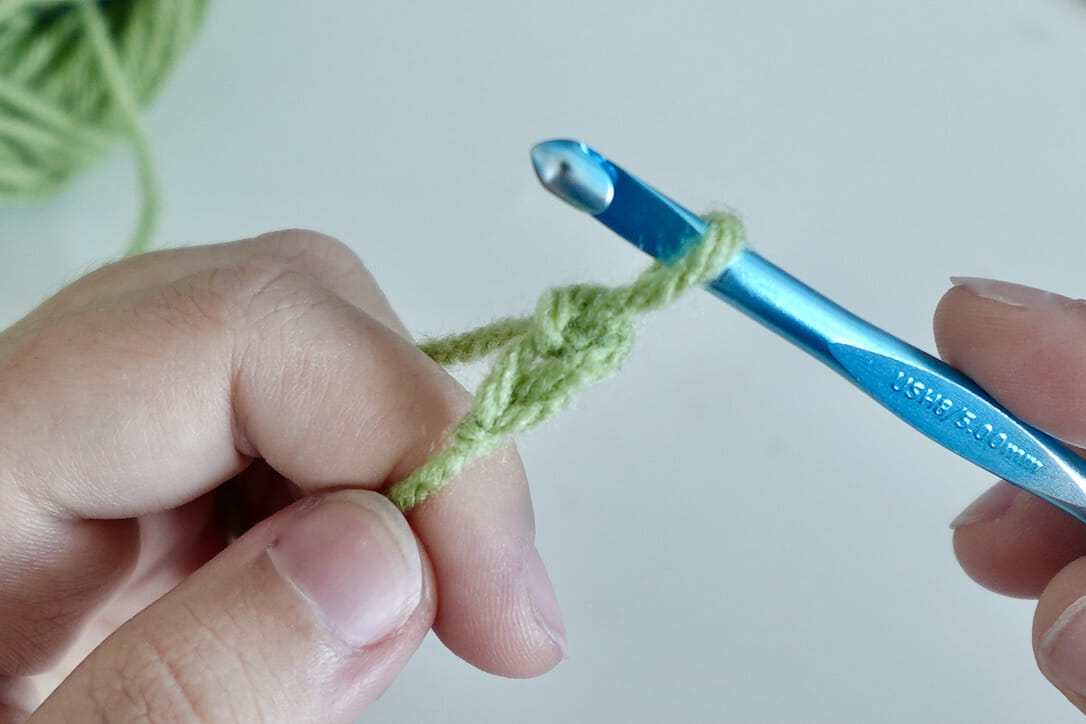
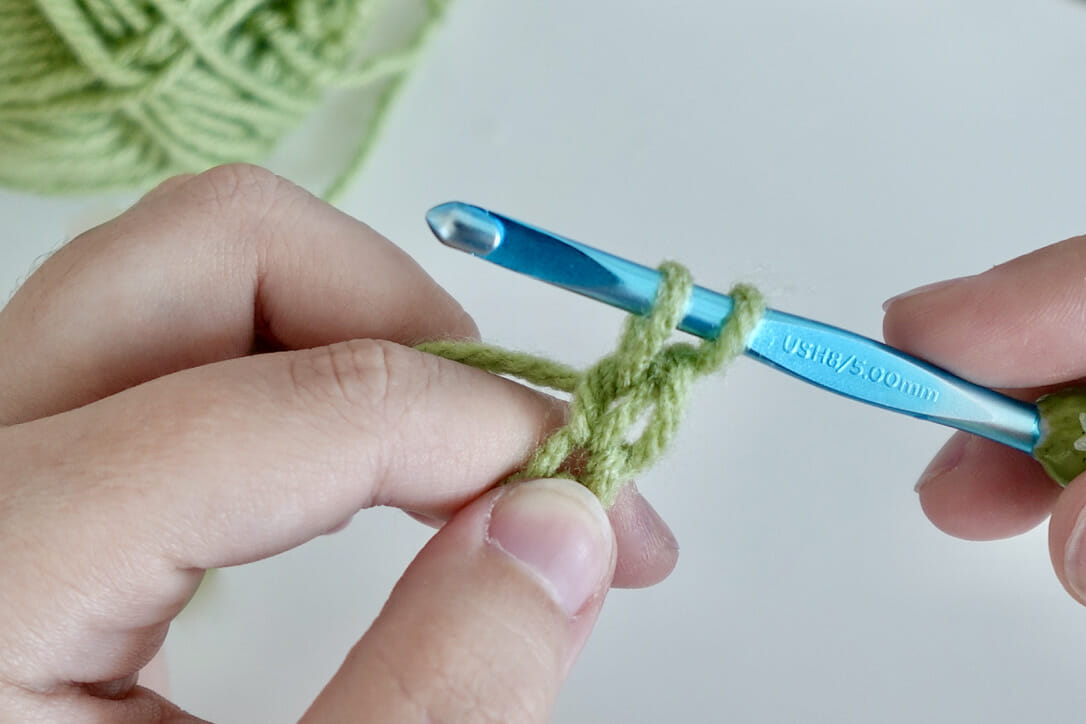
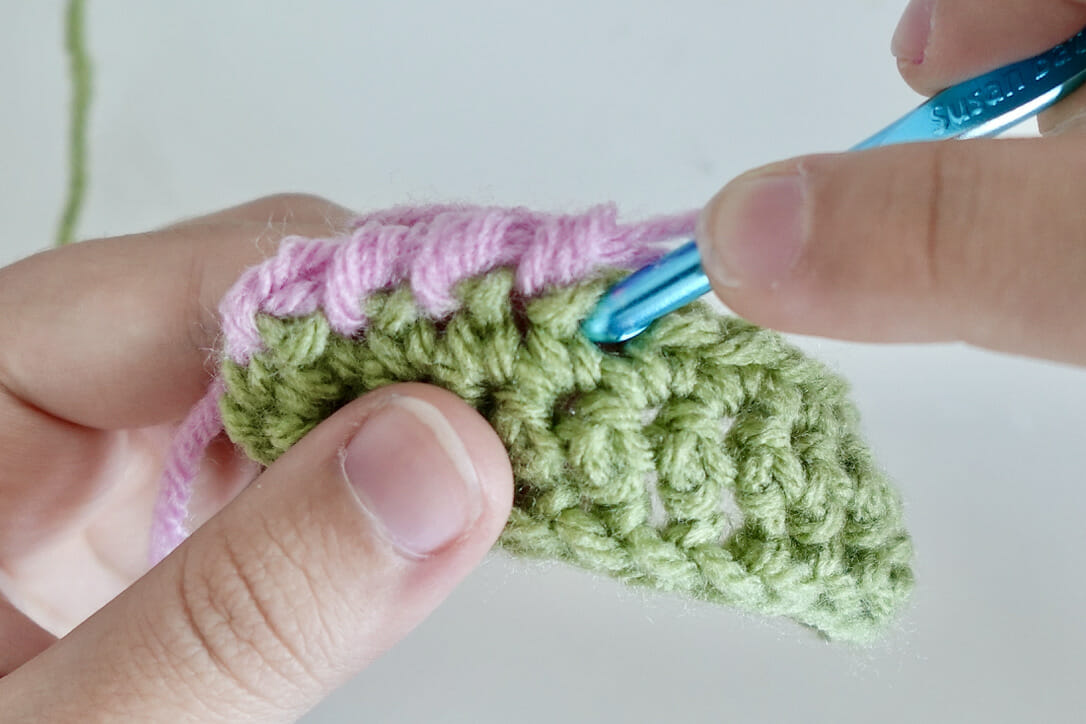
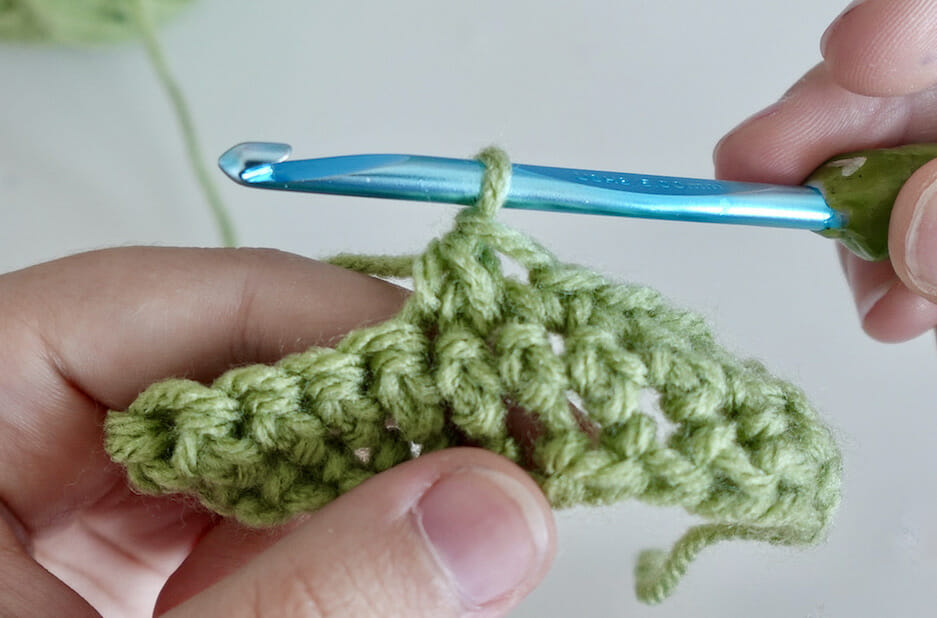
Step 3: Insert the hook into the first chain, yarn over, and pull up a loop.
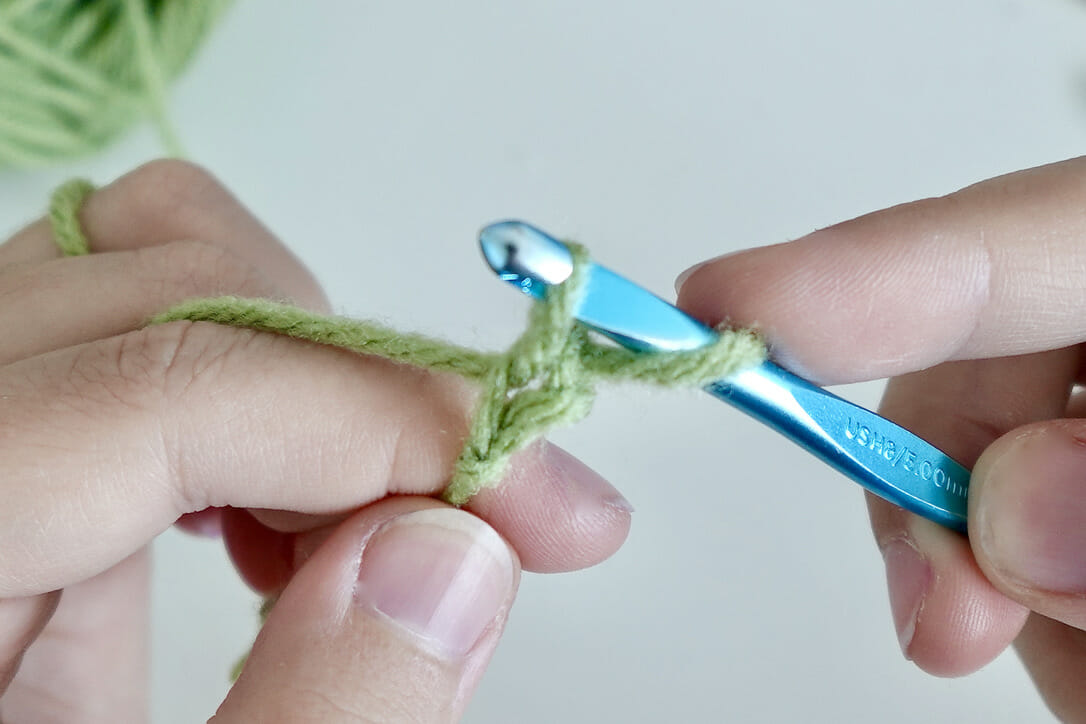
Step 4: Yarn over and pull through, creating a chain. There will be two loops on your hook.
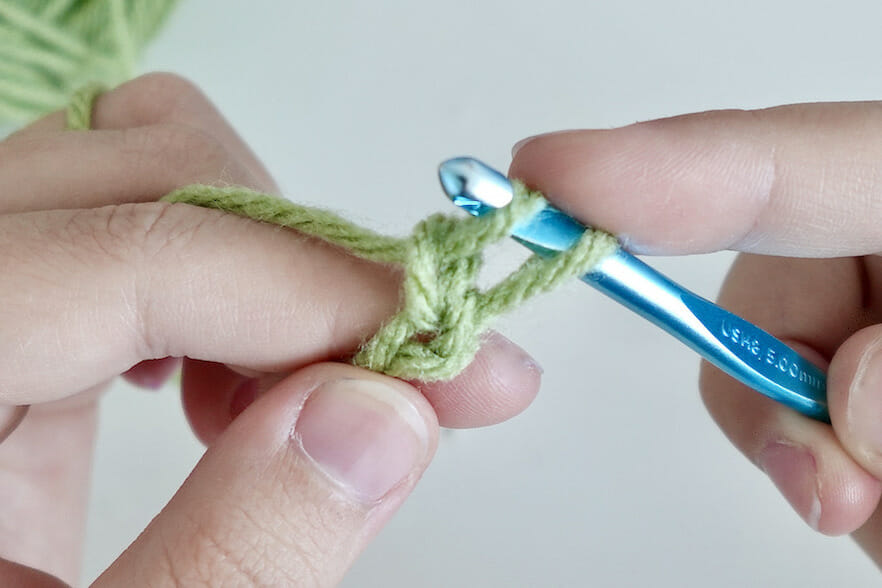
Yarn over and pull through both loops, completing your first foundation single crochet.
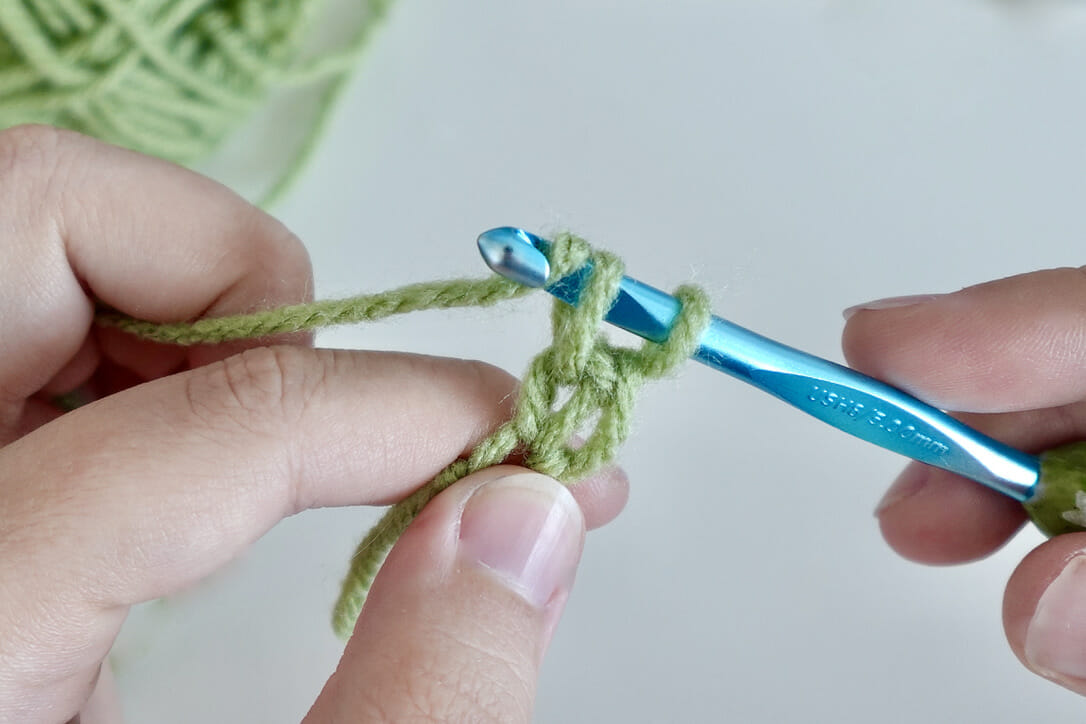
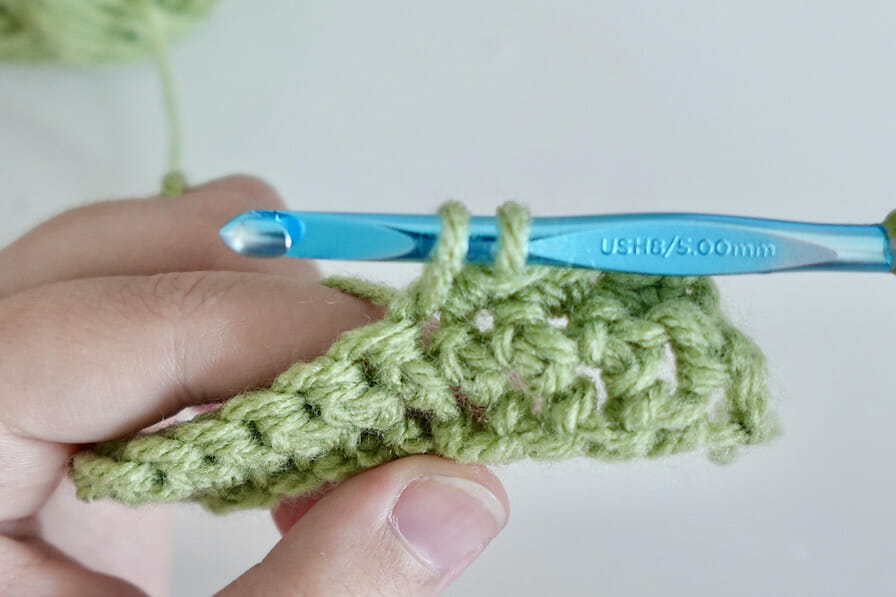
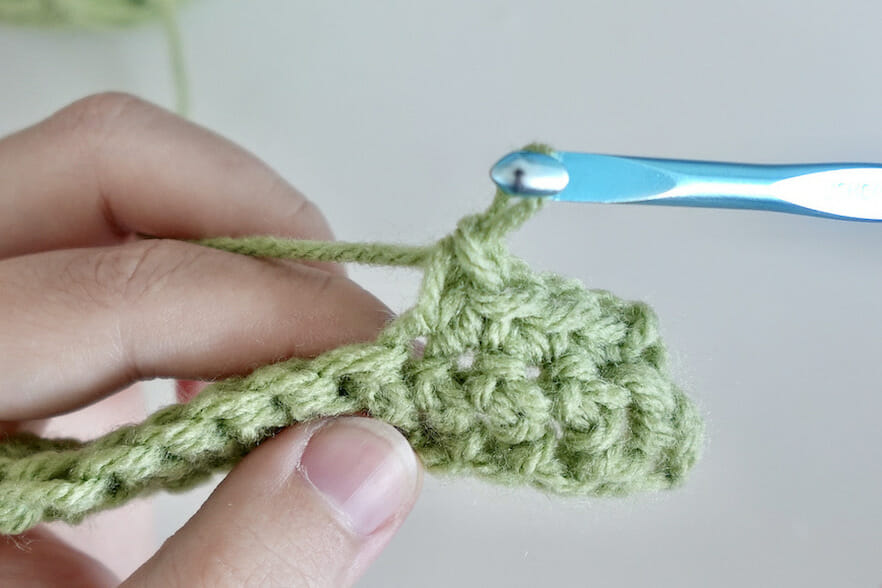
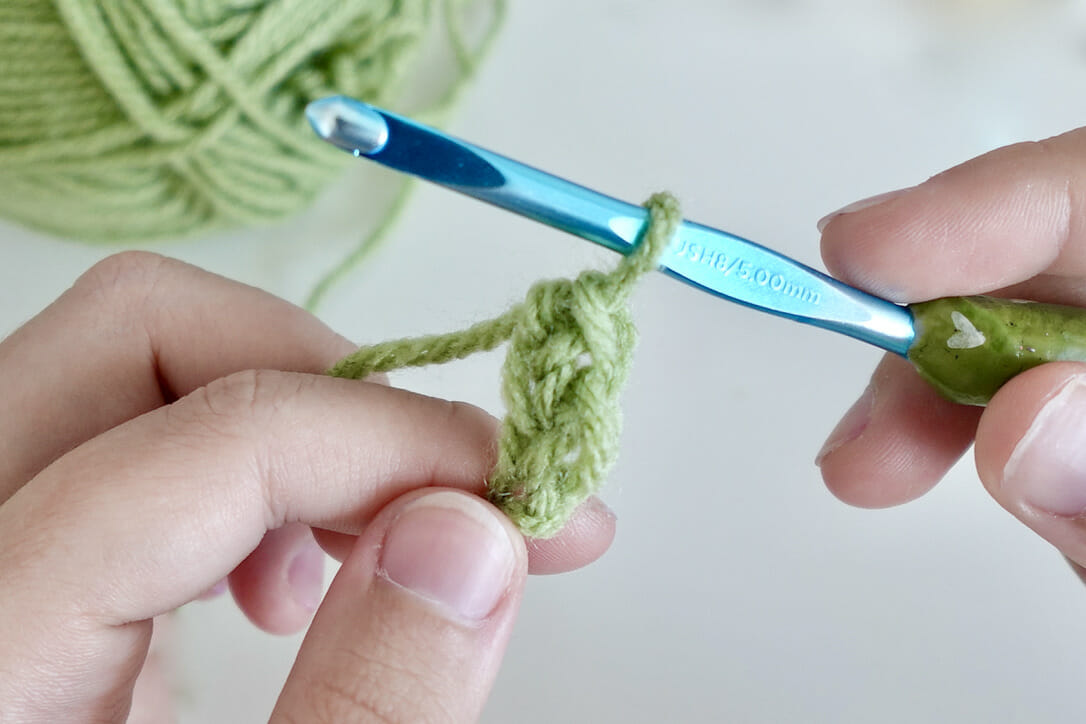
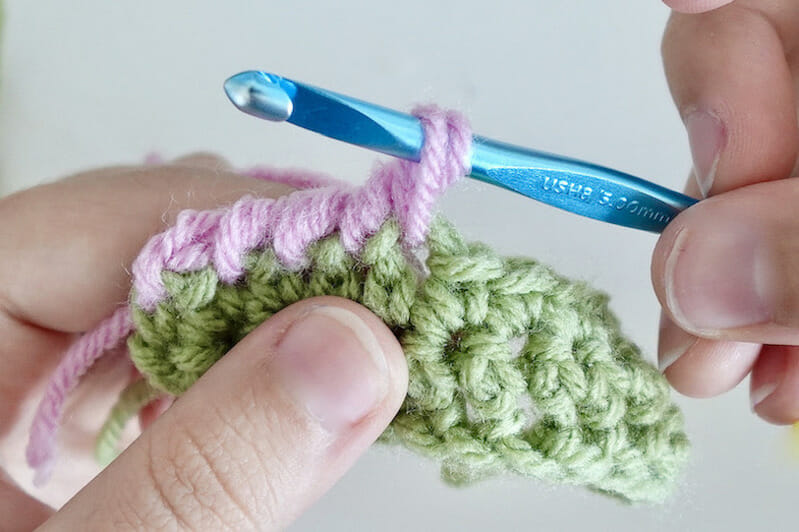
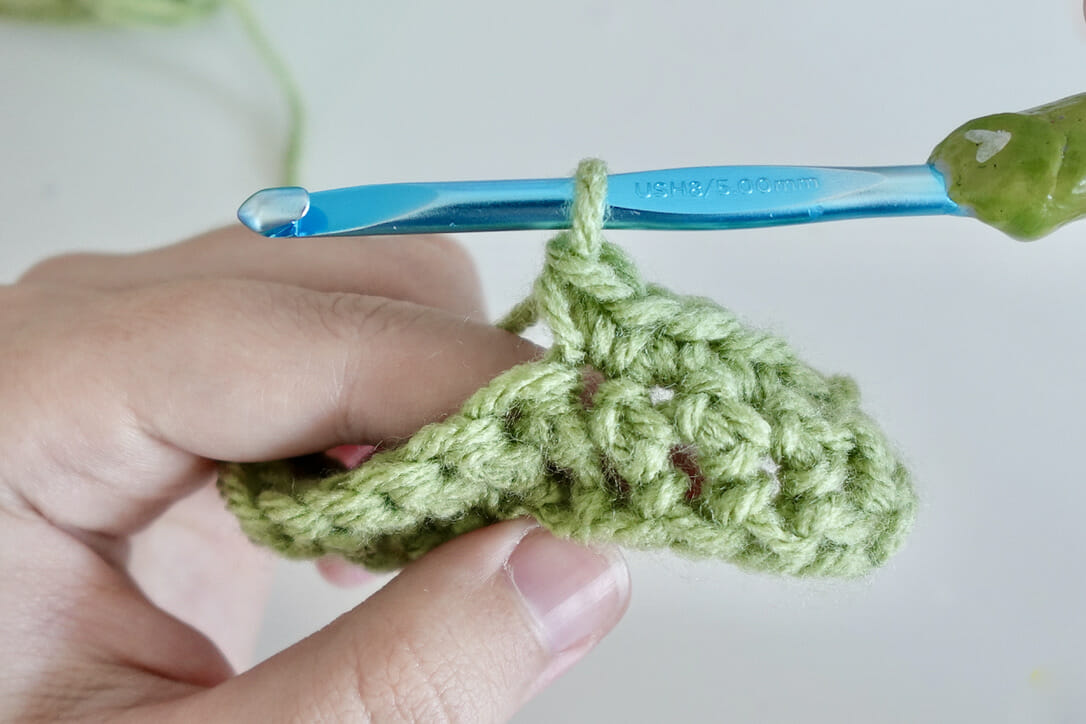
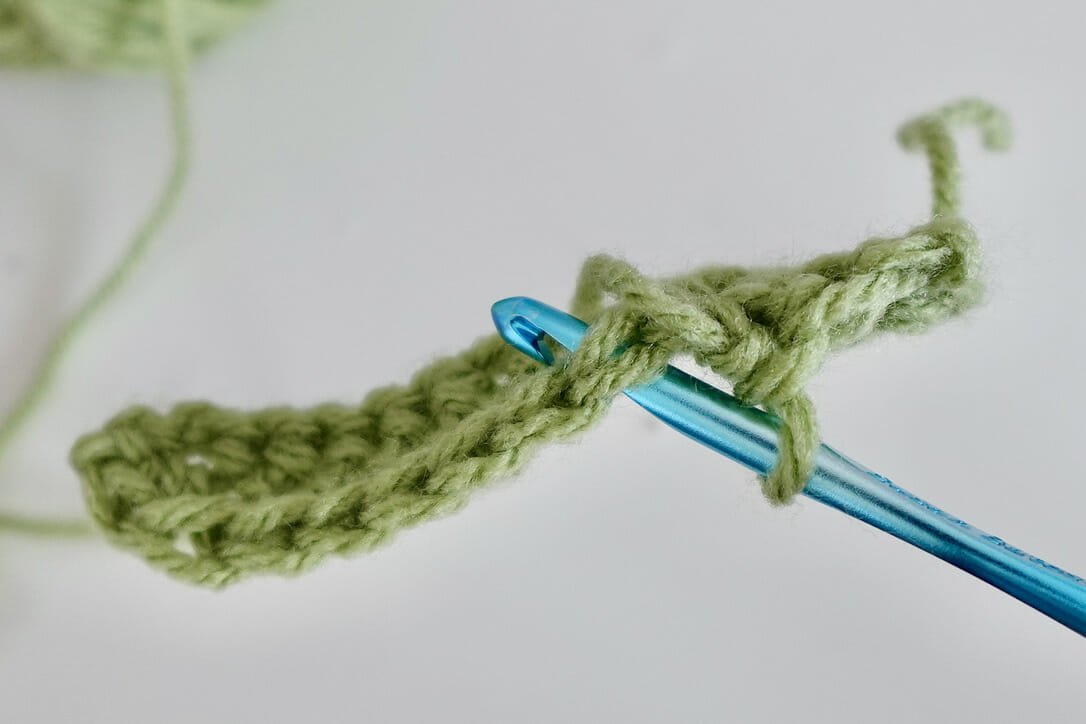
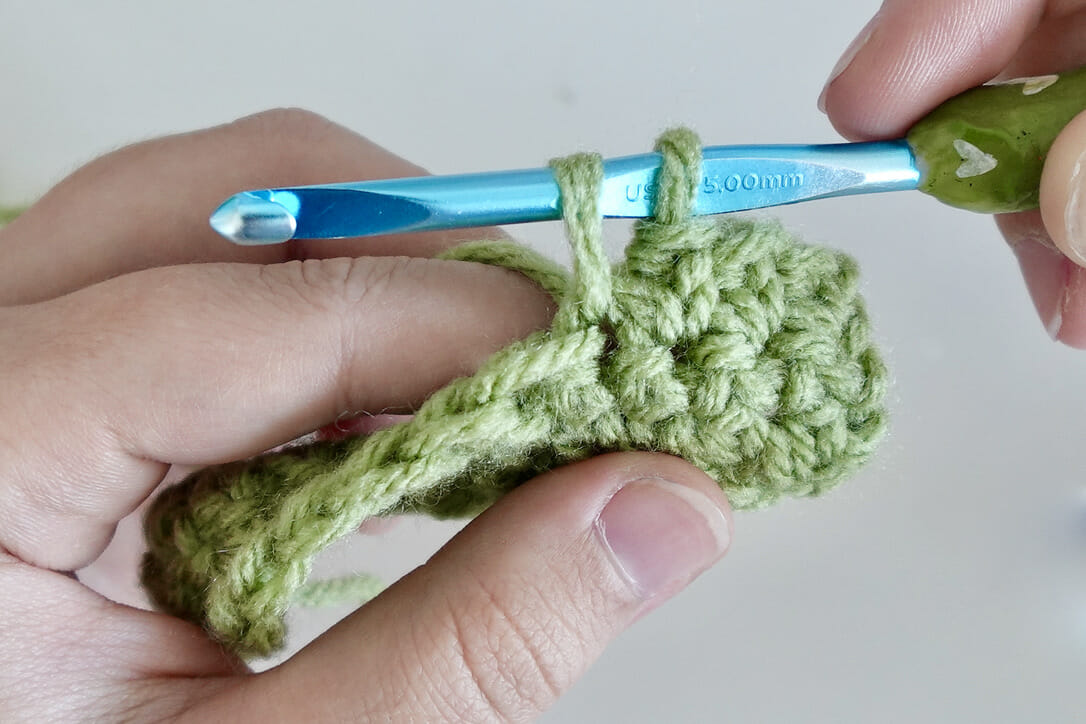
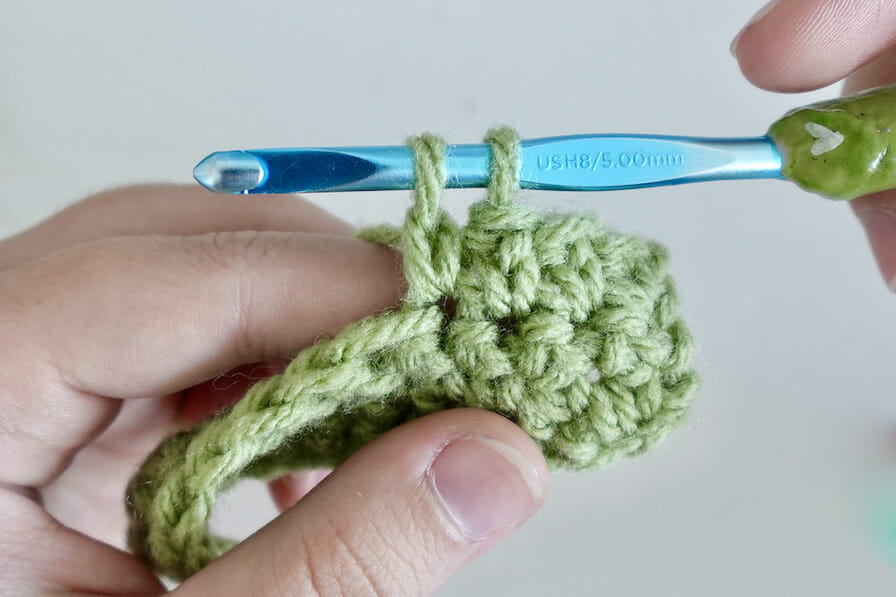
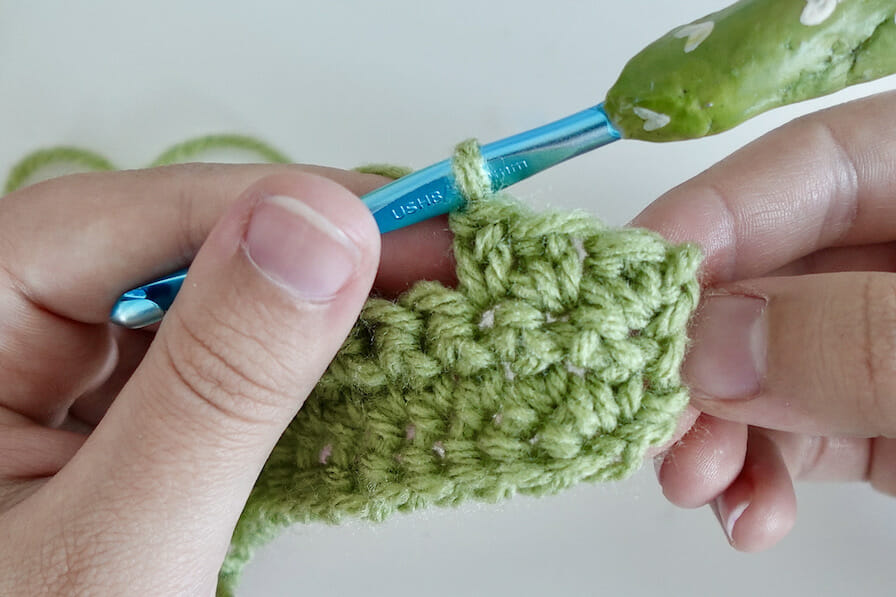
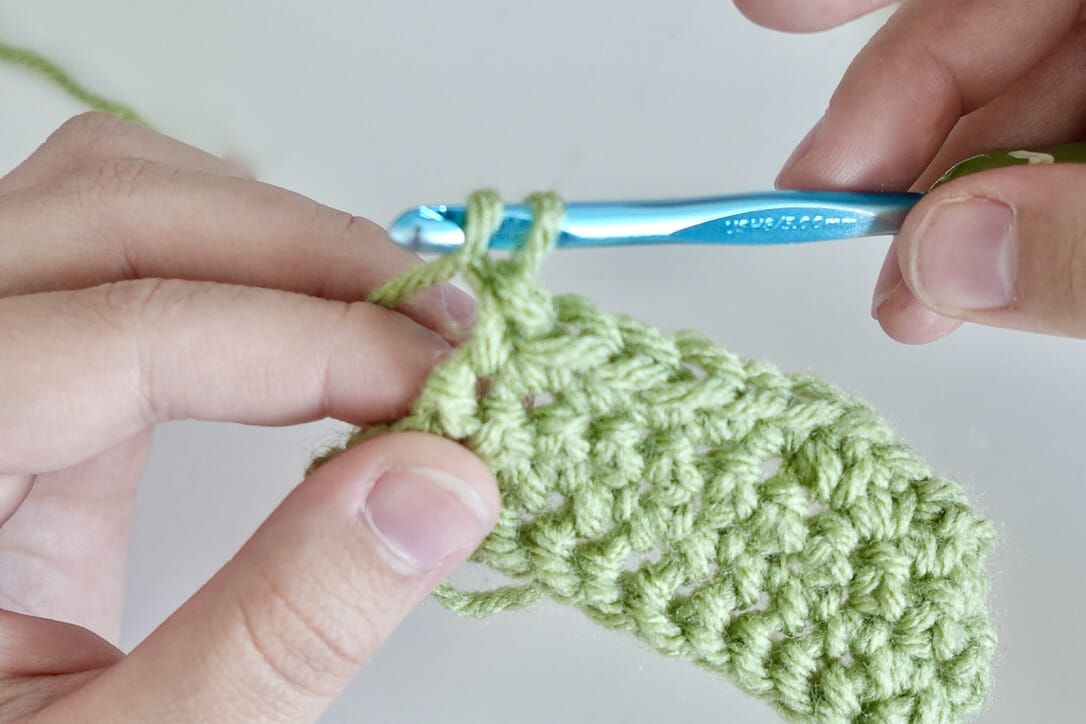
Step 5: To continue the rest of the row, insert your hook under the two loops created in Step 3.
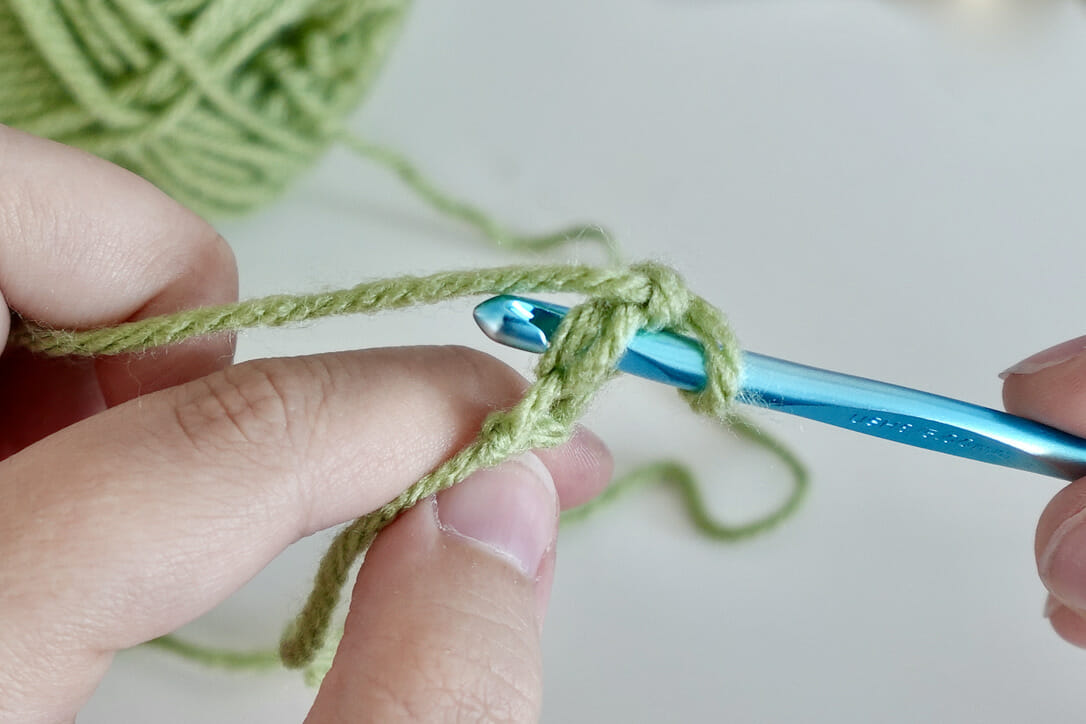
Pull up a loop, yarn over, and pull through the last two loops.
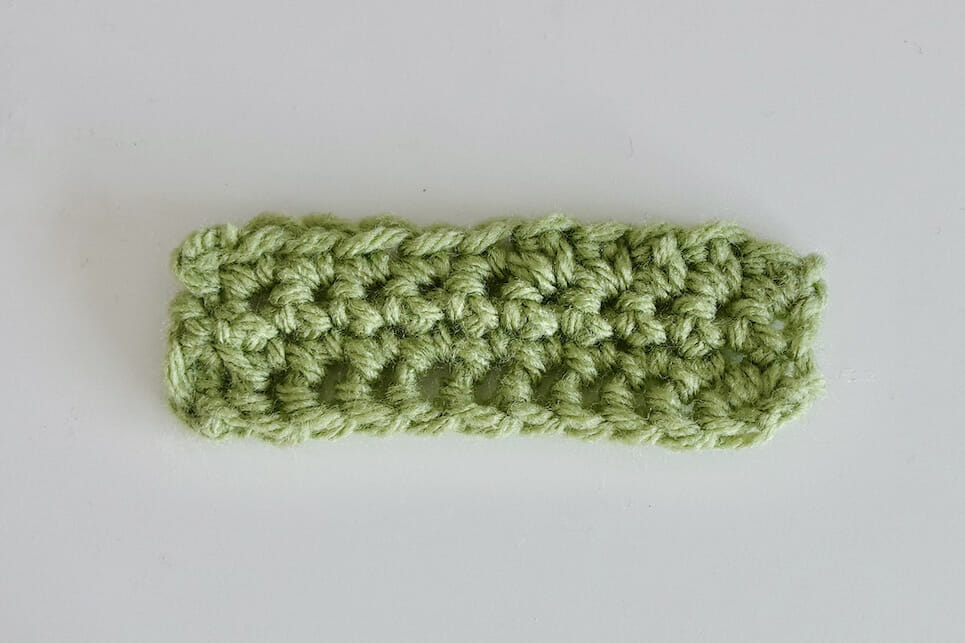
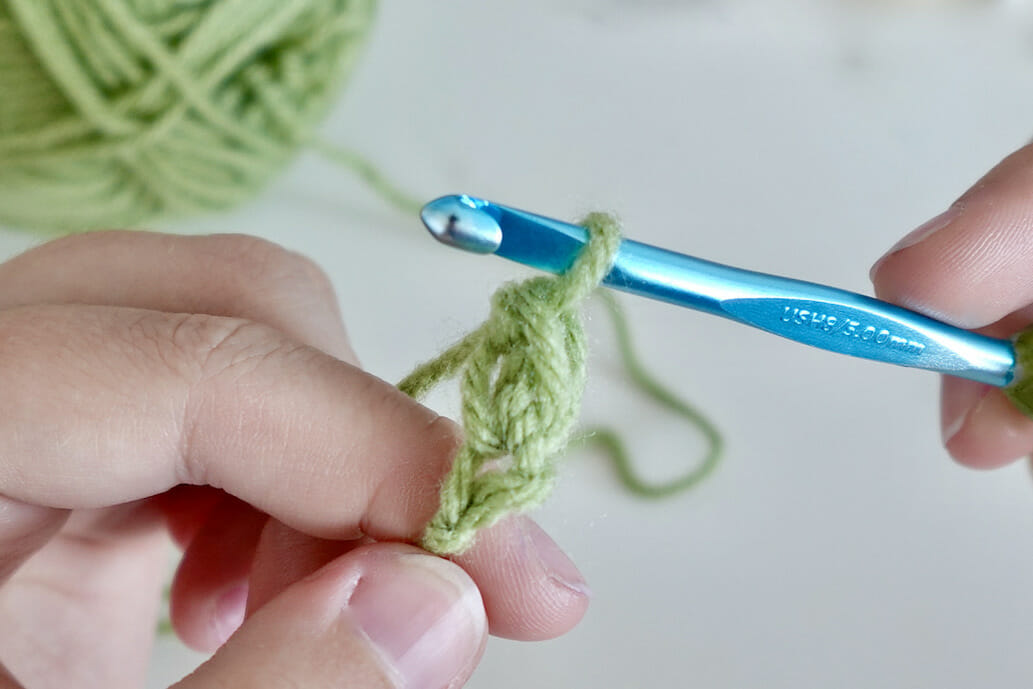
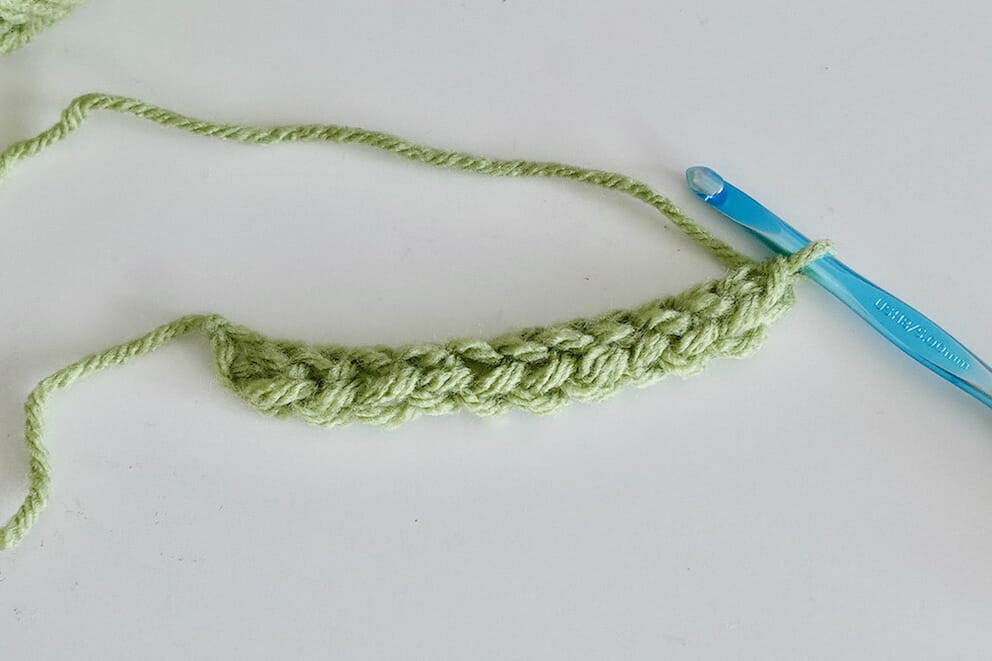
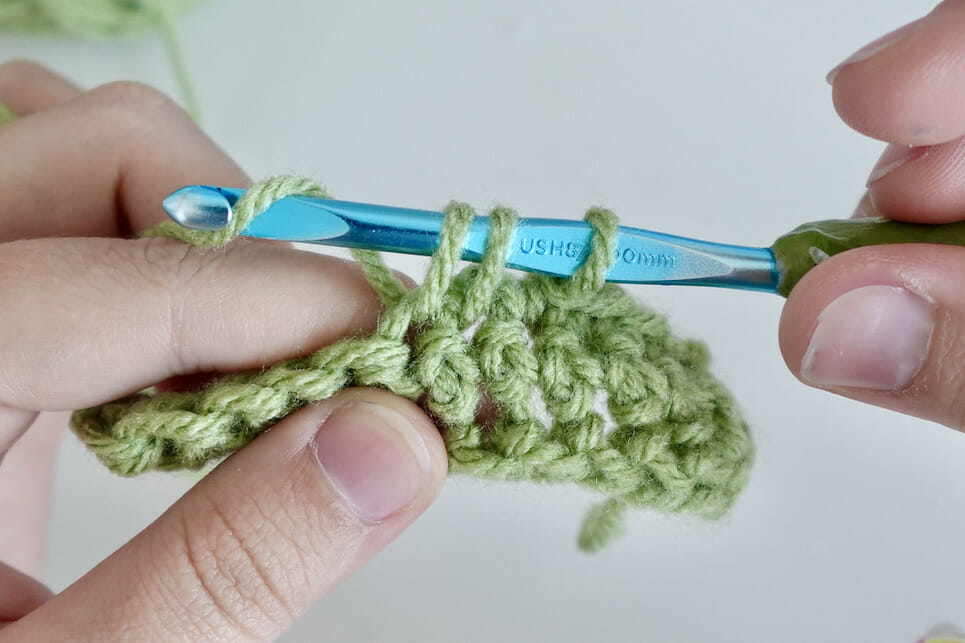
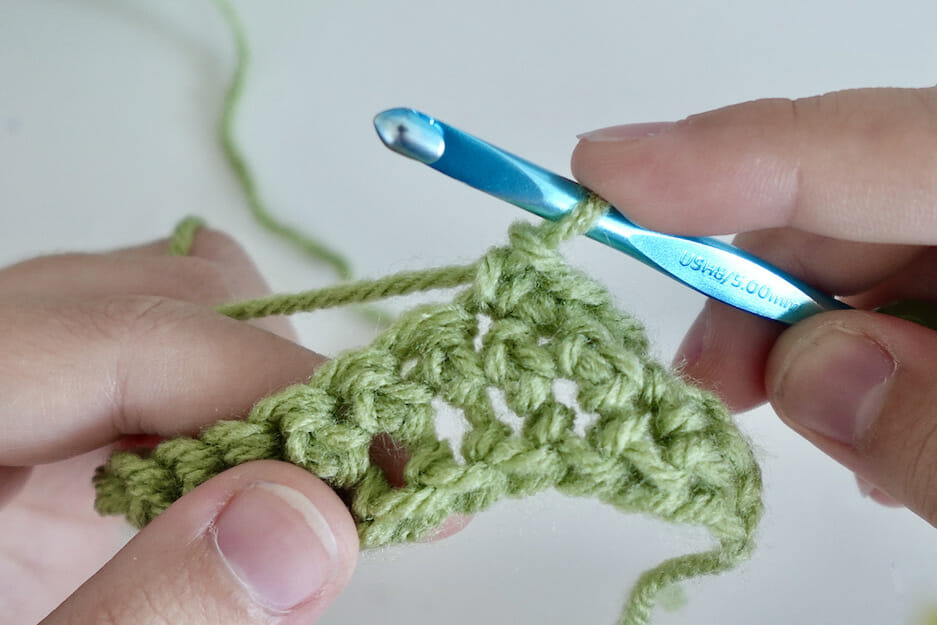
Step 6: Repeat step 5 until you reach the desired number of stitches for your foundation row (image: Foundation SC Chain).
Related: 27 Free Crochet Top Patterns
Reverse Single Crochet
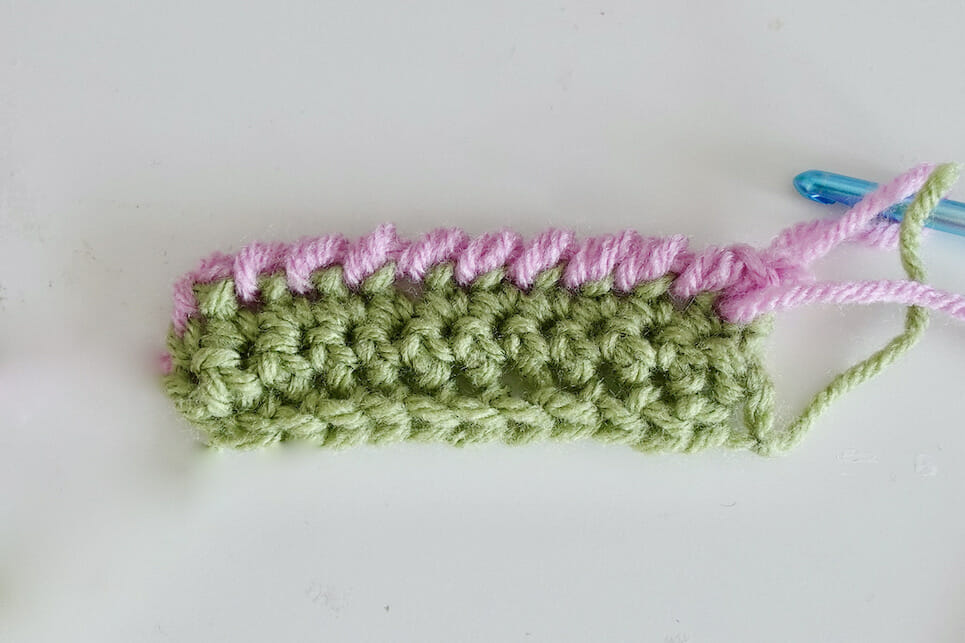
Reverse single crochet, often called “crab stitch,” is a crochet stitch that creates a distinctive decorative edge. Unlike traditional crochet stitches that are worked from right to left, reverse single crochet is worked from left to right, creating a unique twisted or braided appearance along the edge of the fabric.
While the reverse single crochet stitch may take some practice to master, it adds a beautiful finishing touch to your crochet projects. It can be worked in a contrasting color to make the edge stand out or in the same color as the fabric for a subtle yet elegant touch.
To work a reverse single crochet stitch, follow these steps:
Step 1: Begin with a piece of crochet fabric where you want to add the reverse single crochet edging. Yarn over and pull up a loop to create a chain.
Step 2: Insert the hook into the first stitch to the right of your working direction, creating a twist in the loop and working backward (if you are left-handed, this would be to the left).
Step 3: Yarn over and pull the yarn through the stitch so you have two loops on your hook.
Step 4: Yarn over once again and pull the yarn through both loops on the hook, completing the first reverse single crochet stitch.
Step 5: Move on to the next stitch to the right (or left, depending on your dominant hand) and repeat steps 2-4 across the entire edge of the fabric until you reach the end.
Single Crochet Decrease
A single crochet decrease, often known as “sc two together” and abbreviated as “sc dec,” is a crochet technique used to decrease the number of stitches in a row or round. It is commonly used to shape crochet projects or create design elements such as curves, angles, and tapered edges.
There are variations of the single crochet decrease, such as the invisible decrease, which is often preferred for amigurumi and other projects where a visible decrease may disrupt the appearance of the fabric and cause more visible “holes.”
The invisible decrease involves inserting the hook through the first stitch’s front loop, then the next stitch’s front loop, before completing the single crochet as usual. By mastering this technique, you’ll have greater control over the structure and design of your projects, and you’ll be able to follow a wide range of crochet patterns confidently.
To perform a single crochet decrease, follow these steps:
Step 1: Begin with your current row or round of single crochet stitches, and identify the two stitches where you want to decrease.
Step 2: Insert your crochet hook into the first stitch, yarn over, and pull up a loop. You should have two loops on your hook. Insert your hook into the next stitch, yarn over, and pull up a loop.
You should now have three loops on your hook.
Step 3: Yarn over and pull through all three loops on your hook, completing the single crochet decrease. This effectively combines the two stitches into one, decreasing the stitch count by one.
Single Crochet Increase
A single crochet increase, often known as “2 sc in one” and abbreviated as “sc inc,” is a crochet technique used to increase the number of stitches in a row or round. It is commonly used to shape crochet projects or create design elements that require widening or expanding the fabric.
The single crochet increase stitches are worked in a way that adds an extra stitch to the fabric, expanding its width or circumference. By repeating this technique across a row or round, you can gradually increase the size of your project, creating shaping or specific design effects. Single crochet increases are commonly used in amigurumi projects, where creating rounded shapes and curves is essential.
They are also employed in various garment patterns, such as sleeves, where you must gradually widen the fabric. By mastering the single crochet increase technique, you can shape your crochet projects, add width or fullness, and create intricate designs. It is a fundamental technique that enhances your crochet skills and allows you to follow a wide range of crochet patterns easily.
To perform a single crochet increase, follow these steps:
Step 1: Begin with your current row or round of single crochet stitches and identify the stitch where you want to increase.
Step 2: Insert your crochet hook into the designated stitch, yarn over, and pull up a loop. You should have two loops on your hook. Yarn over and pull through both loops, completing the single crochet.
Step 3: Before moving on to the next stitch, make another single crochet in the same stitch by following step 2. This effectively creates two stitches from one, increasing the stitch count by one.
Extended Single Crochet
An extended single crochet, abbreviated as “ESC” is a variation of the basic single crochet stitch. It is an elongated version of the traditional single crochet stitch, resulting in a slightly taller and looser stitch with a more open appearance. The extended single crochet stitch offers a few benefits. Firstly, it creates a slightly looser fabric with more drape compared to traditional single crochet.
This can be useful for projects with a lighter and airier texture. Secondly, the extended single crochet stitch adds height to the fabric, allowing you to cover more ground with fewer stitches. This can be particularly advantageous when working on larger projects, as it helps to expedite the crocheting process.
Lastly, most patterns use the extended single crochet interchangeably with regular single crochet. This means you can easily incorporate this stitch into your projects without modifying existing patterns.
To make an extended single crochet, follow these steps:
Step 1: Begin by chaining the length you wish to achieve or creating a foundation single crochet chain. Yarn over and pull up a loop to create a chain. Turn in your work.
Step 2: Insert your hook into the designated stitch.
Yarn over and pull up a loop. You should have two loops on your hook.
Step 3: Yarn over once again and pull through the first loop on your hook, creating a chain and remaining with 2 loops on the hook.
Step 4: Yarn over once more and pull through both loops, completing the extended single crochet stitch.
Tips For Beginner Crocheters
Holding the crochet hook and yarn properly
There are two ways that crocheters typically hold their hooks: The “Knife Grip” and the “Pencil Grip.” These terms describe the way the crochet hook is held in relation to the hand and resemble the way one would hold a pencil or a knife while writing or cutting.
Related: Why is My Crochet Curling?
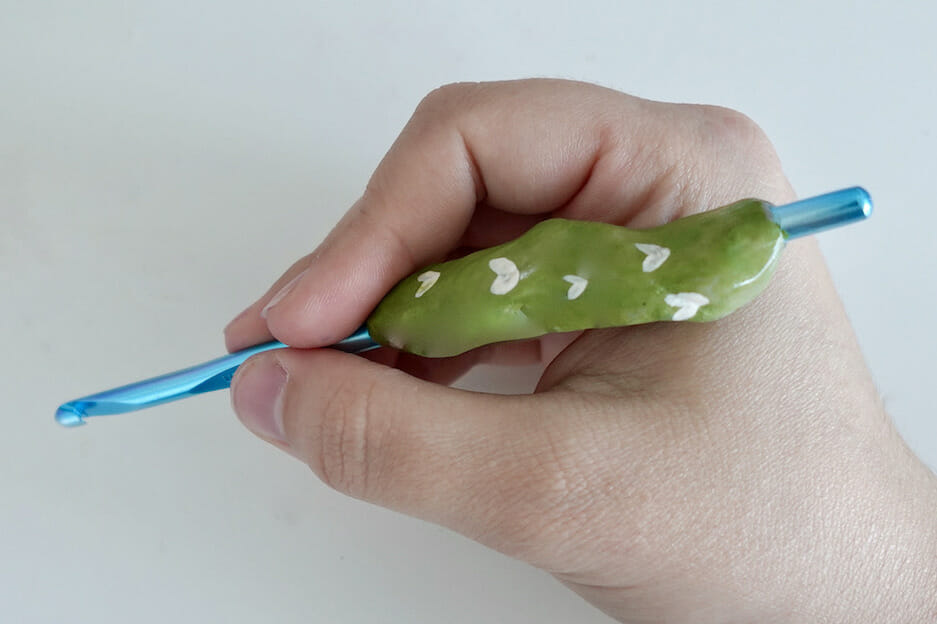
Pencil Grip
In the pencil grip, the crochet hook is held similarly to how one holds a pencil for writing. The hook is gripped between the thumb and index finger, with the middle finger resting on the shaft of the hook for support. The remaining fingers are loosely curled towards the palm, providing stability and control. This grip allows for precise movements and is commonly favored by crocheters who prefer a lighter, more delicate touch.
Knife Grip
In the knife grip, the crochet hook is held in a manner similar to how one holds a knife for cutting. The hook is grasped with the palm facing down, and the handle of the hook rests inside the palm, held by the base of the thumb and the fingertips.
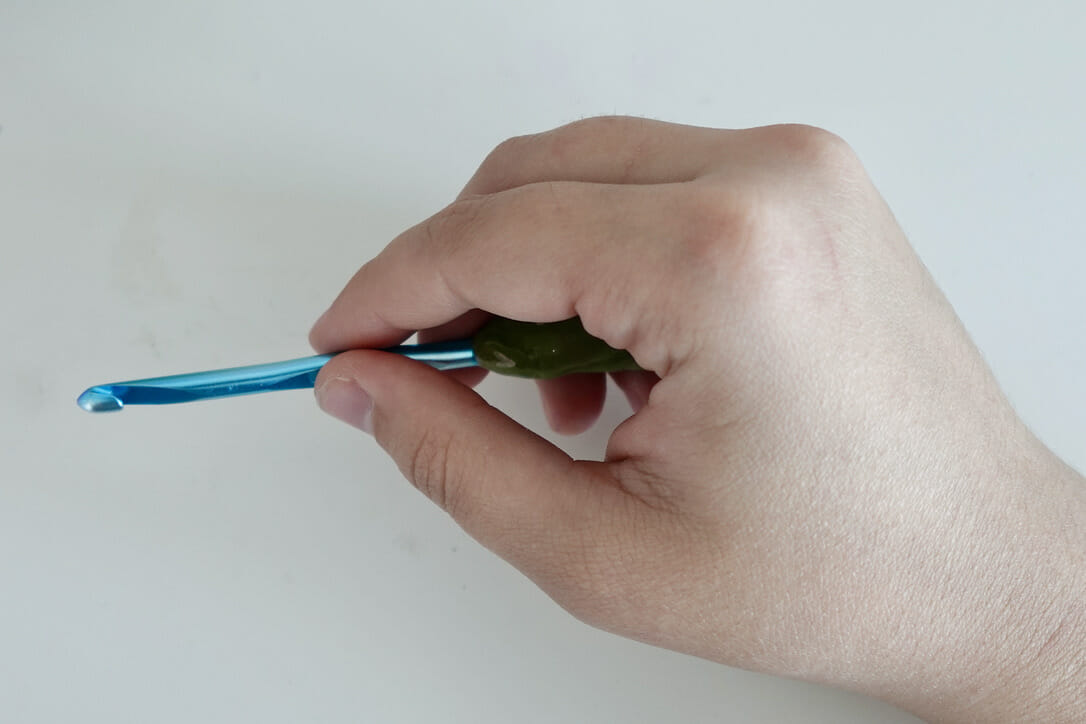
The index finger extends along the top of the hook, providing guidance and control. This grip allows for more power and strength in the movements and is often favored by crocheters who prefer a firmer hold and larger, faster motions.
It’s important to note that these grip styles are not exclusive, and individual crocheters may adopt variations or hybrids of these grips based on personal comfort and preference. The choice of grip is personal, and the most important aspect is finding a grip that allows for comfort, control, and efficient crochet motions.
Holding The Yarn
Crocheters have different preferences regarding how they hold their yarn in their left hand, also known as the “yarn hand” or “working hand.” The technique for holding the yarn in the left hand varies depending on individual comfort and the desired tension of the yarn.
One common method for holding the yarn in the left hand is known as the “overhand” or “over-the-finger” method.
Here’s how it’s done:
Step 1: Begin by allowing the yarn to come from the skein or ball and drape it over the back of your left hand, going over your index finger and ring finger.
Step 2: The tail end of the yarn can be secured between the pinky finger and the palm of the hand to prevent it from slipping.
Step 3: Use your fingers to lightly control the tension of the yarn. You can adjust the tension by slightly spreading or closing your fingers.

It’s important to note that there is no one “correct” way to hold the yarn in the left hand. Crocheters develop their own techniques over time based on personal comfort and efficiency. Experimenting with different methods and observing how the yarn flows smoothly from the left hand while maintaining the desired tension for your crochet stitches may be helpful.
Remember that the primary goal is to find a method that allows you to comfortably and consistently control the tension of the yarn as you crochet. With practice, you will find the technique that works best for you and enables you to crochet with ease and enjoyment.
Making A Slip Knot
Making a slip knot is the first step in starting many crochet projects. Remember that the slip knot should be loose enough to easily slide along the crochet hook but not so loose that it unravels or becomes too large. Adjust the tension as needed by gently pulling the yarn tail or the main strand to achieve the desired size and tightness.
Once you have mastered the slip knot, you can confidently move on to the next steps in your crochet project, such as creating a foundation chain or working stitches into the slip knot itself.
Here’s a quick method on how to make a slip knot:
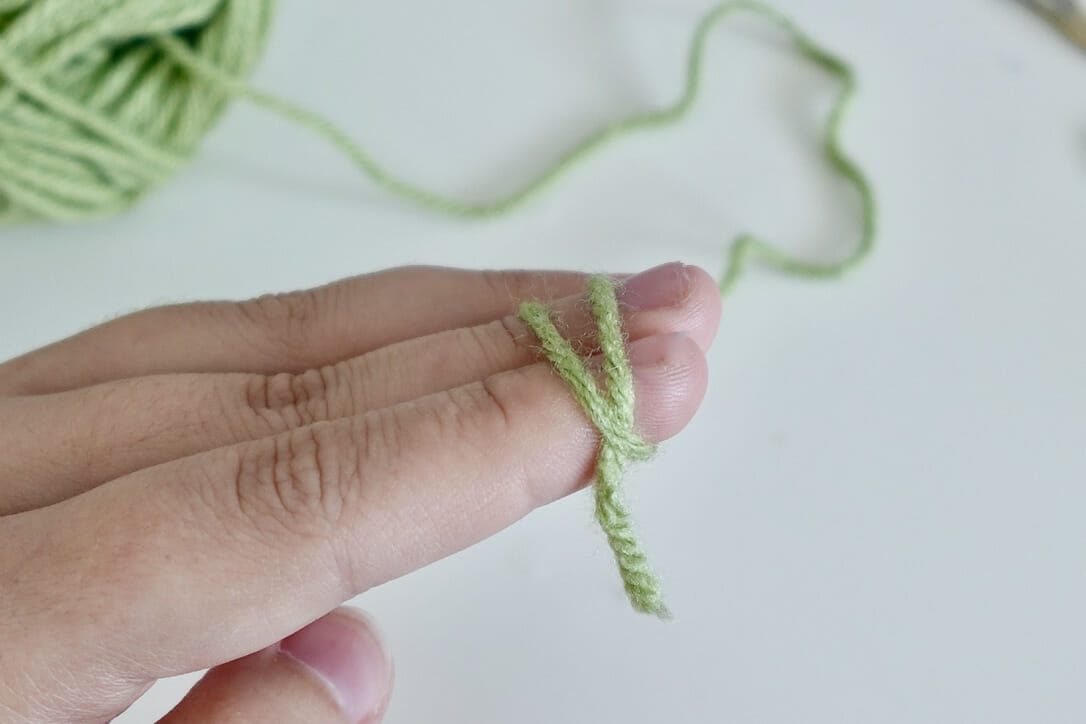
Step 1: Begin with your yarn on your “working hand,” or the hand that you hold your yarn with. Cross it over your index and middle finger, under and back over, holding the tail with your ring finger. This will create an X on the side of your index finger, and two stands on top of your fingers.
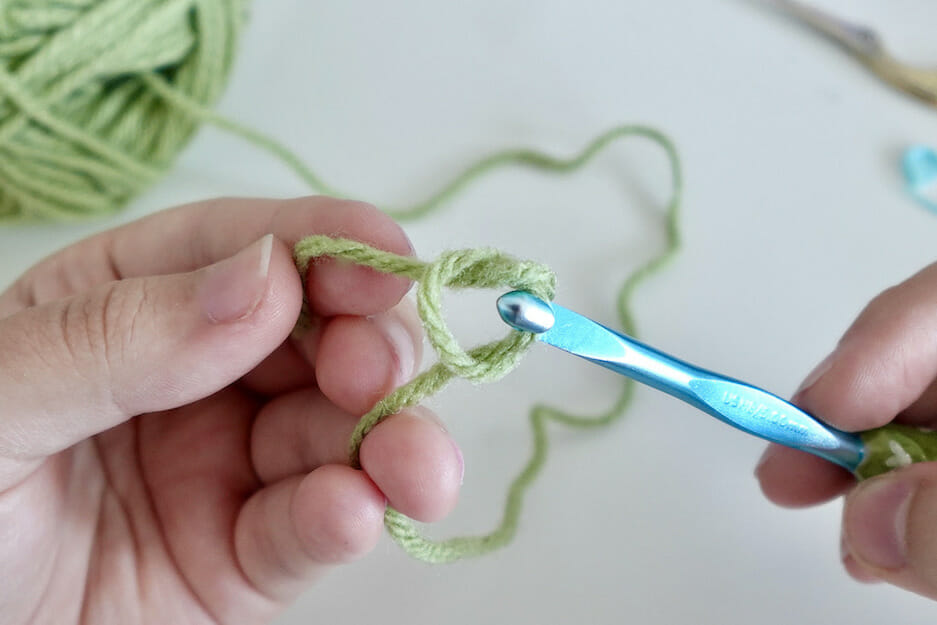
Step 2: Next, slide your hook under the first strand and over the second strand of yarn. Pull the yarn through and twist your hook upwards.

Slip your fingers out of the yarn but hold on to the strand with your hook.
Step 3: Gently tighten the slip knot by pulling the yarn tail while holding the main strand. Make sure not to tighten it too tightly, as you need to be able to slide the knot along the hook. You now have a slip knot on your crochet hook, ready to begin your project. The slip knot counts as your first loop or stitch.
Single Crochet Troubleshooting Tips
While single crocheting, there are some common mistakes that beginners often make. Here are a few mistakes to be aware of and avoid:
Inconsistent Tension
Consistency in yarn tension is crucial for achieving a neat and uniform appearance in your stitches. Avoid pulling the yarn too tightly or too loosely, as it can distort the shape and size of your stitches. Practice maintaining even tension throughout your work to create a consistent fabric.
Skipping Stitches
Be mindful not to skip stitches when accidentally working single crochet rows or rounds. Each stitch should be worked into its designated space to maintain the correct stitch count and prevent gaps or unevenness in your project. Count your stitches periodically to ensure accuracy.
Twisted Stitches
Take care to insert your hook into the correct part of the stitch. Inserting the hook through the wrong loop can twist the stitch and result in an irregular appearance. Ensure that you are inserting your hook under both loops of the stitch unless the pattern specifies otherwise.
Missing the First Stitch
When starting a new row, it’s common to skip the first stitch accidentally. This mistake can lead to a decrease in stitch count and an uneven edge. Double-check that you work into the first stitch at the beginning of each row to maintain the correct stitch count and a straight edge.
Uneven Edges
Pay attention to the edges of your work to avoid creating uneven or jagged lines. Ensure consistent tension and stitch placement at the beginning and end of each row or round. If necessary, use stitch markers to help you identify the first stitch of each row.
Ignoring Pattern Instructions
It’s important to carefully read and follow the instructions provided in your crochet pattern. Each pattern may have specific guidelines for stitch placement, increases, decreases, or special techniques. Failing to follow these instructions can result in errors or inconsistencies in your work.
Rushing
Crocheting requires patience and attention to detail. Avoid rushing through your stitches, as it can lead to mistakes and inconsistencies. Take your time, focus on each stitch, and enjoy the process of creating your project.
By being aware of these common mistakes and practicing good technique, you can avoid them and produce high-quality single crochet work. Remember that mistakes happen to everyone and can be a valuable learning opportunity. Don’t be discouraged if you make a mistake—unravel and try again. With practice, your crochet skills will continue to improve!
Crochet Finishing and Fastening Off
To finish a crochet project and fasten off, follow these steps:
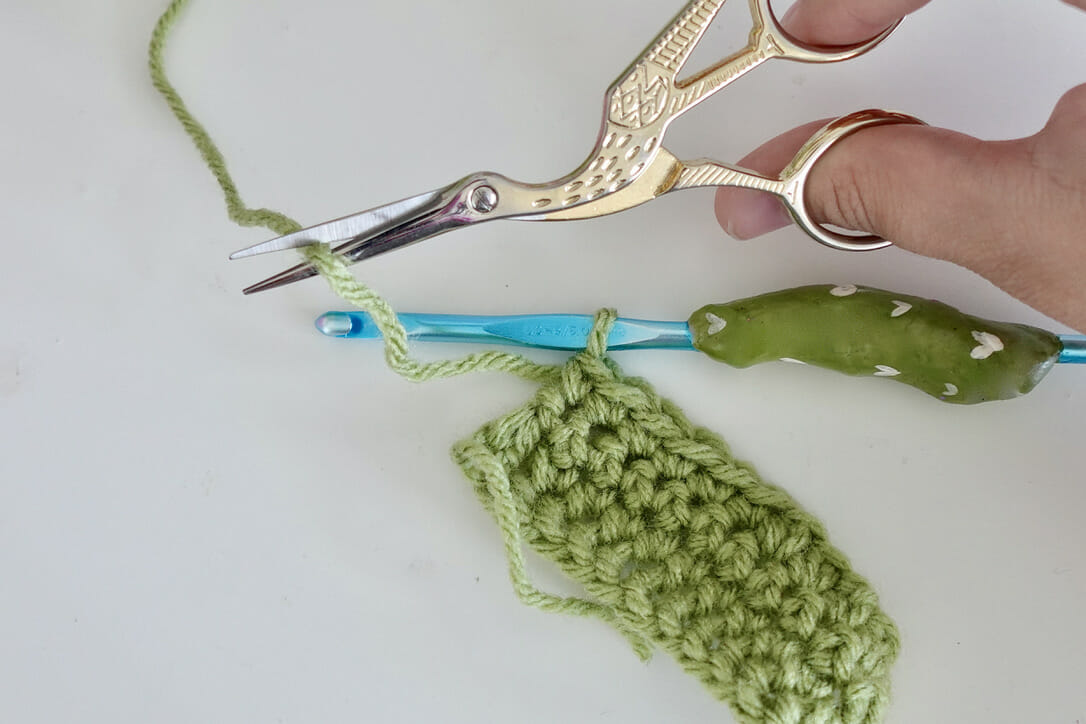
Cut the Yarn
Once you have completed your final stitch, yarn over (wrap the yarn around the hook from back to front) and pull through the loop (this step is similar to making a chain stitch).
Leave a tail of yarn measuring around 4 inches (approx. 10 cm), and using your scissors, cut the yarn, leaving the tail attached to your work.
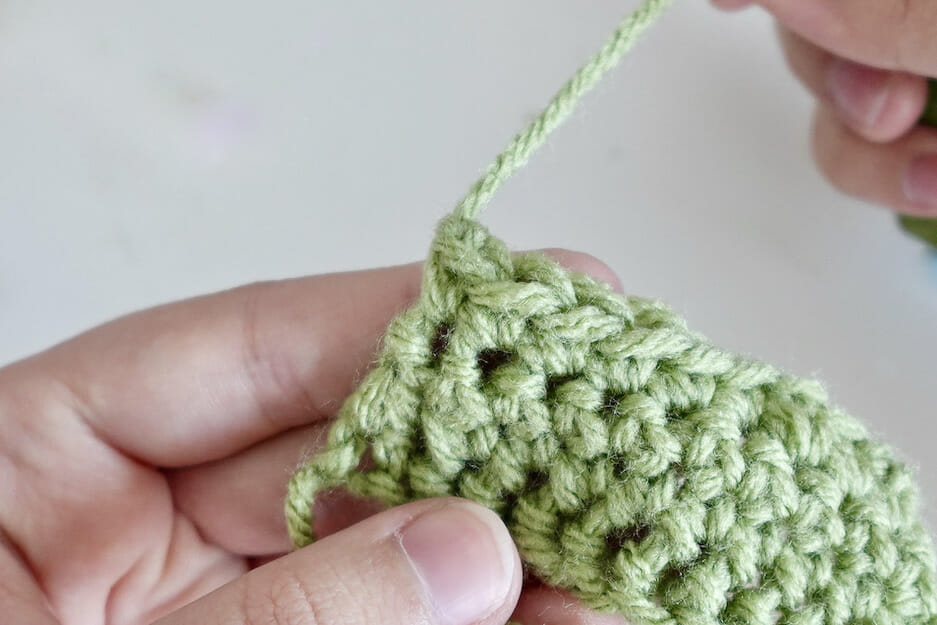
Tighten the Loop
Gently pull the loop with your hook to tighten it, securing the yarn in place. Be careful not to pull too tightly, as it may distort your work.
Weave in the Tail
Thread the yarn tail through a yarn needle using a threader. Then, weave the tailback and forth through the stitches on your project’s wrong side (or inside). This helps to secure the tail and hide it within the stitches.
Trim Excess Yarn
Once you have woven the tail through several stitches, cut off any excess yarn, leaving a small tail that is safely tucked within your work.
By following these steps, you will be able to securely finish your crochet project and prevent your stitches from unraveling. Remember to adjust the tension as you fasten off to ensure a neat and consistent appearance.
Related: How to Crochet a Tube Top – Video Tutorial
Tips for Practicing and Improving
Recommended practice exercises to enhance single crochet skills
Practicing specific exercises can help enhance your single crochet skills and improve your technique. Here are some recommended practice exercises for honing your single crochet abilities:
Foundation Chain Practice
Start by creating a foundation chain of any desired length. Then, practice working single crochet stitches into each chain stitch. Focus on maintaining consistent tension and stitch height throughout the row. Repeat this exercise to develop control and evenness in your single crochet stitches.
Straight Rows Practice
Crochet several rows of single crochet stitches without increasing or decreasing. Concentrate on achieving consistent stitch size and maintaining an even edge. Pay attention to the insertion point of the hook and the yarn tension to ensure smooth, uniform stitches.
Turning Practice
Practice turning your work at the end of each row smoothly and neatly. This will help maintain an even edge and prevent gaps or uneven tension. Experiment with different turning techniques, such as chaining one or using a turning chain, to find the method that works best for you.
Decrease and Increase Practice
Work on mastering single crochet decreases (sc dec) and single crochet increases (sc inc). Practice decreasing stitches to create tapered edges or shaping, and practice increasing stitches to widen or expand your work. This exercise will help you become comfortable with these techniques and understand their impact on stitch count and fabric structure.
Stitch Combination Practice
Combine single crochet stitches with other basic stitches, such as double crochet or half-double crochet, to create different stitch patterns. Practice working rows or rounds with various combinations to become familiar with stitch transitions and develop coordination between different stitches.
Consistent practice, patience, and persistence will lead to improvement and mastery of single crochet skills.
Related: How to Crochet a Basic Beanie Hat – Video Tutorial
Conclusion
Single crochet is relatively easy to learn and execute. Its simplicity makes it accessible to beginners, providing a solid starting point for developing your crochet skills. Learning single crochet helps you understand the fundamental principles of crochet, such as yarn tension, hook positioning, and stitch formation. These skills are transferable to other stitches and techniques, allowing you to build upon your knowledge and tackle more intricate projects as you progress in your crochet journey.
Single crochet is an important and essential stitch for beginners to learn. It serves as a building block for expanding your crochet range, enables you to create a wide variety of projects (cardigans, tops, sweaters, etc.), and instills important foundational skills. Enjoy the process and have fun exploring the versatility of this fundamental crochet stitch!