Art & Craft, DIY ideas and Tutorials – Craftbuds
  • About Us
  • Needlecraft
    • Crochet
    • Knitting
    • Quilting
    • Sewing
    • Embroidery
  • Cricut
  • Jewelry Making
  • Paper Craft
    • Origami
    • Drawing
  • Engraving
  • Collectibles
    • Numismatics
43K Followers
25K Followers
1K Subscribers
Subscribe
Art & Craft, DIY ideas and Tutorials – Craftbuds
  • About Us
  • Needlecraft
    • Crochet
    • Knitting
    • Quilting
    • Sewing
    • Embroidery
  • Cricut
  • Jewelry Making
  • Paper Craft
    • Origami
    • Drawing
  • Engraving
  • Collectibles
    • Numismatics
  • Craft
  • Needlecraft
  • Sewing

How to make bunting with fabric squares

  • Lindsay
  • Posted: January 27, 2022
how to make bunting with fabric squares
Total
2
Shares
0
0
2


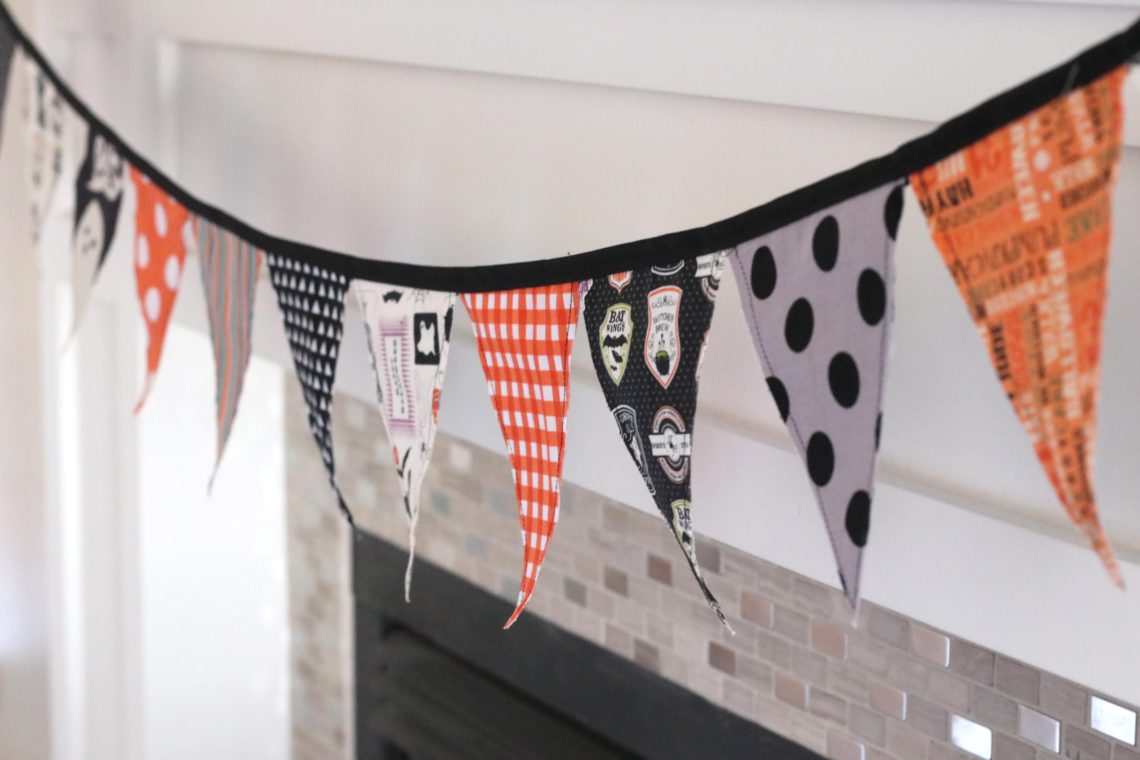
Hanging flag ornaments is a great way to add flair and decorate any room, whether it’s your home or office. Flag bunting is traditionally used on holidays and special occasions such as Independence Day, Memorial Day and Labor Day. Flags can be made from many different materials including cotton, silk and paper; however, fabric flags are very versatile and can be made using just about any material you wish including all clothes. However, most common fabrics include burlap, muslin, satin and lace. Although they may look more complicated than paper flags to create, fabric flags are actually fairly easy to make for even the most novice of craft-makers.

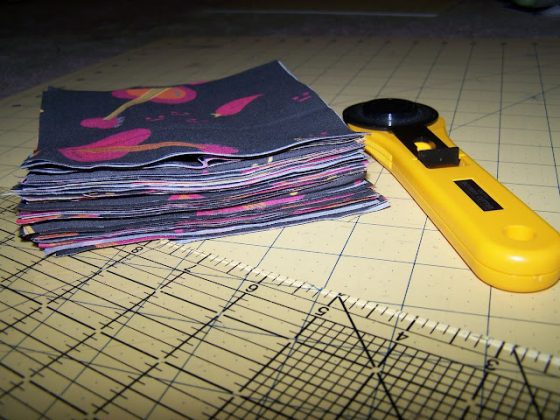
What do you do with the extra fabric squares you made? Nearly a year ago, I collected these fabric charm squares from a couple of swaps on Craft Buds, and I still hadn’t used them. I need a quick and easy sewing project to come to my rescue!


To make this bunting, you’ll need:

– 17 fabric charm squares, 5″ x 5″ (I used repeats of each of 9 prints and used all but 1)
– One 3-yard package of bias tape or quilt binding (I used Wright’s extra wide double fold)
– Pinking shears or a pinking rotary blade See the list of may favorite tools here
– Sewing pins, thread, and sewing machine

First, mark one of the charm squares by folding it down the centerline. Fold from the bottom of that centerline to each corner, and press the fold with your fingernail to mark.

Aside from making your bunting flags very cute, these pinked edges will keep the fabric from fraying! If you have a rotary cutter, you may want to purchase a pinking rotary blade. Otherwise, a pair of pinking shears work great.

how to make bunting flags

Cut along the diagonal lines you marked to make a triangle. I stacked and cut through two charm squares at a time to save time.

To cut the rest of your triangles, fold the charm squares as described above, or use a previous bunting flag and trace the edges with your fingernail. Remove the top flag and cut along the marked line.

Arrange your bunting flags in the order you’d like.

Open up the bias tape and insert the non-pinked edge of your triangle flags into the fold. Pin each flag in place, leaving a 1/2″ to 1″ gap between each one. I left a few inches of the bias tape empty on each end for hanging.

Once the flags are trapped inside of the binding, head to your sewing machine. Like I used, you can sew the bias tape together with a straight stitch or a wide zig-zag stitchContinue to stitch the bunting closed, sewing in the flags while removing the pins.

how to make a fabric bunting

Ta-da! Admire your festive fabric bunting!

Variations:

– If you don’t like the look of pinked edges, cut the triangles with straight edges, and sew two triangles together on the long sides, with the right sides of each fabric facing. Turn the flags right side out and press. Finish the bunting by placing the raw edges inside the bias tape and sewing shut.

– If you prefer, skip the triangles and make a bunting from the 5″ x 5″ charm squares. With the right sides facing, stitch together a pair of charm squares on three sides. Turn right side out and press. Placing the raw edges inside the bias tape and sewing the bunting shut.

how to make a charm square bunting

I hope you enjoyed this super-easy charm squares tutorial! This is a great sewing project for beginners or for teaching kids to sew.


Total
2
Shares
Share 0
Tweet 0
Pin it 2
Related Topics
  • bunting tutorial
  • charm squares
  • easy sewing project
  • how to make a bunting
  • make a banner
  • make a bunting
  • pinking rotary
  • pinking shears
  • sew a banner
  • sew bunting
  • sew bunting flags
  • sewing for beginners
  • triangle flags
Lindsay

Hi, I’m Lindsay Conner, an author, modern quilter, editor, and founder of the Lindsay Sews blog. I’m a Baby Lock ambassador and Stash Books author who loves writing modern sewing and quilt patterns for beginners and weekend sewists! I live in Indianapolis, Indiana with my husband, son, and two loveable cats, Murph and Chloe. I’ve been crafting for as long as I can remember. As a kid, I saved my dollar bills for trips with my mom to Jo-Ann Fabrics, where I’d find new floss for friendship bracelets or mini cross-stitch kits. Because my mom has always shared my love for crafting, she bought me my first sewing machine, a Hello Kitty Janome.

Previous Article
How to make charm squares
  • Craft
  • Needlecraft
  • Sewing

How to Cut Fabric Charm Squares For Quilt & Patchwork

  • Lindsay
  • Posted: January 27, 2022 - Updated at: March 6, 2022
View Post
Next Article
How to make a design board for quilting
  • Craft
  • Quilting

How to make a design board for quilting

  • Lindsay
  • Posted: January 27, 2022 - Updated at: November 13, 2022
View Post
You May Also Like
View Post
  • DIY projects
  • Home

nPhoto – Professional Photo Printing Services for Photographers: Develop Your Brand with Us!

  • Jeremie Berton
  • Posted: January 14, 2025
View Post
  • Craft
  • Outdoor

5 Great Destinations in Costa Rica for Your Next Crafting Retreat

  • Craftbuds Editorial Team
  • Posted: December 16, 2024
Why-Professional-Locksmiths-Are-Essential-for-Home-Security
View Post
  • Home

Avoiding DIY Disasters: Why Professional Locksmiths Are Essential for Home Security

  • Jeremie Berton
  • Posted: April 3, 2024
Putting Together a Wooden Nativity Set for the Holidays
View Post
  • Craft
  • DIY projects
  • Home
  • Outdoor

Putting Together a Wooden Nativity Set for the Holidays

  • Sheila Mae Pedregosa
  • Posted: February 7, 2024
How is AI Impacting Crafting
View Post
  • Craft
  • Tools & Supplies

How is AI Impacting Crafting

  • Craftbuds Editorial Team
  • Posted: December 5, 2023 - Updated at: December 7, 2023
Embroidery Couching Stitch
View Post
  • Embroidery
  • Needlecraft

How to Do an Embroidery Couching Stitch: Variations and Applications

  • Jewel shaju
  • Posted: December 1, 2023
How to Do an Embroidery Back Stitch
View Post
  • Embroidery
  • Needlecraft

How to Do an Embroidery Back Stitch: Variations and Uses (+Video Tutorials)

  • Jewel shaju
  • Posted: November 13, 2023 - Updated at: December 1, 2023
How to Do an Embroidery French Knot
View Post
  • Embroidery
  • Needlecraft

How to Do an Embroidery French Knot Stitch & Variations: Step-by-Step Video Tutorials

  • Jewel shaju
  • Posted: November 6, 2023 - Updated at: December 1, 2023
9 comments
  1. Sewing Mom says:
    March 28, 2013 at 11:55 am

    How fun! I just made a bunting this month too…this one is a little easier. Thanks for sharing.

  2. LJ says:
    March 28, 2013 at 12:12 pm

    The bunting would be a super easy beginner sewing project. I also liked that you gave us some other options for making the bunting. Thanks.

  3. Cindy C. says:
    March 28, 2013 at 12:34 pm

    It’d be fun to make this for our granddaughter and put it back for Christmas. Thank you for the idea.

  4. jan manley says:
    March 28, 2013 at 2:10 pm

    A.D.O.R.A.B.L.E. period!

  5. Joyce Mitchell says:
    March 28, 2013 at 2:59 pm

    Thanks for the cute idea & tutorial.

  6. Mara says:
    March 30, 2013 at 3:12 pm

    This really is a good idea for kids, immediate gratification, thanks for the tutorial and all of the variations.

  7. usairdoll says:
    March 31, 2013 at 12:07 am

    Your Bunting is so lovely! It looks really nice hanging up. Thank you for your tutorial and great photos. I’d love to give this a try.

    usairdoll(at)gmail(dot)com

  8. Terrie says:
    April 4, 2013 at 11:06 am

    I love this! Thank you for the tutorial…I’ve been wanting to make a bunting for a while now 🙂

  9. Pingback: How to Make a Sink Skirt - Step By Step Tutorial - Craftbuds

Leave a Reply

Your email address will not be published. Required fields are marked *

Subscribe

Subscribe now to our newsletter

Art & Craft, DIY ideas and Tutorials – Craftbuds
  • About Us
  • Editorial Guidelines
  • Our Experts
  • Privacy Policy
  • Contact Us
Find fun and creative craft ideas and tutorials across various categories such as Knitting, Quilting, Sewing, PaperCraft, Jewelry Making and much more

Input your search keywords and press Enter.