
I recently made a quilt block for my do Good Stitches charity bee, and I had so much fun making this block that I decided to take photos and put together a square in square quilt block tutorial!
")
This is a paper-pieced (foundation pieced) quilt block pattern that works great with all kinds of fabrics. You can use these blocks to make a pretty paper-pieced pillow, a whole quilt, or just make one block to practice your paper piecing.
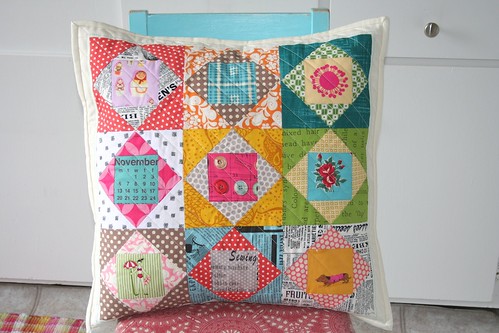
This is a pillow made using the same square in a square block pattern
Foundation Piecing Tips
Here are a few things to remember when sewing foundation-pieced blocks:
- Print out your foundation pattern once for each block you’d like to make. For the 8 blocks pictured, I printed off 8 sheets! I used regular computer paper.
- Shorten your stitch length to 1 or 1.3. This will allow you to tear off the paper easily when you’re done sewing.
- Place your fabric on the non-printed side of the paper. The pretty side of the fabric should face out toward you.
- When sewing a foundation pieced quilt block, always sew directly through the paper on the printed side of the paper. The fabric will be underneath the paper as you stitch, so use a glue stick and/or pins to hold it in place.
- For another little primer on how foundation piecing works, you can visit my New York Beauty block tutorial! Once you get used to placing the fabric on one side of the paper and sewing the other, you should have no problem with this technique.
Square in Square Block Tutorial
Pattern makes a 6″ finished (6.5″ unfinished) block.
For each block, cut the following:
– 1 square 3.5″ x 3.5″ for center
– 2 squares 3.5″ x 3.5″ for center ring. Cut squares in half once diagonally to make 4 triangles total.
– 2 squares 4.5″ x 4.5″ for outer ring. Cut squares in half once diagonally to make 4 triangles total.
Here are two of my printed templates, side by side:

1. To make 1 block, take the 3.5″ x 3.5″ fabric for your center square. Place it on the wrong side of your paper, so the edges overlap the edges of the center box on your printout. You can hold up your paper to the window to see the lines. Use a glue stick to dab just a dot of glue to hold the fabric in place.

2. Next, take two of your triangles (cut diagonally from the smaller 3.5″ squares), and place them right side down on the fabric square as pictured. Align the long straight edges of your triangles with the top and bottom of the square. Center and pin in place. (The photo to the right shows what it will look like after stitching.)

3. Flip the paper and take it to your quilting sewing machine so the printout is facing up at you. Peek under your paper to make sure the fabric has not shifted, and stitch the two lines where you’ve pinned the wide end of your triangles. Backstitch at end edge.

4. Open up the triangles you’ve just sewn and press. Repeat by pinning the long edge of two triangles to the opposite sides, taking the paper to your sewing machine, and stitching along the left and right sides of your center square.

5. Here’s what the triangles will look like stitched. Again, fold the triangles open and press with your iron.

6. Next, it’s time to trim! Take the block to your cutting mat. With the printed side of the paper facing up, fold along one of the diamond edges (diagonal lines) as pictured.

7. Fold the paper corner completely down, so you see the edges of the fabric poking out. Lay your ruler on top of the paper, and measure out 1/4″ from the edge of the paper. Trim the fabric that pokes out past a 1/4″ seam.
8. Unfold the paper corner, and repeat with the other 3 corners to trim each of the edges.

9. Here is what the block looks like trimmed. So pretty!

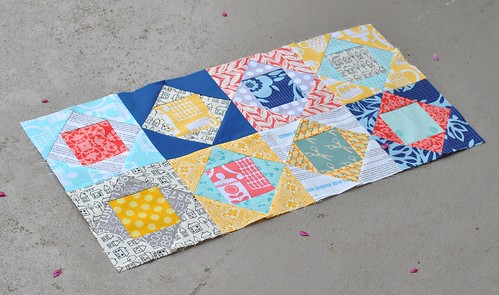
10. Since I was making 8 blocks, I went ahead and assembled the centers and the first row of triangles up to this point. You can see that I left the papers full-size, but you may wish to trim yours at this point or before getting started! Just be sure to leave on the outer printed border, which is the seam allowance.

11. To make the outer border, take two of the triangles cut diagonally from your 4.5″ squares. Pin the long edges of each triangle along the top and bottom of your patchwork square (pictured, left). Stitch in place along the printed lines. Press the triangles open.
12. Take your final two triangles, and pin the long edges along the left and right sides of your patchwork square (pictured, right).

13. Stitch in place. For this entire step, you will be stitching around the lines of the diamond (the second shape from the center), as pictured.

14. Press the entire block. Get excited, because you are almost done!

15. Flip the block over, so the paper side is facing you. Trim along the edges of the paper, again leaving the 1/4″ seam allowance all the way around the edge.
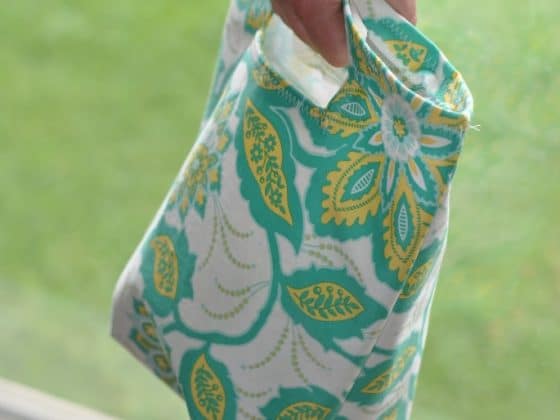
16. Flip over the paper and admire your pretty square in a square quilt block!

17. When you are joining your blocks, it’s helpful to leave the paper on. I know… it seems funny. But it makes it very easy to get an accurate seam allowance and line up all the points.

18. All of your previous seams will naturally be pressed to the sides. For the seams between each block, I like to press the seams open.
I can’t wait to see the quilt that Toni makes from these charity blocks! If you make any blocks based on this or any of our tutorials, we’d love to see them! Please add them to the Craft Buds Flickr group or share a link in the comments.
Have you tried foundation piecing or another type of paper piecing before? What’s your favorite method (or tools and tricks) of paper piecing?


15 comments
Lindsay, your blocks look so great!! This is going to be such a fun quilt to put together. Your tutorial is fabulous, too. I’m so bad about organizing these group projects that it didn’t even occur to me to look for one. So glad you did this so everyone can come here for help!
I made this fun block too! it was easy and it made such an interesting block, sitting on the pillow right now, I love to mix Linen in my projects and this was a perfect one.
I love how you can fussy cut for these blocks 🙂
Can’t wait to try this!
I’m more than a little excited that you’ve already done the math and I can just cut some squares to do this! I hate that part. Ha ha! Thanks!
LOVE how this looks! I really need to have a go at this one day real soon! 🙂 Christine
– ChrisW Designs
Love to do paper piecing – also a favorite block.
This can be done even easier. Start with two 61/2 inch squares make a X through one right in themiddle. place the squares right sides together and sew 1/4 inch around. finish cutting the X’d out one to the coresponding corners and press… cut another square 8 1/2 inches and cut an X in the middle… place it right sides together sew 1/4 inch seam around and then once again cut the X all the way to the coresponding corner and press… much easier…
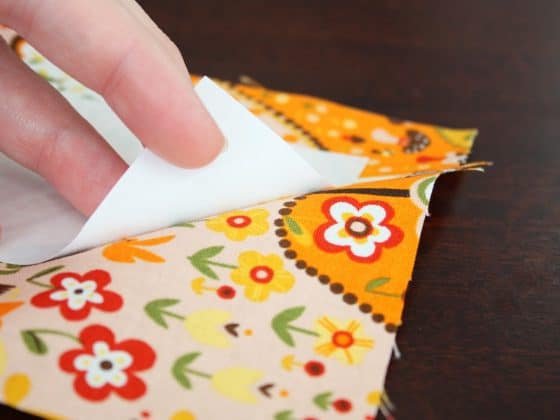
And the paper just easily rips off afterwards?
Yes, it does, especially if you use a shorter stitch length than normal.
I purchased a ream of newsprint form amazon (500 sheet for 6.09). It ran through my printer fine, making it perfect for printing out templates. I use my Dritz Easy hem as my straight edge to fold back the template and I think the add a quarter ruler is a real time saver. I resisted for too long, and it was a very small cost for greater ease/enjoyment. I also found that glue basting…which I think takes no longer than pinning, makes for no shift flip and sewing.
Your squares have lovely fabric choices. I spent last weekend after TG perfecting my foundation piecing for this block. They all turned out great. The newsprint tears away easily.