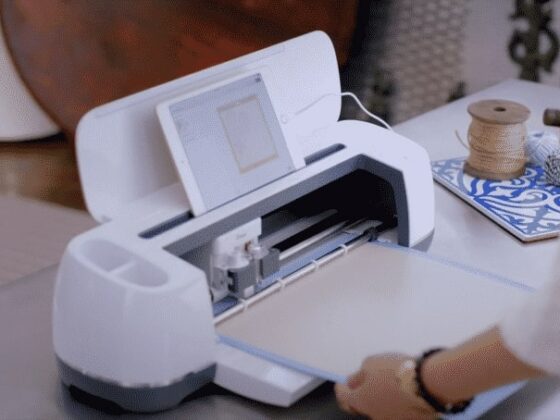
Do you want to make professional-looking stickers at home? It’s quick, easy, and fun to make your own personalized stickers with your Cricut machine. You’ll be decorating everything from your planner to your water bottle to your pantry in no time with this step-by-step guide!
Table of Contents
- 1 What Kind Of Stickers Can a Cricut Make?
- 2 Do You Need a Printer To Make Stickers With a Cricut?
- 3 How to Make Stickers With Cricut – A Step-By-Step Guide
- 4 How to Make Print Then Cut Stickers
- 5 How to Turn Any Cricut Design Space Image Into a Print Then Cut Sticker
- 6 How To Turn Your Own Images Into Print Then Cut Stickers
- 7 Smart Label And Smart Paper Stickers
- 8 Creating Text Labels And Stickers With Cricut
- 9 Cut-Out Vinyl Stickers
- 10 How To Make Cut-Out Vinyl Stickers
- 11 How To Make Stickers with Cricut FAQs
- 12 Conclusion
What Kind Of Stickers Can a Cricut Make?
You can make several different types of stickers with your Cricut machine, depending on the model of machine you have:
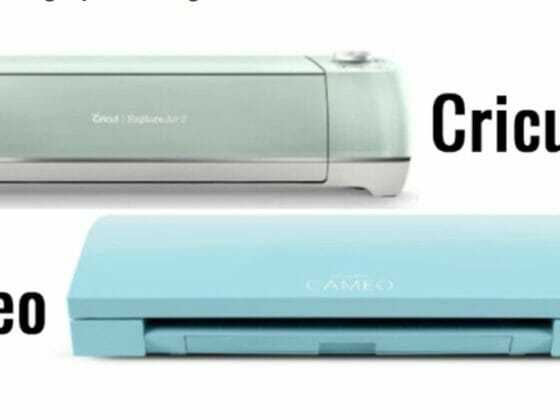
- Print Then Cut stickers (Cricut Explore Air 2, Explore 3, Maker and Maker 3)
- Smart Paper and Smart Label stickers (Cricut Joy, Explore 3, and Maker 3*)
- Cut-out vinyl shape and text stickers (Cricut Joy, Explore Air 2, Explore 3, Maker and Maker 3)
*Smart Materials are designed to work with the listed models, but you can trim them down and use them on a mat with the Explore Air 2 and Maker
Do You Need a Printer To Make Stickers With a Cricut?
You will need a printer to make Print Then Cut stickers. Cricut machines can cut, draw and write, but they cannot print. Don’t worry if you don’t have a printer, as you can still cut stickers from vinyl and use the pen attachment to draw and write on Smart Paper and Smart Vinyl.
Related: What Can I Make With A Cricut Machine? 15 Ideas For All Levels
How to Make Stickers With Cricut – A Step-By-Step Guide
Print Then Cut Stickers
What Supplies Do You Need to Make Print Then Cut stickers?
- Cricut Explore Air 2, Explore 3, Maker or Maker 3
- Cricut Light Grip map (blue)
- Cricut Fine Point Blade
- Printer
- Printable sticker paper or printable vinyl
Cricut sell their own branded printable sticker paper and vinyl:
Or there are many other varieties available from Amazon or your favorite office supplies store. If you’re planning to make stickers to sell, you’ll need to use high-quality sticker paper.
Related: How to Clean a Cricut Mat – A Step-By-Step Illustrated Guide
How to Make Print Then Cut Stickers
You can use the designs available on Cricut Design Space or upload your own images. The quickest and simplest way to make printed stickers is to use Print Then Cut images on Design Space. There’s a huge range available, and it’s increasing all the time, so there’s bound to be something you like
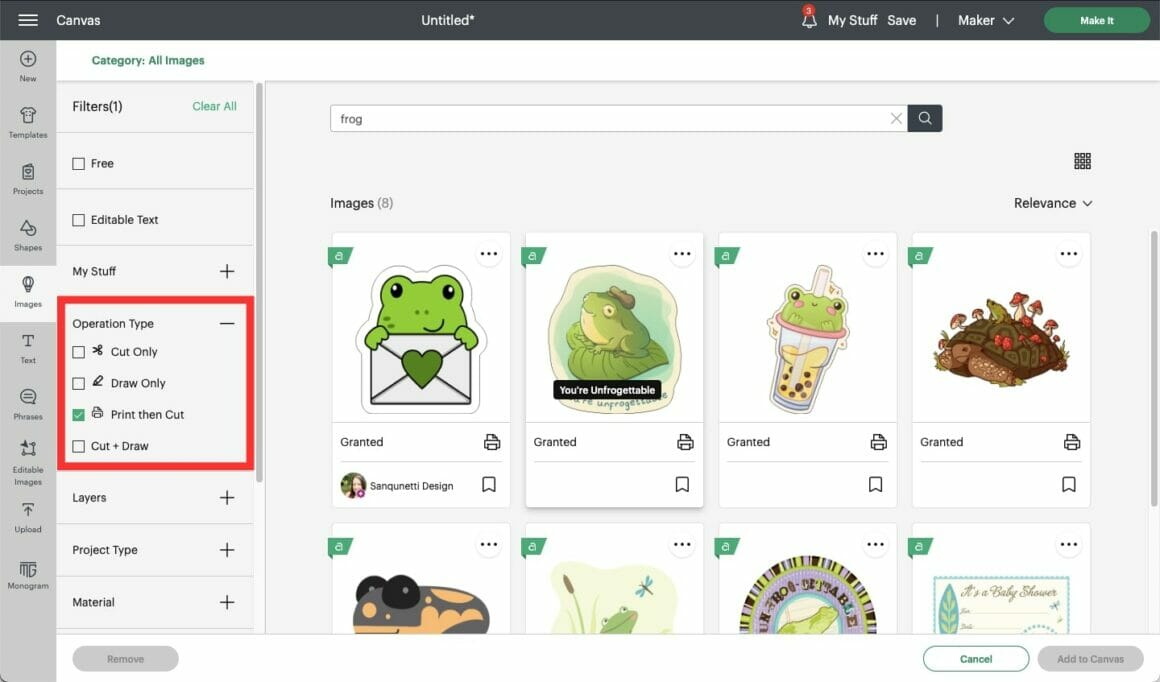
1. In the image library, search for the type of image you’d like to use (e.g. “frog” or “cake”) and select “Operation Type / Print Then Cut” from the left-hand menu filter.
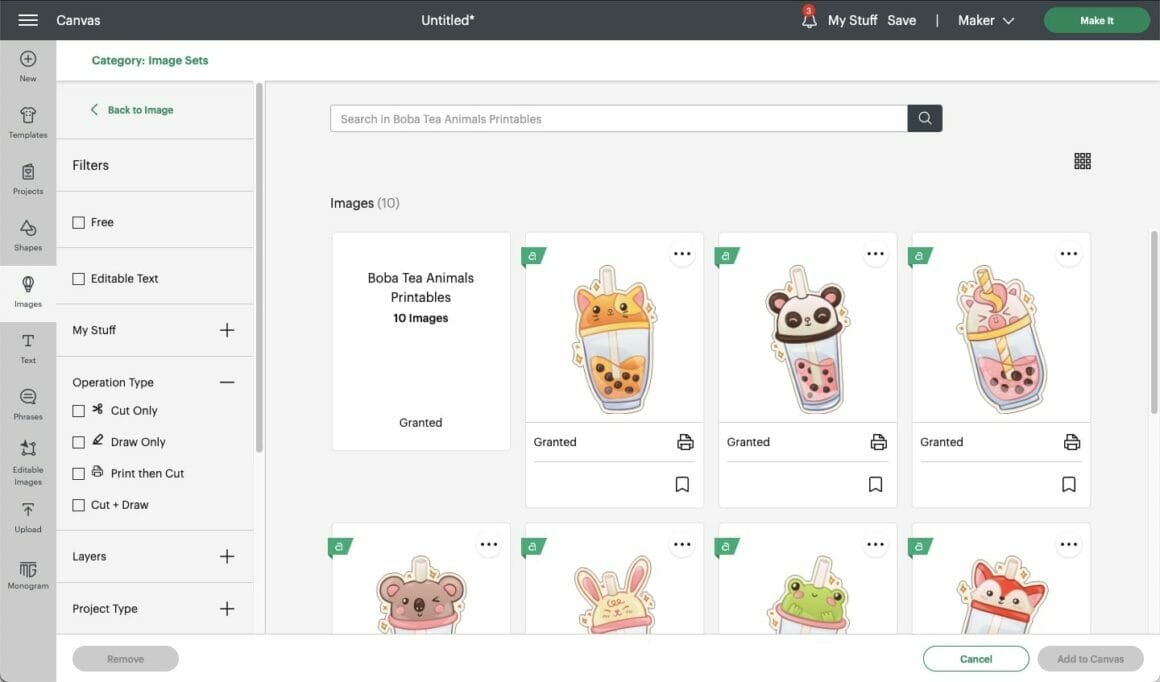
2. If you’d like to create a sticker sheet with several images in the same style, click the three dots in the top right-hand corner of the image and select “view image sets” to see more images from that collection.
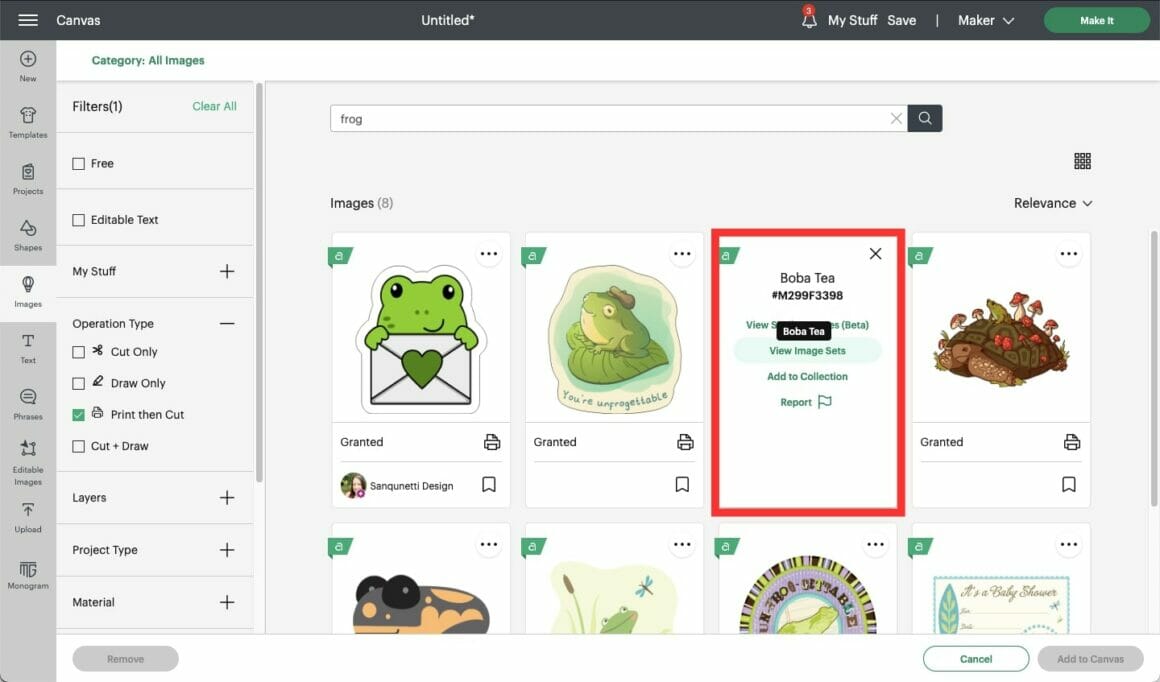
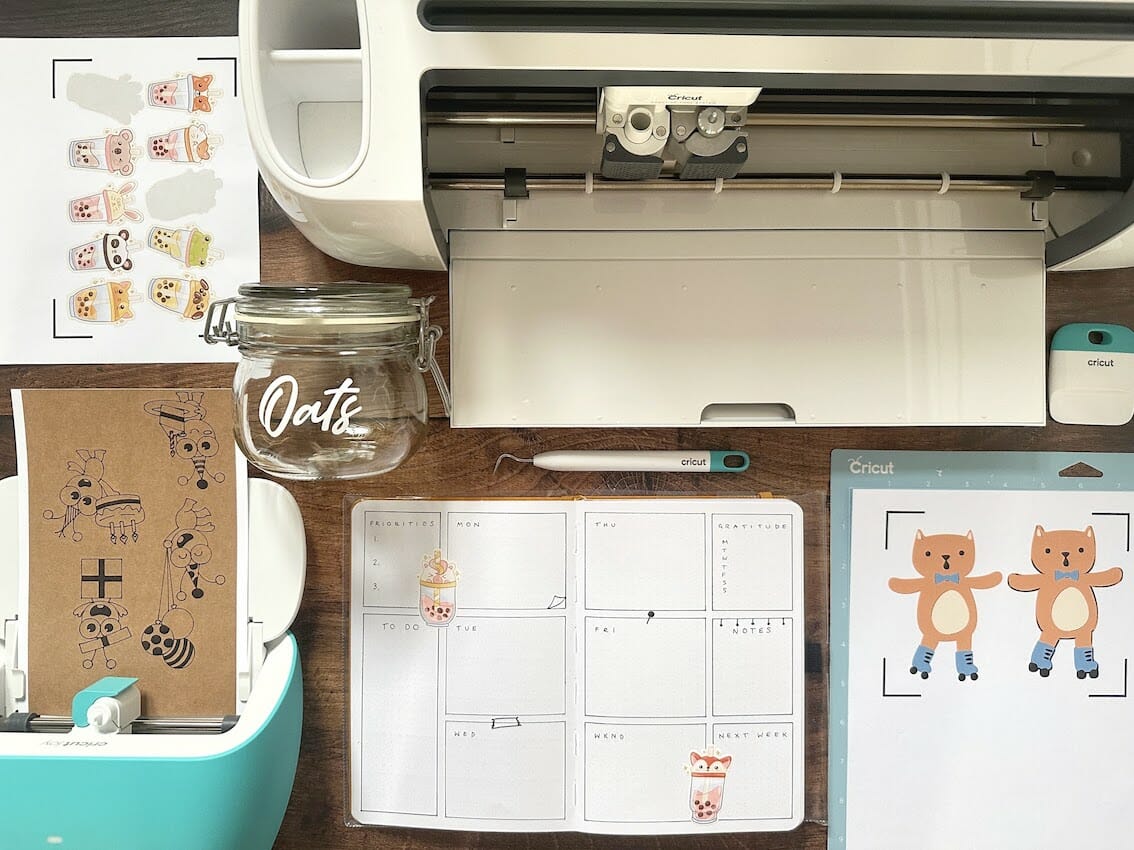
I’ve chosen this adorable Boba Tea Animals Printables image set:
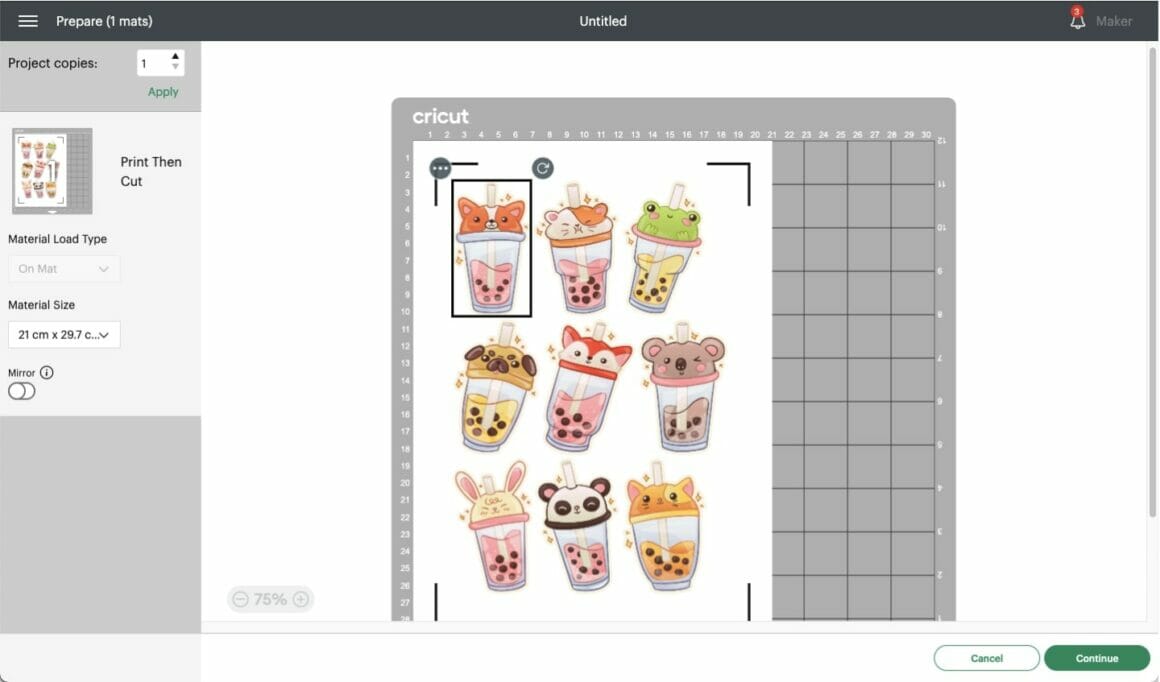
3. Once you’ve selected your images and added them to your canvas, decide on the size you’d like your stickers to be. Don’t worry about rearranging them, as Design Space will do that automatically when it prints.
4. If you’ve not used Print Then Cut before, Design Space will need to perform a calibration to ensure that it cuts the correct place on your stickers. Just follow the on-screen prompts to calibrate your machine.
5. Once you’ve calibrated your machine, you can send your sticker designs to print. Ensure you load your sticker paper the right way in your printer so that you’re printing on the correct side.
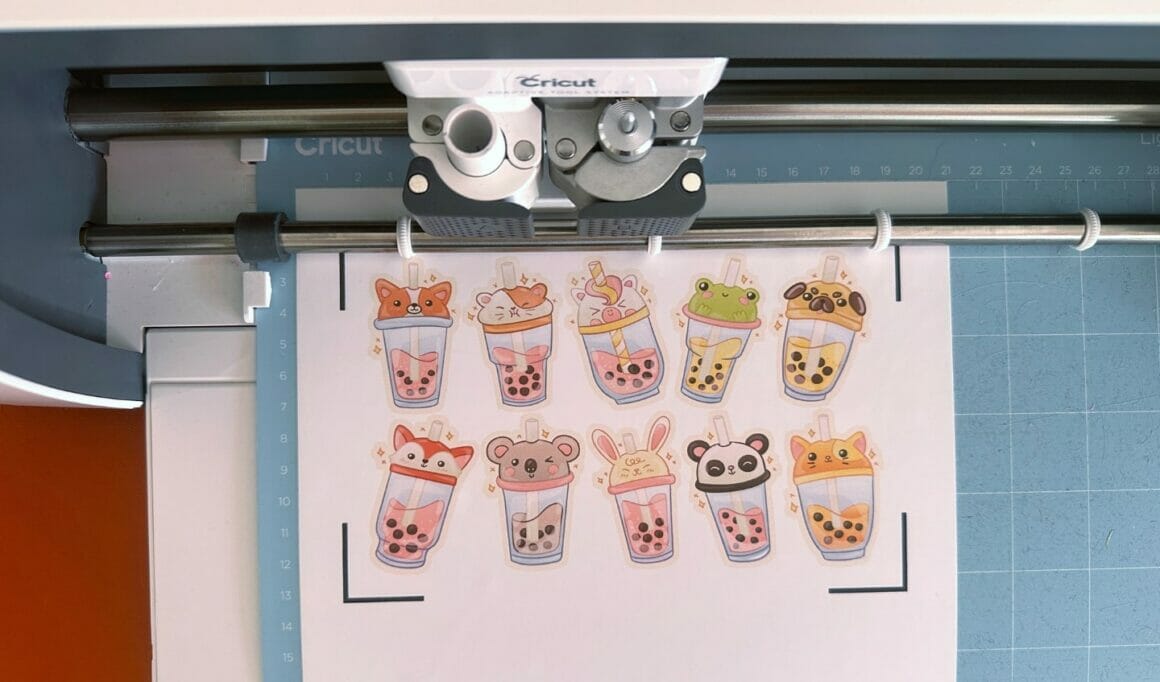
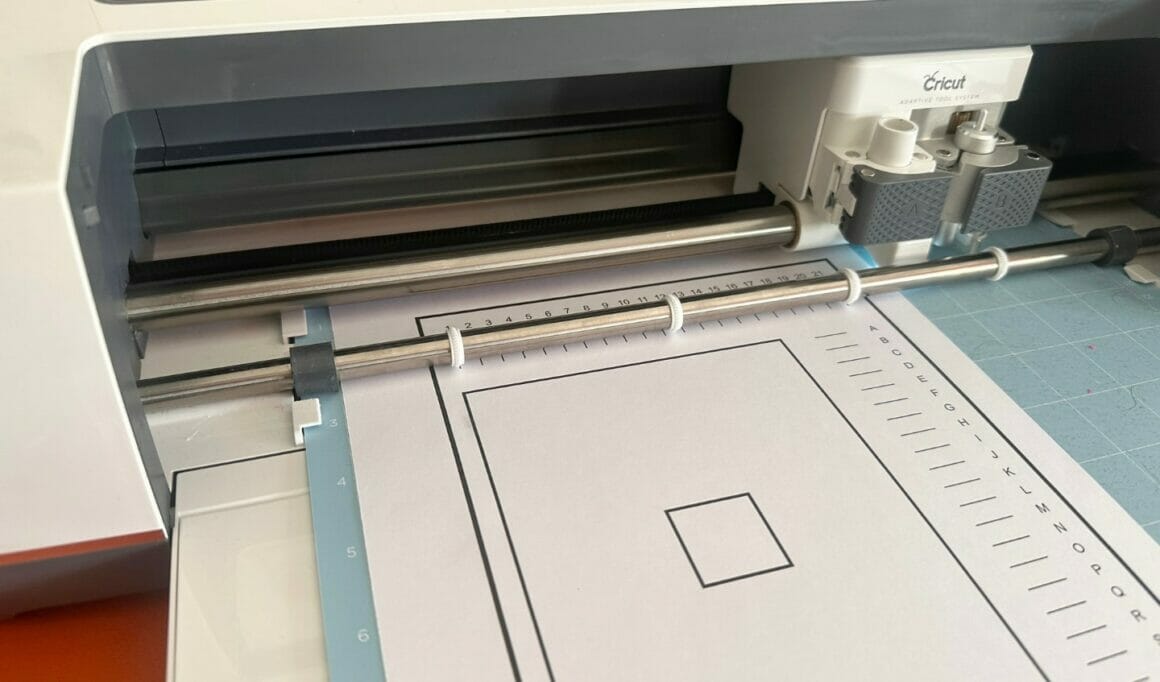
6. Once printed, adhere your sticker sheet to your Standard Grip mat, and select your material. Your Cricut will use the printed black lines around your designs to ensure it cuts the stickers correctly.
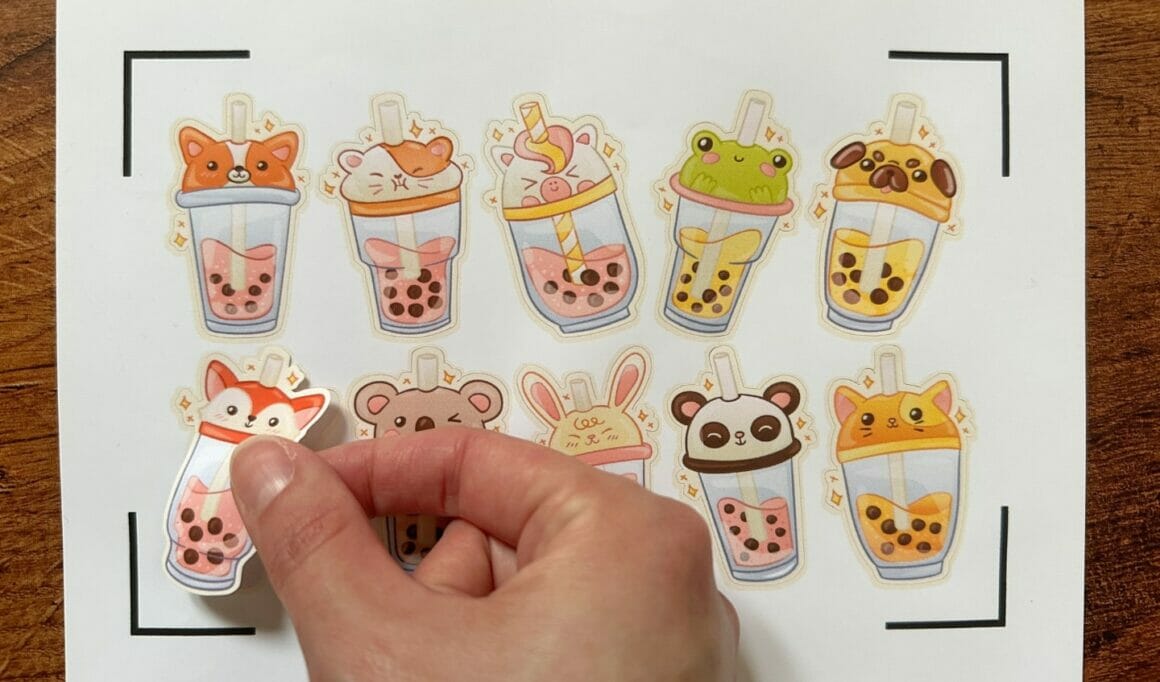
Depending on the thickness of your sticker paper, your Cricut may cut around the designs and leave the backing paper intact – known as a “kiss cut” -, or it may cut through the sticker paper and backing paper, resulting in a cut-out sticker. If you’d like to alter this for your next cut, you can increase or decrease the cut pressure.
How to Turn Any Cricut Design Space Image Into a Print Then Cut Sticker
If you come across an image on Design Space that you’d like to turn into a sticker that isn’t a Print Then Cut image, fear not, as you can convert it very easily:
1. Add the image to your canvas and re-size it as desired.
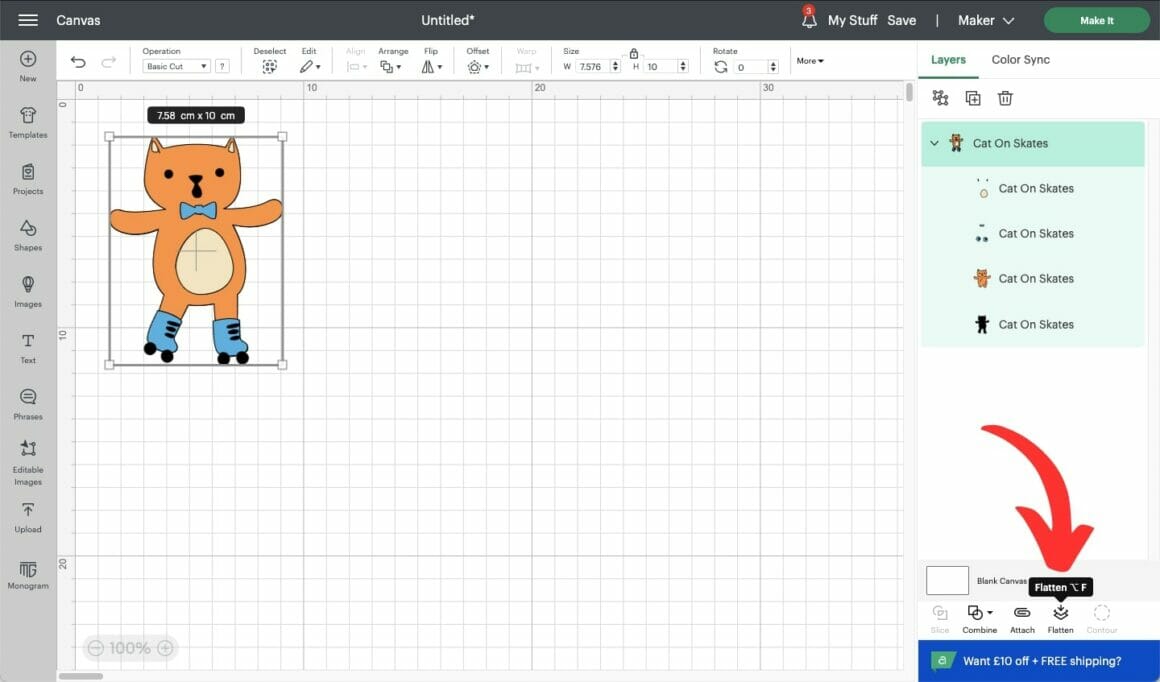
2. If you’d like your Cricut to cut directly around the outside edge, select “flatten” from the bottom right-hand corner menu. This ensures that your Cricut only cuts the outside edge of the image rather than every little detail.
3. Proceed to printing and cutting, as outlined above.
If you’d like to add a border around the edge of your sticker, don’t flatten it just yet, and instead:
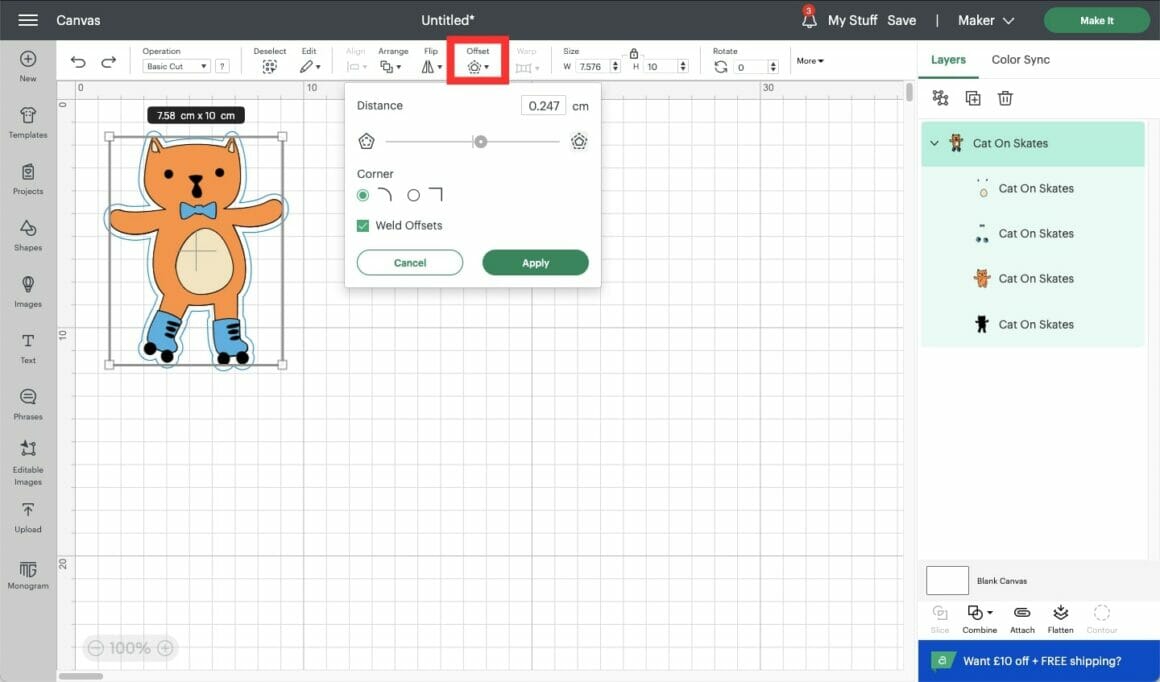
4. Select “offset” from the top menu bar, and adjust the width of your offset as desired. I like to use 0.2 – 0.3 for stickers.
5. As you’ll be printing the offset, you may want to change the offset to white or a color that complements your sticker design by clicking the colored box next to “operation” in the top menu bar.
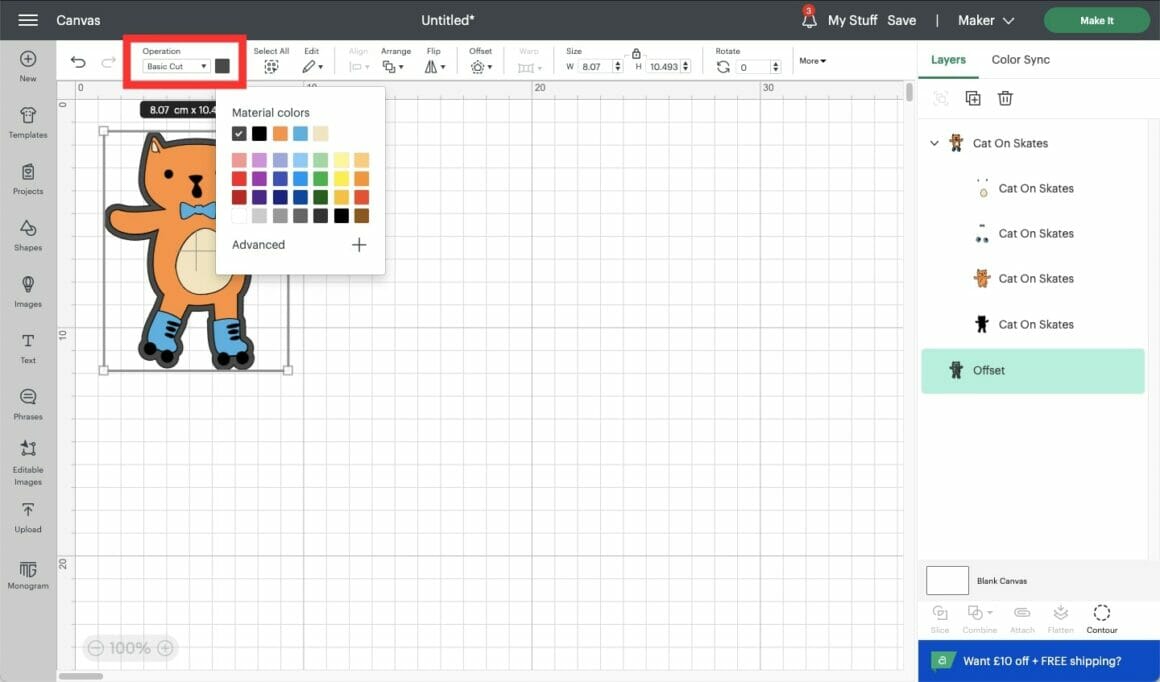
6. Next, attach the sticker image and the offset, and flatten them to ensure that your Cricut only cuts around the outside edge of the offset.

7. Proceed to printing and cutting, as outlined above.
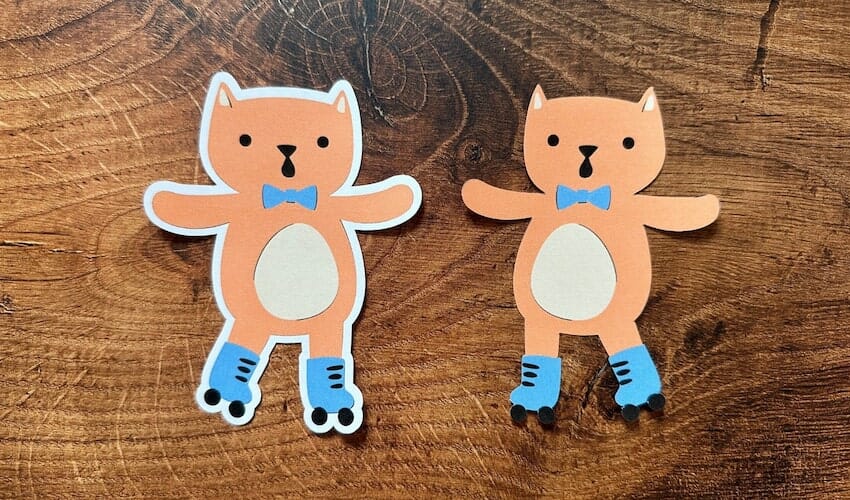
Here you can see the difference between a sticker with and without offset. I flipped one image to make it easier to see which was which as I was setting them up:
How To Turn Your Own Images Into Print Then Cut Stickers
You can also upload your own images and convert them into Print Then Cut stickers. You can buy files from third parties, such as Etsy, or upload your own designs.
1. Click the “upload” button in the left-hand menu and select your file.
2. Select the complexity of your image from the provided options. If I’m not sure, I err on the side of caution and select “complex”.

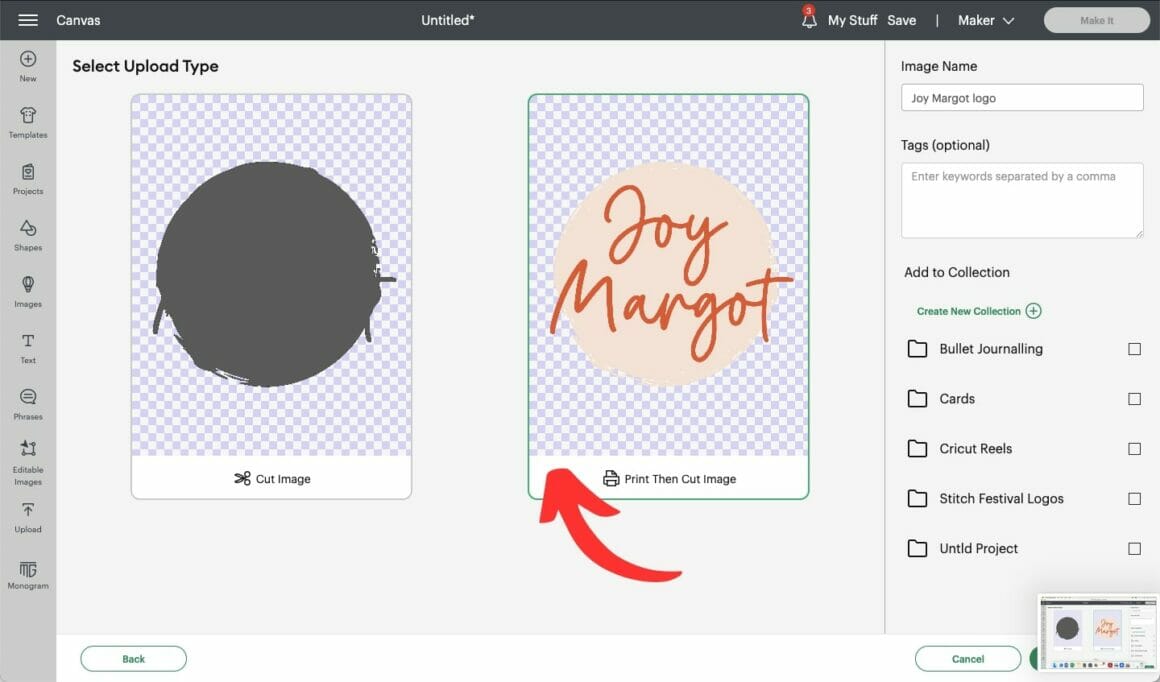
3. Erase the background unless you’re using a transparent background image or want your design to remain square.
4. Select “Print Then Cut Image.”
Then follow the above steps to add an offset, if desired, and to print and cut your stickers!
If you don’t have a printer, fear not, as I’ll show you how to make Smart Paper and Smart Label stickers using Cut + Draw images.
Smart Label And Smart Paper Stickers
What Supplies Do You Need To Make Smart Paper And Smart Label Stickers?
- Cricut machine (Cricut Joy, Explore 3, Maker 3*)
- Cricut Fine Point Blade (or Cricut Joy All Purpose Blade)
- Cricut Pen(s)
- Cricut Smart Paper or Smart labels (that correspond to the machine you have)
*Smart Materials are designed to work with the listed models, but you can trim them down and use them on a mat with the Explore Air 2 and Maker
How To Make Smart Paper And Smart Label Stickers
Similarly to Print Then Cut images, there are lots of Cut + Draw images available in Design Space, and the technique for turning them into stickers is very similar.
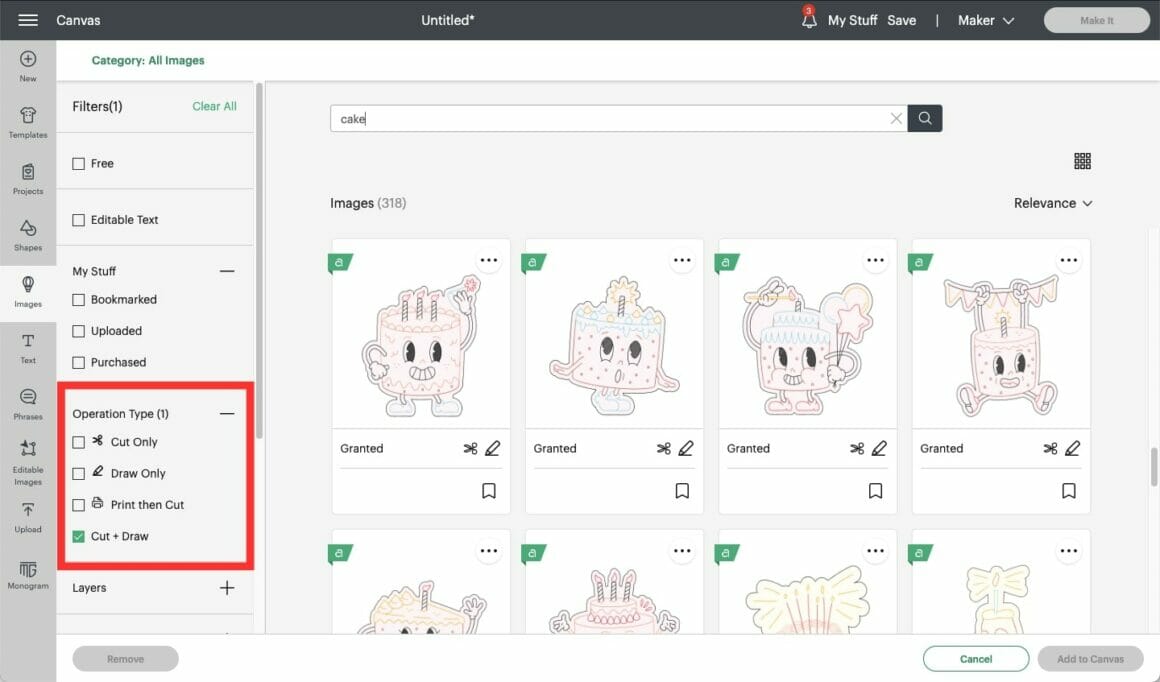
1. In the image library, search for the type of image you’d like to use (e.g., “frog” or “cake”) and select “Operation Type / Cut + Draw” from the left-hand menu filter.
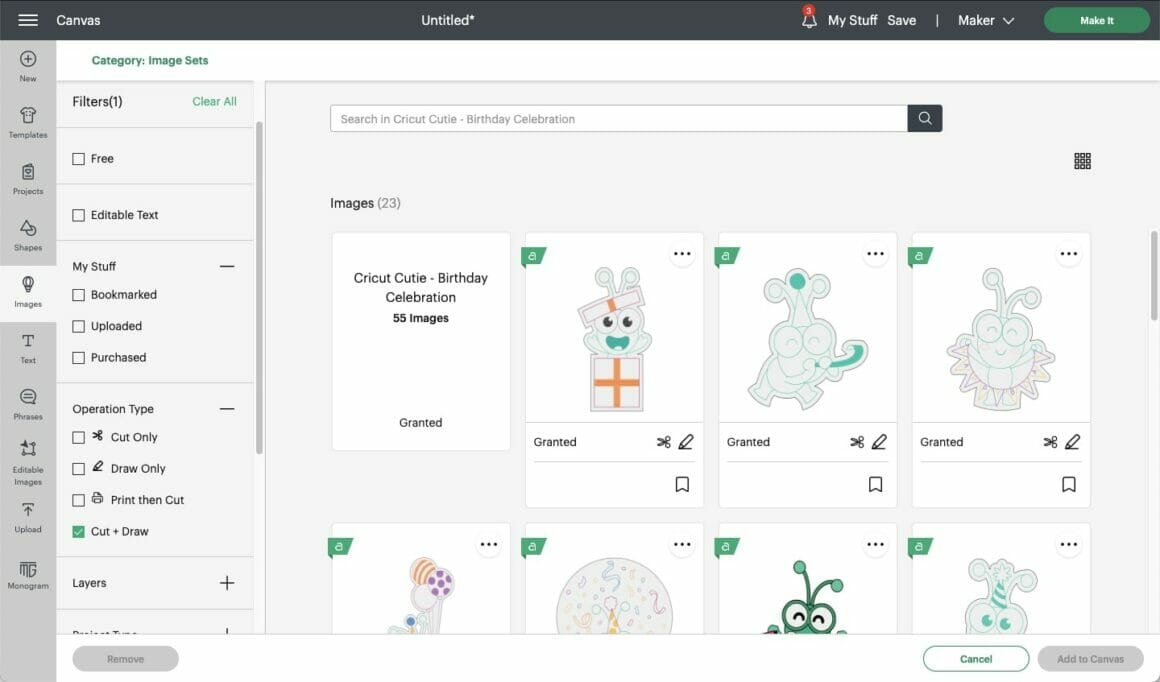
2. If you’d like to create a sticker sheet with several images in the same style, click the three dots in the top right-hand corner of the image, and select “view image sets” to see more images from that collection.
3. Once you’ve selected your image(s) and added them to your canvas, decide on the size you’d like your stickers to be. Don’t worry about rearranging them, as Design Space will do that automatically when it prints.
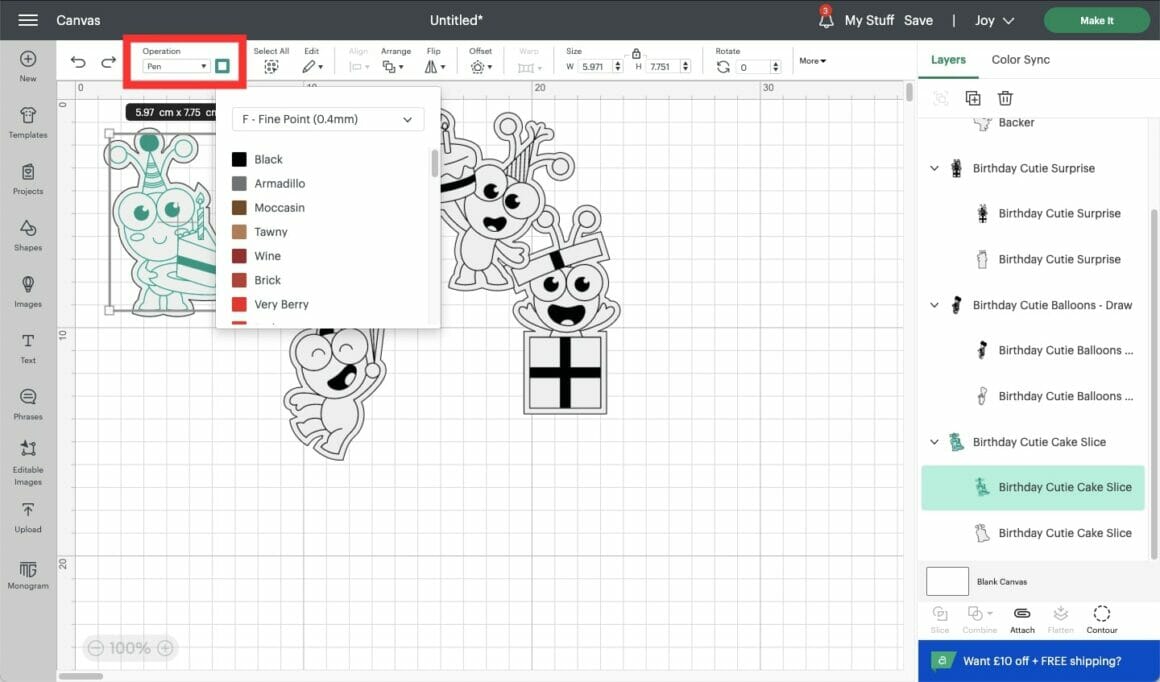
4. If your images are “drawn” in different colors on the screen, but you’d prefer to use the same pen for all of them, you can change the color by selecting just the draw section from the layers tab on the right-hand side, and changing the pen color by clicking the colored box next to “operation” in the top menu bar.
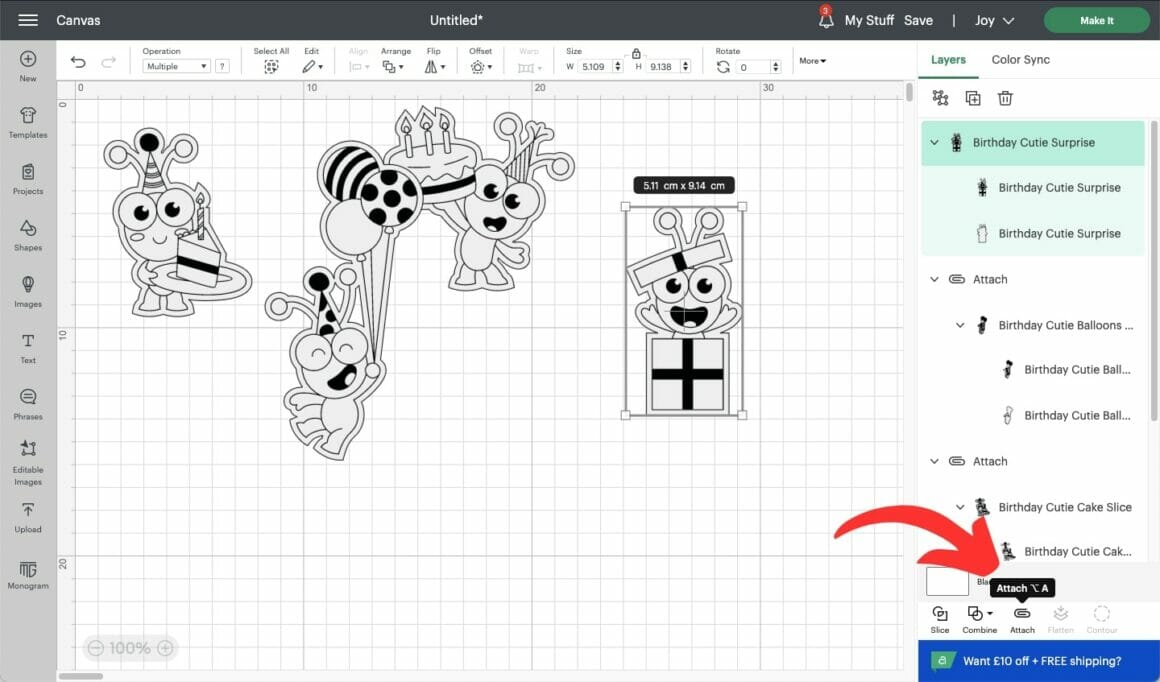
5. You’ll also need to check that all your designs are “attached” to their offset cut line. Click the image, then check whether the menu at the bottom right-hand side says “attach” or “detach.”
6. Now it’s time to make them! Follow the on-screen prompts to load your materials and Cricut pen. I’m using the Cricut Joy, which can only hold one tool at a time, so it will start by drawing my designs and then prompt me to switch to the All Purpose Blade.
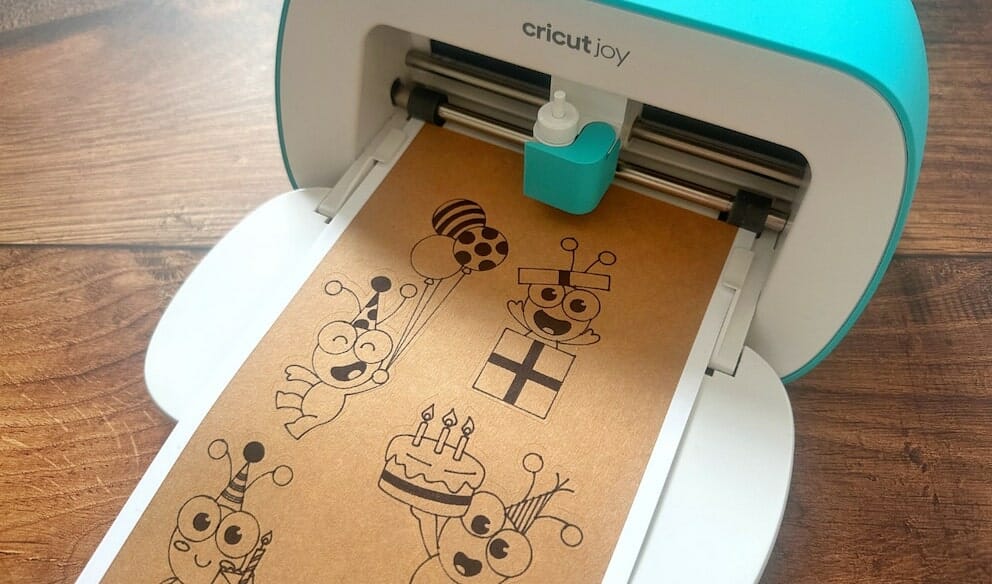
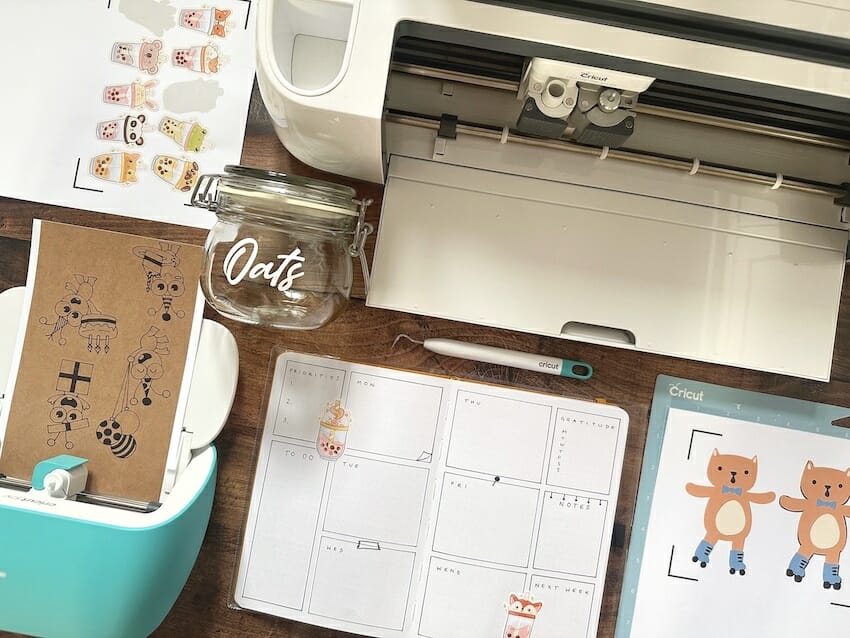
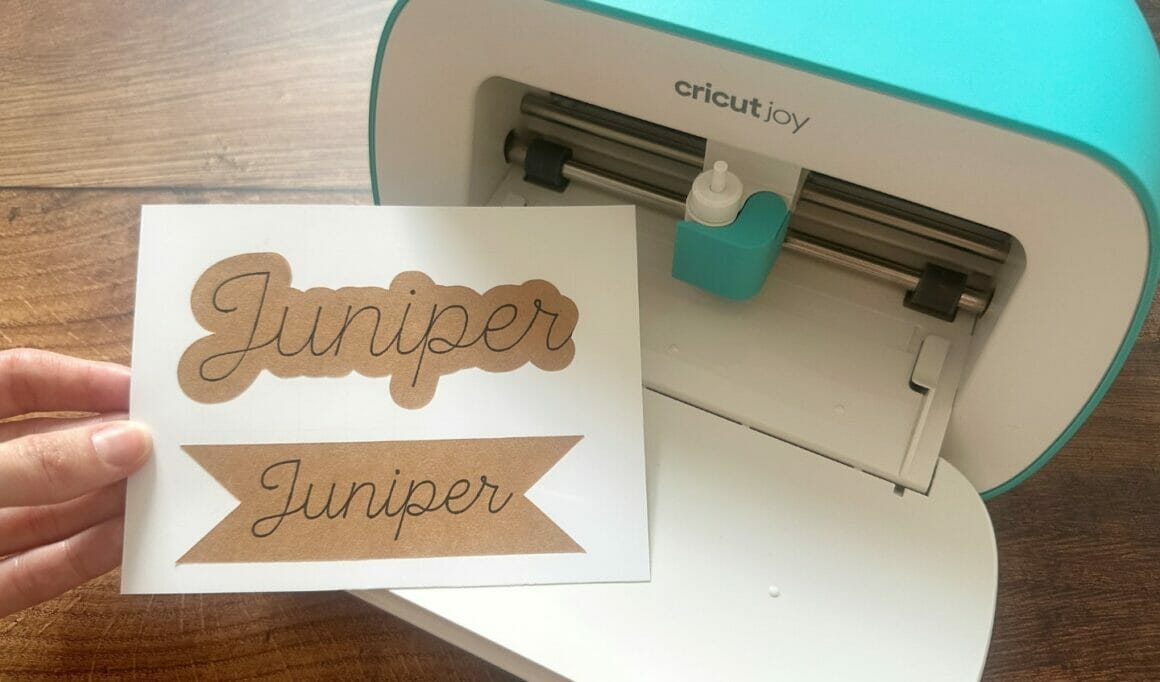
Now you’ve made your own Cut + Draw stickers!
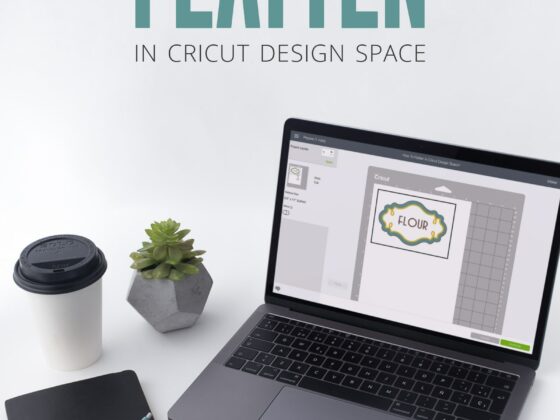
Creating Text Labels And Stickers With Cricut
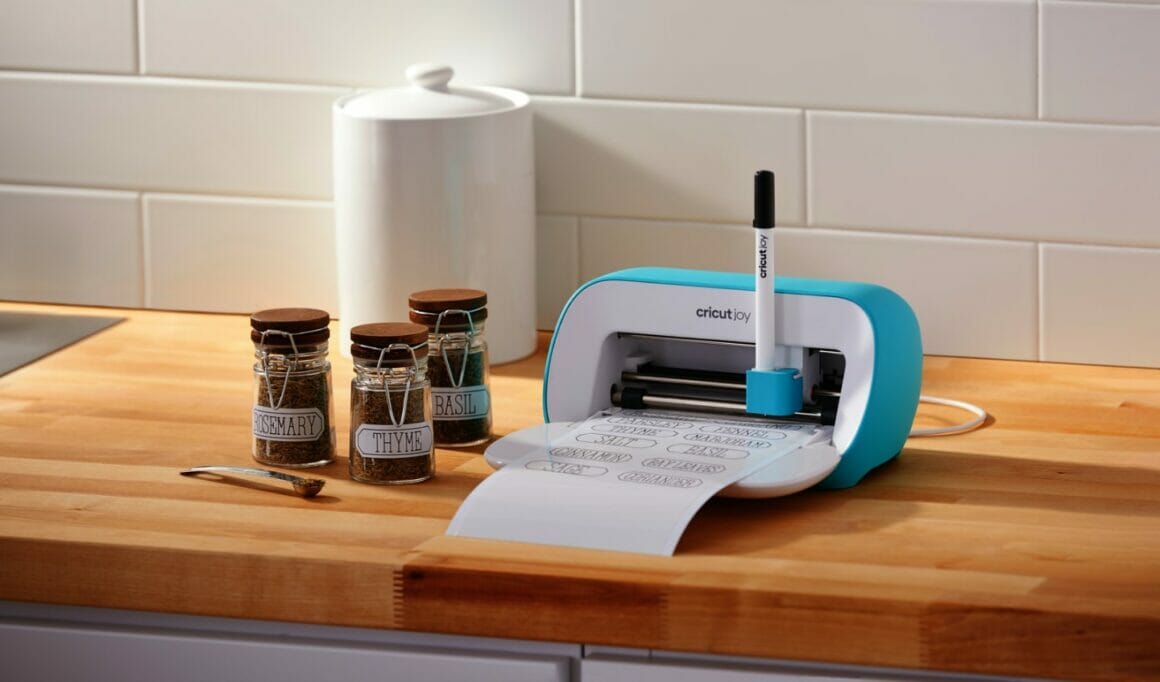
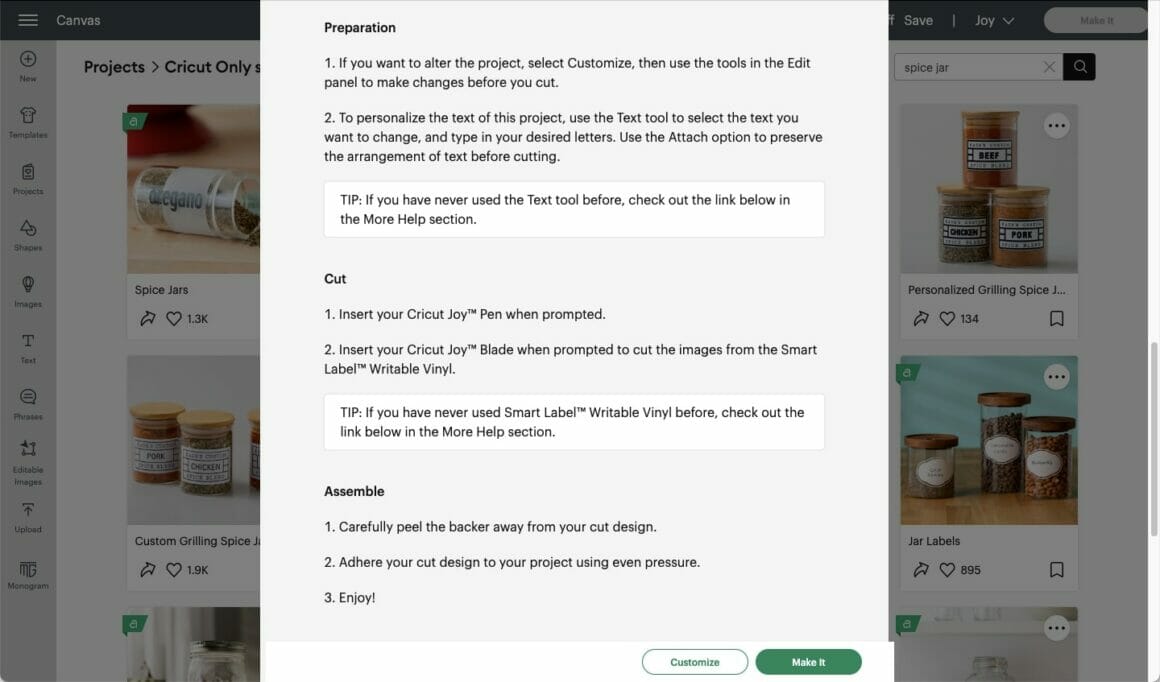
You can use the same method to create your own text stickers. It’s a great way to create stickers for your planner or label your herbs and spices. The quickest and easiest way to create labels is to use one of the available projects on Design Space:
1. Click the “Projects” icon in the left-hand menu.
2. Search “spice labels.”
3. In the drop-down box, you can filter by “Cricut” and “Community” projects.
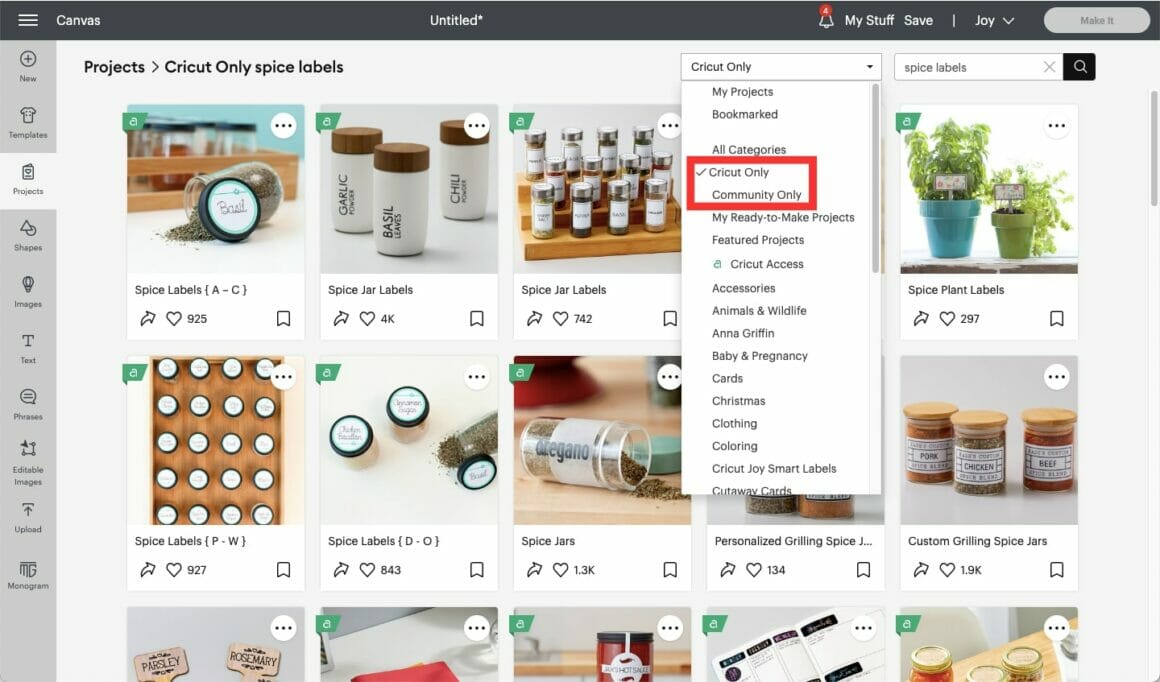
4. Select your chosen style, and follow the steps on the project to create your labels.
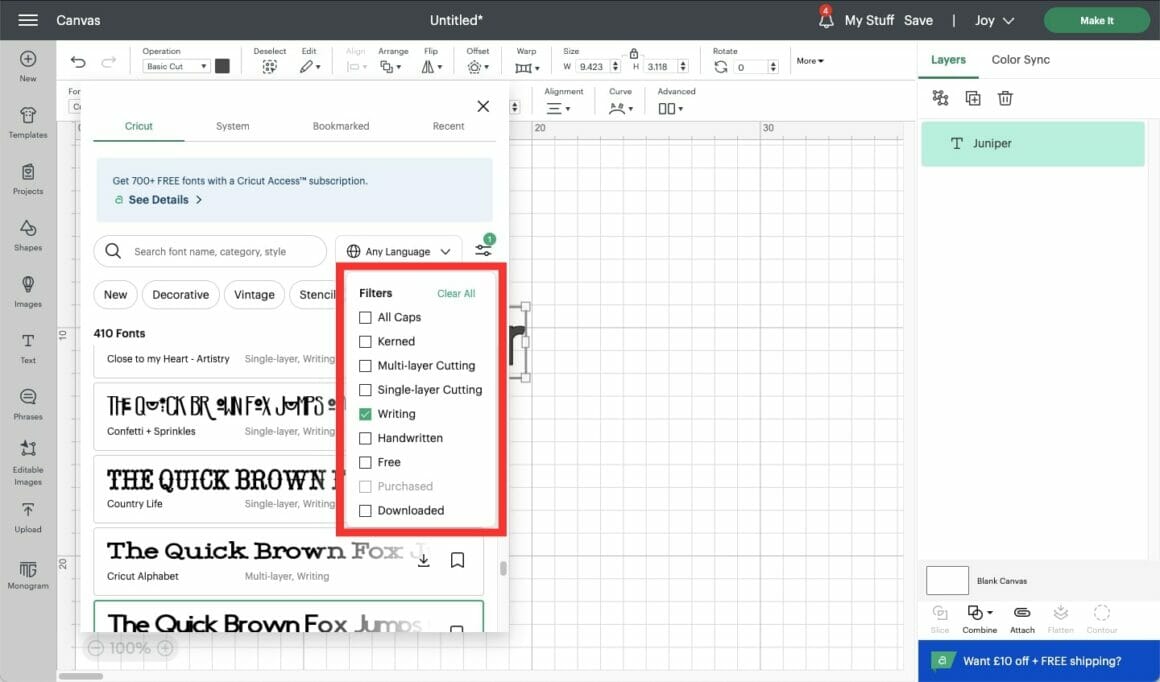
Alternatively, you can create your own text labels by using a “writing” font.
1. Write your chosen text.
2. Highlight it, click “font,” and filter by “writing” to only see fonts that can be written with a pen.
You can either cut around your text by offsetting it or add a shape around the edge.
3. To create an offset cut guide, follow the instructions in the Print Then Cut section, and ensure that the text is set to “draw”, and the offset is set to “cut” in the operation menu.
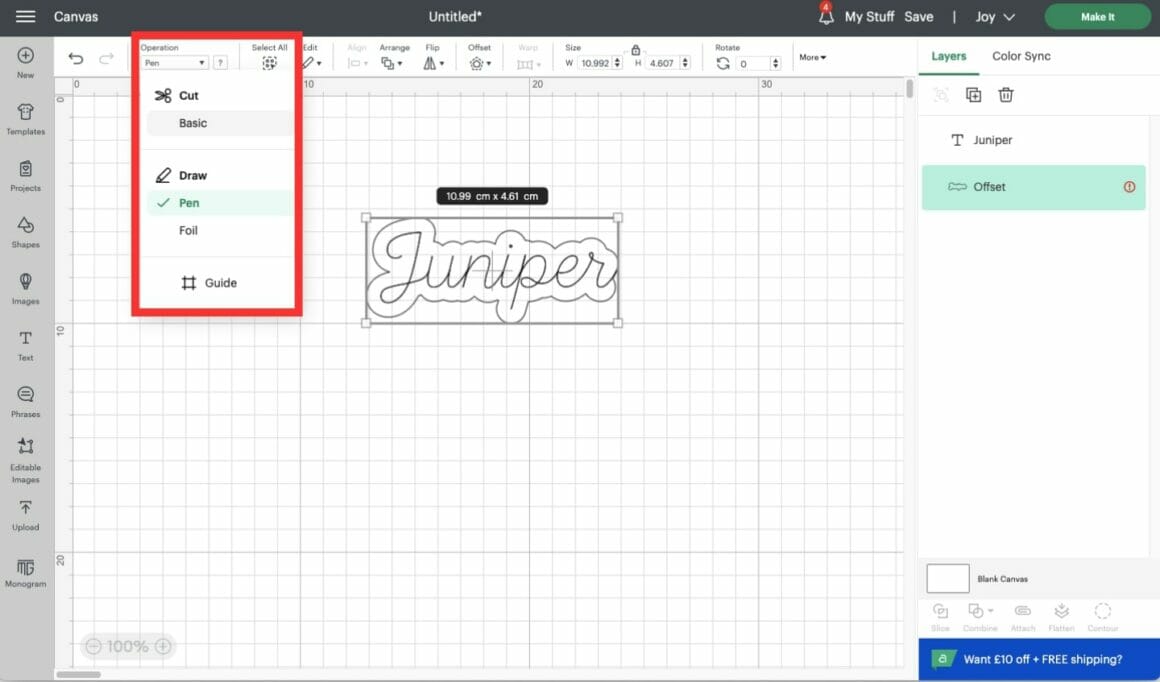
4. Attach the text and offset.
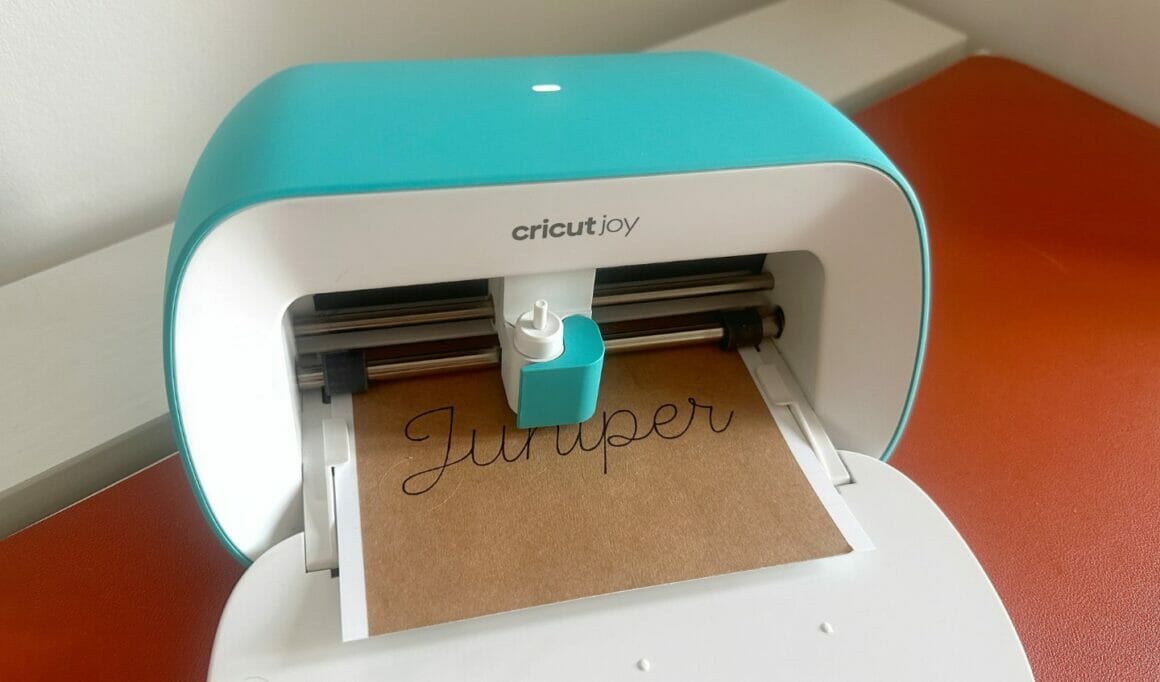
5. Let’s make them! Follow the on-screen prompts to load your materials and Cricut pen. I’m using the Cricut Joy, which can only hold one tool at a time, so it will start by drawing my designs, and then will prompt me to switch to the All Purpose Blade.
Alternatively, you can use a shape from the “shapes” or “images” menu on the left-hand side.
6. Once you’ve chosen and re-sized your shape, make sure your text is centered.
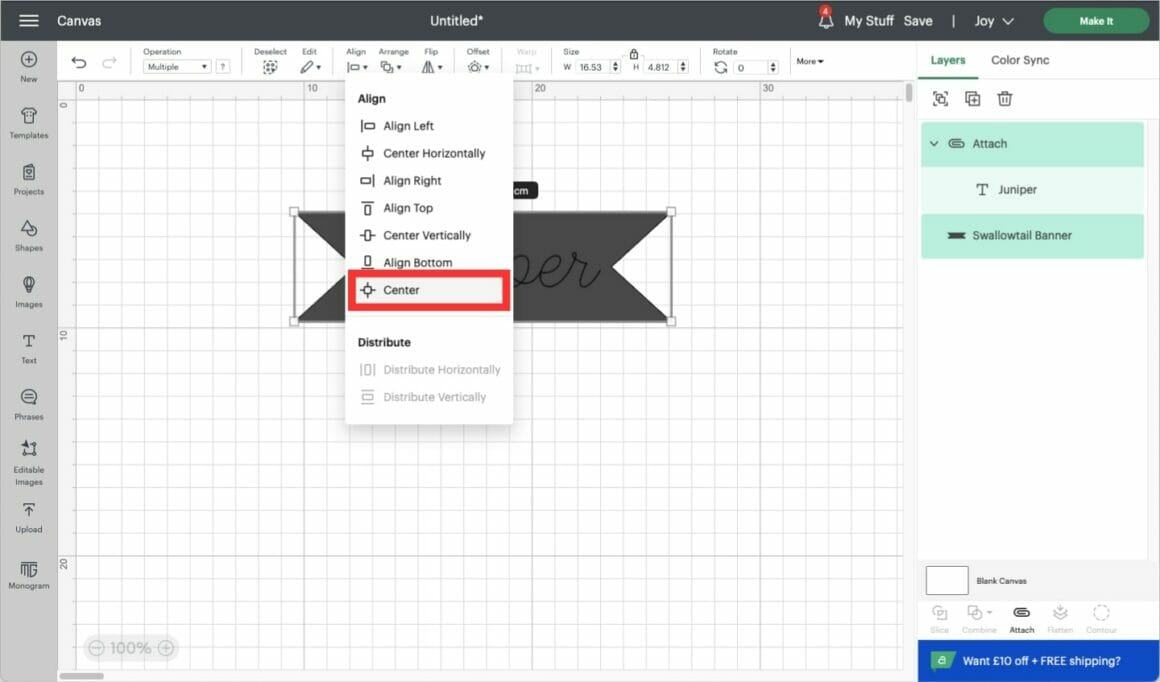
7. Attach your shape and text, as before, and click “Make It”!
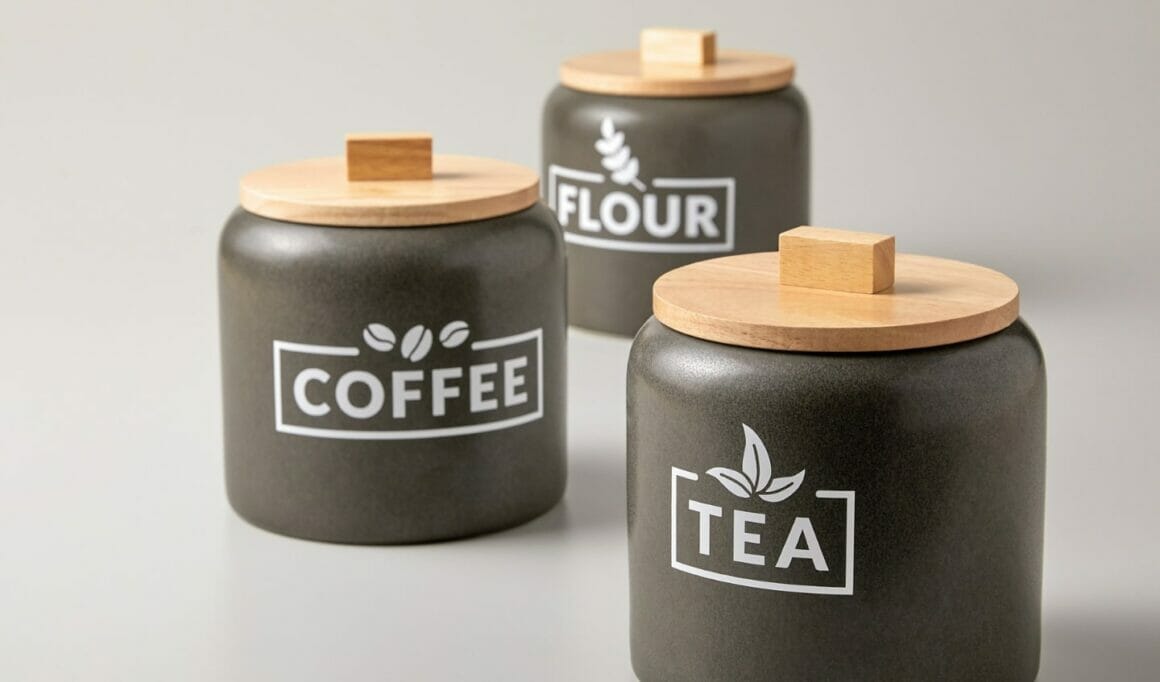
Cut-Out Vinyl Stickers
Finally, if you’ve wondered how everyone on Instagram and TikTok made those beautiful cursive pantry labels, they’ve almost certainly been made with a Cricut!
What Supplies Do You Need To Make Cut-Out Vinyl Stickers?
You will need the following:
- Cricut machine (Cricut Joy, Explore Air 2, Explore 3, Maker or Maker 3)
- Cricut Standard Grip map (green) unless using Smart Materials
- Cricut Fine Point Blade (or Cricut Joy All Purpose Blade)
- Cricut Removable or Permanent Premium Vinyl*
- Cricut Weeding Tool
- Cricut Scraper
- Cricut Transfer Tape
*You can use other brands, but ensure they are self-adhesive and not heat transfer
How To Make Cut-Out Vinyl Stickers
If you’re creating labels for your pantry, there are lots of projects available on Cricut Design Space:
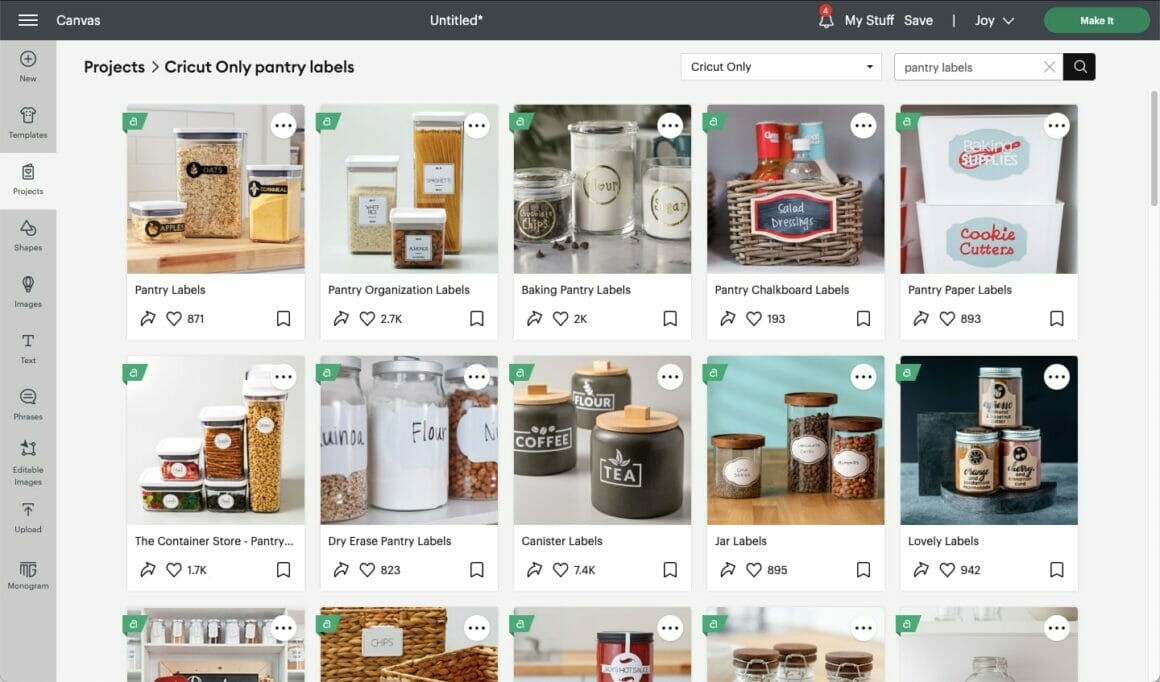
Or you can use any font to create your own custom cut-out text vinyl stickers:
1. Write your chosen text and adjust the size and font as desired.
2. “Unite” your text using the “combine” button in the bottom right-hand menu. This ensures that your Cricut does not cut between each individual letter.
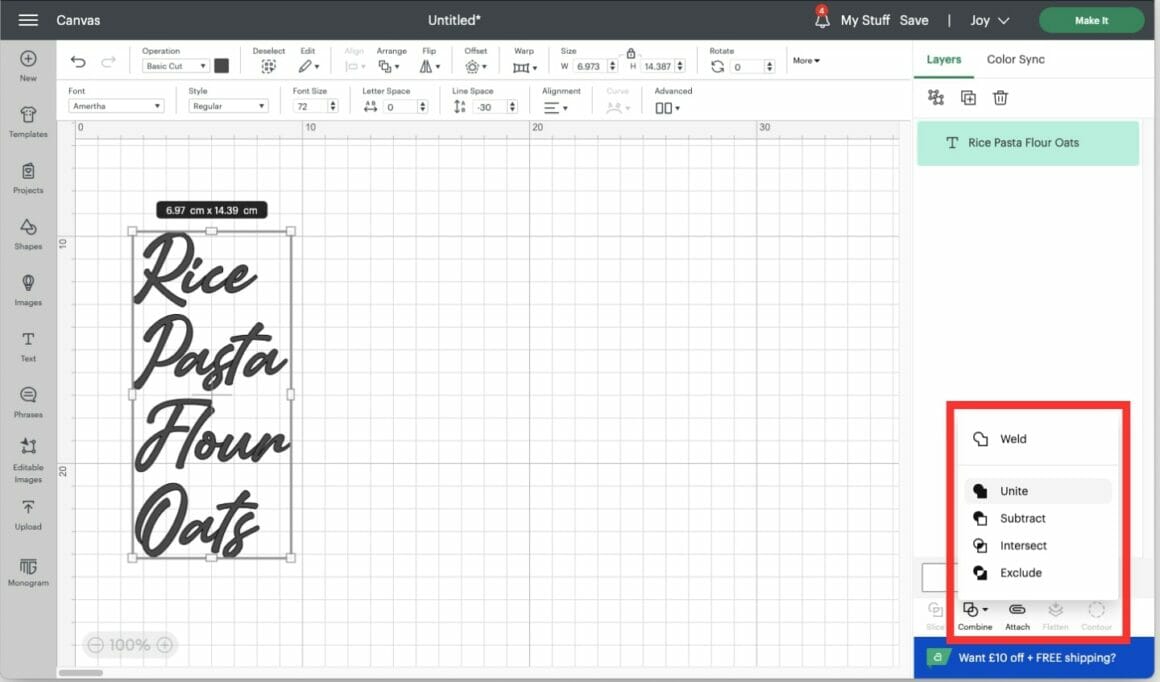
3. Let’s cut out our text! Follow the on-screen prompts to select your materials and cut your text.
4. Ensure the surface you want to apply your sticker to is clean, dry, and free from dust and residue. You can use rubbing alcohol to clean glass or plastic surfaces.
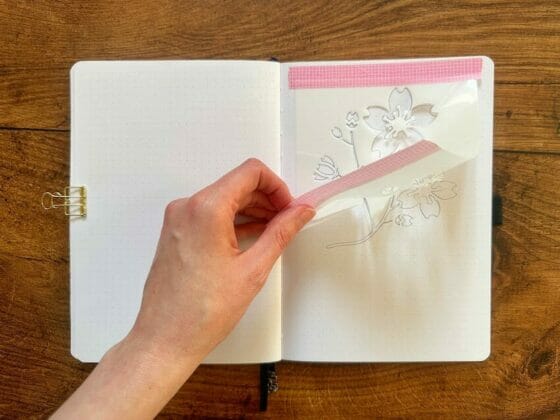
5. You may wish to mark where you’ll be placing your text with washi tape or a removable pen to ensure it’s applied straight and in the correct place.
6. Next, “weed” your design by removing all the sections you don’t want to transfer, such as the vinyl around the edge and the center of your letters, with a Cricut Weeding Tool.
7. Remove the liner from the Transfer Tape (unless you’re using the new Linerless Transfer Tape), and apply it on top of your text.
8. Burnish thoroughly with a Cricut scraper tool to ensure it adheres.
9. Turn your vinyl over, and burnish from the back too.
10. Gently peel the vinyl backing paper away from the Transfer Tape. If any sections have not adhered, press the backing back down and re-burnish with a Cricut Scraper.
11. Once your design is fully transferred to your Transfer Tape, place it on the surface you want to transfer it to.
12. Use the Cricut Scraper to burnish onto your surface. If your surface is something that rolls easily, you may find it easier to prop it up with a towel or cloth.
13. Gently peel the Transfer Tape away at an acute angle. If any vinyl comes away with the Transfer Tape, gently lower it back down, re-burnish, and repeat.
You can also use the same method to apply images, as I’ve done with this monogrammed jewelry box:

… and there you have it: Three different ways to make stickers with your Cricut machine!
Related: Cricut Vs. Silhouette: Exploring the Key Differences
How To Make Stickers with Cricut FAQs
Can you sell stickers made with a Cricut?
The Cricut Angel Policy allows you to sell things you have made using your Cricut machine, tools, accessories, and software, but there are a few exceptions:
- You are not allowed to mass-produce items with your Cricut, which means that all finished products must be made by you alone and cannot be made in a factory or assembly line
- You may sell up to 10,000 finished products (e.g., cards, sticker sheets) per year featuring Cricut designs
- You cannot sell licensed or copyrighted designs. You can easily see which designs are available to use under the Angel Policy as they show the green “A” in the top left-hand corner:
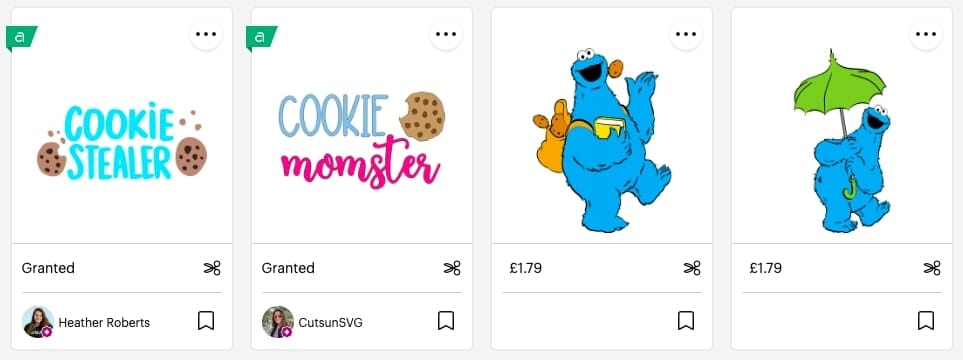
If we search “cookie monster” as an example, you can see that the officially licensed images of the Cookie Monster do not have the “A,” but the text designs are approved to sell under the Angel Policy as they do not include copyrighted designs or characters.
Which Cricut Is Best For Selling Stickers?
It depends on the types of stickers you want to make. The two most popular types of stickers that people make to sell are:
- Print Then Cut sticker sheets
- Cut-out vinyl text stickers for decorating pantry containers
If you want to sell Print Then Cut stickers, you’ll need a Cricut Explore Air 2, Explore 3, Maker or Maker 3, and a printer. You can make cut-out vinyl text stickers on a Cricut Joy. However, it has a much smaller cut area. If you want to make larger vinyl stickers or cut a larger quantity, you would be better served by a Cricut Explore Air 2, Explore 3, Maker, or Maker 3.
Related: Best Laptop For Cricut Maker – 5 Top Picks Reviewed
How Do You Make Stickers With a Cricut Without a Printer?
You can make Smart Paper, Smart Label, or cut-out vinyl stickers if you don’t have a printer. Please see the step-by-step instructions above.
How Do You Make a Picture Into a Cricut Sticker?
You can turn an image in Design Space or your own design into a sticker using the Print Then Cut sticker step-by-step instructions above.
How Do You Make Word Stickers With a Cricut?
You can use any of the three sticker techniques listed above to create word stickers. The most commonly used are cut-out vinyl stickers. Please see the tutorials above for full instructions.
Related: How to Make a Stencil With Cricut – A Step-By-Step Illustrated Guide
Conclusion
By following the step-by-step guide provided in this article, you have learned how to design and cut your own stickers with your Cricut machine! Whether you’re customizing your planner, labeling your pantry, or creating sticker sheets to sell, the power of Cricut sticker-making is now in your hands.
I hope you’ve found this blog post helpful and are now feeling confident and ready to make your own stickers! If you’ve learned something from it, why not bookmark it to refer to later or send it to a crafty friend who may enjoy it too? Happy crafting!