Do you love using stencils in your planner or mixed media projects? Isn’t it annoying when the craft store doesn’t have the design you want, it’s not the right size, or you need it urgently? Thankfully it’s quick, easy, inexpensive, and fun to make your own stencils with your Cricut machine!
You can make a couple of different kinds of stencils with your Cricut machine, but this blog post will focus on sturdy plastic stencils to use with pen, paint, and ink on paper and mixed media projects.
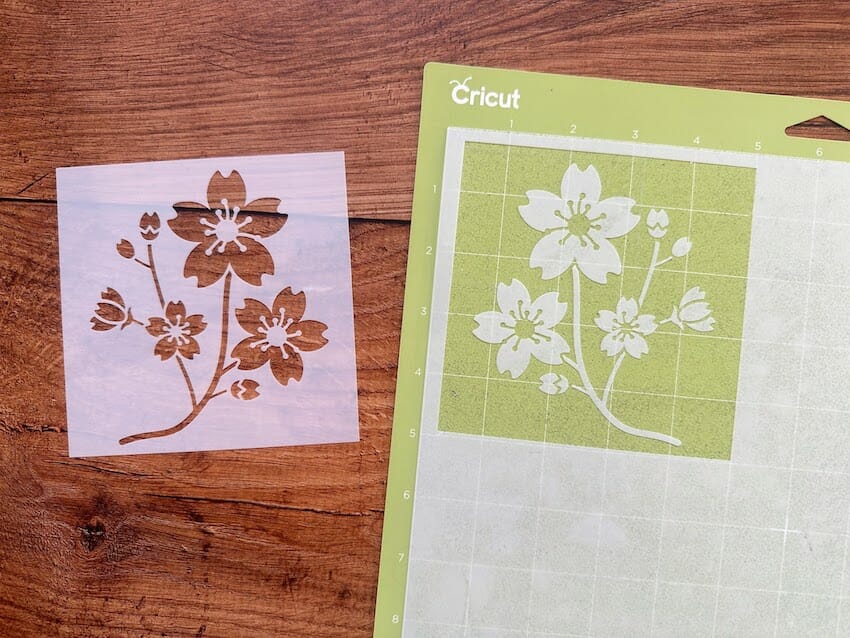
Table of Contents
- 1 Materials Needed to Make a Stencil With Your Cricut Machine
- 2 Which Settings Should You Use to Cut Stencils on Your Cricut?
- 3 A Step-By-Step Guide to Making Stencils with Your Cricut
- 4 Designing Your Own Stencils with Your Cricut
- 5 How to Turn Any Font into a Stencil Font
- 6 How Do I Use My Cricut Stencils?
- 7 How to Make a Stencil With Cricut FAQs
- 8 Conclusion
Materials Needed to Make a Stencil With Your Cricut Machine
- Cricut machine: I recommend a Cricut Explore, Cricut Explore 3, Cricut Maker, or Cricut Maker 3 for this project
- Cricut fine point blade: Buy with Cricut or Amazon
- Cricut standard grip mat: Buy with Cricut or Amazon
- Acetate or mylar sheets: Buy Here
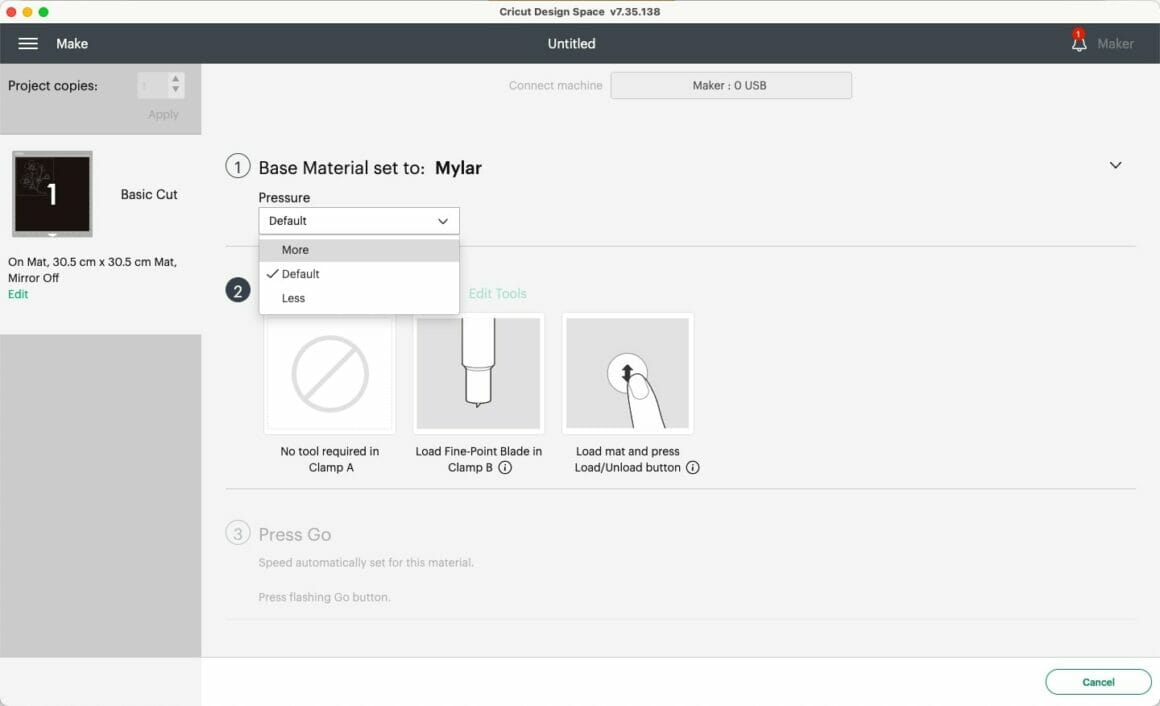
Which Settings Should You Use to Cut Stencils on Your Cricut?
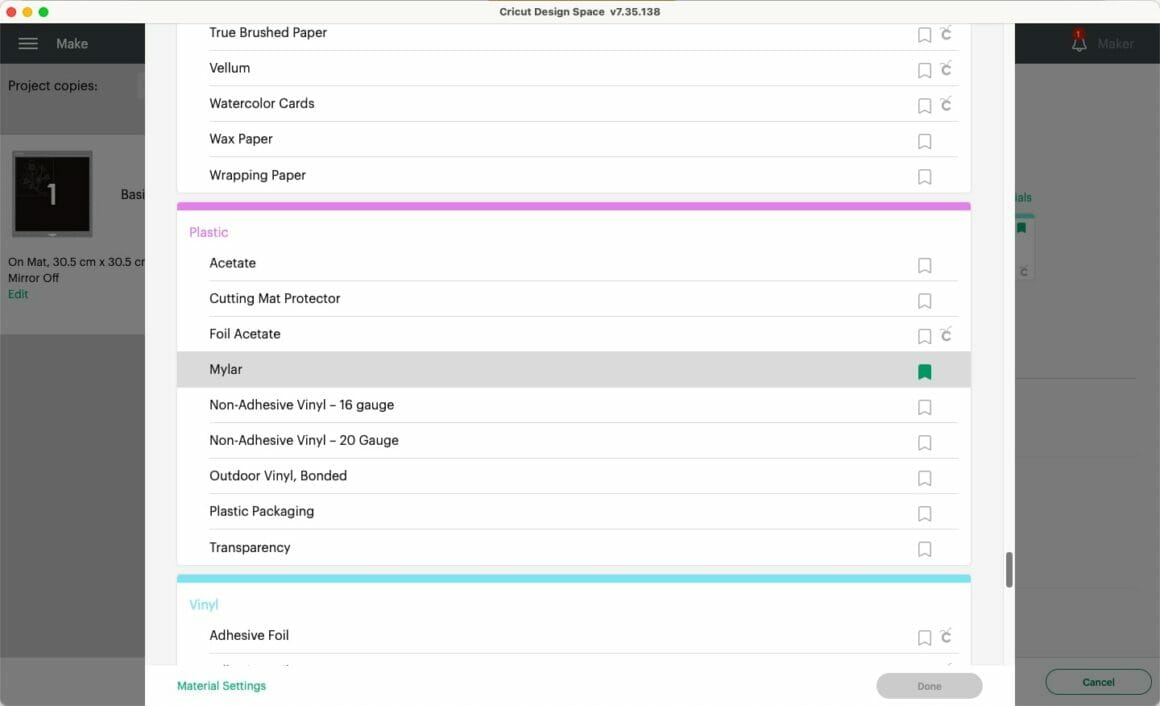
- If you have a Cricut Maker or Cricut Maker 3, you can select the “mylar” setting from the materials list.
- If you have a Cricut Explore or Cricut Explore 3, set your machine to a cut pressure of 292 and 2x multi-cut
- Cricut does not list mylar in the materials the Cricut Joy can cut, but selecting the “faux leather” material setting and increasing the pressure is possible. Please note that I have not tried this myself and am reluctant to recommend anything that may void your Cricut machine’s warranty, so please do your research and make your own judgment call here!
It’s also worth mentioning that cutting mylar sheets dulls the fine point blade quicker than other materials, so you may wish to have a replacement blade on standby for your next project. You may also need to increase the cut pressure to get the most out of your blades:
Related: Cricut Maker Vs. Cricut Maker 3 – A Detailed Comparison
A Step-By-Step Guide to Making Stencils with Your Cricut
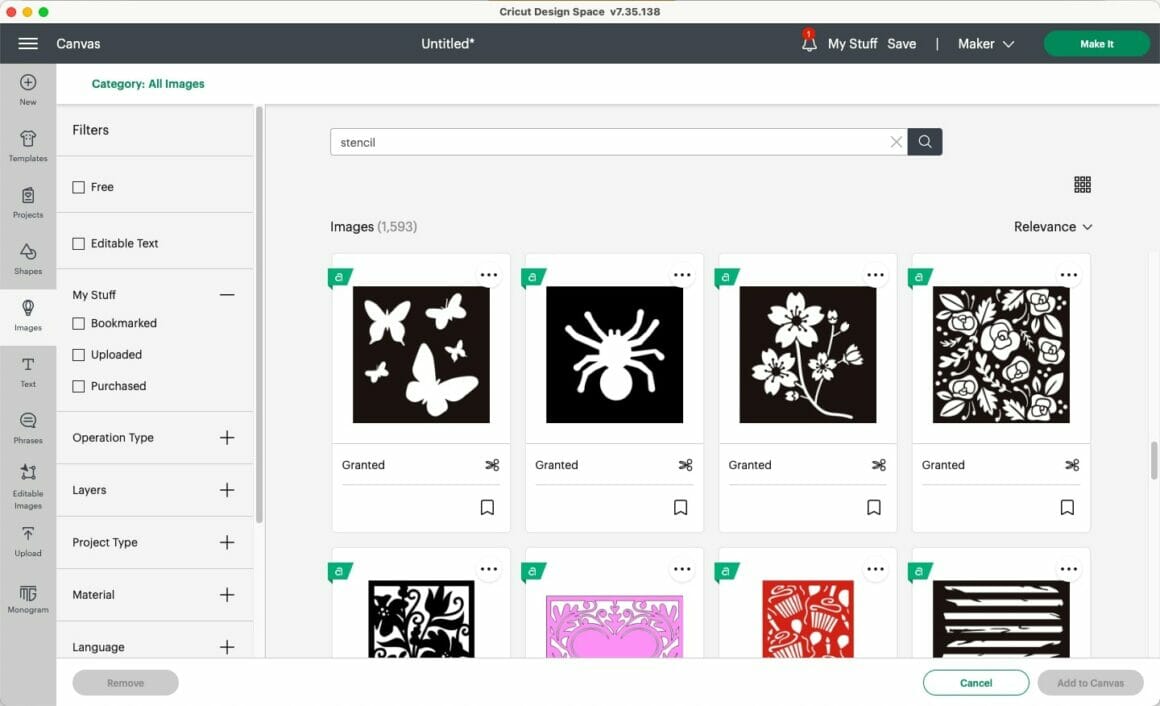
I recommend starting with a test cut to ensure that your tools and settings are up to the task of cutting your mylar sheets. There are loads of stencil designs to choose from on Cricut Design Space, so you could start with one of these:
- Select your chosen stencil image from Design Space’s image library.
- Re-size the image as desired on the Design Space canvas
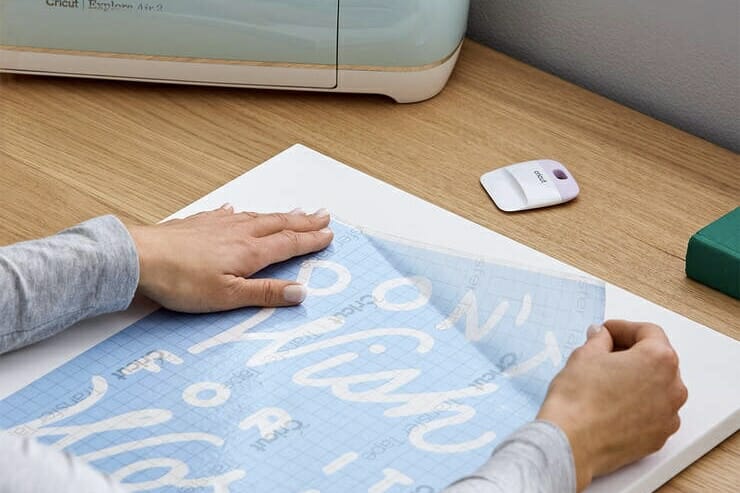
- Use a Cricut brayer to thoroughly adhere your mylar sheet to your Cricut standard grip mat
- Select the appropriate settings for your Cricut machine, as above
- Feed your mat into your machine and press Go!
- To remove, turn your mat upside down and gently peel away from the stencil.
Related: What Can I Make With A Cricut Machine? 15 Ideas For All Levels
Designing Your Own Stencils with Your Cricut
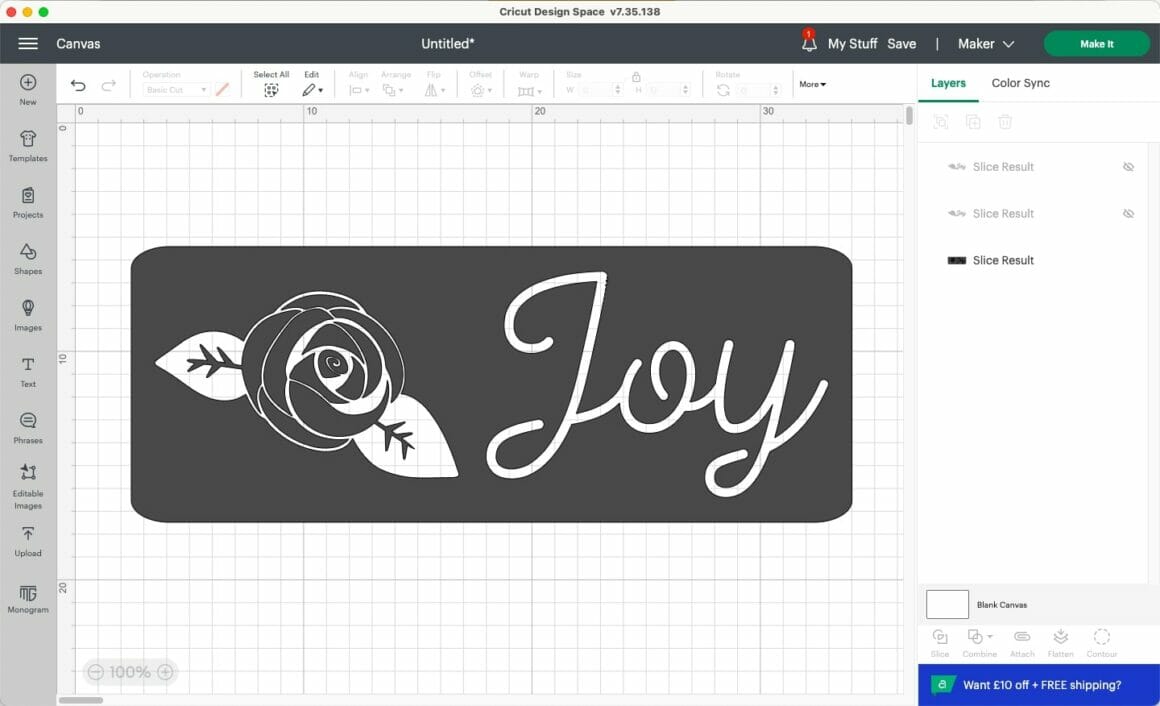
Once you’ve completed a test cut, you can move on to designing and cutting your own stencil designs with your Cricut. The most important thing to remember is that you will lose the center of any continuous line or shape. For example, if we take the following two blossom images:
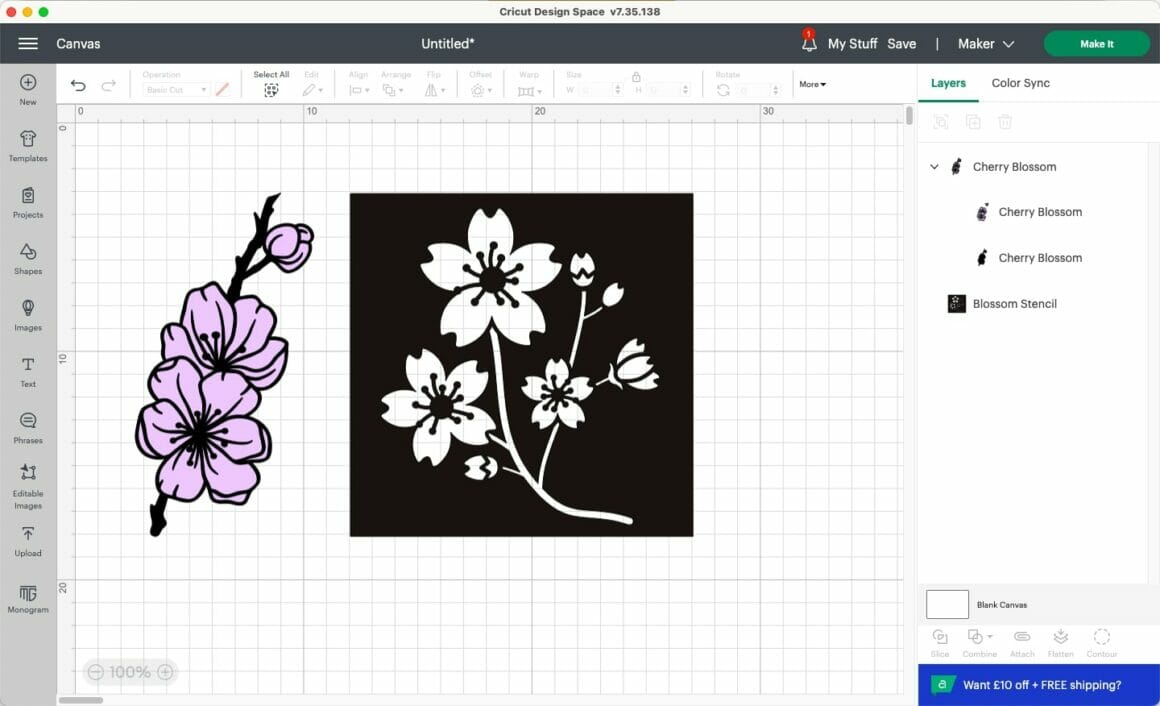
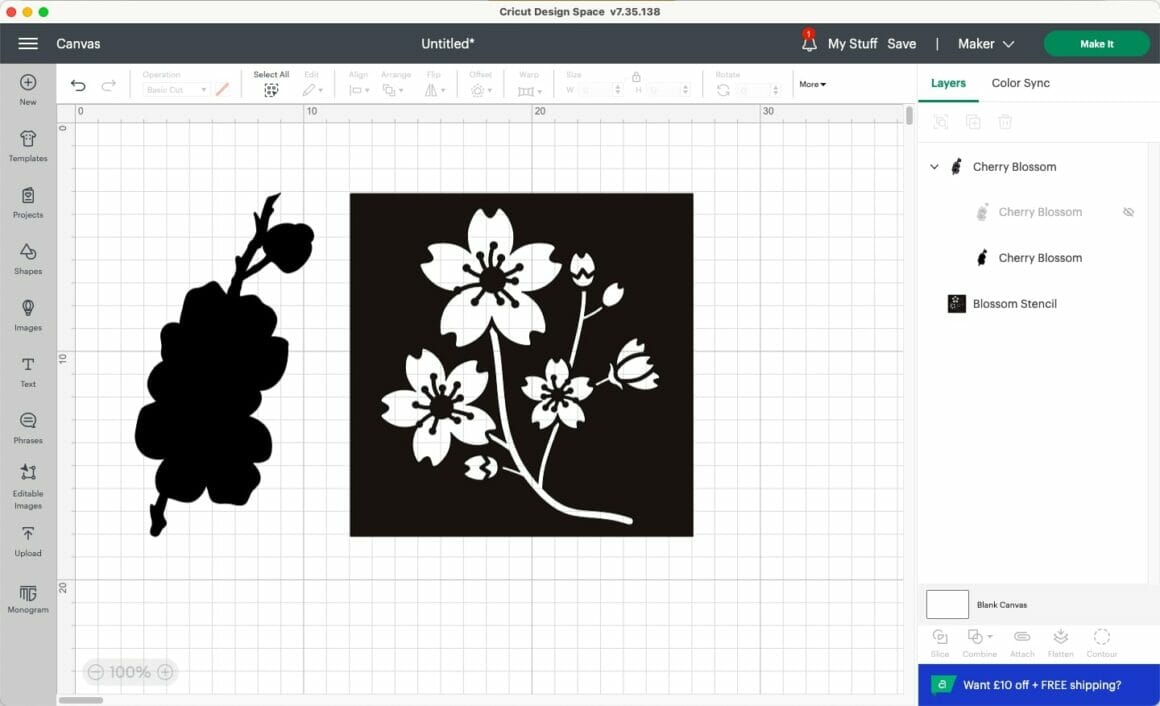
The image on the left is a stencil image, and there are no “floating islands” in the design. It will look exactly the same once cut as it does on the screen. The image on the right is not a stencil image, and once you’ve cut and removed the mylar from the cutting mat, you’ll be left with just an outline:
There are a couple of ways to get around this. You can either stick to using stencil images and fonts, or you can add your own “bridges” to ensure that the center of your design remains intact.
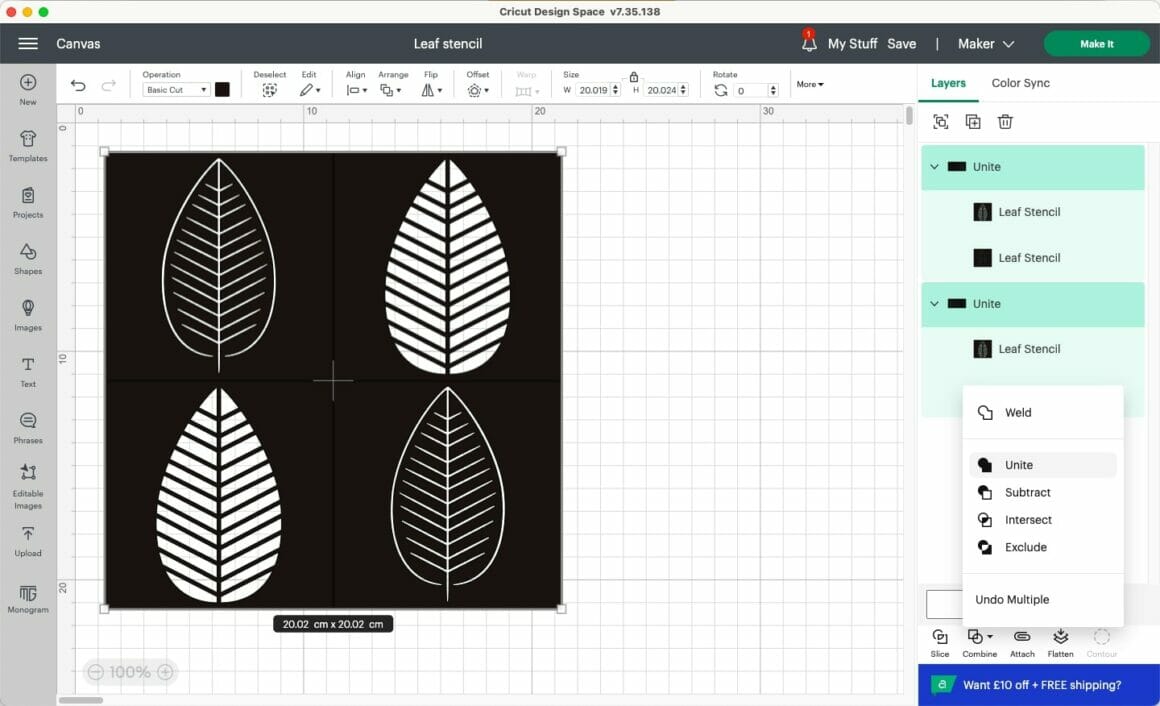
Let’s start by exploring Cricut Design Space’s range of stencil images and fonts. As I mentioned earlier, there’s a huge range of stencil images to use, and you can either use them as they are or combine a number of smaller stencil images to make your own design. Remember to unite or weld any images that you want to remain in the same arrangement when you cut them:
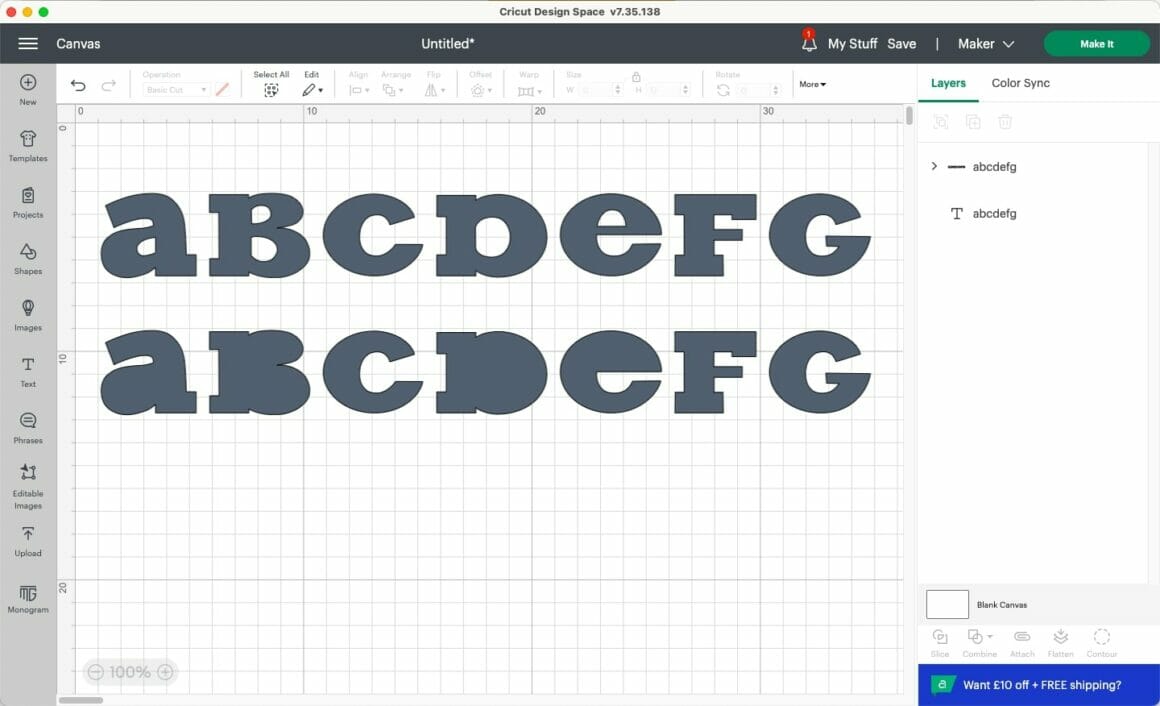
Cricut Design Space also has a large collection of stencil fonts designed so you won’t lose the center of your letters when you cut them. Just search “stencil” on the fonts tab:
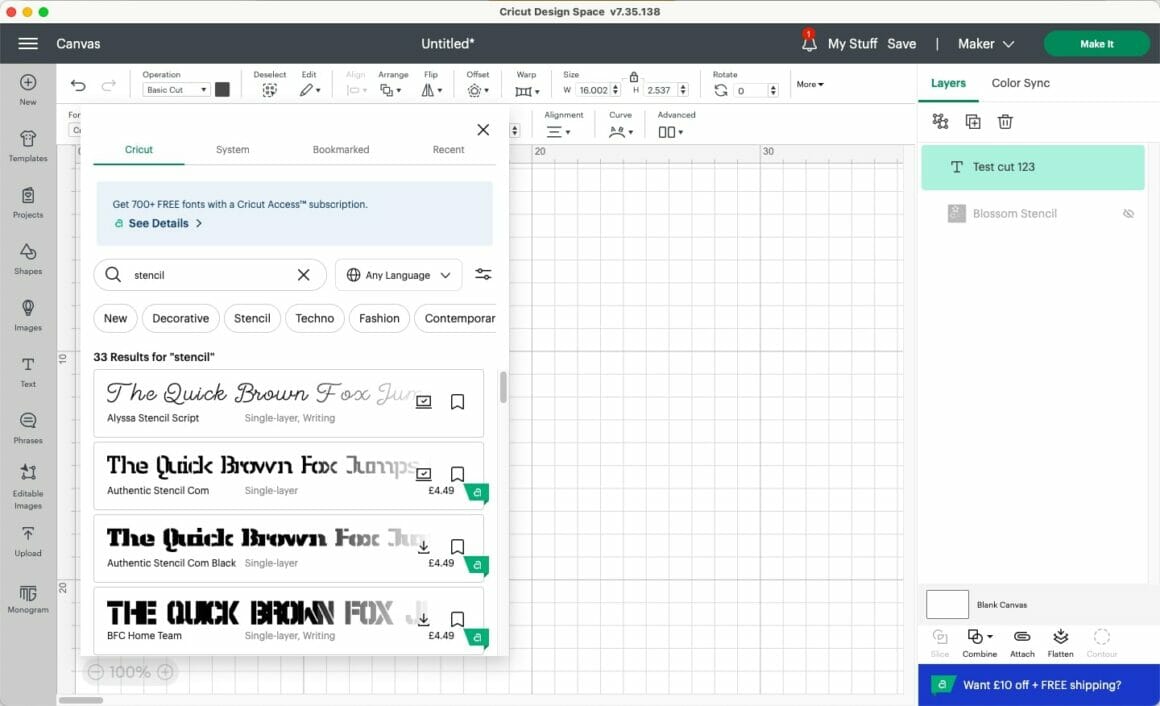
These are some of my favorite stencil fonts – I’ve added the names to the layers tab on the right-hand side.
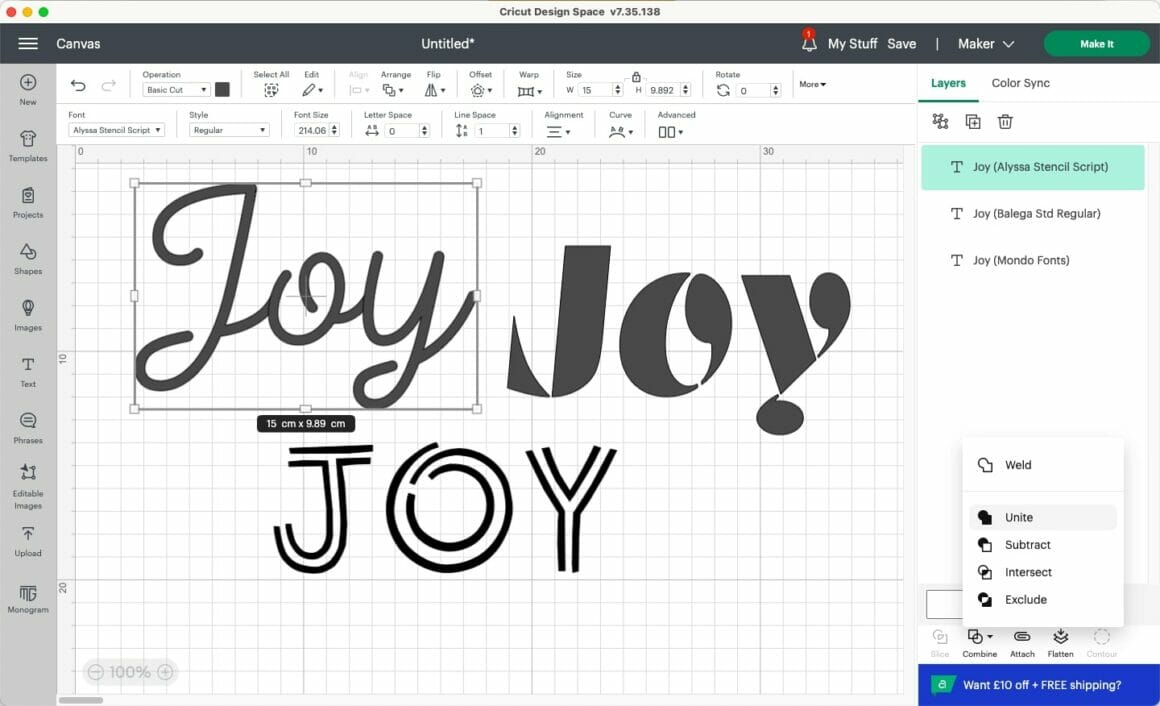
Once you’re happy with your text, here’s how you can turn your text into a stencil:
- For fonts where the letters join, such as Alyssa Stencil Script, you’ll need to unite or weld your text
- Add a box around the edge of your text – I like to use a round-edged rectangle
- Centre your text in the box
- Select the text and box, and use the “slice” tool
- Delete or hide the slice results in the right-hand column
- Now you’re ready to cut out your stencil, using the directions above
It’s worth noting that you can’t edit text or images that have been sliced, so make sure you triple-check that your design is exactly as you’d like it before hitting that slice button.
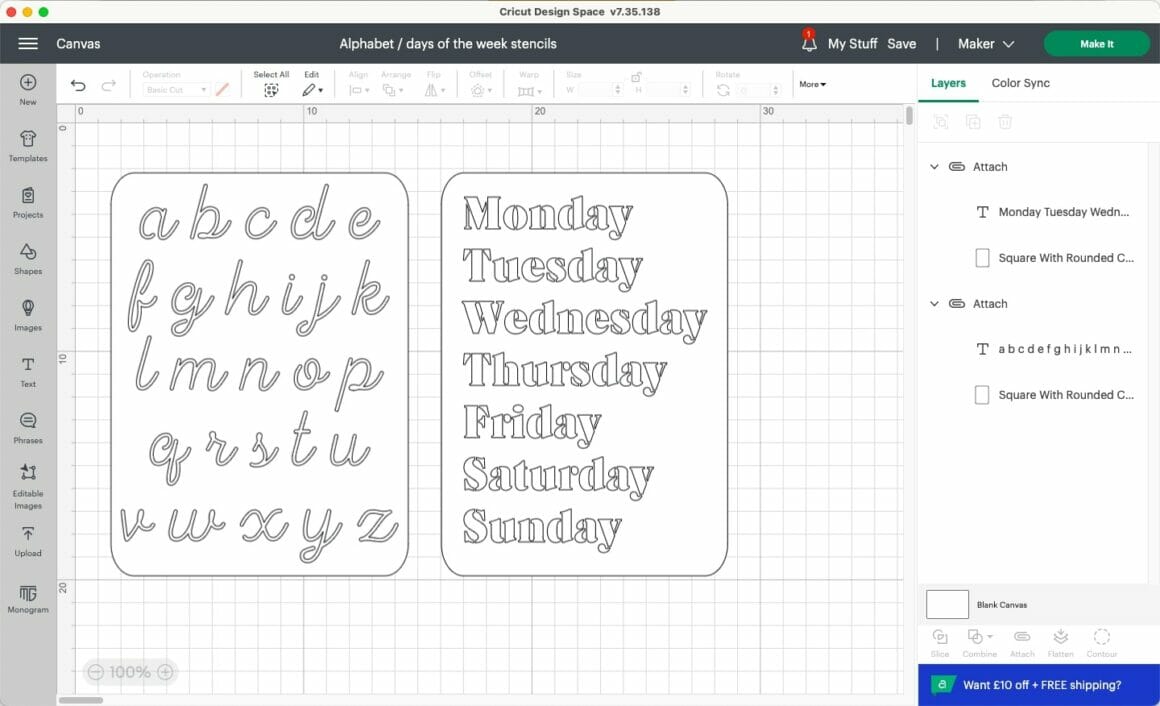
You can use this method to create words or phrases that you’d like to stencil or make alphabet stencil sheets that will allow you to create any word or phrase:
You can also use the same method to combine images and text:
Related: How to Clean a Cricut Mat – A Step-By-Step Illustrated Guide
How to Turn Any Font into a Stencil Font
Now, what if you want to use a particular font that isn’t a stencil font? If you’re happy to lose the “islands” in the middle of some letters, you can follow the steps above. The top line shows how the text looks on-screen, and the second shows what the cut stencil would look like:
If you’d like to retain the center of the letters, you’ll need to add “bridges”:
- Add a rectangle to your canvas from the “shapes” menu on the left-hand side
- Click the padlock in the “size” section of the toolbar to unlock the ratio
- Make the rectangle long and thin. The width will depend on the size of your lettering, but I usually use 0.5cm for large text and 0.2 – 0.3cm for smaller text.
- Place the rectangle over your text – I try to keep the “bridges” next to a straight line.
- Select the rectangle and your text and use the “slice” tool
- Delete or hide the slice results in the right-hand column
- You can now follow the above steps to turn your text into a stencil
You can also use this method with images, although, of course, it can get very complicated to add bridges to a detailed image! I find that stencils with large empty areas can be very unstable and hard to use, so I recommend adding bridges and islands to stabilize your image:
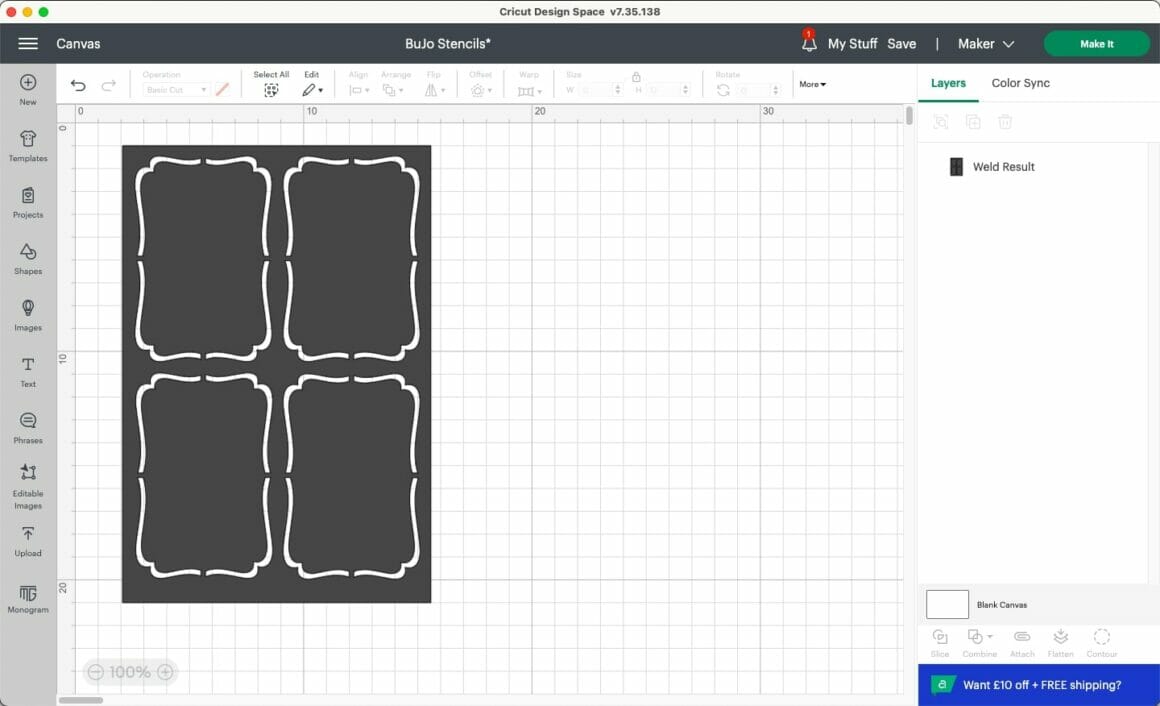
This method is particularly helpful when designing page layout stencils for your journal or planner:
Related: How to Make Stickers with a Cricut – A Step-By-Step Illustrated Guide
How Do I Use My Cricut Stencils?
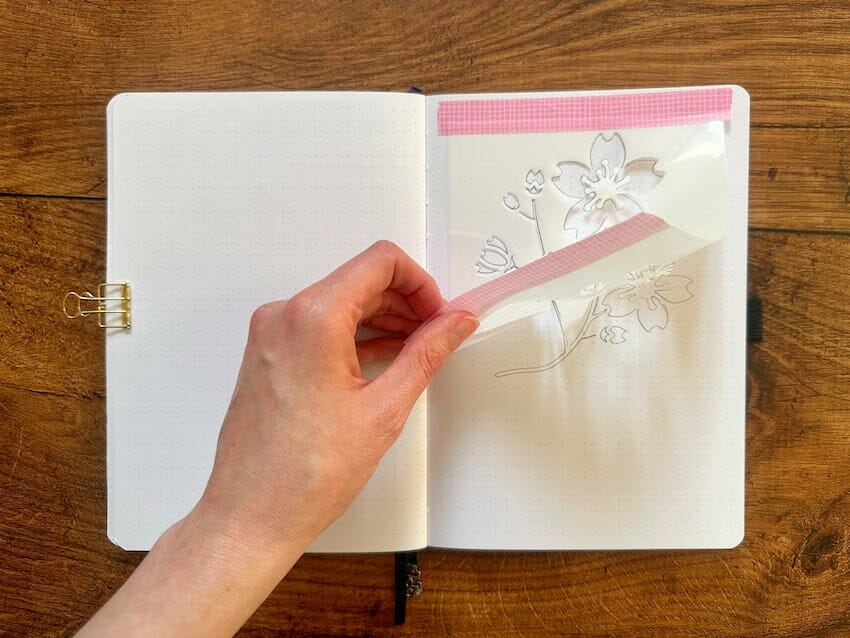
I mostly create stencils to use in my bullet journal or planner and hold them in place using washi tape, Blu-Tack, or clips so that they don’t move around as I’m tracing the design.
You can either use a pencil to trace the shape, then go over this with a pen once you’ve removed the stencil, or use a quick-drying pen such as a marker or felt tip with the stencil in place. I don’t recommend using a liquid pen, such as a paint pen or gel pen, as these can seep underneath the stencil.
Related: Cricut Vs. Silhouette: Exploring the Key Differences
How to Make a Stencil With Cricut FAQs
Can I make reusable stencils with my Cricut?
Absolutely! Mylar stencils are hard-wearing and can be reused over and over again. I recommend cleaning them after every use to ensure they don’t acquire a build-up of pen or paint. I usually wipe mine with a baby wipe, but they can be soaked in a bowl of warm soapy water if they require a deeper clean. Just leave them to air-dry completely before using them again or storing them.
Can I make plastic stencils with my Cricut?
Yes, both mylar and acetate are plastic and will create long-lasting, reusable stencils.
Can I make a stencil with Cricut cardstock?
You can follow the same steps in this blog post to create stencils with cardstock, but please note that these will not be as hard-wearing or long-lasting as mylar or acetate stencils. They may become soggy with repeated application of pen or paint and cannot be cleaned.
Does Cricut sell stencil vinyl?
Yes, Cricut makes Stencil Vinyl, Stencil Film, and Smart Stencil, but these are soft, flexible, and self-adhesive types of vinyl that are better suited to painting stenciled designs on furniture, walls, and canvas. They would not be suitable for creating reusable stencils for paper and mixed-media crafts.
Can you use Cricut Transfer Tape to make stencils?
Cricut Transfer tape is designed to transfer self-adhesive vinyl onto a surface. It can be used to cut similar soft, flexible stencils to those mentioned above, but would not be suitable for the projects outlined in this blog post.
I hope you’ve found this blog post helpful and are now feeling confident and ready to make stencils with your Cricut machine! If you’ve learned something from it, why not bookmark it to refer to later or send it to a crafty friend who may enjoy it too?
Related: How to Use Cricut Infusible Ink – A Step-by-Step Guide
Conclusion
Creating stencils with your Cricut is a fun and rewarding craft technique that opens up endless possibilities for personalizing your projects. By following the step-by-step guide provided in this article, you have learned how to design, cut, and use stencils with precision and ease.
Whether you’re customizing your planner or journal, embellishing your scrapbook or mixed media projects, or creating stencils for designs you need to recreate again and again, the power of Cricut stencil-making is now in your hands. So gather your materials, let your imagination soar, and enjoy the journey of creating beautiful stenciled creations with your Cricut machine. Happy crafting!