Quilt binding is a finishing technique that involves adding fabric to the edges of your quilt so that it can be neatly folded and sewn shut. It is typically done by sewing strips of fabric onto the edges of your quilt, and there are many different styles and techniques for doing this. Some common types of quilt binding include mitered corners, bias tape, invisible machine stitching, and fold-back bindings.
If you’re new to quilting, finishing off your first quilt with binding can be scary. You’ve put in a lot of work – you don’t want a wonky binding to mess it up! Fortunately, putting a binding on a quilt is actually pretty simple.
In this step-by-step tutorial, I’ll show you how to sew an easy quilt binding.
Table of Contents
- 1 Supplies to bind a quilt
- 2 How to put a binding on a quilt: step-by-step tutorial
- 3 Quilt biding Q&A
- 4 Why should you put Binding On a Quilt?
- 5 Do I sew the binding to the front or back of the quilt?
- 6 How do you attach the ends of binding on a quilt?
- 7 How do you bind a thick quilt?
- 8 How do you bind with backing fabric?
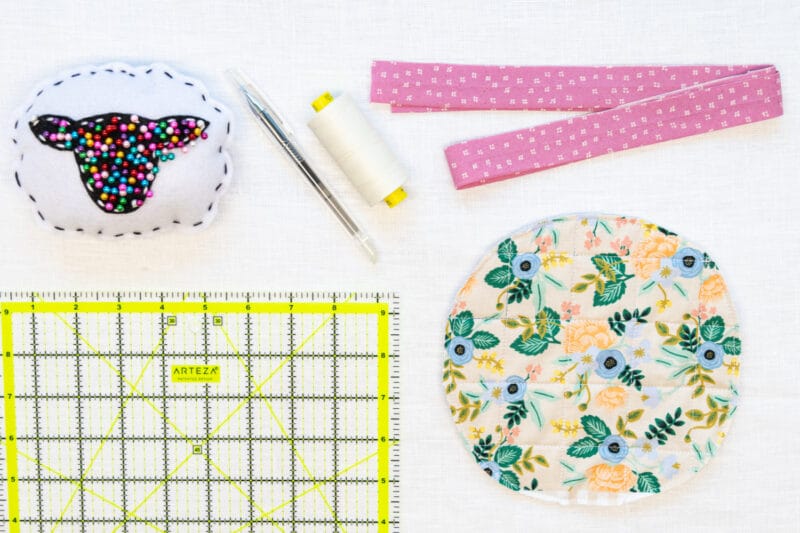
Supplies to bind a quilt
- Quilt that needs a binding
- Quilt binding (store-bought or homemade) – a long strip of fabric 2.25 inches wide, folded in half lengthwise with wrong sides together
- Sewing pins
- Matching thread
- Quilting machine
- Sewing machine needle
- Iron
- Ironing board
- Fabric chalk or marker
- Quilting ruler
*Tip: I recommend using a 2.25-inch-wide strip of fabric for your binding as a good all-around width. If you are binding an extra-thick quilt, you may want to make your binding strip wider – try 2.75” or even 3”.
How to put a binding on a quilt: step-by-step tutorial
Below, I’ll take you through my favorite easy method of attaching a binding to a quilt.
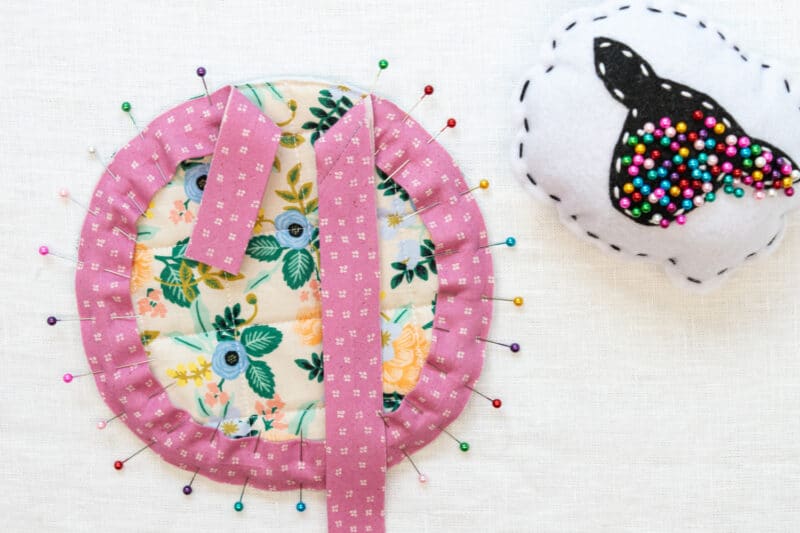
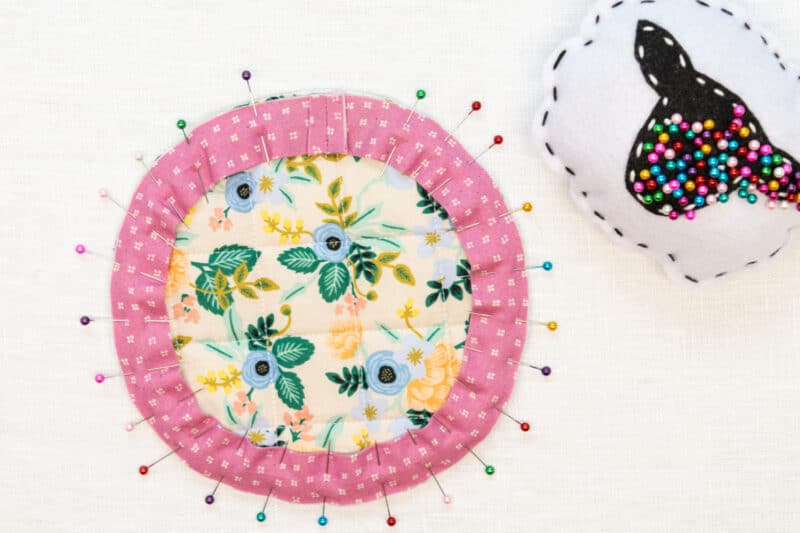
Pin the binding to the quilt
Step 1
First, place your quilt right side up on your table.
Step 2
Starting about 3 inches from the end of the binding strip, pin the unfinished edges of the binding along the raw edge of your quilt.

Step 3
Stop pinning when you’re approximately 2 inches from your first pin.

Step 4
Trim the binding strip to leave a 3-inch tail.
*Tip: I like to sew my binding to the right side of a quilt, then flip it to the wrong side, because I think it looks cleaner. However, this method will still work if you sew it to the wrong side and flip it to the right side.
Attach the ends of the quilt binding
Step 5
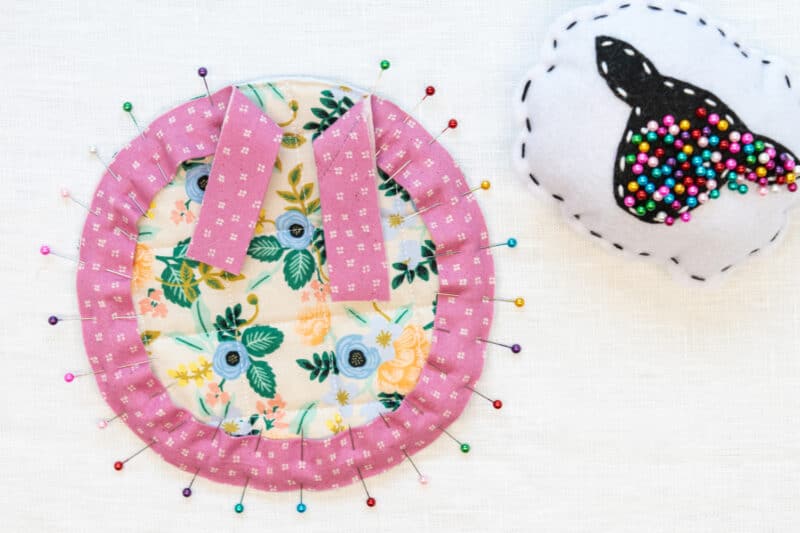
Next, you’ll need to join the ends of the quilt binding. To do this, overlap the tails of the binding strip along the edge of your quilt.
Step 6
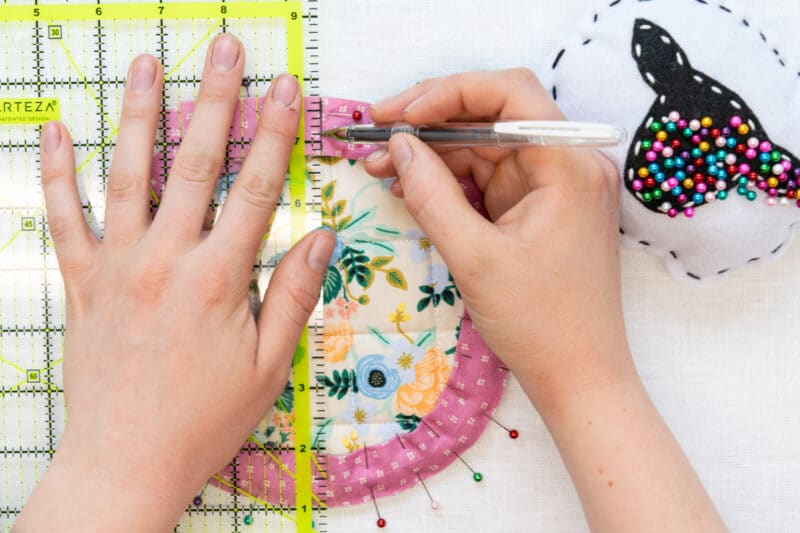
Mark both binding tails at the center of the overlap, making sure your markings line up with each other exactly.
Step 7
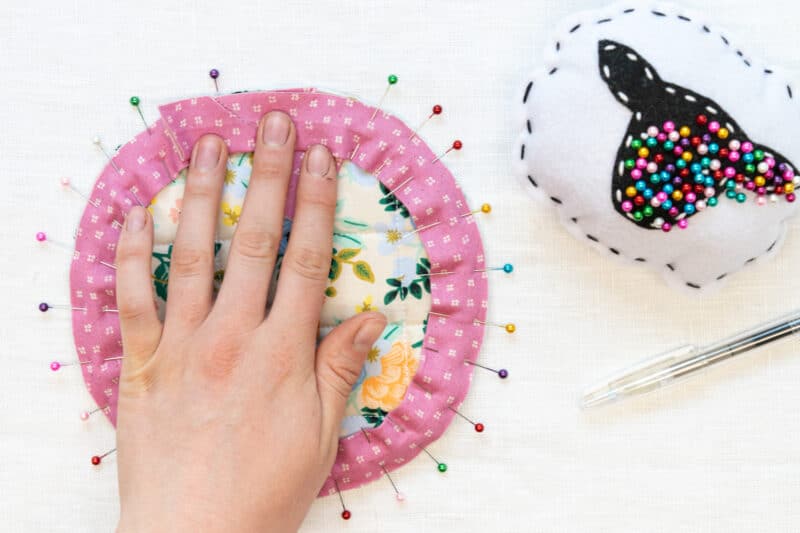
Lift the binding strip tails away from the fabric of the quilt, match the markings, and pin them with the right sides together.
Step 8
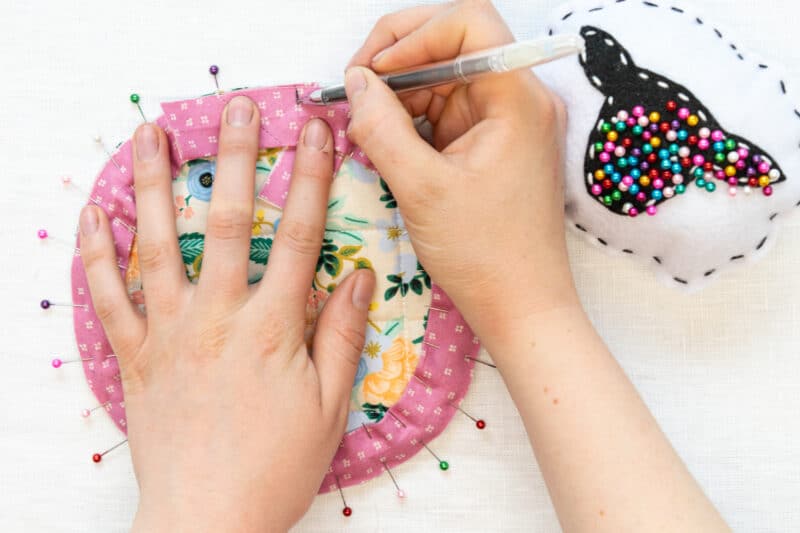
Draw a line across the pinned binding tails on one side, going through your marking.
Step 9
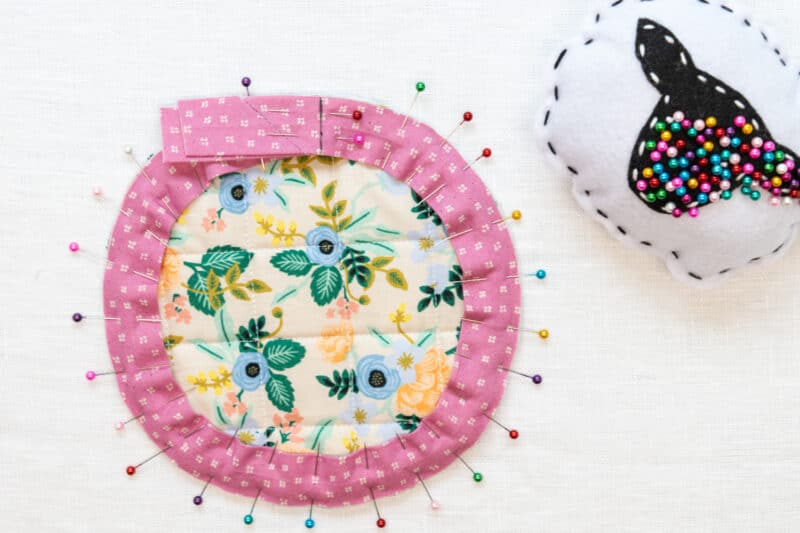
Take the quilt to your sewing machine and sew along the line you just drew to join the binding ends.
Step 10
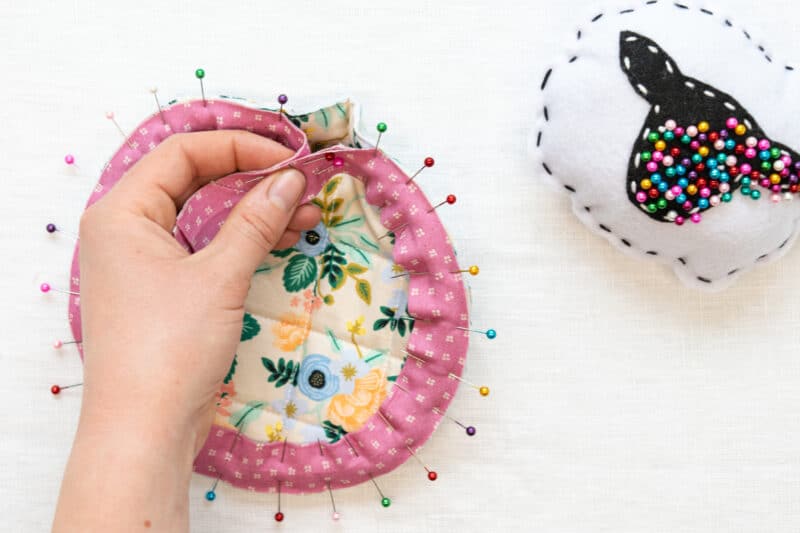
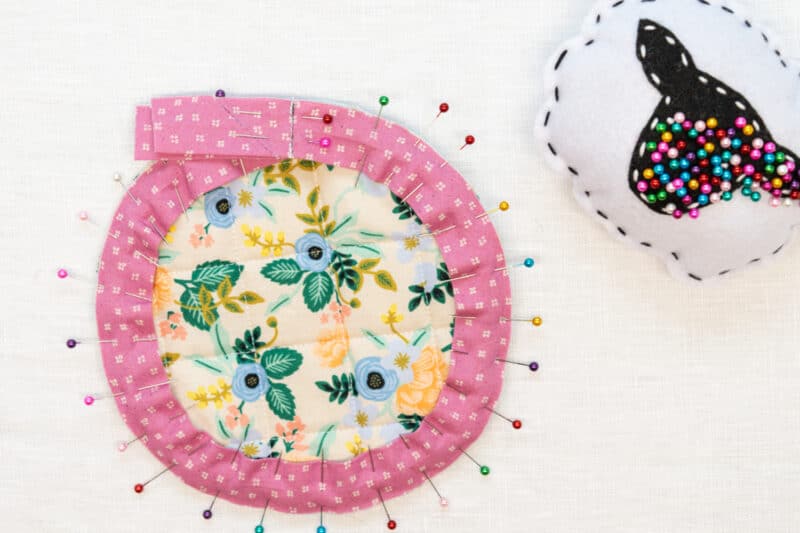
Make sure the binding fits the edge of the quilt exactly. If it does, great! Trim the seam allowance to about ¼ inch and press it open.
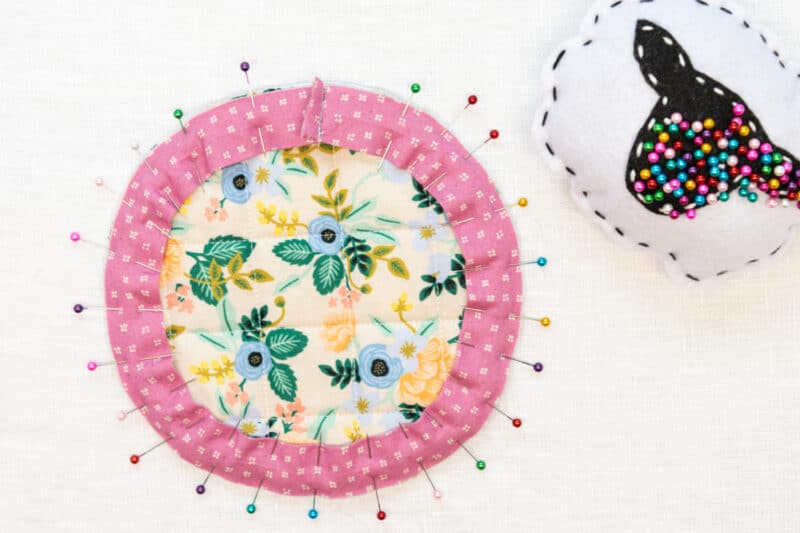
If the binding doesn’t fit quite right, you’ll need to seam rip and re-try.
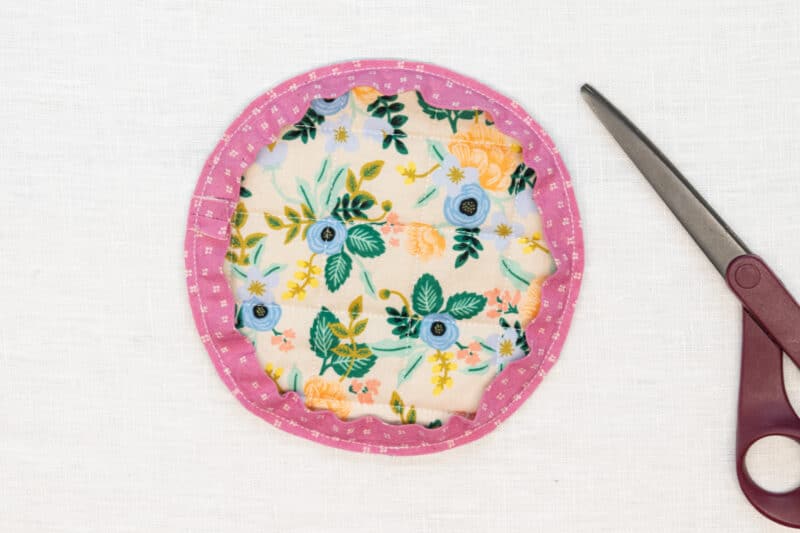
Sew the binding to the quilt
Step 11
It’s time to stitch the binding to the quilt! Simply sew around the edge of the quilt with a ¼ inch seam allowance to attach the binding. Don’t forget to backstitch at the beginning and end.

Step 12
If you prefer a narrower finish, trim the seam allowance down by half.
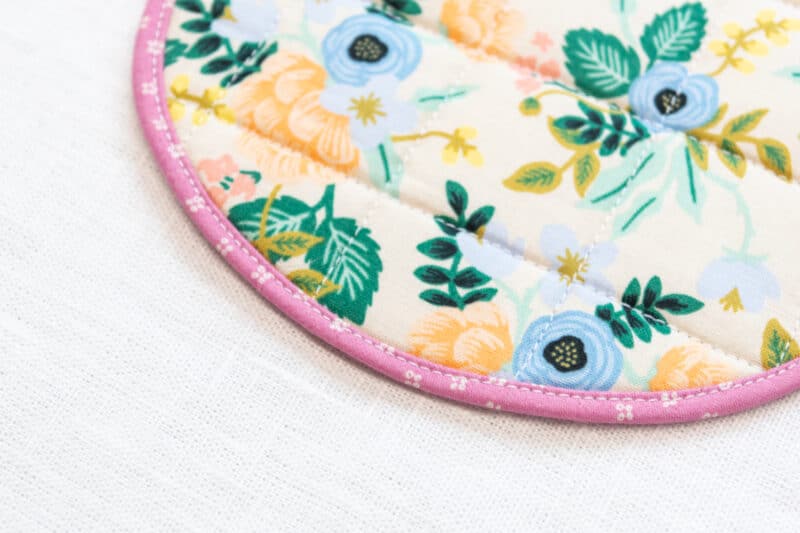
Fold and topstitch the quilt binding
Step 13
With the binding stitched on, fold it to the wrong side of the quilt and pin it in place.
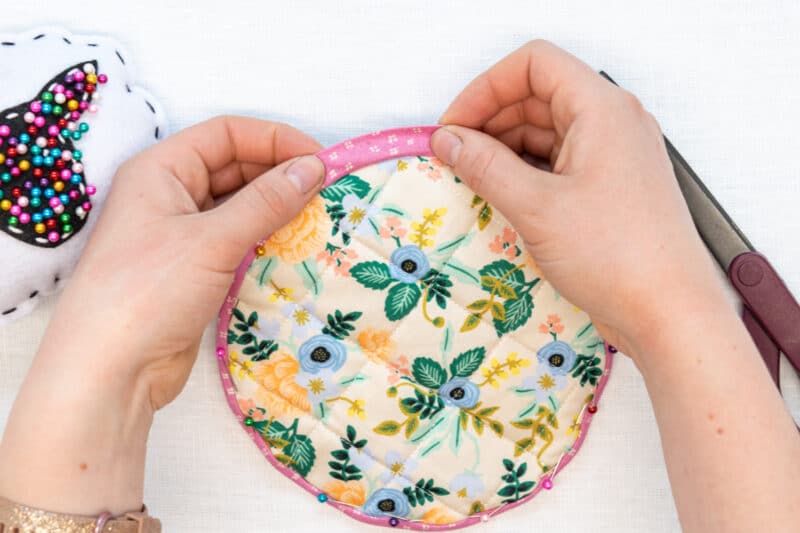
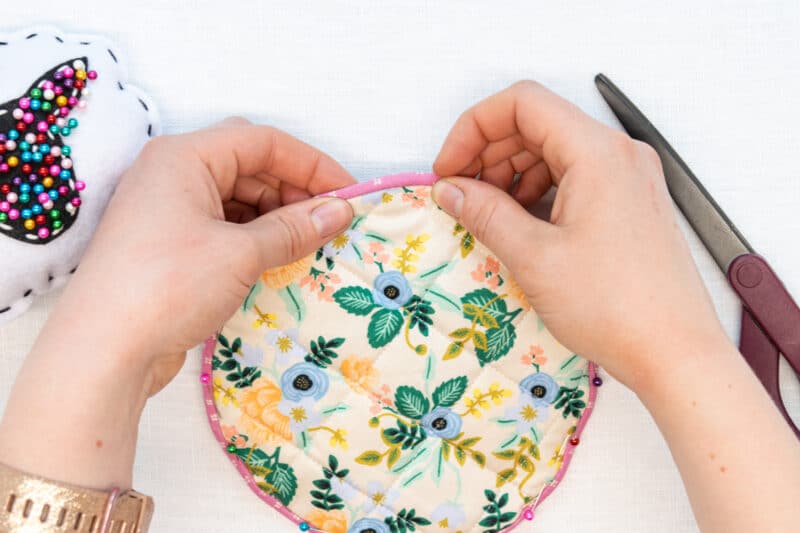
Step 14
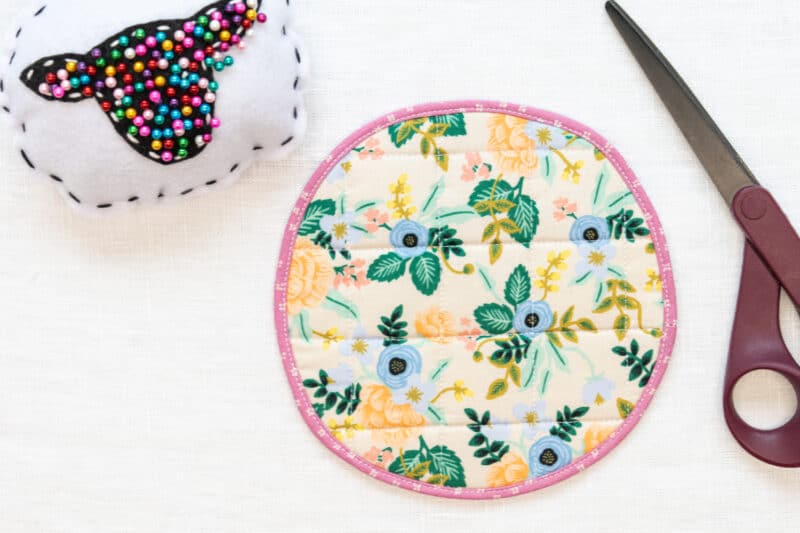
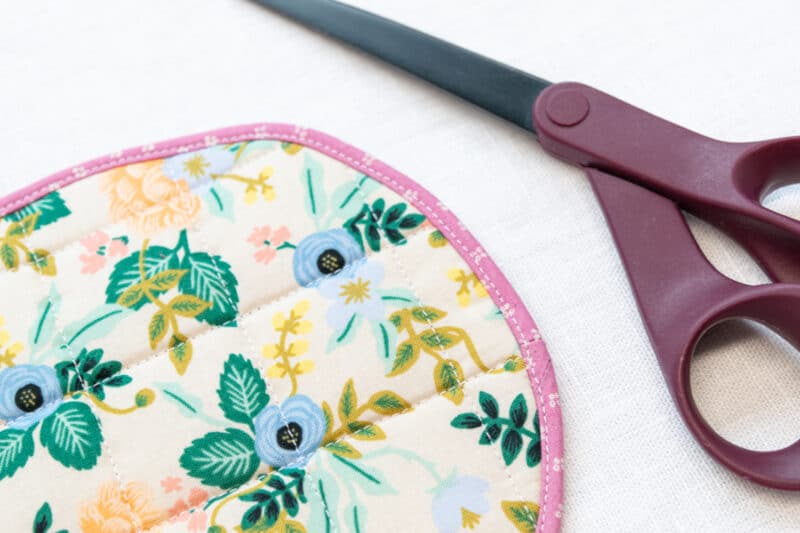
The key to a beautiful binding is getting it tight to the edge of the quilt, but not so tight that it creates pulls and wrinkles.

Step 15
Once you have the binding pinned all the way around, it’s time to topstitch! Sewing from the right side of the quilt, topstitch through the binding, staying ⅛ inch from the seam. This stitching will catch the binding edge on the wrong side, securing it in place.
Step 16
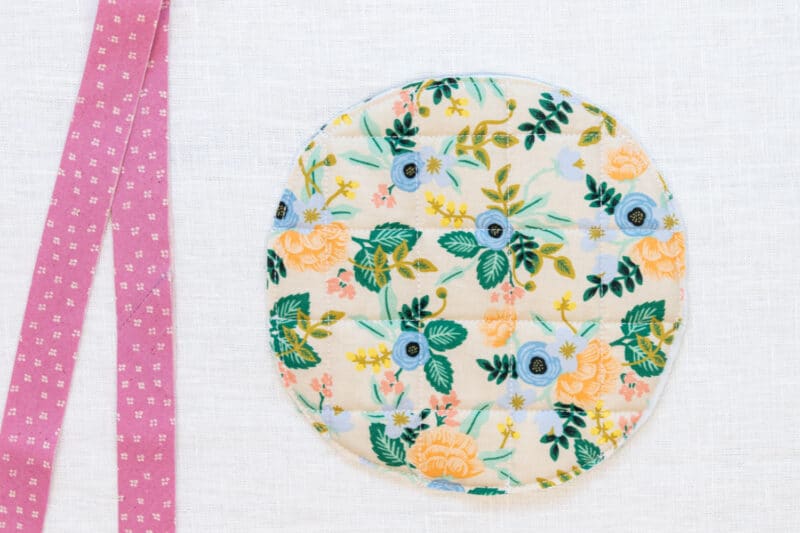
Finally, give your quilt binding a good pressing and you’re done!
Quilt biding Q&A
Why should you put Binding On a Quilt?
There are many reasons why you should Binding On a Quilt. Some of the most important benefits include increased durability, aesthetic appeal, and better protection against wear and tear. Binding can be an easy way to customize your quilts and add a personal touch, making them even more special or meaningful. Additionally, using binding helps prevent fraying and other damage that could shorten the lifespan of your quilt.
Whether you are looking for a quick and simple DIY project to spruce up an old blanket or quilt, or you need a cost-effective way to protect your precious handmade creations, wrapping them with binding is definitely something to consider.
Do I sew the binding to the front or back of the quilt?
When you are binding a quilt, you can sew the binding to the front or back of the quilt. If you sew the binding to the front of the quilt, it will be visible from the front and you will need to hand-sew the binding in place. If you sew the binding to the back of the quilt, it will be hidden from view and you can machine-sew the binding in place. Whichever method you choose, make sure that all of your stitches are nice and even for a professional-looking finish.
How do you attach the ends of binding on a quilt?
To finish the binding on a quilt, you will need to attach the two ends together. There are a few different ways that you can do this, but the most common is to simply sew the two ends together with a needle and thread. You can also use binding clips or adhesive tape to hold the ends in place while you sew them together. Once the ends are attached, you can trim off any excess binding material and then enjoy your beautiful quilt!
How do you bind a thick quilt?
Do you have a thick quilt that needs binding? If so, you’ll need to learn how to bind it properly. Fortunately, this is fairly simple – all you need are a few basic tools and supplies. So read on for some tips on how to bind a thick quilt effectively.
The first step in binding a thick quilt is to prepare your materials. You will need plenty of bias tape or strips of fabric, as well as a thread that matches the color of your fabric. Additionally, you may want to use double-sided tape or basting spray to help hold the layers together while sewing.
Next, place your quilt top and backing side by side, with the right sides facing outwards. If you are using batting, place it in between the two layers. Then, use bias tape or strips of fabric to bind the quilt layers together. Start by sewing the binding around the edges of the quilt, then continue stitching in the middle of the quilt to secure all three layers together.
Finally, finish off the binding by hand-sewing it closed. Once complete, your thick quilt will be properly bound and ready to use!
How do you bind with backing fabric?
When working with fabric, it’s important to have a good understanding of how different fabrics bind together. There are many different types of binding techniques that can be used depending on the type of fabric you are using and the look that you want to achieve.
Some fabrics, such as stretchy knits or woven cotton, are easy to work with and tend to bind together nicely without any additional steps. However, other fabrics, like lace or sequined material, may require special treatment in order to ensure that they stay securely in place.
One common technique for binding fabric is called overlock stitching. This involves sewing a narrow strip of fabric around the edges of your project to help keep everything in place and prevent the edges from fraying.
To do this, you will need a special sewing machine called an overlocker that can sew these narrow strips of fabric together in one step. However, if you don’t have access to an overlocker, you can also use a regular sewing machine and just take extra steps to ensure that the binding is secure.
There are many different types of binding techniques that you can choose from for your project, depending on what look you want to achieve and what type of fabric you are using. Experimenting with different methods will help give your projects a unique and professional-looking finish.


5 comments