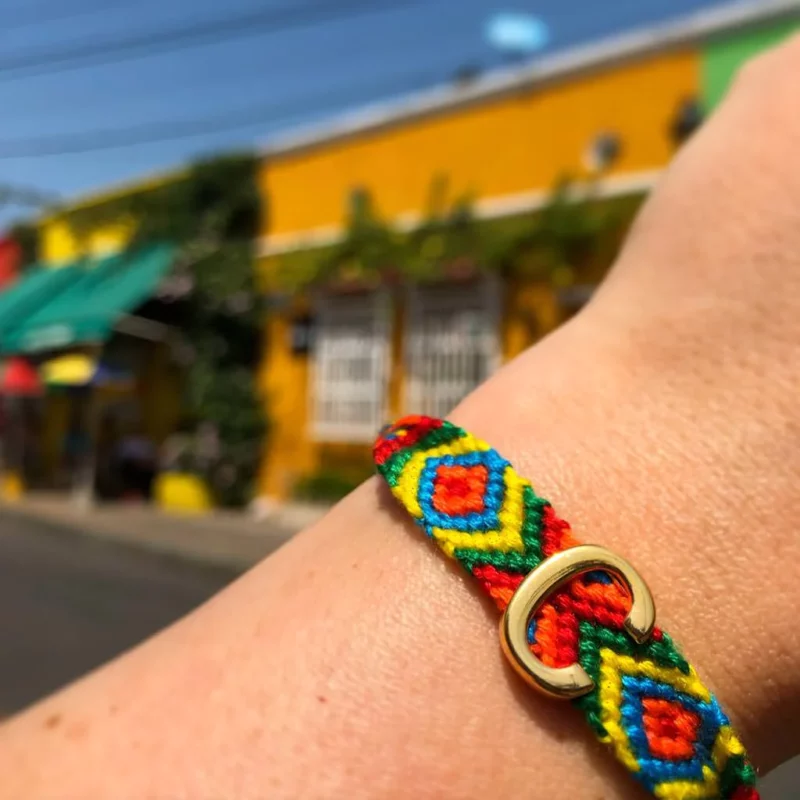
There are two types of bracelet patterns: the usual ones made with diagonal knots and the alpha bracelet patterns made with horizontal knots. The alpha patterns are used to make a more intricate bracelet design, the ones made with beads, patterns, and letters.
In this article, I’ll discuss in detail alpha bracelets and how to make one. Besides, you’ll learn about how these bracelets are different from normal bracelets. To know more about these beautiful bracelet designs, keep reading the article till the end.
Related: 10 Rubber Band Bracelet Ideas – Easy & Unique
Table of Contents
How Are Alpha Bracelets Different From Basic Bracelets?
As stated before, the alpha bracelet patterns have horizontal knots, and the chart of an alpha bracelet pattern looks like a grid. Such a bracelet is made by tying one long string on top of a few different strings, which makes creating patterns or names easier.
Knots are one of the core elements of making bracelets. The knots make the designs in both normal bracelets and alpha bracelets. But what makes alpha bracelets different from general ones?
Related: 8 Amazing Clay Bead Bracelet Ideas You Must Try!
Knot style is the main difference between these two bracelet types. The basic bracelets are made with forward and backward knots. But alpha bracelets don’t use these knots; instead, they are made with downward knots. So, for example, when the background string moves to the left, you tie a left downward knot, and when it moves to the right, you tie a right downward knot.
And when you make a letter or a pattern, you’ll follow the opposite tying pattern. For instance, if the background string is going right, you have to tie the letter or pattern string over the background string and tie a left downward knot.
Related: Chinese Staircase Bracelet: Patterns & Meaning
How Do You Make An Alpha Pattern Bracelet?
There are numerous ways you can make alpha-pattern bracelets. I’m going to share an easy tutorial for a basic alpha bracelet. Let’s see the materials you’ll need and the step-by-step process of making the bracelet.
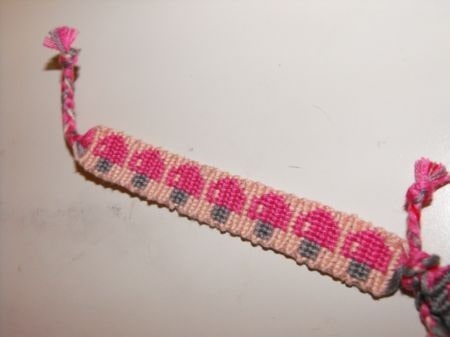
(we are going to make a mushroom design, and I will explain the steps accordingly)
Supplies:
- Strings of three colors. One is the background color, and the other two strings make the mushroom top and the stem. (I’m taking pink for the mushroom top, gray for the stem, and light orange for the background color)
- Safety pin or securing tape.
- Cardboard to secure the strings.
Process:
Step one: Arranging The Strings
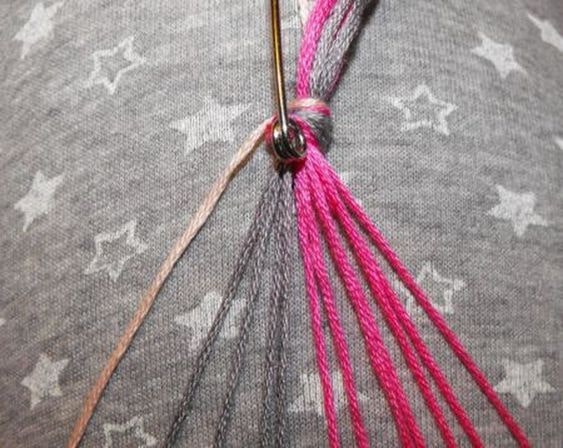
We need seven strings to make the mushroom tops, four strings for the stem, and one long light orange string for the background. Arrange them in a similar order and tie a knot at one end of all the strings. Secure the strings to the cardboard using a safety pin or measuring tape.
Step two: Start Making Rows
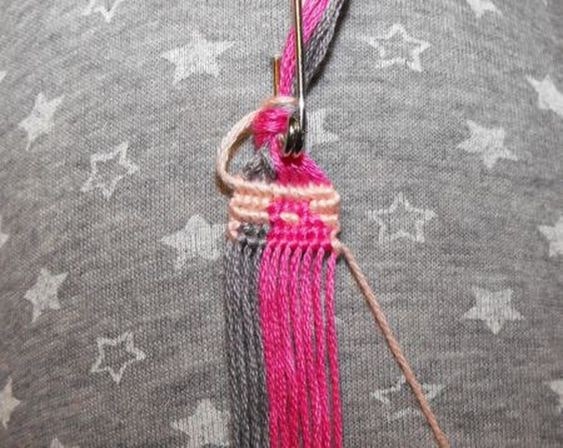
- Row One
We will start making the pattern now. In the first row, you have to make eleven knots with the background color (the light orange string).
- Rwo two
The second row is a little complicated. To ensure that the mushroom design stands out, you have to make three backward knots with the orange string, four forward knots with the pink string, and four backward knots with the orange string again.
- Row three
For the third row, make four orange forward knots, one backward knot with the pink string, two orange forward knots, again two pink backward knots, and finally, two orange forward knots.
- Row four
One backward knot with the orange string, three forward knots with the gray string, six pink forward knots, and one backward orange knot.
- Row five & six
Repeat the same knots we made in the fourth row.
- Row seven
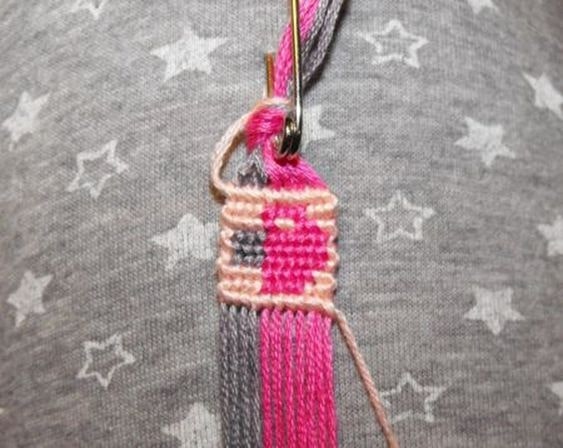
Make four orange forward knots, five backward knots with pink string, and two forward knots with orange string.
- Row eight
Make three orange backward knots, four pink forward knots, and four orange backward knots.
- Row nine
Make the entire row with orange backward knots. You’ll see that you have made one mushroom pattern with the stem.
Now repeat the process till you have a long enough bracelet. That’s it. It’s not that complicated, and you can make one once you learn to tie the forward and backward knots.
Here is a video tutorial for a similar-style bracelet. Check it out to learn the knots better.
You’ll find different alpha pattern tutorials on the web to make varied-style alpha bracelets.
Related: Matching Bracelets Ideas & Meanings: All You Need To Know
Alpha Bracelet Patterns FAQs
How Long Should The String Be For An Alpha Friendship Bracelet?
Usually, you need 30 inches of string to make letters or other patterns for an Alpha friendship bracelet. But the length also depends on the difficulty level and detailing of the design. And you may need an entire ball of string for the background color.
What Kind Of String Do You Use For An Alpha Bracelet?
Embroidery floss is the best string to use to make alpha bracelets or any bracelets. Alternatively, you can use wool or other thick string if you want a thicker bracelet.
How Many Rows Should There Be An Alpha Bracelet?
The total number of rows depends on the length and design of the bracelet. But on average, an adult-size alpha pattern bracelet usually has 93 rows.
Related: How to Make Pura Vida Bracelets? Video Tutorial
Conclusion!
Alpha bracelet patterns need a little more work than usual bracelets, but the outcome makes it worth the time and labor. I hope this detailed guide on alpha bracelet designs was insightful. Make sure to check the step-by-step guide on making the bracelet, and do try your hands on it as well.
If you have any further queries regarding tying knots and making the design, drop them in the comments!

