Welcome to the captivating realm of Adirondack chairs. Allow us to guide you through the allure of these timeless pieces and the sheer pleasure of crafting your own bespoke creation.
Picture a beautifully designed chair situated on your patio, porch, deck, or amidst your garden, extending an open invitation to relish the tranquil beauty of the outdoors, the satisfaction of knowing it’s a result of your own craftsmanship enhancing the experience.
Constructing an Adirondack chair is not only a simple and cost-effective venture but one that assures boundless satisfaction. So much so the enjoyment derived from creating one might compel you to craft enough chairs for the entire family.
Our meticulously assembled compilation of free Adirondack chair plans equips you with all the resources required to construct your own elegant refuge. Comprehensive instructions, illustrative diagrams, vibrant photographs, and expert guidance together facilitate the creation of your durable and visually appealing masterpiece.
Read on to discover more about the iconic Adirondack chair, its diverse variations, and detailed instructions to manifest your personalized version.
Table of Contents
- 1 Understanding Adirondack Chairs
- 2 Getting Started: Essential Tools and Materials
- 3 Benefits of DIY Adirondack Chairs
- 4 11 Free Adirondack Chair Plans
- 4.1 1. Simple Adirondack Chair Plans
- 4.2 2. Adirondack Rocking Chair Plans
- 4.3 3. Folding Adirondack Chair Plans
- 4.4 4. Kids Adirondack Chair Plans
- 4.5 5. Adirondack Chair With Cupholder Plans
- 4.6 6. Adirondack Chair Kit
- 4.7 7. Gliding Adirondack Chair Plans
- 4.8 8. Double Adirondack Chair Plans
- 4.9 9. Toddler Adirondack Chair Plans
- 4.10 10. Giant Adirondack Chair Plans
- 4.11 11. Ski Adirondack Chair Plans
- 5 Safety First: Precautions and Tips
- 6 How to Build an Adirondack Chair Step-by-Step
- 7 Outdoor Protection: Covers and Maintenance
- 8 Maintenance Tips to Prolong Your Chair’s Life
- 9 DIY Adirondack Chairs: FAQs
Understanding Adirondack Chairs
Let’s look at the history of Adirondack chairs and explore their unique design features and elements in more detail.
A Brief History of Adirondack Chairs
The Adirondack chair originates from Westport, NY, and was invented by Thomas Lee, a Harvard graduate with a love for nature. He spent between 1900-1903 developing a chair that could withstand the rugged terrain of the Adirondacks but also provided comfort. He enlisted his family to help test his prototypes before perfecting his design, with wide armrests, a high back, and a slanted seat.
Originally known as the Westport chair, its popularity grew, and over time variations began to appear until it evolved into the style of the Adirondack chair we know and love today.
Innovations were made to aid production. The original design called for a single piece of knot-free wood for the back and the seat. Changing to using multiple slats of wood helped keep up production and reduce costs.
The Adirondack chair is still the most popular style of outdoor wooden chair used today and is mainly used in gardens, porches, and beaches.
Iconic Design Elements and Features
Iconic designs and features of the Adirondack chair include:
- Wide and flat armrests
- High backrest
- A slanted seat
- Created using multiple wooden slats
- It has a low-slung profile
Getting Started: Essential Tools and Materials
Tools needed to build your Adirondack chair:
- 4-in-1 screwdriver
- Circular saw
- Clamps
- Cordless drill
- Countersink drill bit
- Framing square
- Jigsaw
- Miter saw
- Orbital sander
- Paint tray
- Paintbrush
- Safety glasses
- Straightedge
- Tape measure
What Material Should I Choose to Make My Adirondack Chair?
Adirondack chairs are usually made from recycled plastic that has been molded to resemble wood or from a variety of different hardwoods, including:
- Poplar
- Alder
- Aspen
- Maple
- Oak
Some hardwoods are also suitable, but bear in mind they may not be as durable. These woods include cedar, cypress, fir, and pine.
Related: Easiest DIY ‘Floating’ Shelves: Cheater Method!
Benefits of DIY Adirondack Chairs
There are lots of benefits to making your own DIY Adirondack chair
Here’s why crafting your own chair is an excellent choice:
- Endless customization – When you build your Adirondack chair, you have full control over the design and materials used. This allows you to create your perfect design, from choosing the design, material, paint, or stain colors to adding embellishments.
- Cost-Effective – Building a DIY Adirondack chair is more cost-effective than buying a pre-made chair. Many free chair plans are online, and materials can be purchased cheaply, saving you lots of money.
- It’s fun – Building your own Adirondack chair can be extremely fun and allow you to develop your woodworking knowledge. You will also be proud of your finished chair in a way buying a premade one will never make you feel.
11 Free Adirondack Chair Plans
1. Simple Adirondack Chair Plans
Follow this free plan to create the classic look of an Adirondack chair. Simple, sturdy, and durable, this Adirondack chair style never goes out of fashion. Even with a simple design, you can customize the look by using different colors and wood stains.
2. Adirondack Rocking Chair Plans
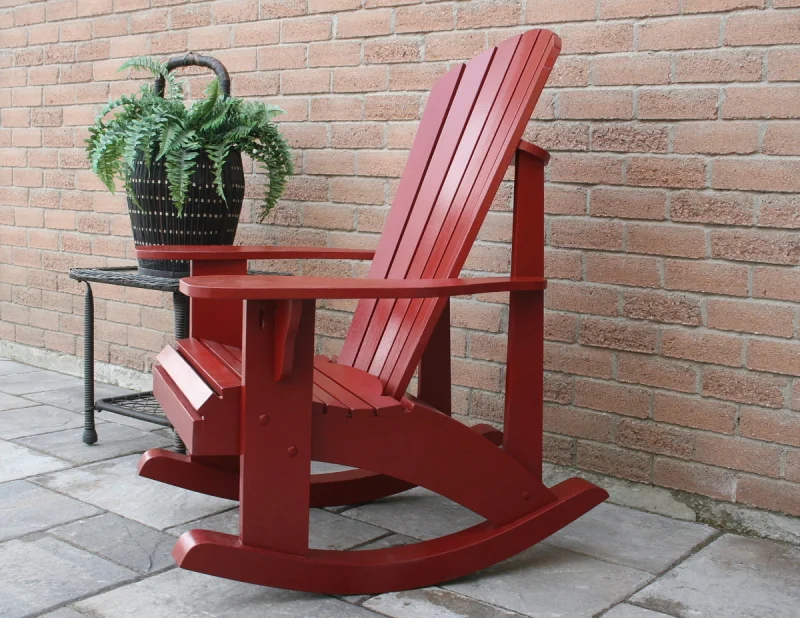
Designed to smoothly rock you as you take in the nature around you this Adirondack chair is a great variation on a classic design. The seat and back rest are still upright enough with added back support that helps keep the chair easy to get in and out of. Check the plan here.
3. Folding Adirondack Chair Plans

Being able to fold and store your Adirondack chairs easily is a great idea. It means you can get more chairs out when you have visitors, and you don’t need to have them on show all year round. Storing your chairs in a clean, dry environment will also help them last longer. Check out the free plan to start making your own foldable Adirondack chairs.
4. Kids Adirondack Chair Plans
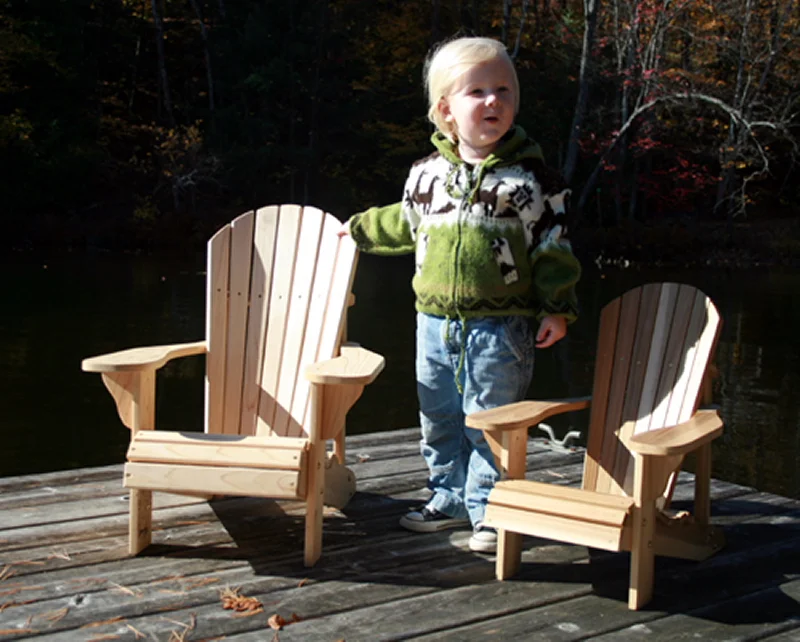
Create miniature versions of your favorite Adirondack chair for the little ones in your life. We all know they love to feel grown up, and what better way is there to make them feel included in summer evening conversations than having a chair perfectly made for them? Let them get involved in building their own chair by using their own screwdrivers and choosing what color to paint their finished chair. Check the free plans here.
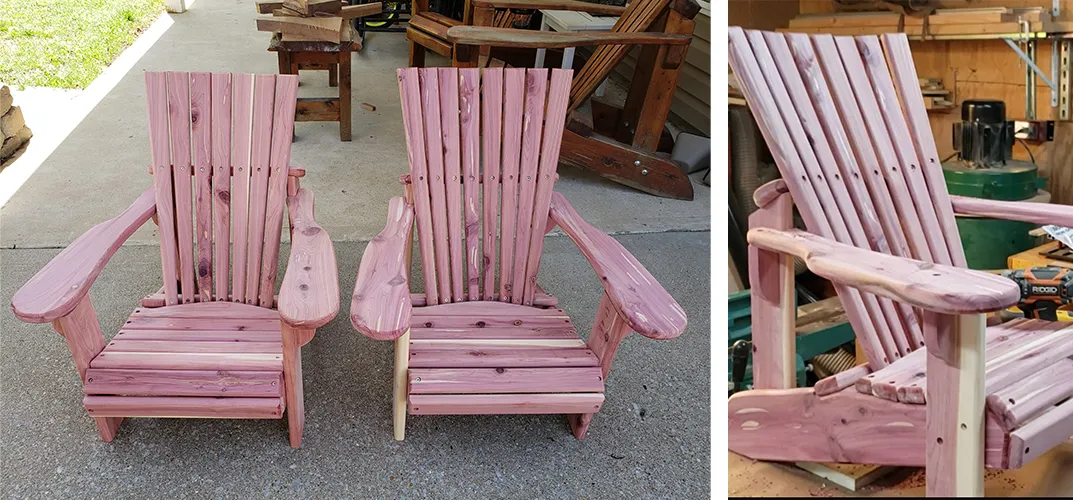
5. Adirondack Chair With Cupholder Plans
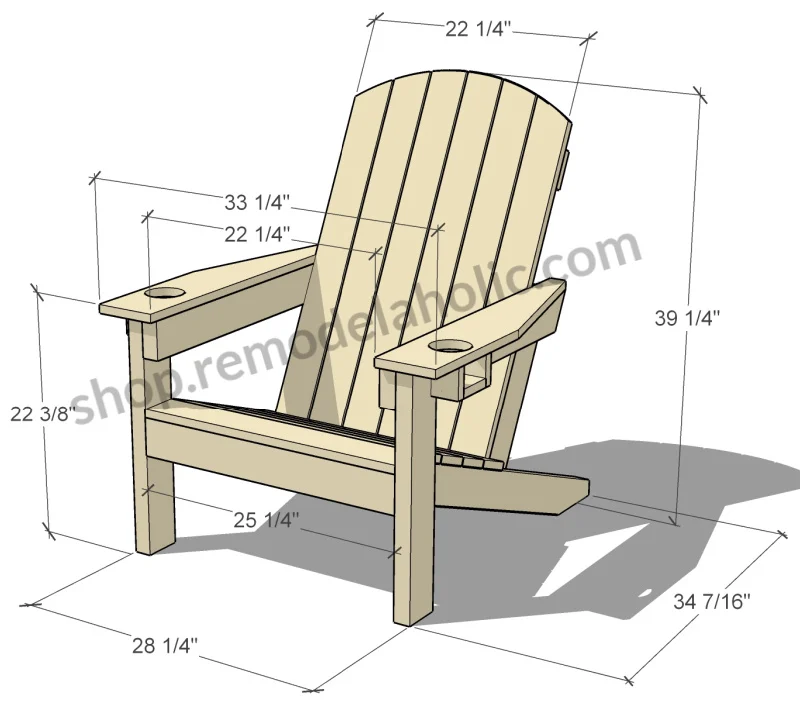
This free plan is great for two reasons. Not only does the design include built-in cup holders perfect to hold an ice-cold beer or fizzy glass of soda this chair plan creates a chair big enough for two people to sit side-by-side. Imagine sitting and watching the sunset on a hot summer’s evening sat next to your special someone. Plus knowing you built your chair from scratch will make the moment even sweeter.
6. Adirondack Chair Kit
If you’re not confident using power tools and saws you can purchase a DIT kit that needs assembling. You will still need a screwdriver, glue and clamps to assemble your chair but a lot of the dangerous work will be done for you. These kits can cost around $110 and are great to help build your confidence in woodworking and DIY projects.
7. Gliding Adirondack Chair Plans
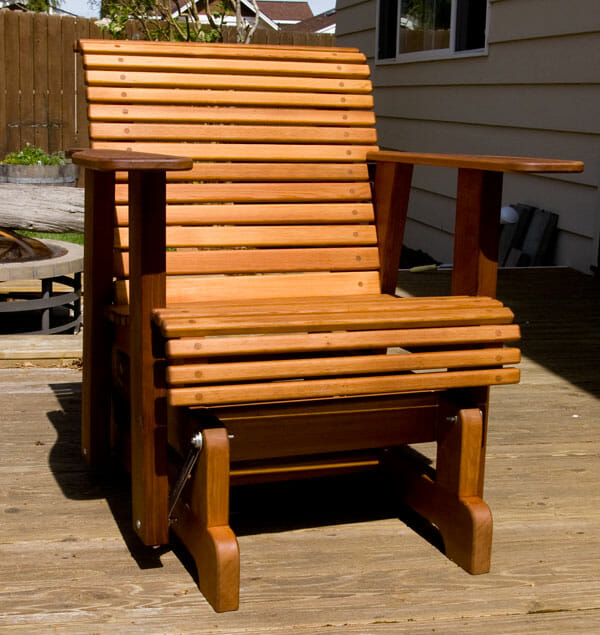
The gliding Adirondack chair has a built-in footrest that slides out when needed, gliding neatly back under the chair when not in use. Follow the instructions here to find out the extra steps needed to upgrade your Adirondack chair and give it the wow factor.
8. Double Adirondack Chair Plans
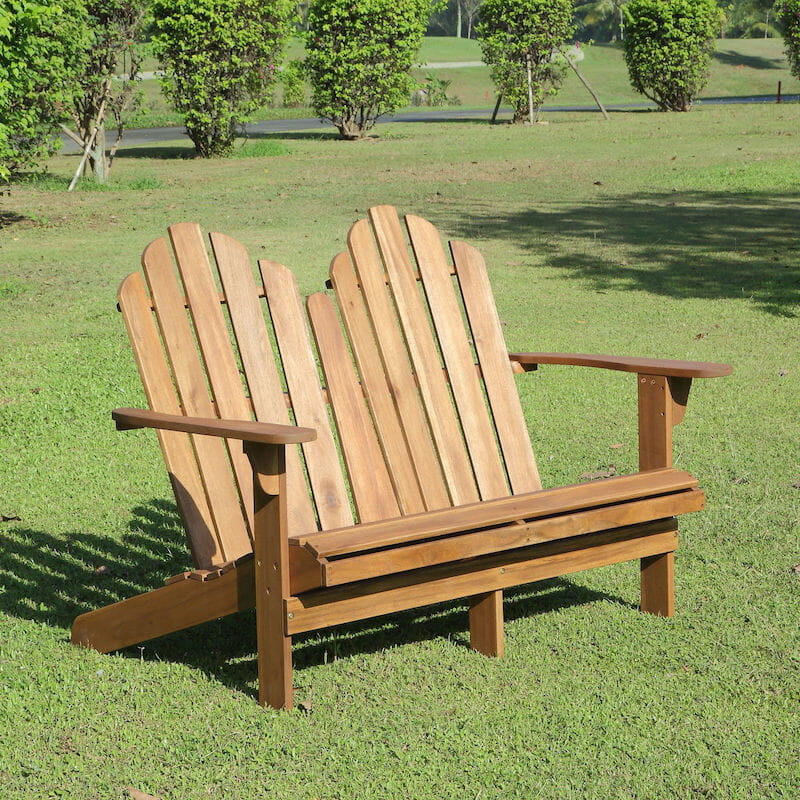
Follow this free plan to create the perfect Adirondack loveseat to complete your garden. The simplicity and comfort of the classic Adirondack chair have been kept in this extended design. Complete your new loveseat by adding your favorite color or wood stain. Give your Adirondack loveseat pride of place in your garden for everyone to enjoy.
9. Toddler Adirondack Chair Plans
These tiny versions of Adirondack chairs are perfect for any toddlers in your life. The rolled front to the seat means there will be no hard edges to annoy little legs, and the slightly fanned design on the backrest gives toddlers all the wiggle room they need when trying to sit still, which we all know is a giant task for them. Find the free plans here.
10. Giant Adirondack Chair Plans

If you want to set yourself a fun challenge, why not build yourself a giant Adirondack chair to display in a hidden, flower-filled corner of your garden? Once complete, you will feel like a Hobbit from the Shire sitting on this huge chair. Friends and family will take turns trying out your new giant chair. Check the free plans here.
11. Ski Adirondack Chair Plans
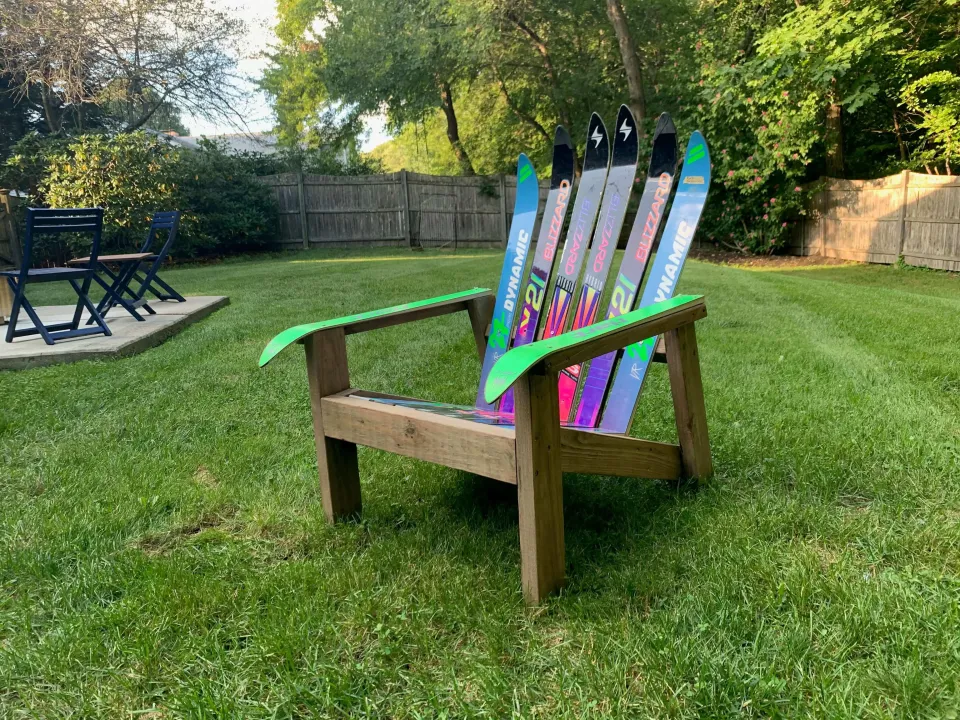
If you’re into skiing create a unique, fun way to celebrate your favorite sport by using old skis to create different aspects of your Adirondack chair. Use a saw to cut your skis into the correct lengths and then use them to create the backrest, seat, and armrests. You’re guaranteed to have the only chair in that design! Find the free plan here.
Safety First: Precautions and Tips
When working with any power tool it is essential to keep yourself safe. Follow the tips below to ensure you have no mishaps or accidents.
- Use personal protective equipment (PPE) – Ear plugs, safety glasses, and a good-fitting pair of work gloves are necessary to protect your eyes, ears, and hands from loud noises, dust, debris, and shavings while working.
- Wear the right clothes – Avoid wearing loose-fitting clothes and remove anything that dangles, such as necklaces, bracelets, and earrings. Also, make sure to tie your long hair back.
- Read the instructions – There is no excuse for not reading your tools manual on safely using and maintaining your tools. Accidents can occur quickly when tools are misused. Checking your tools before every use is also great advice to make sure they are in good working order with no defects.
- Keep your work area clean – Ensure that your working area is clean and tidy to avoid accidents or trips.
- Turn the tools off after use – This might sound like common sense, but you must turn off and unplug your power tools after every use. Accidents can happen when someone doesn’t realize a power tool is on stand-by or still plugged in.
- Work in a well-lit place – Make sure you work using natural light or use a bright light when working. Accidents can happen quickly in dimly lit workspaces.
- Maintain a firm grip and balance – Make sure you have good balance and a firm grip on your tools before starting work. Don’t use tools that are too heavy for you or try and use tools at an overstretched position or odd angle.
How to Build an Adirondack Chair Step-by-Step
For this step-by-step tutorial, we will use wood to create our Adirondack chair.
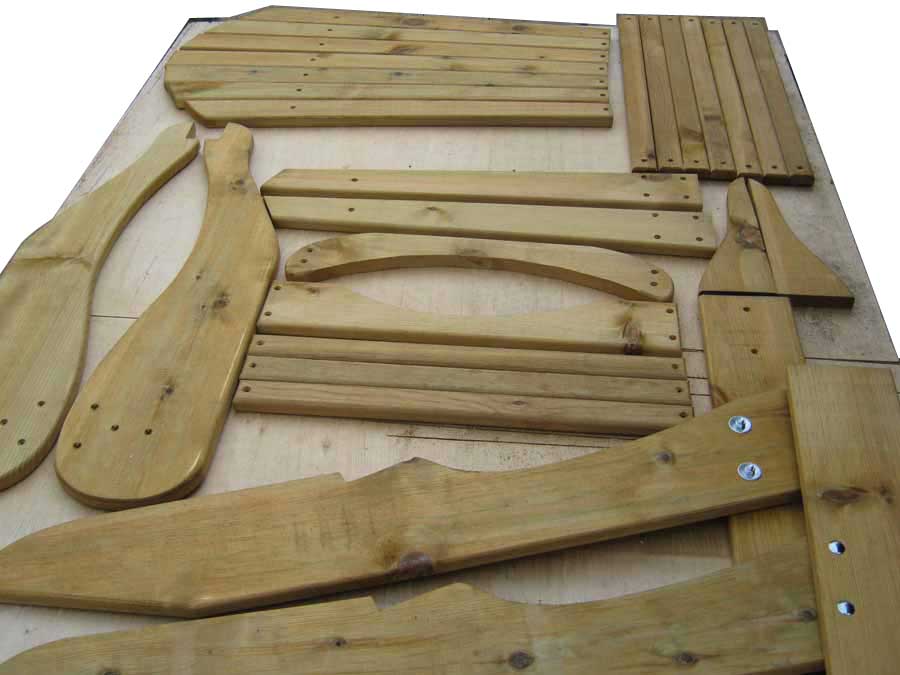
Step 1: Preparing the Wood and Cutting the Pieces
- Trace your pattern onto your wood, and label each piece lightly in pencil so you don’t get confused later on.
- Use a jigsaw to cut out your pattern pieces.
- If you cut out the left arm and leg pieces first, you can use these as a guide to cut the right pieces, remember to flip them over to create the mirror of each piece.
- Cutting the tapered back pieces can be trickier. Use a larger piece of wood if you can and secure it down with nails so it won’t move. Use a circular saw to cut out your pieces from the wide end to the narrow end.
- Before moving on to the assembly of your chair sand down all the pieces to make them smooth.
Make sure you work on a flat surface when assembling your chair
Step 2: Assembling the Backrest
- Lay out the back pieces face down, ensuring even spacing between each piece by inserting a ¼ inch spacer.
- Attach 3 horizontal supports across the backrest slats, securing them with countersunk screws and wood glue
- Create a curved edge at the top of the backrest by marking out your curve and use a jigsaw to cut out, sand the top edge of your backrest.
Step 3: Creating the Chair Arms and Legs
- Take the front legs and using your jigsaw cut out a notch that fits the front support in, about halfway down your wood.
- Glue and screw in the front support.
- Stand the front legs up, with the support going horizontally.
- Attach the back legs next to the front support. Use glue and countersunk screws to secure them in place.
- Next position the arm supports on the outer edges of the front legs, again glue and screw in place.
- Place the arms on top of the front legs and arm supports. Make sure the arm overhangs the front leg by around 3 inches. Check that the arms are parallel before securing them with glue and countersunk screws.
- Add the back leg support to each leg, ready to add the backrest.
Step 4: Joining All the Components Together
- Place the backrest against the back support and clamp in place. Secure using glue and countersunk screws.
- Next position the seat slats one at a time making sure they are level at both edges and use ¼ inch spacers to create even spaces between them before screwing them into place with countersunk screws.
Step 5: Finishing Touches
- Apply a weather-resistant finish or stain to your chair to protect against the elements.
- Allow to dry completely before placing your Adirondack chair in the perfect outdoor spot.
Outdoor Protection: Covers and Maintenance
What Chair Covers and Accessories Should I Choose?
Side tables
A circular or oval side table is an excellent addition to your Adirondack chair. A side table gives youGflexibility in where to place your drink, book, and other items you need whilst relaxing in the sun. Choose one that matches the aesthetic of your chair or have a look at making your own side table here.
Cup and Glass Holders
If you haven’t made your chair with a built-in cup holder you can add them separately and usually in the same wood or material as your chair making them hardly noticeable. Check out the types of glass and cup holders you can buy here. They swing around and hide under the chair arm when not in use. Genius!
Cushions
Although Adirondack chairs are supposed to provide the best comfort, many people enjoy a little extra cushioning. You can either buy a long, sectioned cushion that covers the bottom and back of your chair or a small cushion that gives your neck and head extra support. A cushion that combines both is even better, like this one from Vonhaus.
Maintenance Tips to Prolong Your Chair’s Life
Depending on the type of wood or material you’ve chosen when creating your Adirondack chair will determine how best to maintain your chair to keep it looking new and increase its longevity.
Recycled Plastic Adirondack Chairs
- Are generally UV protected to help minimize color fading over time.
- Are easy to clean with mild soap and water; a power washer can be used for tough stains and dirt, but be careful not to exceed 1,500 psi.
- Store or cover when not in use to keep maintenance even lower.
Wood Adirondack Chairs
- Require more maintenance than recycled plastic chairs.
- Protect from prolonged water and sunlight exposure by covering or storing in a dry place when not in use.
- Periodically refinish painted or stained chairs to maintain their appearance and durability.
- Regular cleaning with a pressure washer or mild soap and water.
- Use weather-resistant finishes with mold inhibitors or UV protectants to shield from damage.
More Diy Tutorials
- 25 DIY PLant Stant Plans & Tutorials
- 13 Free Bunk Bed Plans
- 25 Free Macrame Wall Hanging Patterns
- How to Make a Fence With Pallets?
- How To Make Bed Frames Out Of Pallets?
- How To Build A Bookshelf Wall?
- How To Make A Tire Swing?
- 19 Diy Chicken Coop Plans
DIY Adirondack Chairs: FAQs
Q: Can I build an Adirondack chair as a beginner?
A: Adirondack chairs are a great choice of project when starting out in woodworking. There are lots of free plans and tutorials online with clear step-by-step instructions and diagrams to help you create your first project. With the right tools and patience, you can make your own chair.
Q: What are the cost implications of building my own chair?
A: Building your own Adirondack chair can be cost-effective compared to purchasing a pre-made one. However, the total cost will depend on a few things such as the type of wood, finishes, and any additional features you choose to include. Although recycled plastic can be a more expensive option, it requires less maintenance in the long run.
Q: How long does it typically take to complete a DIY Adirondack chair?
A: The time required for building an Adirondack chair can vary based on your experience and the chair design you choose to make. Generally, it may take a beginner around 4 to 8 hours to complete a chair, while experienced woodworkers might finish one in 2 to 4 hours.
Q: What kind of wood is best for outdoor durability?
A: To help make your new chair durable in the natural elements, consider using rot-resistant woods like cedar, redwood, or teak. These choices naturally resist decay, insects, and moisture. Pressure-treated pine is also an option, but it requires more overall maintenance.
References: