Women love stacking up on jewelry, especially earrings. We need matching pairs for every outfit, don’t we? While it’s fun to have an extensive earring collection, what’s frustrating is not finding the right pair when you want to wear it.
This is why an earring holder is a must, and what can be better than making one on your own? Making an earring holder is easy and cheap, as you need only a few items. These items are readily available in any craft store; some might already be lying around your home.
So without further ado, let’s check out ten incredible DIY earring holder ideas that’ll make sorting your earring collection easier.
Related: How To Make Hoop Earrings With Beads – Video Tutorial
10 Easy DIY Earring Holder Ideas: Beautiful and Beginner-Friendly
-
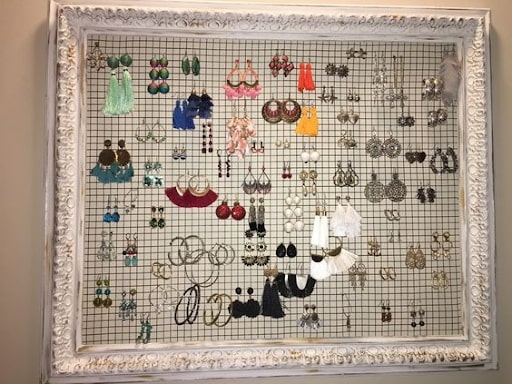
Framed Earring Holder

This is one of my favorite DIY earring holders because of its aesthetic appearance and ease of making it. To make this framed holder, you’ll need-
- Any new or old wooden or plastic photo frame
- Nails and hammer
- Chicken wire or metal mesh
Method
Attach the metal mesh or the chicken wires to the photo frame with nails. Hammer the nails well so that the mesh metal is not flimsy.
That’s it; no additional steps. Isn’t it pretty simple? Now you can start hanging your earring in the mesh holes.
If you want to get more creative, you can attach a mesh or lace fabric with the frame instead of the metal mesh. It looks more aesthetic but may not be as durable as metal.
Related: 8 Amazing Clay Bead Bracelet Ideas You Must Try!
-
Old Vinyl Record Earring Holder
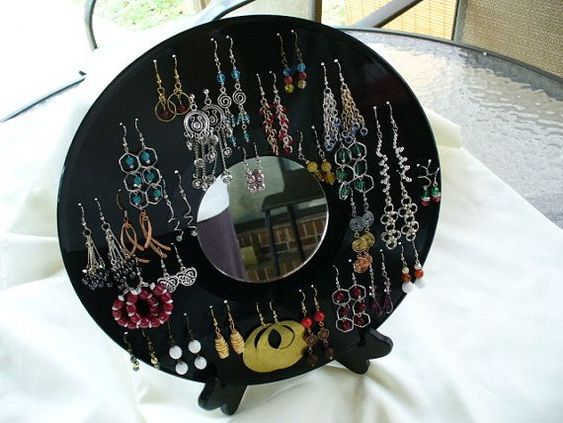
This is another interesting way to showcase your beautiful earring collection. Also, it’s pretty easy to make and requires very minimal supplies. Here is what you’ll need-
- Old vinyl record
- Metal skewers or anything similar
- Heat source like a lighter or candle.
- Heavy cardboard
- Plate stand
Method
Step one: Place the vinyl record on top of the cardboard to prevent the skewer from damaging your workspace.
Step two- Heat the metal skewer with a lighter or candle. Take the hot skewer and poke a hole in the vinyl. Make two holes for each pair of earrings. The tip of the skewer or the needle should not be too big. Otherwise, your earrings won’t stay in place.
Step three- Let the holes cool down completely and place your vinyl in the plate stand. You can now start arranging your earrings in the holes.
-
Cheese Grater Earring Holder
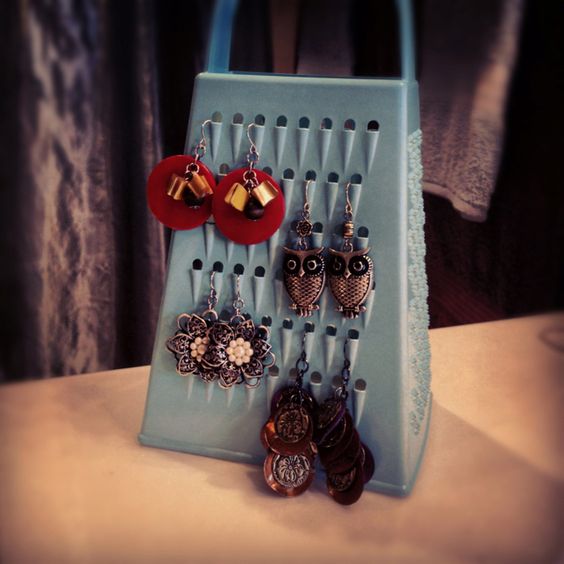
Have you ever thought you could use your old cheese grater as an earring holder? I guess not. But it’s actually the best DIY earring holder that requires minimal effort. Also, it looks really beautiful if you paint it in interesting colors.
Here is the supply list-
- A standing cheese grater or a flat one
- Spray paint
- Fake pearls (optional)
- Hot glue gun (optional)
Method
Step one- Spray paint the cheese grater with the color of your choice. You can go as creative with the paint as you want. I made mine with two colors.
Step two- Once the paint dries, stick the pearls around the grater frame using a hot glue gun. This is completely optional. I wanted mine to look a bit more beautiful, so I used the pearls. You can use other beads if you want.
Step three- Once the glue dries, start arranging your earrings. That’s it; your new earring stand is ready to use.
-
Ribbon Earring Holder
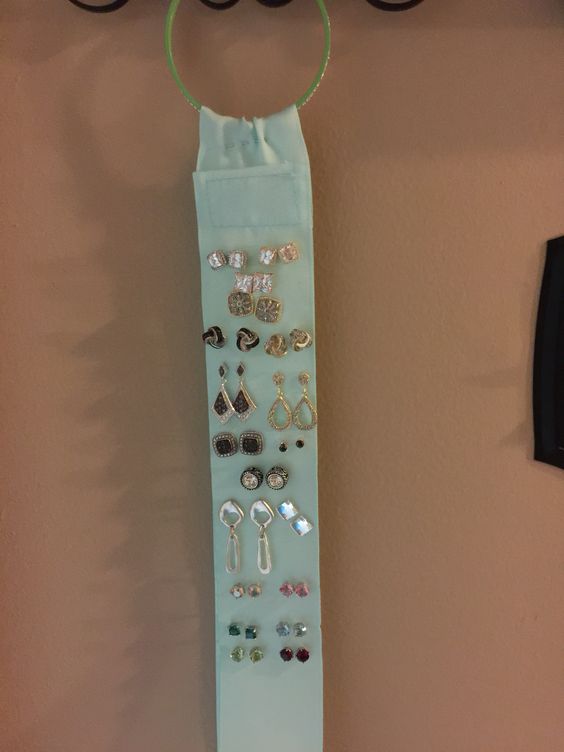
This ribbon earring holder is also pretty easy to make and keeps your earrings well-organized. But this earring holder is especially useful for storing studded earrings only.
To make the ribbon earring holder, you’ll need just one item- a thick piece of ribbon.
Method
There is nothing to explain here, to be honest. Once you get the ribbon, start placing your earrings in it. But you should choose a thick fabric that won’t rip off when you start pricking your earrings in it. You can keep this ribbon earring holder folded or hanging as per your liking.
-
Metal Mesh Pen Cup Earring Holder
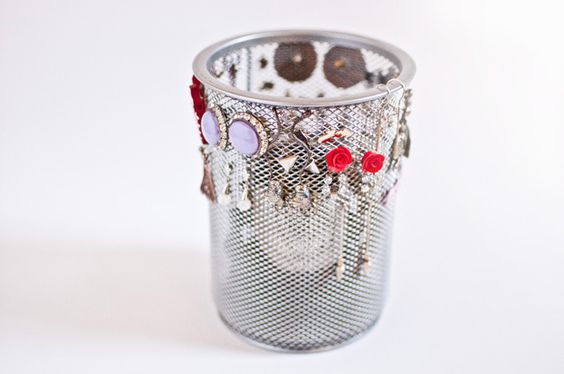
Do you have any old metal mesh pen cups laying around your house? If yes, why not repurpose it to make a beautiful earring holder? I’m sure you never thought of it.
But these mesh cups make great earring holders. You don’t need any additional accessories to make this earring holder. But if you wish, you can spray paint it or add some pearls for beautification.
Once the paint dries, start arranging your earrings.
-
Fridge Rack Earring Holder
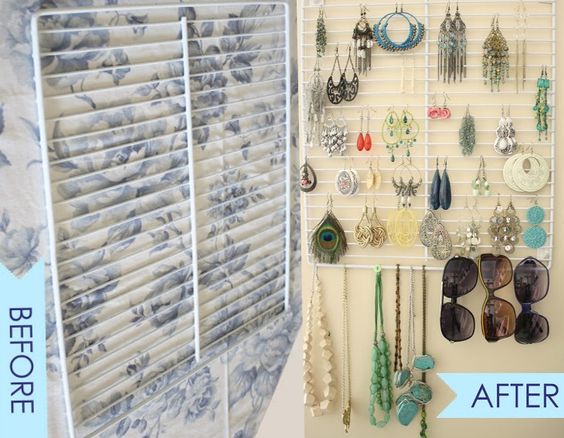
If you have an old fridge rack in your store room, it’s time to put it to use. These racks are perfect for organizing your earring collections without much fuss.
You need minimal supplies such as:
- An old fridge rack
- Spray paint (optional)
- Self-adhesive hooks to hang the rack
Method
Step one- Clean the rack first before spray painting it. You can totally skip the painting part if you want to keep it as it is.
Step two- Once the paint dries, stick on the adhesive hooks wherever you please, and hang the rack on it. You can now start arranging the earrings. You can add your personal touch by adding polaroids, fake flowers, and similar decorative stuff on the rack. And your new earring holder is ready.
-
Embroidery Hoop Earring Stand
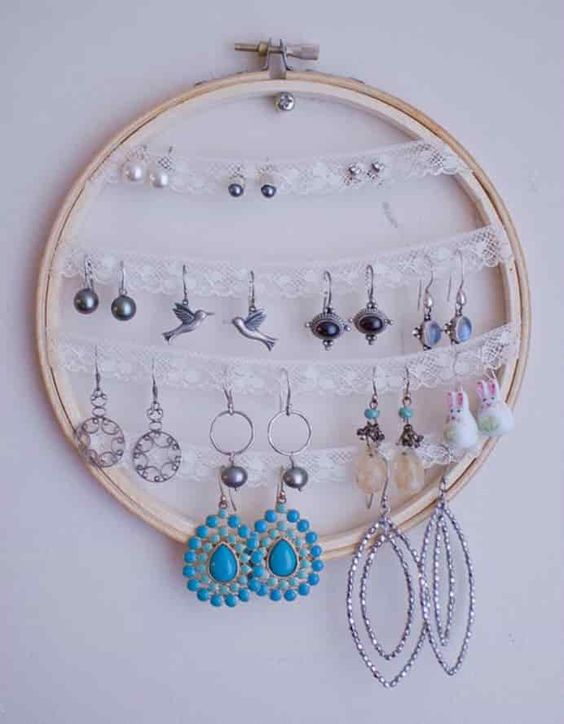
You don’t really need anything expensive to make beautiful earring holders. Things that are already available in your house would work best. If you do embroidery, you must have some hoops stored.
Pick one or two of these to make a beautiful earring stand. Other things you’ll need are-
- Spray paint (optional)
- Lace or mesh fabric
- A pair of scissors
Method
Step one- You can spray paint the hoop if you wish and let it dry.
Step two- Attach the mesh or lace fabric to the hoop as you generally do for embroidery. Trim excess fabric with scissors, and it’s ready. You can either hang it or keep it standing on your vanity.
-
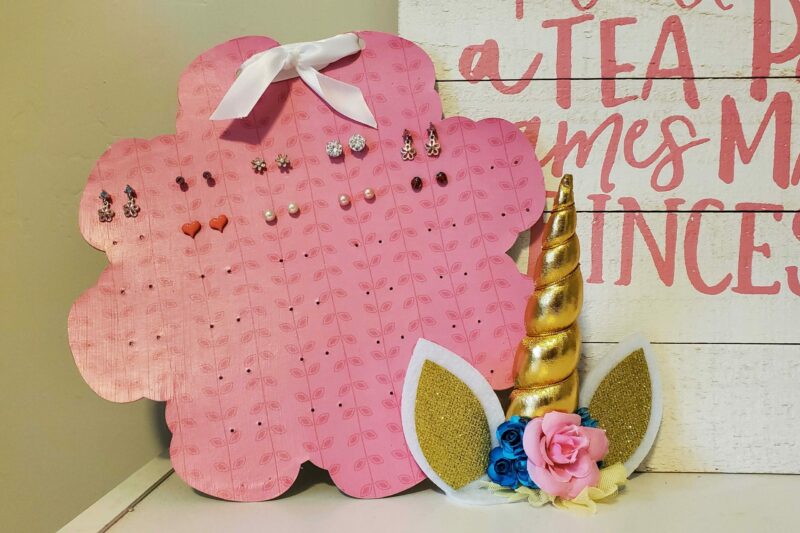
Chipboard Cut Out Earring Stand
Cupboard cutouts are super fun to make. If arts and crafts are your things, you’ll enjoy working on them. Things you’ll need are-
- Pick any chipboard cut out. You can make one yourself too.
- Glue
- A piece of wood
- Paint
- Paintbrush
- Sandpaper
- Drill
- Scrapbook paper
Method
Step one: Paint the cardboard cutout. Make sure you use a similar color as your scrapbook paper.
Step two: Now trace the chipboard cut out on the back of the scrapbook paper. Start cutting the paper along the line.
Step three: Apply glue all over the cutout and stick the scrapbook paper into it. Using the sandpaper, sand around the edges of the cutout. It’ll remove any paper hanging on the sides and make it smooth.
Step four: Start drilling holes in the cutout to hang your earrings. But be careful and light-handed while drilling; otherwise, the scrapbook paper will tear up.
Step five: You need to create a groove in the wood piece. The groove should be the same thickness as the cutout; otherwise, the cutout won’t fit perfectly. Now paint the wooden piece and slide the cut out in it once it dries. And your new earring holder is ready.
-
Cork Earring Holder
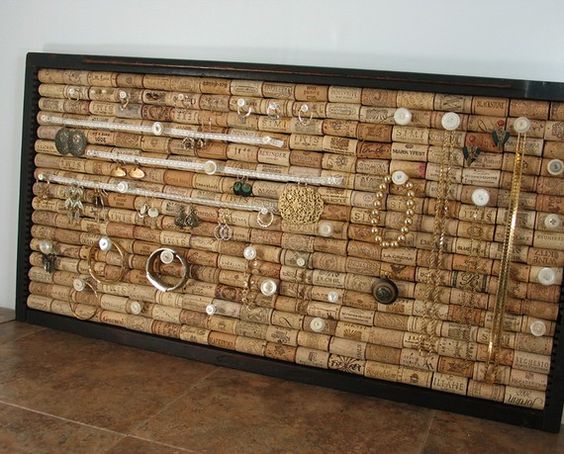
If you have plenty of wine corks in your kitchen, you can use them to make an easy DIY earring organizer. Things you’ll need are-
- Wine corks
- Glue
- A frame
Method
Step one: Pick any frame of your choice and start attaching the corks one by one with glue.
Step two: When the glue dries, you can start arranging your earrings in the cork gaps. But this cork earring organizer is best for storing studs if you want to hang dangly earrings; if you do, drill some holes in the corks.
-
Stud Earring Organizer Box
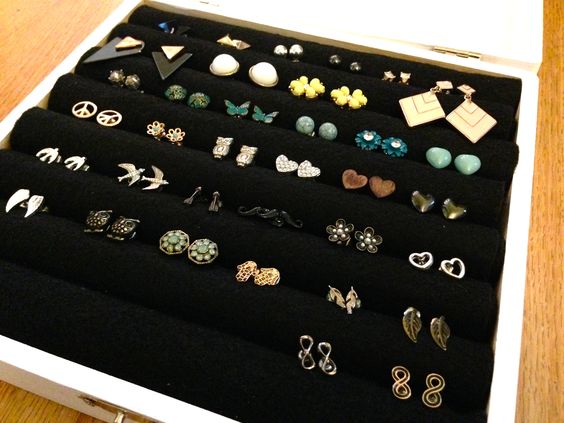
Last but not least, I have this DIY stud earring box. You’ll need the following supplies to make it-
Method
Step one: Wrap the felt sheets around the dowels perfectly.
Step two: Start lining the box with the wrapped felt sheets in the velvet tray. That’s it; no more additional steps. Please note that this earring organizer is only for storing studs.
How To Make An Earring Holder FAQs
1. How Do You Make A Stud Earring Holder?
The ribbon earring holder is best for storing stud earrings. You only need a thick piece of ribbon and can pierce your earrings in it in an organized manner.
2. How Do You Make An Easy Jewelry Holder?
You can use a cheese grater, a cardboard tube, a cloth hanger, or even a refrigerator rack to make an easy jewelry holder. These holders need no additional work. If you wish, you can spray paint them and start arranging your jewelry once the color dries.
Final Thoughts!
Now you have many ideas to make your own DIY earring holder and display your exquisite earring collection. Let me know which one is your favorite in the comments. These earring arrangers will keep your pairs perfectly sorted, and you won’t have to de-tangle them whenever you pick one.