Adding a lazy Susan to your home fittings is an easy way to organize the available space and make your life easier. You can place one on the kitchen shelf to organize the spice jars and condiments or keep one on your desk for quick access to the office supplies.
But finding a well-made lazy Susan is pretty tricky. You may need help finding the size you’re looking for or the material its rotating tray should be made of.
Even if you’re lucky enough to get the perfect lazy Susan, its price tag might change your mind.
So, why not leave these hassles behind and make a lazy Susan at home?
You can make awesome lazy Susans from different materials, for example, cardboard, wood, fidget spinner, marbles, and even cheap supplies from Dollar Tree.
Please continue reading to learn how to make a lazy Susan from all the above materials, and thank me later.
Related: Why Is It Called A Lazy Susan? – Fun Facts
Table of Contents
How To Make A Lazy Susan With Marbles?
Here are the supplies and a few steps to make a lazy Susan with marbles.
Supplies:
- 2 cake pans of any size
- A bag of marbles or pie weights
Procedure:
- Take the first cake pan.
- Empty the bag of marbles or pie weights into this pan.
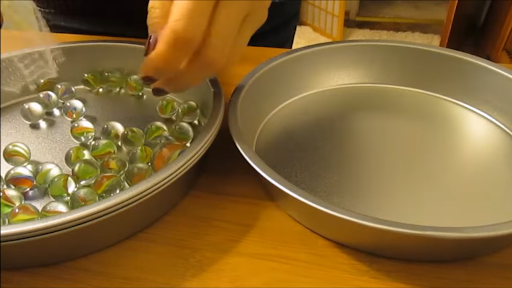
- Place the second cake pan over these pie weights or marbles.
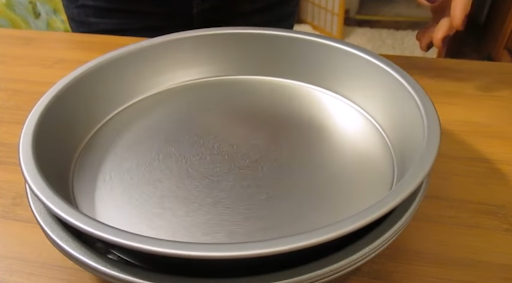
- Spin away!
If required, add more pie weights or marbles between the two pans for better stability of the top pan and smoother spin.
Tip: Source the cake pans and marbles from Dollar Tree to make this lazy Susan in under $3.
Related: Best Wood Engraving Machine in 2023: Our Top 6 Choices
How To Make A Lazy Susan With A Fidget Spinner?
If you’re a fan of fidget spinners and have one lying idle at home, you can use this fidget spinner to make a lazy Susan. And here’s how to do it!
Supplies:
- 1 fidget spinner
- 3 marbles
- Pencil
- Multi-purpose glue
- Round tray (any diameter)
- Wooden board
Procedure:
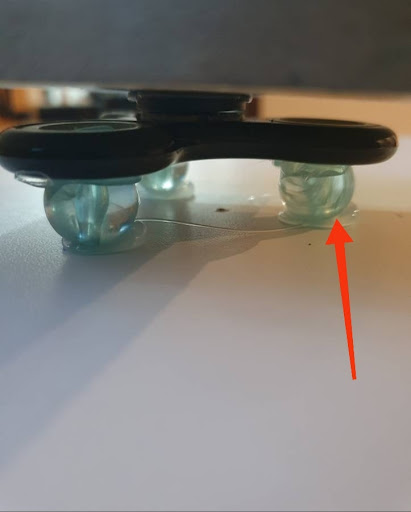
- Glue The Marbles On The Fidget Spinner

Glue the three marbles on the three ends of the fidget spinner. Multi-purpose glue is best for this.
- Mark The Center Of The Wooden Board & Round Tray
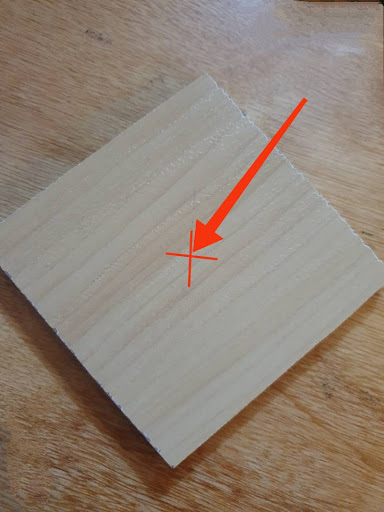
While marbles are set on the fidget spinner, mark the center of the wooden board and round tray. This step is necessary to place the fidget spinner at the center of both the board and the round tray.
- Glue The Fidget Spinner At The Center Of The Wooden Board
Glue the fidget spinner at the center of the board. Make sure to take the help of the marking done earlier to align the center of both.
Also, apply some multi-purpose glue on the three marbles in this step.
- Place The Round Tray On The Fidget Spinner
As the last step, place the round tray on the fidget spinner, aligning their center. Finally, press the wooden board against the round tray to glue the fidget spinner to the latter.
Your fidget spinner lazy Susan is ready to spin!
Related: How to Engrave Wood? Dremel, Router, Chisel & Cricut
How To Make A Lazy Susan From Wood?
For a wooden lazy Susan, gather the below supplies and follow the steps.
Supplies:
- Jigsaw
- Compass
- Any rough cleaning cloth
- Screwdriver & screws
- Pencil
- Sandpaper or an electric sander
- Lazy Susan turntable hardware
- Sheet of plywood or MDF
- Paint
Procedure:
- Draw A Circle On The Plywood/MDF
Take the sheet of plywood or MDF. It can be of any thickness per your liking but must be thick enough to hold the weight of the items you plan to place on it.
Take a pencil and draw a circle using the compass. This is our “lazy Susan turntable.”
- Cut Out The Circle
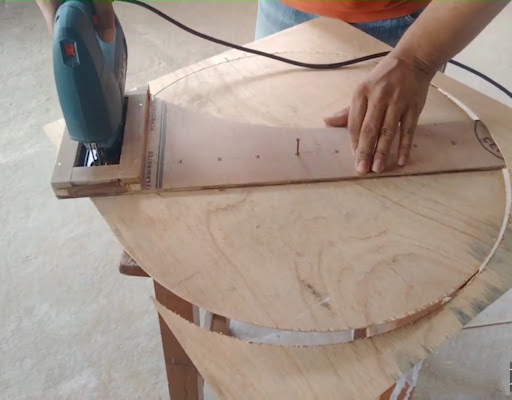
Cut the above-drawn circle perfectly using the jigsaw. Ensure not to damage the circle while cutting.
- Smoothen The Circle
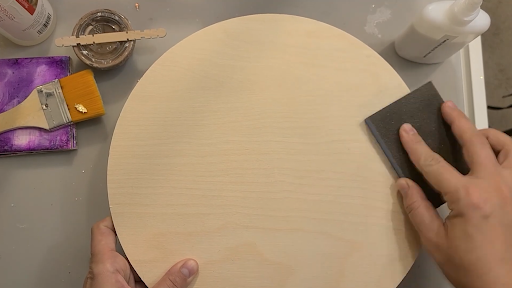
Using an electric sander or sandpaper (suggested grits – 120-220), smoothen the circle, especially its top and base.
This step will ensure no issues while priming/painting and installing the hardware unit.
- Apply The Primer & Paint
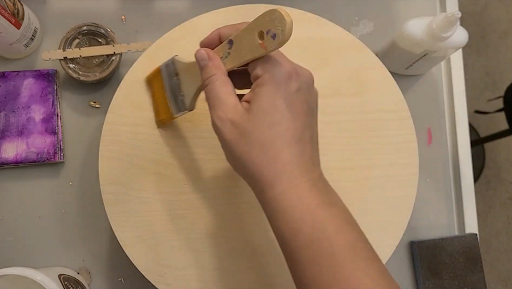
After smoothening the circle, the next step is applying the primer and paint. However, clean the surface of the circle with any cleaning cloth to remove any leftover sawdust.
Once cleaned, apply 2 layers of primer and wait for them to dry. Take your favorite paint (milk paint, chalk paint, or acrylic latex paint) and apply its 2 layers as well.
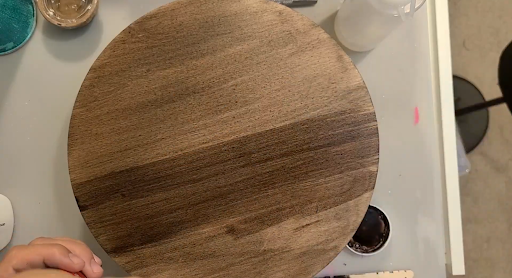
Wait for a few hours for the paint to dry. If required, you can apply more layers of paint.
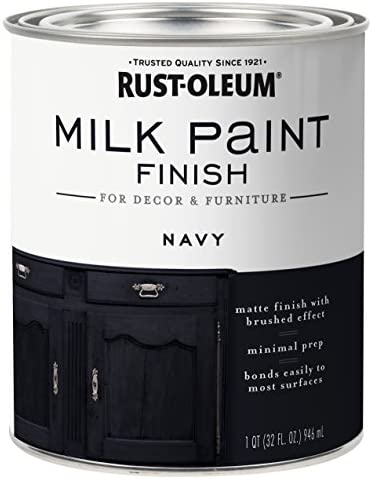
Note: I recommend Rust-Oleum 331051 Milk Paint as it’s easy to apply, odor-free, quick-drying, and has a matte finish.
- Install The Lazy Susan Turntable Hardware
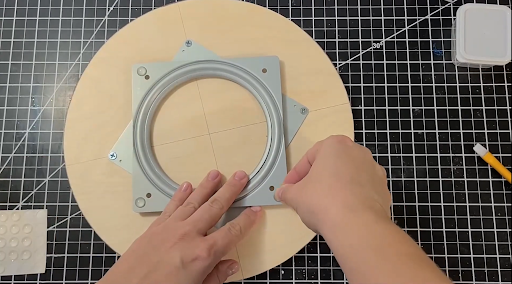
Now that we’ve prepared the lazy Susan turntable let’s install the remaining hardware.
For this, mark the required number of holes at the bottom of the circular turntable and drill them using the drill machine. Place the ball-bearing unit on these holes and tighten everything with screws.
Flip the turntable and check it by spinning it. If the turntable is spinning smoothly, your lazy Susan is ready to be used.
Related: How To Build A Bookshelf Wall? A Detailed DIY Guide
3 Maintenance Tips For Your Lazy Susan
Their maintenance is crucial to extend their life and keep them free of grime and dust when it comes to lazy Susans.
Here are some valuable tips to follow.
- Regularly clean the lazy Susan with a soft cloth and mild cleaning agent. This is mainly for glass, wooden, and stone models.
- Don’t use water with a wooden lazy Susan.
- Keep the turntable hardware free from dust and debris to avoid blockage during spinning.
Related: How To Organize A Lazy Susan Cabinet – Full Guide [2023]
How To Make A Lazy Susan (FAQs)
- How Do You Make An Easy Lazy Susan?
Ans: To make an easy lazy Susan, you need two cake pans (of any suitable size) and marbles. Place the latter on one of the cake pans and put the second pan on these marbles. You can now keep anything on this second pan and spin it freely.
By the way, this is also how you make a cheap lazy Susan.
- What Hardware Do I Need To Make A Lazy Susan?
Ans: Typically, a lazy Susan requires a base (wood, glass, or stainless steel) and a lazy Susan turntable hardware. This all-inclusive hardware comprises the rotating stainless steel ball bearings to be screwed underneath your base.
- What Material Is Best For A Lazy Susan?
Ans: Out of the common lazy Susan materials like stainless steel, hard plastic, wood, and stone, hard plastic is my top recommendation for a lazy Susan as it’s durable and easy to clean.
Talking about others, stainless steel and wood aren’t easy to clean and prone to stains and fingerprints. On the other hand, stone, which makes your lazy Susan a decorative piece, is the most fragile.
- How To Make A Lazy Susan With Cardboard?
Ans: To make a lazy Susan with cardboard, we’ll make the base with a thick cardboard sheet and the top will comprise two plywood sheets since both these materials go well with each other. Instead of the turntable hardware, we’ll use steel balls and a nut & bolt.
Takeaway!
Here you go. That’s everything you should know about how to make a lazy Susan. Making a lazy Susan is more or less the same irrespective of the material you use.
First, prepare the rotating tray, drill the holes at the bottom, and attach the lazy Susan hardware. And that’s it. Your DIY lazy Susan is ready.
Refer to the above sections for the detailed step-by-step process, and let me know how your lazy Susan turned up in the comments below.