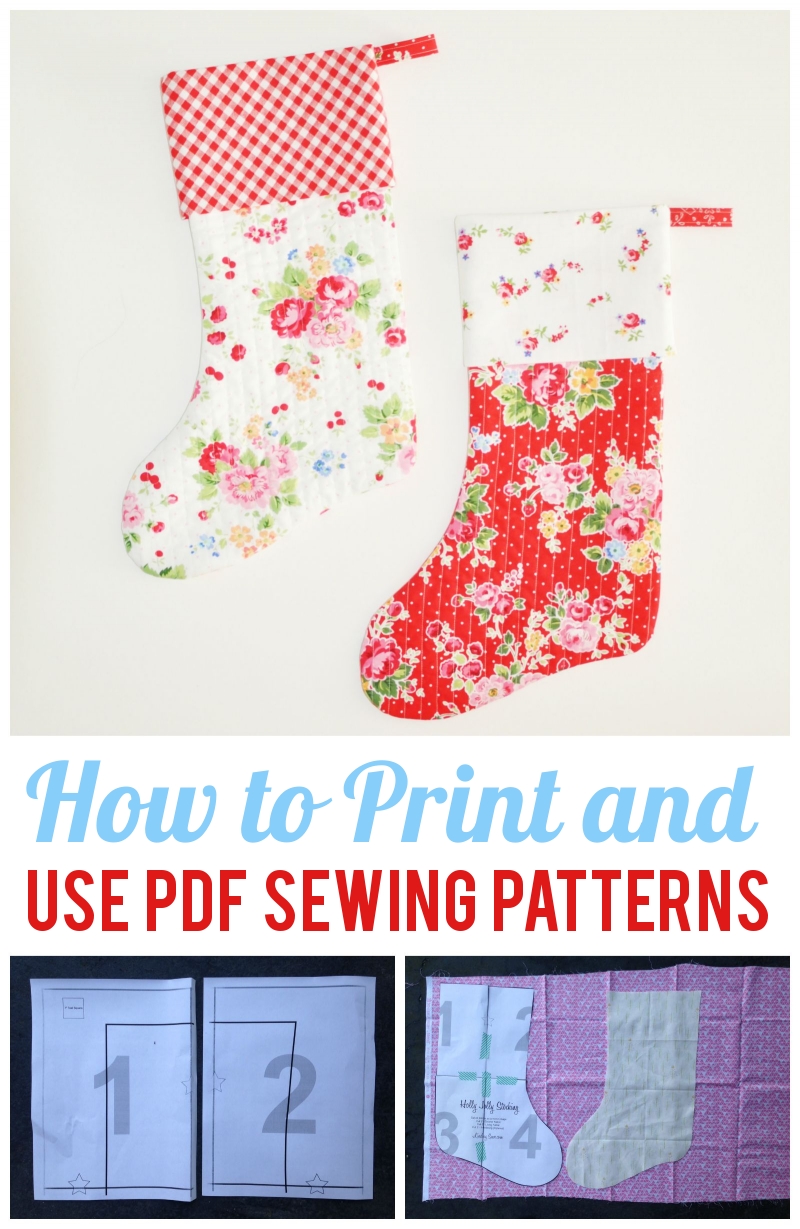
Sometimes, it’s the little sewing tips and tricks that really help to get us motivated to finish that next project! Today, I’m sharing with you a little tutorial on how I like to print and use PDF sewing patterns.
Unlike a paper sewing patterns, PDF patterns must be printed on your home computer and printer in order to use them. If you are not used to this, it may take a little trial and error to get started. I hope to save you a few steps by showing you the way I like to do it!
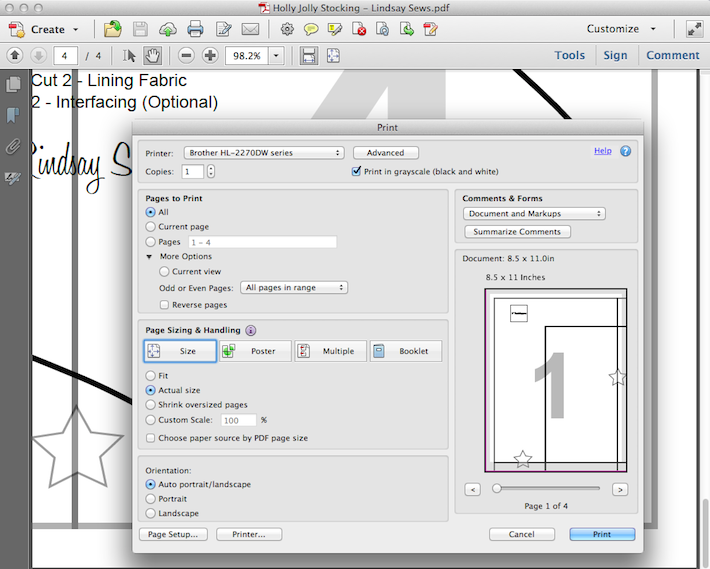
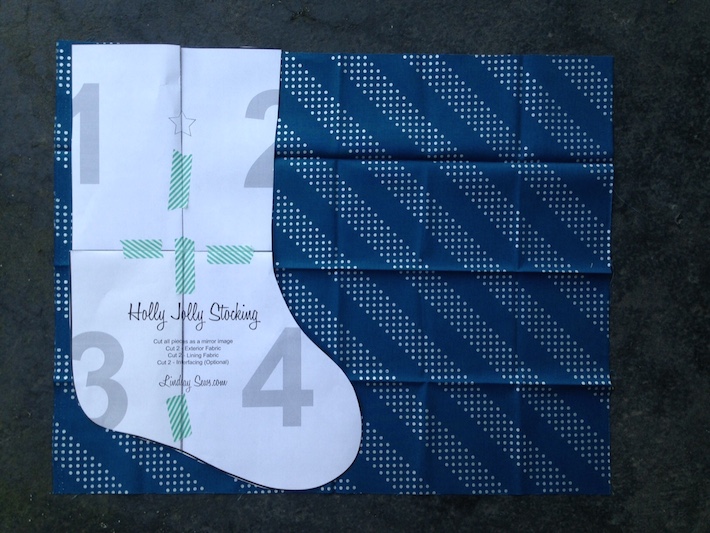
Step 1: Download the PDF pattern. I’m using my Holly Jolly Stocking pattern as an example. Open the pattern file on your computer. Since it’s a PDF file, your computer will select a program to use to open it (such as Adobe Acrobat, pictured above).
Select “Print” then look around the pop-up menu until you find an option that says print “actual size” or something similar. You want to make sure you don’t shrink the pattern to fit on the paper. The screenshot above shows how I ticked the button that says “Actual Size.” Now I can select print!
Important: Many PDF patterns have a 1″ test square on the pattern (shown below on the upper left corner). Measure this box on the printout with a ruler to confirm it has printed the correct size.
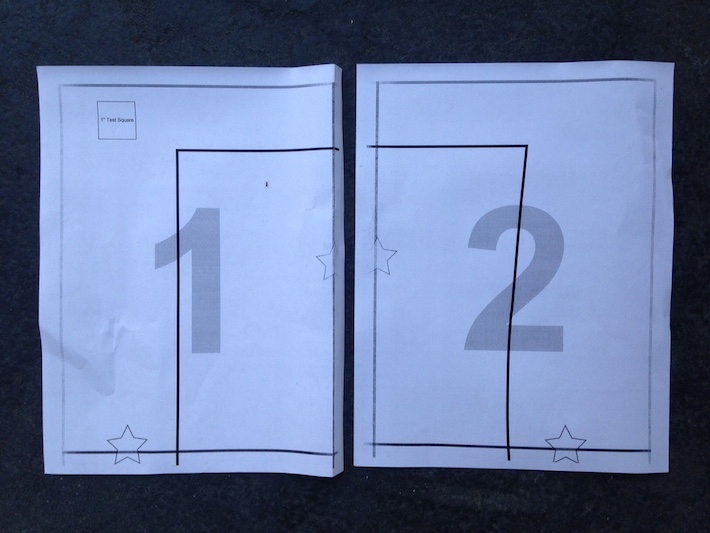
Step 2: Take your printed pages and look for the natural place where they overlap. Some people like to cut off the overlap, but I prefer to simply fold it back. In this stocking pattern, you can see how I fold along a thick line on the right side of sheet 1. Then I can place it on top of the corresponding line on sheet 2, and line up the stars (a mark intended to help place the pattern).
Not all PDF sewing patterns will have a distinguishing mark like this, but you can usually line them up from the point the pattern starts on one sheet and ends on another.
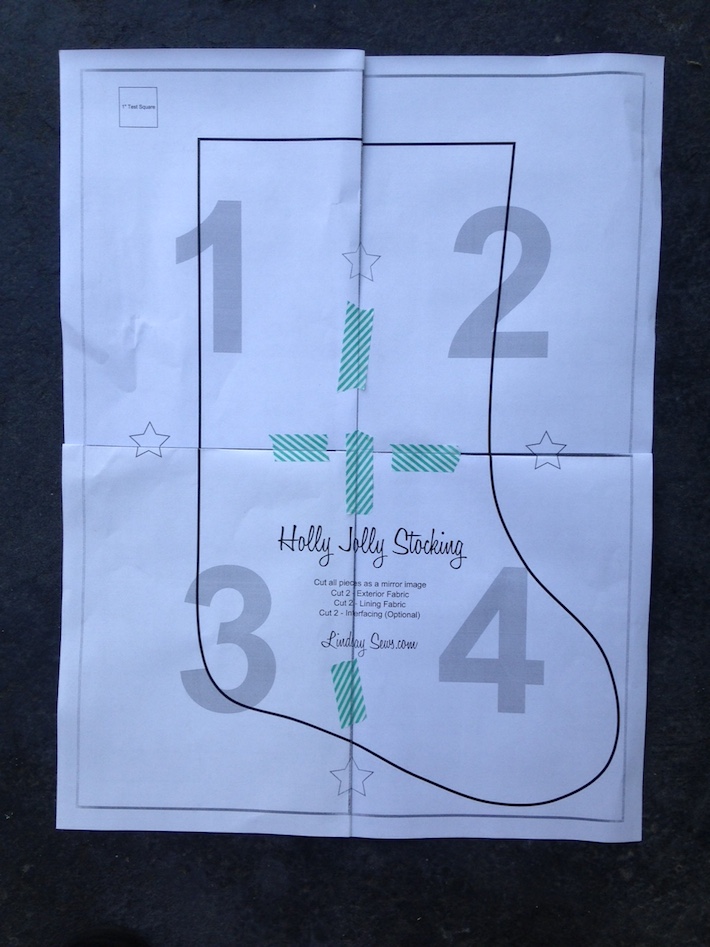
Step 3: Continue to fold under the edges of the pattern, and tape the papers together in the order they belong. On the bottom row, you’ll fold under two edges of the paper. Don’t worry about the order border for now. I like to use washi tape, taping a few times inside the pattern, because it is quick, easy, and surprisingly durable!
Step 4: Cut out the sewing pattern along the border. Place the pattern on your fabric, and trace directly around it with a rotary cutter and mat, or scissors. If using scissors, you’ll want to pin the pattern in place on the fabric.
Wasn’t that simple? I hope you enjoyed this easy tutorial on how to print and use a PDF sewing pattern. Read my handy tutorial on how to transfer a paper sewing pattern with freezer paper here!
And if you’d like to check out my Holly Jolly Stocking pattern for yourself, you can get it here.


1 comment
Very well explained and very useful for people like me who spend our time on drawing patterns. It is not always easy to explain what for us can seem quite obvious.
Thank you.