Art & Craft, DIY ideas and Tutorials - Craftbuds
  • All Craft
  • Needlecraft
    • Crochet
    • Knitting
    • Quilting
    • Sewing
    • Embroidery
  • Jewelry Making
  • Paper Craft
  • Product Reviews
43K Followers
23K Followers
98 Subscribers
Subscribe
Art & Craft, DIY ideas and Tutorials – Craftbuds
  • All Craft
  • Needlecraft
    • Crochet
    • Knitting
    • Quilting
    • Sewing
    • Embroidery
  • Jewelry Making
  • Paper Craft
  • Product Reviews
  • Craft
  • Needlecraft
  • Sewing

How to Make a Headband? 2 in 1 Tutorial

  • Lindsay
  • March 8, 2022
How to Make a Headband?
Total
383
Shares
30
0
353

It’s been incredibly hot around here lately so between the heat and planting a garden I needed a way to keep my hair out of my face! To solve the problem I designed these two fun and functional adult-sized headbands. They’re a great way to use fabric scraps that you love and didn’t want to throw away! I did a regular headband style that’s reversible and a 3 strand headband, both with elastic at the base.

Three-strand headband materials list

  • 3 strips of fabric 1″ x 18″
  • 2 strips of fabric 1″ x 1 3/4″
  • One 3 1/2″ piece of 1/2″ elastic (elastic not pictured)

Reversible headband materials list

  • 2 strips of fabric 1″ x 18″
  • 2 strips of fabric 1″ x 1 3/4″
  • 2 rectangles of fabric 2″ x 18″


Step 1 Folding

Fold the rectangles into quarters and cut off the corners (second photo below) to form the headband shape.

Step 2 Prepping your fabric for either headband:

For either headband, you’ll make double-fold bias tape out of the long 1″ strips and a single-fold bias tape out of the short 1″ strips. To do this, iron the strip in half. Then open it back up, fold both sides toward the center crease, and iron again. You now have single-fold bias tape. For the two long long strips, fold in half with the raw edges inside and iron one more time.

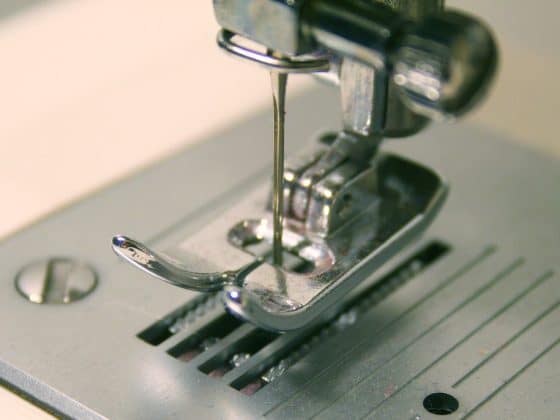
Step 3 Sewing the three-strand headband

First, sew shut all 3 long strips of bias tape.

Then sew the three strips together at the ends.

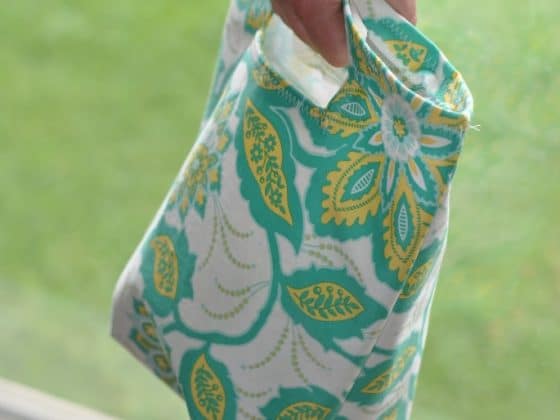
Step 4 Sewing the reversible headband

With wrong sides together, line up the front and back and sew the strips of bias tape onto the sides.

Step 5 Finishing both headbands

Stitch the elastic strap to each side. Wrap your single-fold bias tape around the seam where the elastic is sewn on. Fold under the raw edge, pin down and stitch along the top and bottom.

And here’s one last shot of the completed headbands!

Additional notes:

  • I based the size off of a store-bought headband that fits me well. When you get to the elastic stage, you may want to safety pin it in place before sewing it down to make any adjustments necessary for a comfortable fit for you.
  • Rather than using homemade bias tape as directed, you could also use store-bought.
  • These directions have you make 1/4″ bias tape. If you’ve never used bias tape before or if you find it’s tricky to work with you may want to make yours a bit wider. If you cut your strips to 1 1/2″ rather than 1″, your bias tape will be 3/8″ rather than 1/4″.
Total
383
Shares
Share 30
Tweet 0
Pin it 353
Related Topics
  • 3 strand headband
  • adult headband
  • cloth headband
  • elastic
  • fabric headband
  • head band
  • headband
  • reversible headband
  • summer sewing
  • three strand headband
Lindsay

Hi, I’m Lindsay Conner, an author, modern quilter, editor, and founder of the Lindsay Sews blog. I’m a Baby Lock ambassador and Stash Books author who loves writing modern sewing and quilt patterns for beginners and weekend sewists! I live in Indianapolis, Indiana with my husband, son, and two loveable cats, Murph and Chloe. I’ve been crafting for as long as I can remember. As a kid, I saved my dollar bills for trips with my mom to Jo-Ann Fabrics, where I’d find new floss for friendship bracelets or mini cross-stitch kits. Because my mom has always shared my love for crafting, she bought me my first sewing machine, a Hello Kitty Janome.

Previous Article
Best Sewing Machine for Free Motion Quilting
  • Needlecraft
  • Product Reviews
  • Quilting

Best Sewing Machine for Free Motion Quilting in 2022

  • Lindsay
  • March 8, 2022
View Post
Next Article
How to Make a Car Trash Bag or Reusable Lunch Bag?
  • Craft
  • Needlecraft
  • Sewing

How to Make a Car Trash Bag or Reusable Lunch Bag?

  • Lindsay
  • March 8, 2022
View Post
You May Also Like
View Post
  • Craft
  • Crochet
  • Needlecraft

Single Crochet Three Together – sc3tog – Video Tutorial

  • Mahnoor Malik Awan
  • June 13, 2022
How to crochet a tube top
View Post
  • Craft
  • Crochet
  • Needlecraft

How to Crochet a Tube Top – Video Tutorial

  • Mahnoor Malik Awan
  • June 13, 2022
How to Crochet a Cylinder
View Post
  • Craft
  • Crochet
  • Needlecraft

How to Crochet a Cylinder – Video Tutorial

  • Mahnoor Malik Awan
  • June 12, 2022
How to make a closed tube in crochet
View Post
  • Craft
  • Crochet
  • Needlecraft

How to Make a Closed Tube in Crochet

  • Mahnoor Malik Awan
  • June 12, 2022
How to Crochet a Tube
View Post
  • Craft
  • Crochet
  • Needlecraft

How to Crochet a Tube – Video Tutorial

  • Mahnoor Malik Awan
  • June 12, 2022
How do you do a Hdc2tog stitch?
View Post
  • Craft
  • Crochet
  • Needlecraft

Half Double Crochet Two Together – hdc2tog – Video Tutorial

  • Mahnoor Malik Awan
  • June 7, 2022
View Post
  • Craft
  • Crochet
  • Needlecraft

Single Crochet Two Together (SC2TOG) Video Tutorial

  • Mahnoor Malik Awan
  • June 7, 2022
gift Ideas for artists
View Post
  • Craft
  • Tools & Supplies

32 Gift Ideas For Artists And Painters In 2022

  • Lindsay
  • June 6, 2022
30 comments
  1. Amanda says:
    June 11, 2011 at 12:09 am

    Great tutorial! I love the headbands…I’m going to have to make some very soon. Thanks for sharing!

    Reply
  2. ElfRenee says:
    June 11, 2011 at 1:11 am

    This is great, thank you! I’ll give it a try.

    Reply
  3. Melissa S., SoChick! says:
    June 11, 2011 at 8:27 am

    Great tutorial and such pretty headbands… this may become a weekend project! Thanks for sharing!

    Reply
  4. Tammy/FancieStrands says:
    June 11, 2011 at 12:51 pm

    Love, love, love these. I will be making these for sure. Thanks for sharing.

    Reply
  5. staci k says:
    June 11, 2011 at 11:57 pm

    Love these! I will be making some for myself and my daughters. 🙂

    Reply
  6. [email protected] says:
    June 12, 2011 at 10:42 am

    what a cute headband.. I love the fabric and simplicity.. 🙂

    Reply
  7. Jill says:
    June 12, 2011 at 5:10 pm

    Beautiful headbands – and a great tutorial!
    Hi there
    Just stopped by to let you know that I featured your shirt to purse upcycle on my round tuit post this week!
    Round Tuit 53
    Thanks again for linking up! Hope you have a great week!
    Jill @ Creating my way to Success

    Reply
  8. Beverly @ FlamingoToes.com says:
    June 12, 2011 at 10:19 pm

    These are so sweet!! Thanks so much for linking them up to Think Pink Sundays – I shared them on my FB page! 🙂

    Reply
  9. Jill says:
    June 13, 2011 at 1:08 am

    Thanks for linking these to a Round Tuit!
    Hope you have a great week!
    Jill @ Creating my way to Success
    https://www.jembellish.blogspot.com/

    Reply
  10. Felicity says:
    June 13, 2011 at 1:23 am

    Cuuuute! I wish my kid would wear headbands. 🙁

    Reply
  11. Wendy from Wendys Hat says:
    June 13, 2011 at 4:07 am

    Really cute! My teenager will love these!

    Reply
  12. Sara says:
    June 13, 2011 at 7:33 am

    I love these, and have never seen a tute for a skinny headband! I’m all over that one! Pinning!! 🙂

    Reply
  13. Tanya @ Greetings From the Asylum says:
    June 13, 2011 at 11:19 am

    I think your headbands are just darling! I wish I could make them and wear them, but I have an oddly shaped head. (That may explain my blog’s title.) Thanks for sharing!

    Reply
  14. Angie says:
    June 13, 2011 at 5:43 pm

    Great idea!

    Reply
  15. Mindie says:
    June 13, 2011 at 10:27 pm

    I love headbands.

    Thanks for linking up at Bacon Time. Wow for a first party I can’t believe we had over 300 links. Can’t wait to see what you share next week. I have a special give away planned just for the linkers at the party.

    I would love it if you would grab the party button to add to your collection!

    Reply
    1. Mary says:
      June 13, 2011 at 11:03 pm

      Thanks Mindie! Just added your button to the collection.

      Reply
  16. sarah h. says:
    June 14, 2011 at 9:58 am

    This is SOOO great!! thanks for such a comprehensive tutorial, i am gonna give this a try! and i pinned this to my pinterest 😉

    Reply
  17. Susan says:
    June 14, 2011 at 3:48 pm

    Great tutorial for lovely headbands.

    Reply
  18. Andee Eve says:
    June 15, 2011 at 4:21 pm

    Awesome! I am so loving headbands right now, and this tutorial will help me make some super cute one. Thanks!
    Andee

    Reply
  19. Valentina says:
    June 15, 2011 at 7:46 pm

    So cute 🙂

    https://carabossesbedchamber.blogspot.com/2011/06/hoos-got-talent.html

    Reply
  20. Mrs H says:
    June 16, 2011 at 2:56 pm

    Adorable! I have a bunch of old clothes that I’m trying to upcycle and this is definitely going on my craft list!!

    Reply
  21. Megan @ Canoe Ridge Creations says:
    June 16, 2011 at 4:34 pm

    These are great! I will be bookmarking! 🙂 Thanks for linking up to {Sew} Modern Monday and have a great week!

    Reply
  22. Katy says:
    June 17, 2011 at 7:53 am

    Oh, these are fab, and saves me trying to work out a pattern in the 5 remaining days before I head off to the sun on holiday, thanks!

    Reply
  23. Kara says:
    June 17, 2011 at 8:41 pm

    Lovely! I especially like the 3 stripes one.

    Reply
  24. Amie @ Pinkapotamus says:
    June 19, 2011 at 5:31 am

    These are awesome! Love that they are soft and not made of hard plastic that irritates the ears! Will have to try these! Thanks so much for sharing with the Pink Hippo Party!

    Reply
  25. Ashley says:
    June 19, 2011 at 11:22 am

    So stinkin’ cute!!! 🙂 I wanna make one! 🙂

    Reply
  26. Katie from Sew Woodsy says:
    June 22, 2011 at 9:09 am

    I’ve made a sweat band before, but never a headband! I need to give this a try! Thank you for linking up to Sew Woodsy last week!

    Reply
  27. Jennifer says:
    July 28, 2011 at 10:10 am

    I love these and it is just what I was looking for.

    Reply
  28. Kristen says:
    March 22, 2012 at 1:31 pm

    I got my fabric all cut out and realized I didn’t have 1/2″ elastic – bummer. Can’t wait to finish these! For some reason I was so nervous about cutting off the corners on the reversible. I’m still not sure it looks quite right LOL
    Thank you for sharing this tutorial!

    Reply
  29. Lisa Mizerak says:
    June 15, 2012 at 9:16 am

    I loved this idea! I whipped one up last night in about 15 minutes. I am planning on making several of these to match my wardrobe…finally I can wear my hair down and keep it out of my face! Thanks sooo much for this tutorial.

    Reply

Leave a Reply Cancel reply

Your email address will not be published. Required fields are marked *

Social Links
Facebook 43K Followers
Pinterest 23K Followers
YouTube 98 Subscribers

Latest Articles

  • Single Crochet Three Together – sc3tog – Video Tutorial
  • How to Crochet a Tube Top – Video Tutorial
  • How to Crochet a Cylinder – Video Tutorial
  • How to Make a Closed Tube in Crochet
  • How to Crochet a Tube – Video Tutorial

Subscribe

Subscribe now to our newsletter

Art & Craft, DIY ideas and Tutorials – Craftbuds
  • Privacy Policy
  • About
  • Contact
Find fun and creative craft ideas and tutorials across various categories such as Knitting, Quilting, Sewing, PaperCraft, Jewelry Making and much more

Input your search keywords and press Enter.