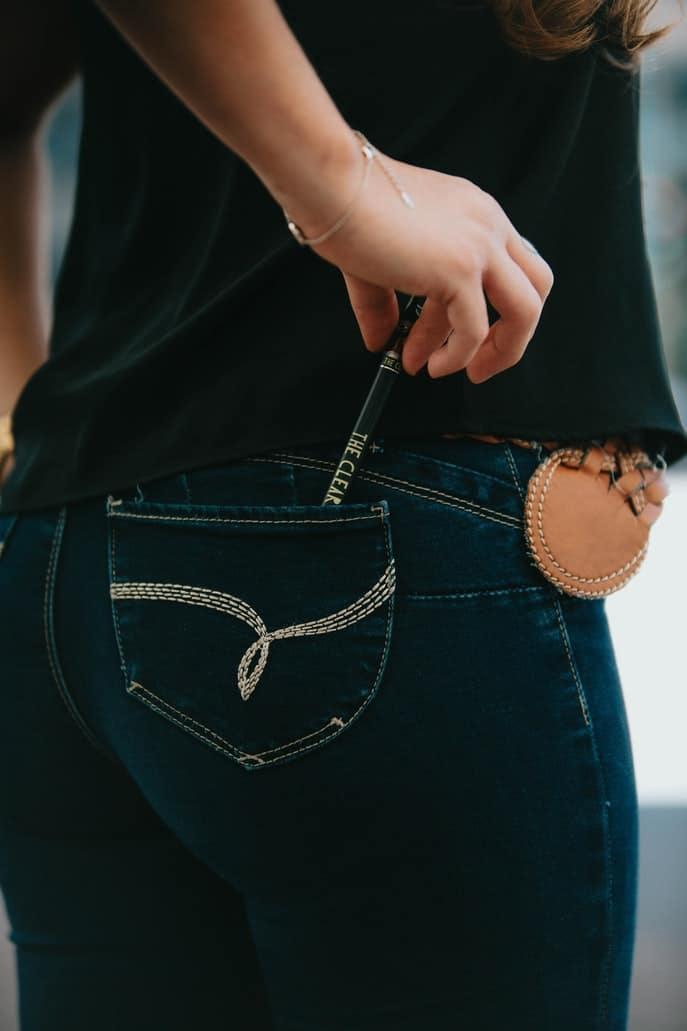
In sewing, a top stitch is a row of stitching on the top of a garment that finishes raw edges as well as enhances the appearance. In addition to finishing fabric edges, it also strengthens them and prevents unraveling or stretching out of shape. It’s normally done by machine on lightweight fabrics such as knits and on very fine seams on woven garments. A topstitch can be made with one, two, or more rows of stitches depending on design and fabric weight. It is also called a bartack or edgestitch. A row of contrasting thread is added on the right side of an otherwise plain seam for decorative purposes
Table of Contents
- 1 Is a top stitch the same as a straight stitch?
- 2 Is top stitching necessary?
- 3 What are some types of top stitching?
- 4 Chain stitch topstitching
- 5 What kinds of thread do I use for top stitching?
- 6 Is there a recommended stitch length?
- 7 What kinds of needles are used when top stitching?
- 8 Topstitch setting on a sewing machine
Is a top stitch the same as a straight stitch?
Not it is not the same as a straight stitch. In topstitching, two seams are sewn with one seam allowance while in a straight stitch only one seam is sewn.
Is top stitching necessary?
Some garments require a stabilizing edge to give support and prevent fraying. Some examples of this include necklines, armholes, waistbands, or any other area that will be gathered or shirred. A topstitch prevents the garment from stretching out of shape by preventing fraying and sagging at the raw edge. Topstitching also gives garments extra details such as cuffs, lapels, and hems. The contrasting look can add a pop of color, a design element, or highlight a specific part of the garment. It can also provide better visibility in close-up areas that need stitching for added strength. Topstitching is normally used on medium-weight fabric and lighter ones. When using heavy fabrics or closures such as zippers, buttons, or snaps, topstitching would be too thick to sew properly. When you are sewing with heavy fabrics, it’s recommended that you use two rows of stitching instead of one.
The use of top stitching depends on what type of garment you are sewing. If it is lightweight, then one row will suffice. Any stretchy or heavier fabric should have two rows. Topstitching is not necessary but adds detail and style to your item.
What are some types of top stitching?
A wide variety exists depending on what type of garment you’re making and how many layers the fabric has. Some common topstitching types include a double row, twin needle stitching, and chain stitch topstitching.
Should I do a single row of topstitching or double?
The choice depends on what type of garment you’re making and how many layers the fabric has. For lightweight items like blouses and dresses, a double row will hold better than a single row; however, if you’re using a heavyweight material like denim and your machine can handle the thickness, then a single row might be fine. Try both, and look at what your favorite sewers are using to judge which would work best for you.
Twin needle stitching
Twin needle stitching is a specialty stitch. It uses two needles at the same time to simultaneously sew two parallel rows of straight stitches, this looks like one single zigzag seam. A twin needle can be used for decorative seams or hems on quilting fabric. It may also be used to finish raw edges with an overcast stitch, which prevents fraying. The width between two parallel lines of stitches is determined by the distance between the left and right needles that are attached to each side of your sewing machine. Twin needles are commonly available in sizes 70/10H, 80/12H, 90/14H, 100/16H, 110/18H & 120/19H.
How do I sew a twin needle?
1. Use a twin needle in between your upper and lower looper making sure they are fitted securely by following the manufacturer’s instructions.
2. Thread each of your threads through their respective tension disks and pull them towards the back of your sewing machine.
3. Position one fabric piece up under both presser feet, pulling it slightly to make stitching easier.
4. Sew over four or five stitches to secure each thread (shorter stitches may cause skipped stitches). Make sure you adjust the needle position, preventing it from hitting the foot.
5. Connect each part with a line of topstitching and remove your fabric from under the presser feet.
Chain stitch topstitching
Chain stitch topstitching is a chain stitch, with an extra chain at the beginning and end. The chain stitches are used to keep the seam allowance in place, preventing it from flipping over to one side or front of the jacket. Chain stitch stitching can be done by hand but most often it is sewn using a sewing machine, typically on jackets and coats that have lining attached to the facing. To sew chain stitch top stitching;
1. Place both layers of fabric right sides together with raw edges even.
2. Sew all around your garment leaving two openings for turning through – usually one opening at the neckline and another larger hole for turning through armholes.
3. Trim off excess seam allowances (keeping chain stitching intact).
4. Turn the fabric through the chain stitching openings so that it is right side out and press.
5. Sew chain stitch top stitching with your sewing machine close to the edge of the seam allowance (catching all layers of your garment).
What kinds of thread do I use for top stitching?
A good top stitching thread is one that does not stretch out of shape. It should hold firmly during machine stitching without breaking, snapping, or puckering up the fabric. A 100% polyester thread would be the best choice. It would not twist or give under pressure, making it ideal for sewing topstitching. Using polyester threaded with 100/6 or 70/10 needles ensures that you won’t have any skipped stitches.
Is there a recommended stitch length?
The proper stitch length depends on your machine’s capability, the type of fabric you are working with, and what you are trying to achieve with your stitching. When using lighter threads, sew at a shorter 2.5 mm length. If you’re sewing with heavier fabrics or closures like zippers, use a longer stitch length of 3.5-4mm.
What kinds of needles are used when top stitching?
A regular or universal needle is preferred for topstitching so that it can go easily through multiple layers of fabric without breaking the thread. An edge stitch length between 3.5-4mm is ideal for topstitching.
Topstitch setting on a sewing machine
The best stitch setting for top stitching is a straight stitch or an edge stitch. There is generally no need to backstitch since the top stitching will be caught in the seam allowance. Topstitch with either 100/6 Polyester Machine Thread (for woven fabrics) or 70/10 Cotton Machine Thread (for knits) using a 3.5 mm straight stitch length, without thread nesting. Use a stabilizer on the bottom side of the fabric if your fabric tends to stretch.
To set up your sewing machine for basic top stitching, start by loading it with some bobbin thread — preferably the same color as the top thread so you can see your stitches better. Set the machine to a straight stitch, and adjust both the length and width of your stitch until it’s slightly longer than normal.
1. Your upper looper must be able to hold your second thread, either by being wide enough or having the option to attach a horizontal spool pin that can hold multiple threads. Also, check if your upper looper will accommodate two threads as well.
2. Put each thread into its own lint-free bobbin and wind them both with the same color thread.
3. Attach the twin needle to your machine, making sure it is set at a straight stitch and that both needles will be in the center position (refer to the manufacturer’s instructions).
4. Thread each of your threads through its respective tension disk and upper looper and pull the top threads toward the back of your machine.
5. Position one fabric piece so it is under both presser feet, slightly stretching it to ease stitching later on.[28] 6. Sew over four or five stitches to secure each thread (shorter stitches may cause skipped stitches). Make sure you adjust the needle position, preventing it from hitting the foot.
7. Connect each part with a line of topstitching and remove your fabric from under the presser feet.
I hope this article was helpful for a better understanding of what top stitching is. If you have any comments please do not hesitate to send me an email here on Craftbuds.com

