Welcome to our specialized tutorial on “How to Draw a Chinese Style Dragon.” This guide is crafted for artists who are looking to push their skills to the next level by diving into the rich tapestry of Chinese mythology. As the dragon holds a significant place in Chinese culture, mastering the art of drawing this mythical creature can be both challenging and rewarding. If you’ve already tried your hand at simpler projects and feel ready to take on something more complex, you’ve come to the right place!
Table of Contents
- 1 12 Steps To Draw a Chinese-Style Dragon
- 1.1 Step 1: Establish the Form with Guiding Lines
- 1.2 Step 2: Break It Down into Basic Shapes
- 1.2.1 Step 3: Create the Initial Outlines
- 1.2.2 Step 4: Refine the Head’s Features
- 1.2.3 Step 5: Detail the Body, Legs, Wings, and Tail
- 1.2.4 Step 6: Focus on the Legs
- 1.2.5 Step 7: Perfect the Wings
- 1.2.6 Step 8: Refine the Outlines
- 1.2.7 Step 9: Add Fine Details
- 1.2.8 Step 10: Add Shading
- 1.2.9 Step 11: Final Cleanup
- 1.2.10 Final Step: Your Chinese Style Dragon is Complete!
- 1.3 More Drawing Tutorials
Suggested Materials
- Drawing Paper: A good quality paper that can handle shading and erasing.
- Graphite Pencils: A set ranging from hard (H, 2H) to soft (B, 2B, 4B) for different shading and detailing needs.
- Mechanical Pencil: Useful for fine details.
- Erasers: A kneaded eraser for large areas and a precision or vinyl eraser for small details.
- Rulers or Straight Edges: Helpful for guidelines, though not strictly necessary if you’re comfortable drawing freehand.
- Blending Stumps or Q-Tips: For smoothing out your shading.
- Pencil Sharpener: To keep your pencils sharp for precise lines.
- Optional: A lightbox or tracing paper if you like sketching your drawing before finalizing it.
Now that you’re equipped and ready let’s embark on this artistic journey of creating a stunning Chinese-style dragon. Follow along with our step-by-step guide, and remember, the key to mastering any art form is practice and patience. Happy drawing!
Related: How To Draw An Easy Cartoon Dragon
12 Steps To Draw a Chinese-Style Dragon
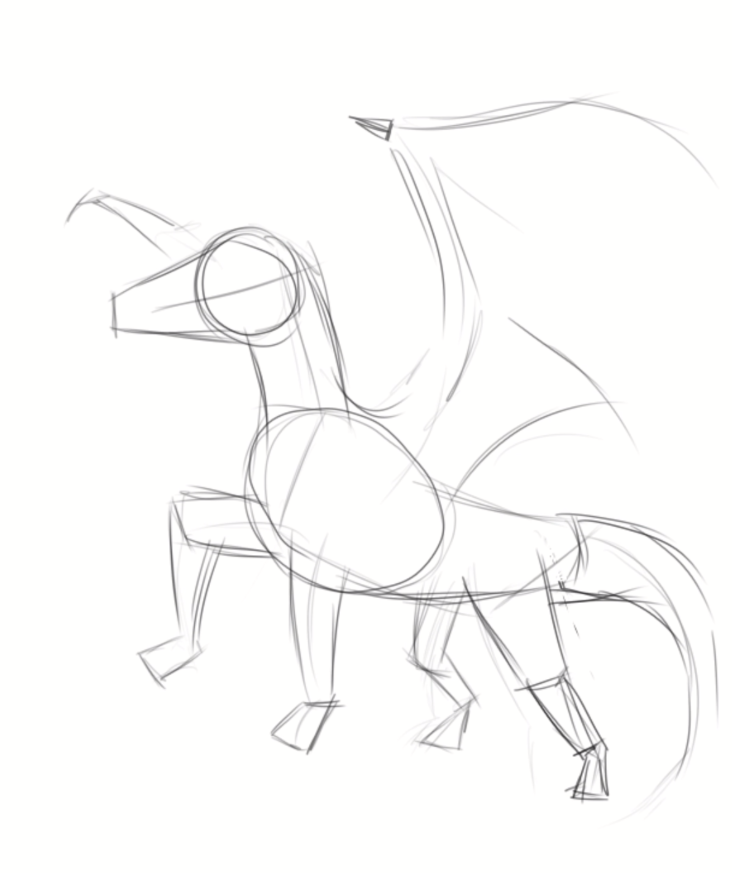
Step 1: Establish the Form with Guiding Lines
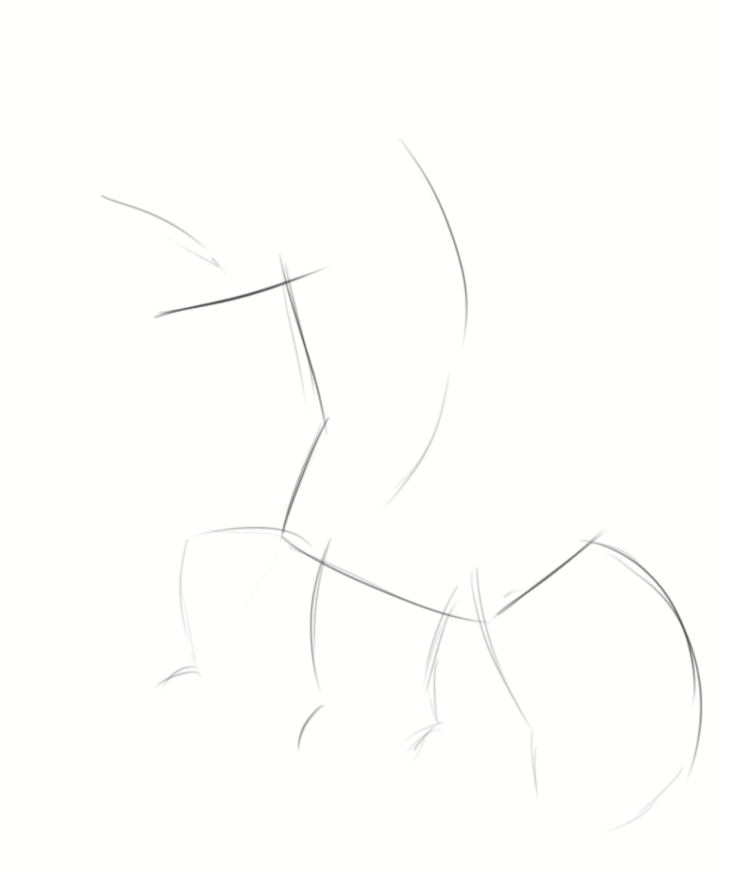
Begin by drawing guiding lines to map out the structure of your dragon. Think of these lines as a roadmap for your drawing—they indicate where the head, neck, tail, wings, and legs will be. For instance, you might start by sketching a line for the head, followed by lines for the neck, tail, wings, and legs.
Step 2: Break It Down into Basic Shapes
Now, overlay these guiding lines with basic shapes. This will help you better visualize the dragon’s body parts. Use simple geometric shapes like circles, squares, cones, triangles, and rectangles. For example, circles can represent joints, while rectangles can stand for body segments.
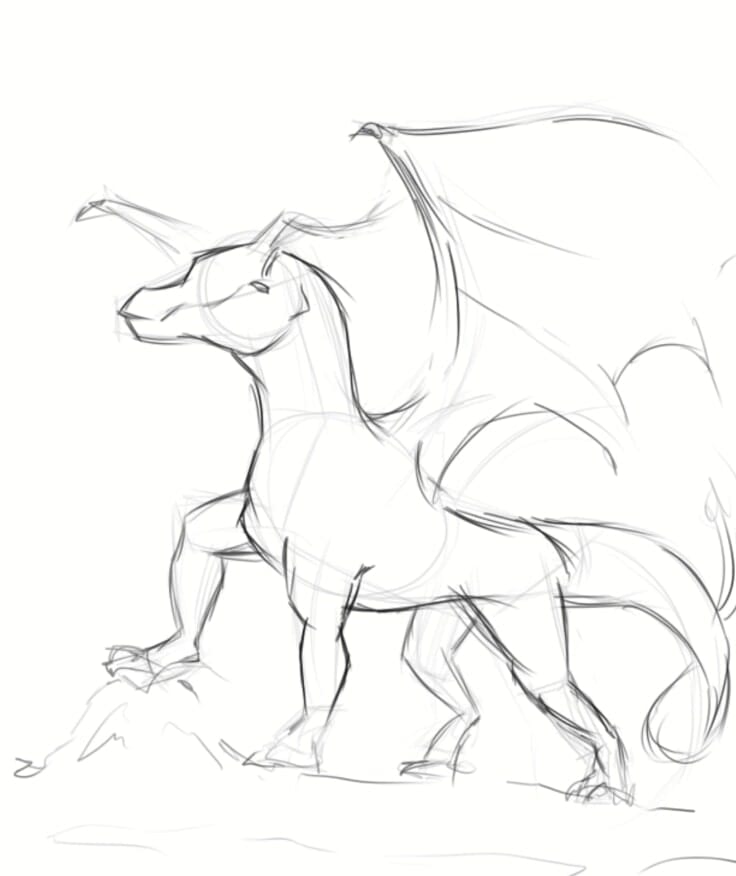
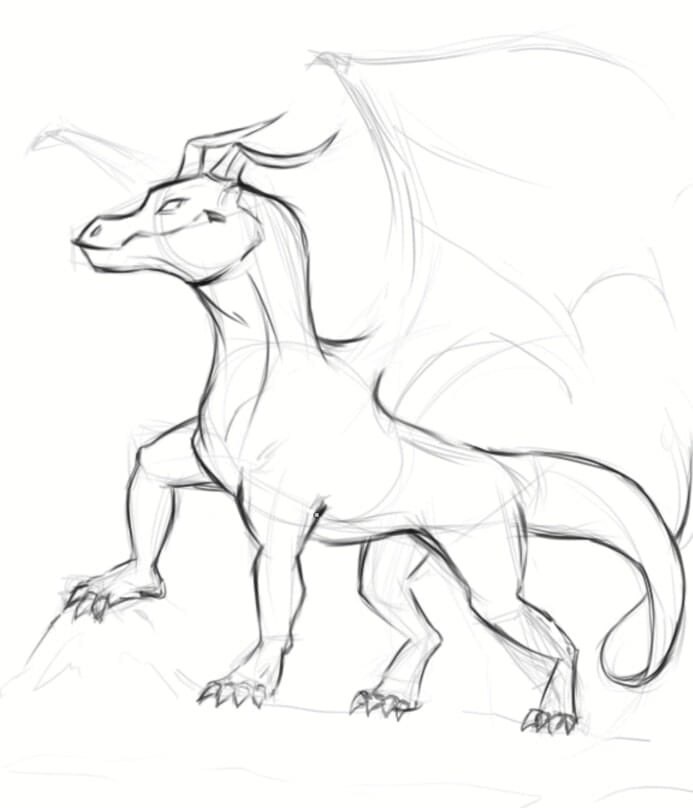
Step 3: Create the Initial Outlines
With your basic shapes in place, begin tracing over them to form the initial outlines of your dragon. At this stage, focus on getting the general shapes down and avoid diving into intricate details. Your goal is to make the drawing start to come alive with these outlines.
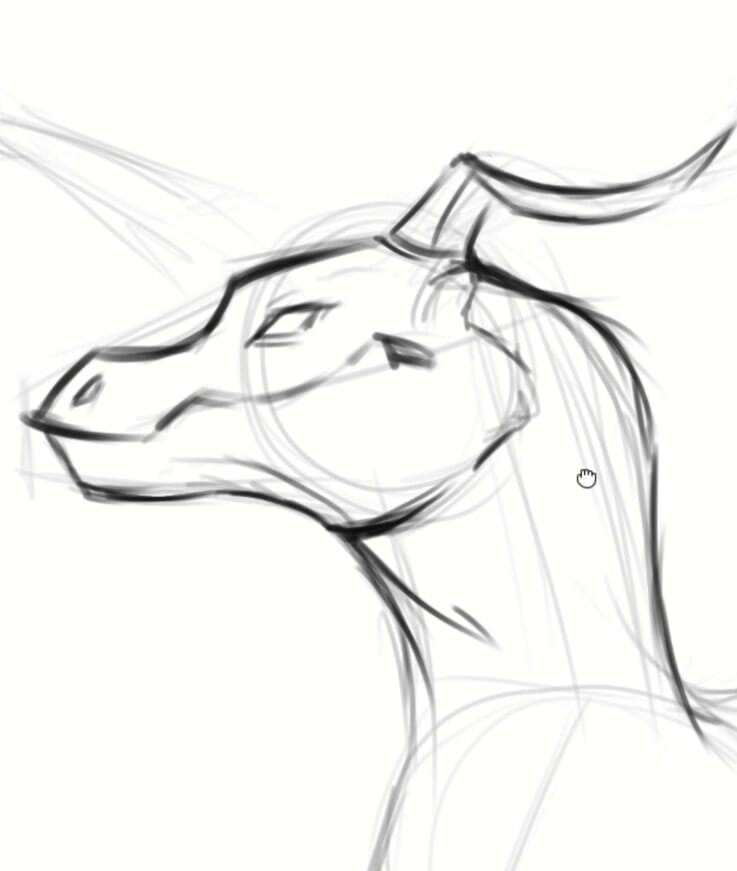
Step 4: Refine the Head’s Features
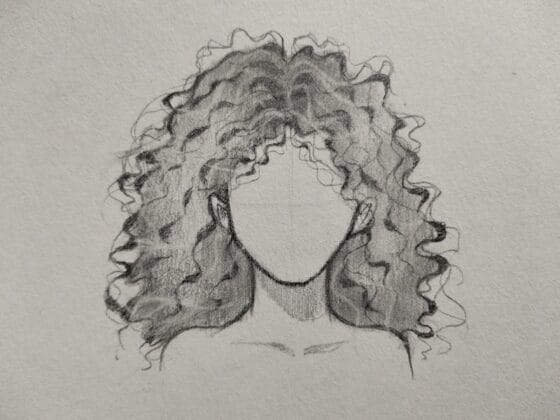
Now, concentrate on the head. Start refining its outline by adding facial features. You might include eyes, nostrils, and perhaps even the dragon’s fangs or beard, depending on the style you’re going for.
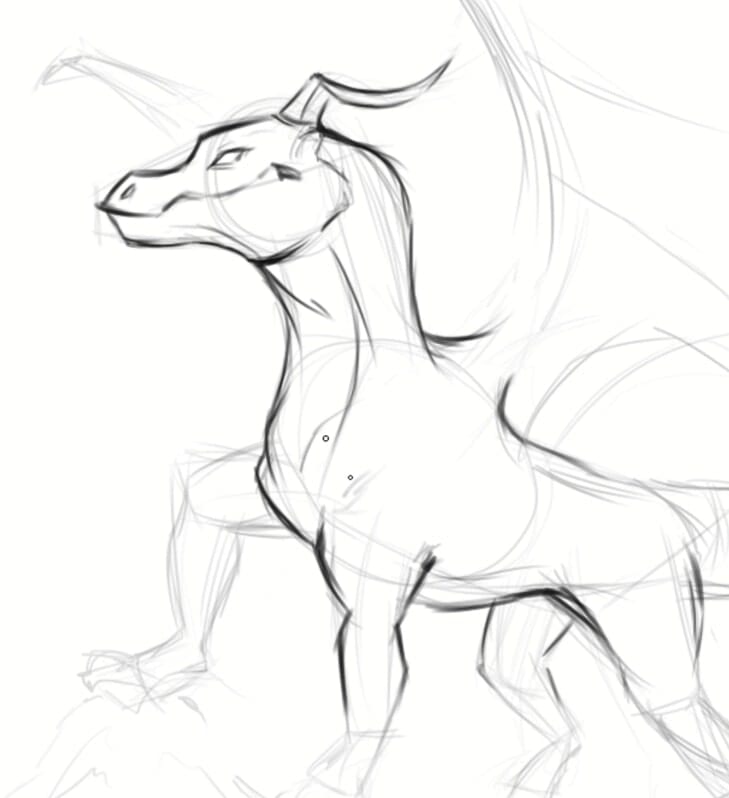
Step 5: Detail the Body, Legs, Wings, and Tail
Move on to the body and give it character by adding elements like muscle definition. You could also incorporate small scratches or scales at this point. Repeat this process for the legs, wings, and tail, ensuring each part is detailed according to your vision.
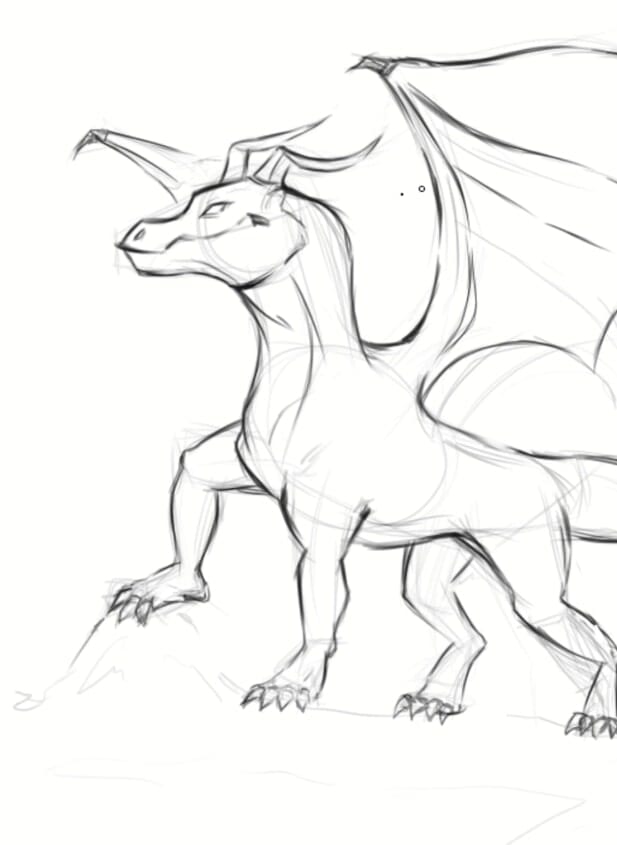
Step 6: Focus on the Legs
Turn your attention specifically to the legs. Dragons in Chinese art often have intricate detailing here, including claws and scales. Take your time to get these elements just right.
Step 7: Perfect the Wings
Now, focus on the wings. Chinese dragons may or may not have wings, depending on the lore you’re drawing from. If you include them, ensure they’re proportional to the body and feature appropriate detailing, like feathering or membranes.
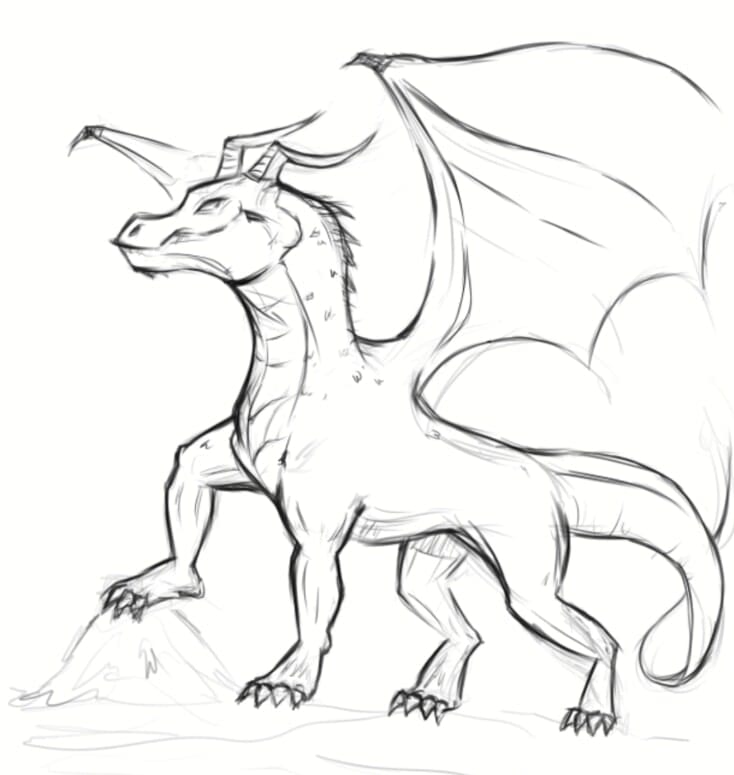
Step 8: Refine the Outlines
Once you’re satisfied with how the various elements look, go back and refine your outlines. Make them thicker or darker to emphasize the dragon’s shape and give the drawing a cleaner appearance.
Step 9: Add Fine Details
It’s time to make your dragon look more realistic or mythical, according to your preference. Add finer details like scratches, hairs, and scales. Consider drawing lines that make the muscles appear more defined and ripped.
Step 10: Add Shading
With your details in place, begin to add shading. Consider where your light source is coming from, and shade the areas that would naturally be darker. This adds depth and dimension to your dragon.

Step 11: Final Cleanup
If your drawing is nearly complete, erase any unwanted lines or errors. This is the time to clean up your work and ensure everything looks as you intended.
Final Step: Your Chinese Style Dragon is Complete!
Congratulations, you’ve successfully drawn a Chinese-style dragon! Revel in your artistic achievement, and consider adding color or background to bring your creation to life.
This tutorial should provide a comprehensive guide for drawing a Chinese-style dragon, catering to various skill levels, from beginners to more advanced artists. Happy drawing!