Unlock the secrets of drawing intricate and lively curly hair with our step-by-step tutorial! Whether you are a beginner artist eager to expand your skills or a seasoned professional looking for new techniques, this guide is tailored to help you grasp the essentials of sketching curls. With detailed instructions, expert tips, and visual aids for every step, you will learn to capture curly hair’s unique patterns and textures, bringing your drawings to life. So, grab your pencils, and let’s dive into the world of curly locks with enthusiasm and creativity!
Drawing Curly Hair Tips and Fixes
- Realistic Observation: Dive deep into observing real curly hair, scrutinizing diverse curl patterns, textures, and how light plays with the strands.
- Pattern Familiarity: Understand that curls come in many patterns, from loose waves to tight coils, and strive to familiarize yourself with them to depict them accurately.
- Volume with Layering: Start your sketch with the head’s underlying shape, accounting for the curly hair’s natural volume and creating a well-rounded base.
- Reference Image Utilization: Refer to various images by enhancing your understanding of curls’ behavior, their interaction with the scalp, and their fall.
- Flowing Outlines: Kick off your drawing with light, flowing lines to outline the hair’s overall shape, setting a solid foundation for further detailing.
- Essence of Curls: Focus on capturing the essence of curls with a few well-defined spirals, avoiding clutter while maintaining realism.
- Line Thickness Variety: Employ a variety of line thicknesses to instill depth and texture; use thicker lines for shadows and thinner lines for curl definition.
- Shadows and Textures: Pay close attention to shadows within the curls, and ensure to depict the contrast and texture this creates in the hair.
- Highlights for Dimension: Introduce highlights on top of curls, considering your light source, to imbue them with a lifelike three-dimensional look.
Possible Issues and Fixes
- Avoiding Flat Curls: Counter flat-looking curls by incorporating individual strands and employing shading techniques to infuse depth and a natural flow.
- Maintaining Consistency: To tackle inconsistent curl patterns, consistently refer back to your reference images.
- Balancing Detail: Evade the trap of over-detailing by choosing select curls to focus on, allowing the rest to suggest their presence merely.
- Texturizing: Ensure the depiction of the texture unique to curly hair through diverse line thicknesses and strategic shading.
- Preventing Tangles: For a more organized look, clearly define individual curls and utilize highlights and shadows to sculpt them.
- Balanced Contrast: While contrast can add dimension, strive for balance to avoid an overly harsh appearance.
- Correct Curl Direction: Be vigilant about ensuring your curls follow the head’s contour for a more natural look.
9 Steps to Draw Realistic Curly Hair
Step 1. Sketching
Initiate your drawing by sketching the head, determining where the hair will be, and finding the center point to guide the hair growth.
Step 2. Basic Shapes for Volume
Establish the hair’s volume using basic shapes, keeping in mind the irregularities due to curls, and ensure these shapes roughly adhere to the head’s contour.
Step 3. Initial Outline
Start outlining the hair strands establishing a direction or flow for the hair. Introduce curls and spirals of varying sizes and directions within your basic shape, emphasizing more definition towards the ends.
Step 4. Clean Up with Erasure
Lightly erase the initial outlines to refine your work and prepare for cleaner line work.
Step 5. Refined Outline
Follow your initial outlines, but aim for cleaner, more precise lines. Ensure varying thickness in your curly hair strands.
Step 6. Layered Shading
Begin shading with a lighter pencil shade, building up to darker shades for the hair’s deeper parts, like the back of the neck, crown, and ends.
Step 7. Adding Details
Introduce finer hair strands for added detail, enhancing the texture and realism.
Step 8. Creating Highlights
Using an eraser to add highlights creates an illusion of light reflecting off the hair.
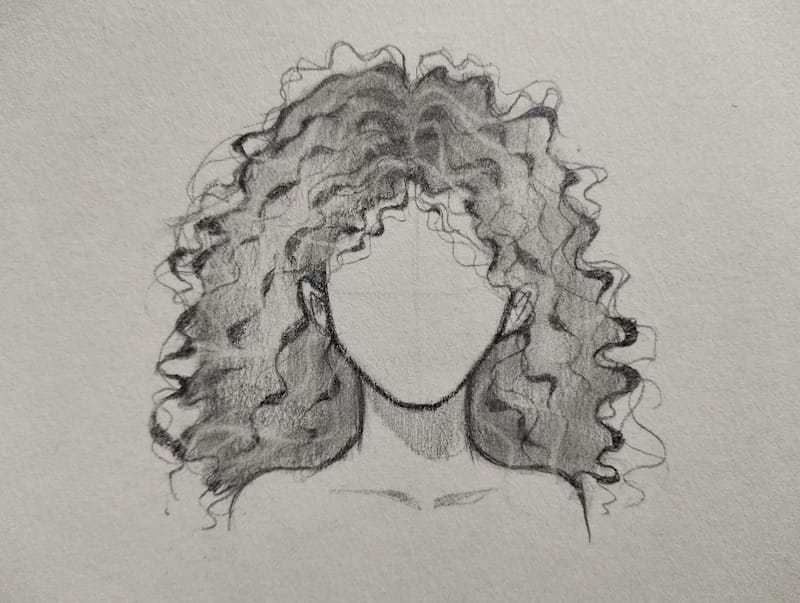
Step 9. Final Touches
Add any additional tiny hair strands for extra detail, stopping when you feel satisfied with the result.