🐬 Dive into the magical world of drawing with our step-by-step tutorial on “How to Draw a Dolphin!” Dolphins are known for their grace, playfulness, and intelligence, and now, you can bring their spirit to paper. Whether you’re a young artist or a beginner, this guide will help you create a wonderful dolphin illustration. So, grab your pencils, and let’s make a splash! 🌊
Table of Contents
- 1 Tips for Young Artists and Beginners
- 2 Step-by-Step Guide to Drawing a Dolphin:
- 2.1 Step 1. Laying the Foundation
- 2.2 Step 2. Shaping the Belly
- 2.3 Step 3. Adding the Side Fins
- 2.4 Step 4. Sculpting the Body
- 2.5 Step 5. Designing the Tail
- 2.6 Step 6. Crafting the Dorsal Fin
- 2.7 Step 7. Capturing the Eyes
- 2.8 Step 8. Highlighting the Eyes
- 2.9 Step 9. Detailing the Features
- 2.10 Step 10. Finishing Touches
- 2.11 Step 11. Painting with Colors
- 3 Easy Dolphin Tutorial – Full Video Tutorial
Tips for Young Artists and Beginners
- Start Light: Using a light hand to sketch initially makes it easier to erase mistakes.
- Practice Makes Perfect: The more you draw, the better you’ll get. So, practice as often as you can!
- Use References: Look at pictures of real dolphins to understand their anatomy and movements better.
- Personalize Your Dolphin: Add your own unique touches. Maybe a fun pattern or some accessories!
- Stay Relaxed: Art should be fun! Don’t get discouraged if you’re unhappy with your first attempt. Every artist started somewhere.
- Share Your Work: Show off your beautiful dolphin drawing to family and friends. They’ll surely be impressed!
Step-by-Step Guide to Drawing a Dolphin:
Step 1. Laying the Foundation
Start with a flipped “U” shape. This forms the dolphin’s head. Now, extend a curved line from the top, giving a smooth arc to the dolphin’s back.

Step 2. Shaping the Belly
Draw another curved line beneath your initial “U”, creating the dolphin’s underbelly.

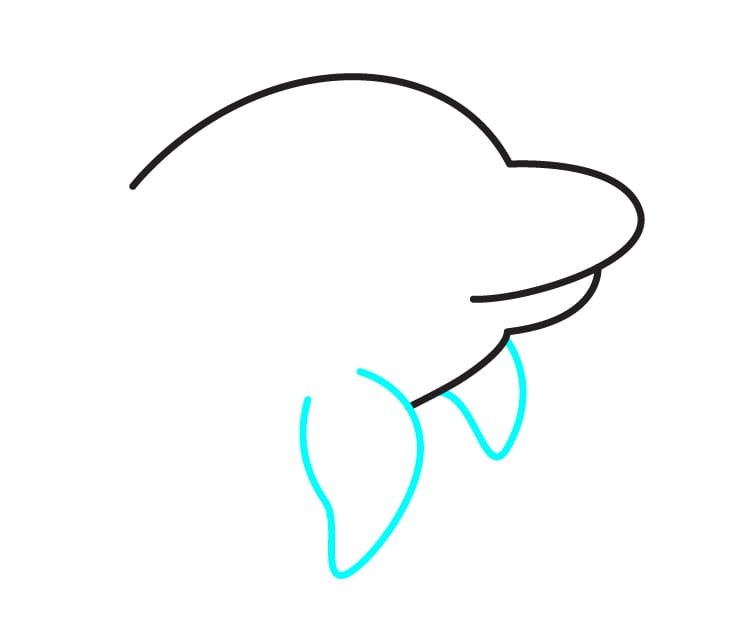
Step 3. Adding the Side Fins
Picture these as curved wings. Sketch them on either side of the dolphin’s body.
Step 4. Sculpting the Body
Extend the body by adding two graceful curved lines that begin where your side fins end.
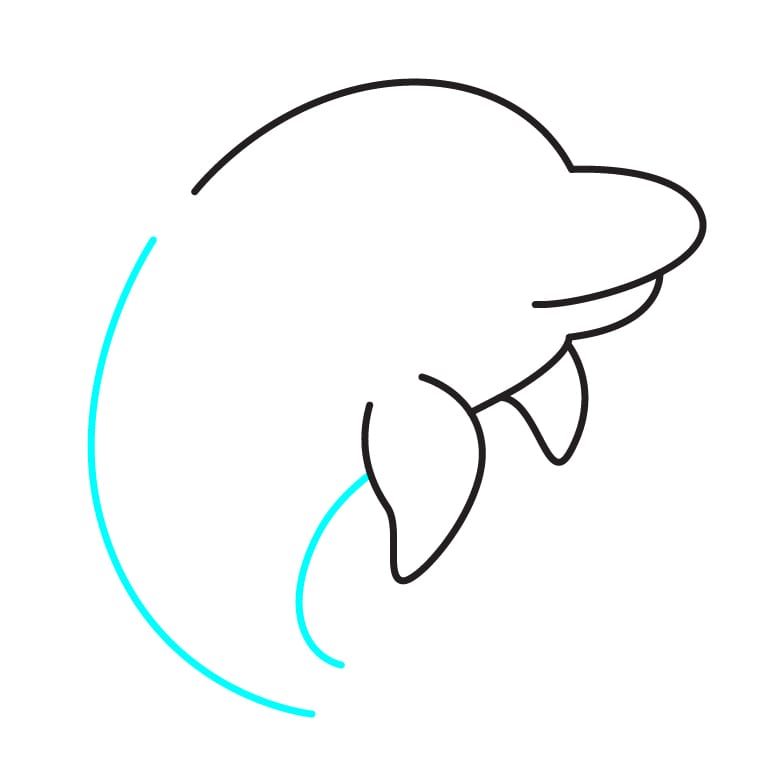
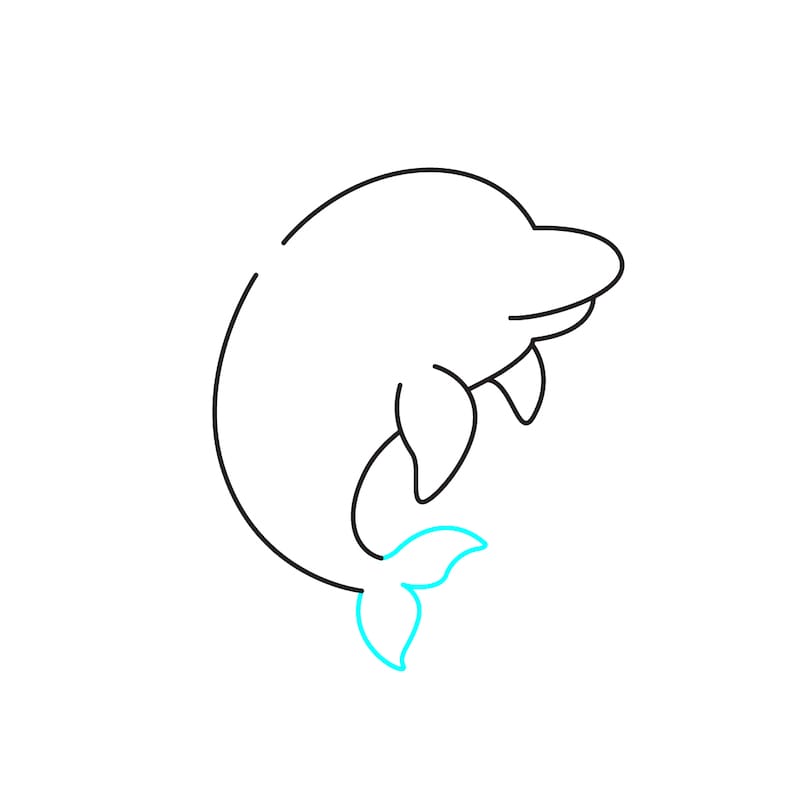
Step 5. Designing the Tail
Craft a forked tail using smooth lines. This gives our dolphin the ability to glide through water!
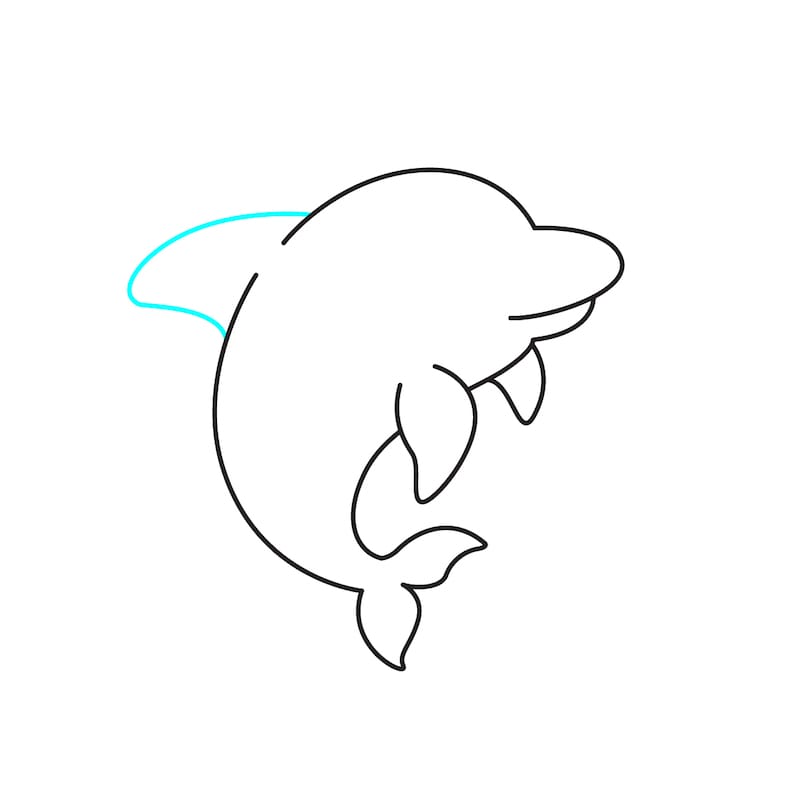
Step 6. Crafting the Dorsal Fin
Draw an upward “U” shape on the dolphin’s back. This dorsal fin adds to its aerodynamics!
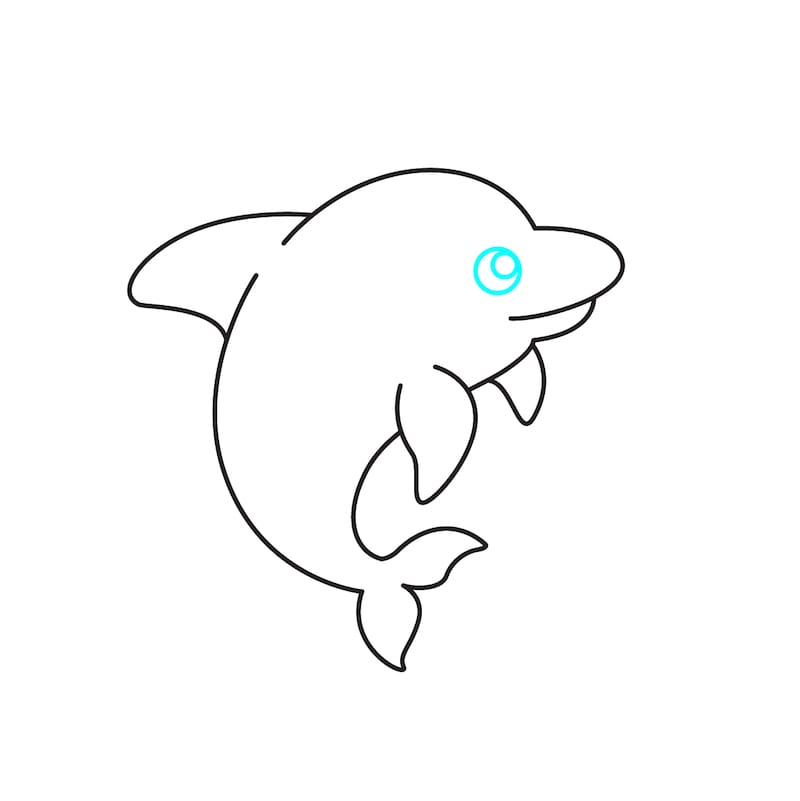
Step 7. Capturing the Eyes
Start with a circle for the eye. Within it, draw a smaller circle. This smaller circle will be the pupil.
Step 8. Highlighting the Eyes
Shade the area between the smaller and larger circles, but leave the smaller circle unshaded. This creates a sparkling look in the dolphin’s eyes.

Step 9. Detailing the Features
Enhance your dolphin by adding a curved line stretching from the mouth area to the tail. This gives a sense of movement and texture.

Step 10. Finishing Touches
Take a moment to admire your work. You’ve successfully drawn a dolphin!

Step 11. Painting with Colors

Now, the real fun begins! Add colors to your dolphin. You can stick to natural shades or let your imagination run wild. It’s all up to you!
Easy Dolphin Tutorial – Full Video Tutorial
Now, dive deep into the ocean of creativity and let your imagination sail! 🌊🐬✨
More Drawing Tutorials
- How to Draw a Dragon
- How to Draw Sonic
- How to Draw a Unicorn
- How to Draw Naruto
- How to Draw Fire
- How to Draw a Bat
- How to Draw a Cute Dinausor
- How to Draw a Snowflake
- How to Draw a Bunny
- How to Draw a Cow
- How to Draw a Cute Fox
- How to Draw a Tiger
- How to Draw a Penguin
- How to Draw a Turkey
- How to Draw Godzilla
- How to Draw a Toucan
- How to Draw a Lion
- How to Draw a Butterfly