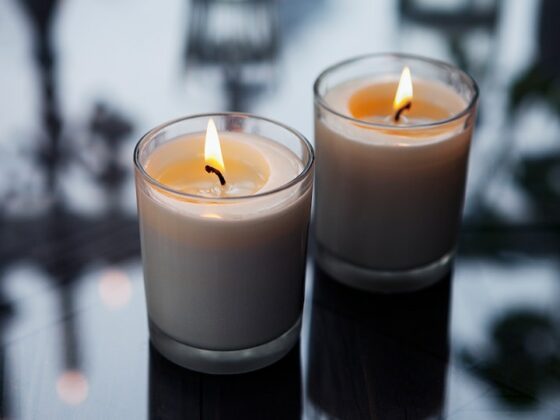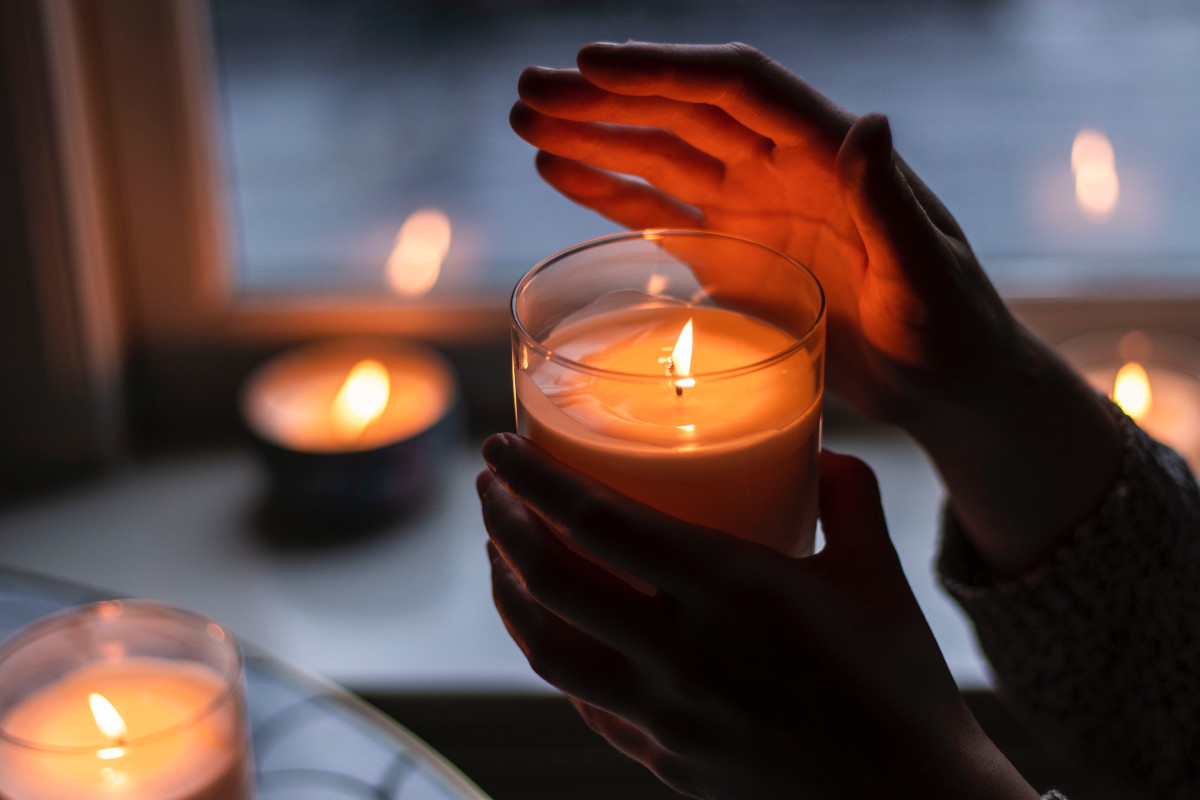
Do you often splurge on expensive candles because of their exquisiteness and premium fragrance?
While candles are the best way to add warmth and fragrance to your home, they don’t last long and can be pricey, especially some of the premium candle brands on the market. So, the best way to experience the same warmth and light is by making them at home.
Whether a DIY lover wants to start a candle business, you can easily make unique candles with a few supplies and a little know-how.
Here is your detailed guide to making candles. The post even covers the ingredients you need, different types of candle wax, mistakes to avoid when making candles, and much more.
Related: How To Fix Candle Tunneling – 5 Easy & Effective Ways
Different Types Of Candle Wax
There are different types of wax candles. Let’s first take a look at them, and then we’ll go ahead and learn how to make candles using one of these waxes.
Soy Wax Candles
Soy candles are pollutant-free and made from natural soy. The soy is derived from vegetable soybeans, making soy candles a biodegradable product. Soy candles are better than most other types because they are easier to clean in case of accidental spills.
Moreover, soy candles burn cooler and don’t produce petrol-carbon soot like other types. Also, soy candles last longer compared to different varieties.
Paraffin Wax Candles
Paraffin is a petroleum byproduct and the preferred pick for commercial candle production. Commercial producers prefer paraffin wax because it works best with colors and fragrances. Plus, paraffin has a high burning point and the rigidity required for tall pillar candles.
Some studies showed that paraffin candles release toxic fumes harmful to asthma and cancer patients. However, it won’t have any immediate effects, and if you burn a paraffin wax candle occasionally, it shouldn’t lead to such issues.
Liquid Wax Candles
Liquid wax candles also contain paraffin oil, and it’s made by mixing with other mineral oils. These candles don’t produce soot or smoke, which is why they are a cleaner substitute for traditional candles. Additionally, liquid wax candles don’t leave any melted wax, so there will be no waxy mess.
Palm Wax Candles
Manufacturers make palm wax candles by hydrogenation of palm oil. The fatty acids from the palm oil are separated by extreme pressure and heat. Palm wax candles are even more long-lasting than soy and paraffin wax. These are also sustainable options.
Bayberry Wax Candles
Bayberry wax candles are another eco-friendly option. Bayberry wax is made from a mix of aromatic green fruits and vegetables. It has a pleasant natural aroma that keeps your house feeling fresh.
Types Of Candle Wicks
Just as there are different waxes, there are different types of candle wicks. Wicks is one of the most crucial parts of a candle because they supply wax to the flame. Wicks should have a slow and consistent burn to limit smoke release.
Following are some of the best and most popularly used candle wick types-
Cotton And Paper Core Wicks
Cotton wicks are the most preferred choice for candles. They produce tall flames that help spread the aroma evenly. But these wicks burn very hot and produce more melted wax.
Wood Wicks
Wood wicks are an eco-friendly option. They produce minimal carbon build-up and don’t require regular trimmings like cotton or paper wicks.
Metal Cored Wicks
These are tin or zinc cores and are preferred by commercial manufacturers. They stand tall while the wax burns down, making them best for pillar candles. Zinc or tin wicks are also safe because they don’t emit any toxic pollutants.
What Candle Making Supplies Do You Need To Make Candles?
Now that you know different candle wax and wick materials, let’s start the candle-making process. But before making candles, you must be aware of the supplies you’ll need.
First, you need to find a corner where you’ll make your candle and cover it with paper because the wax might damage the floor.
Here is the list of things you’ll need to make your candle-
- Candle wax. You can use either of the five types of wax I mentioned earlier. I prefer to use soy or palm oil wax because of their sustainability. I have used American Soy Organics wax for my soy candles and found them good. But if you want a cheaper option, you can also go for the paraffin wax. I would recommend the Direct Candle Supply for paraffin wax as they are high-quality and easy to work with. Dry candle wax is available in different forms like chips, flakes, blocks, beads, etc.
- Molds: Next, you’ll need candle molds. Multiple candle molds are available, such as plastic, silicon, metal, etc. These molds also come in various sizes and shapes to give your candles an aesthetic appearance.
- Wicks: The next thing you need is candle wicks. You have to choose the wick according to your candle size. Generally, you should use thinner wicks, and for large candles, you should use thick wicks. Please note that very thick wigs will melt the candle faster, so don’t get very thick wicks. You’ll find instructions on your candle molds about which types of wicks you should use.
- Fragrance: This is optional. You can get fragrances if you want to make fragrant candles. I would suggest you use natural oils because some oils are flammable, and you don’t want your candle-making experience to turn into an accident.
- Colors: This is also optional. You only need colors if you want to make colored candles. I prefer colored candles over plain ones, so I always mix up some in many candle batches. You’ll find a complete set of candle wax colors online or in stores. I like mixing multiple colors to create my shade; you can use this trick too.
- Skewers or Chopsticks: To secure wicks after pouring the wax
- Double boiler: To melt the wax.
- Heat Proof container and spatula: A pot to melt the wax and the spatula to mix it.
- Non-stick cooking spray or release spray: To coat the molds
You can also decide to purchase a candle-making kit that will have everything you need.

Let’s Make A Candle From Scratch: A Step-By-Step Process
Now that you have all the ingredients you need to make candles, let’s go ahead and see the process of making them.
Step One: Measuring And Melt The Wax
Start the procedure by measuring the wax first. But as I said before, choose a clean surface and cover it with newspapers to avoid damaging it.
Measure the amount of wax you need to fill the container and double the amount. Transfer the wax to the double boiler and let it melt completely. Use the spatula to stir frequently to ensure there are no lumps. It should take approximately 10 to 15 minutes, but the time may vary depending on the quantity.
Step Two: Add The Fragrance Oils And Colors (If You Are Using One)
Once the candle melts completely, add the fragrance oils to it. Read the instructions on your wax package to know how much you should use. But you can adjust the quantity based on how strong you like the fragrance (but don’t go overboard as it will create more soot or flame). Stir the wax for a few seconds to let the scent get mixed nicely.
Similarly, add a few drops of colors to the melted wax and stir nicely to mix the color well.
Step Three: Prepare The Molds & Attach The Wick
Your wax is ready, so it’s time to prepare the molds. Coat your candle molds with a non-stick cooking spray or a release spray. Now you have to attach the wick to the bottom of the mold. This needs to be done before pouring the wax.
Dip the wick tail in the melted wax to attach the wick to the bottom of the mold or candle jar. You can also use a nice glue to stick the wick.
Step Four: Secure The Wick
You can use a skewer to tie it with the wick so that the wick does not move while you pour the wax. Or sandwich the wick between two chopsticks and put the sticks on top of the mold. This will ensure that the wick does not sway when the wax settles in.
You can avoid this step by making tiny candles such as tealights.
Step Five: Time To Pour The Wax
You have completed all the necessary steps; now it’s time to pour the wax into the molds or the candle jar. Check the wax temperature; it should be around 140 to 150 degrees Fahrenheit. If it’s hotter than that, let it sit for a while. If the wax starts settling while you prepare the wicks and the mold, you can quickly microwave it for about 30 seconds.
Now slowly pour the wax into the mold and hold the wick with one hand. Don’t pull the wick; just hold it lightly to not let it move. Keep some melted wax to top it off later.
Step Six: Finish Off By Pouring The Remaining Wax
Most of the time, the candle tops have holes and cracks when they are set. To soften the top, reheat the remaining wax and pour it over again. Let it set again. Your wick should be no longer than half-inch, so trim the excess.
Those who are making candles in jars can use them as they are. If you have used a silicone candle mold, gently pull your candle out from it. Pulling the candle out can be tricky; therefore, you should not rush the process. If the candle isn’t settled well, it can crack. So let the candle harden for at least 24 hours before removing it from the molds or burning it.
If you have not skipped using the spray, you should be able to take the candle out without facing any issues. You must tap on the bottom lightly and gently pull the candle by tugging the chopsticks you used to settle in the wick.
If this does not work, place the molds in hot water for a few seconds. It will slightly melt the candle to let the mold slip out. But don’t keep the molds in hot water for too long; otherwise, the wax will over melt.
Pro tip: If you want your candle to have a more aesthetic look, you can add some flower petals or leaves to it. All you have to do is dry out a few petals and leaves, stick them to the candle jar using candle wax, and let them dry. If you use a mold, you can add some petals to the candle wax after melting it.
Avoid These Mistakes While Making Candles
Now that you know the complete procedure of making candles, let’s discuss common mistakes and how to avoid them.
Holes, Air Pockets, And Cracks In The Candle
This is one of the most common issues new candle makers face. Cracks or holes appear in the candle due to water or moisture in the molds or jar. Air pockets or cracks may also appear if you pour the wax at an inappropriate temperature.
To avoid that, always dry the molds or jars entirely before pouring in the wax and check the temperature using a thermometer.
Putting Excessive Fragrant Oil
New candle makers think their candles will smell better if they pour essential oil. But that’s not the case. The ideal ratio is one ounce of essential oil per pound of wax.
If you pour more than the recommended amount, your candle will emit smoke and burn poorly.
Using Same Wicks For All Scents
Choosing the perfect wick size for different fragrances is essential. People avoid this and use the same type of wick for all fragrances. But the correct wick size can absorb the right amount of fragrance to make your candle smell good.
Therefore, you must pick the wick size according to your candle’s type and fragrance quantity.
Burning Candle Before It Sets Down Completely
You should wait until your candle solidifies to ensure no thermal energy at the bottom. Most wax seems to harden entirely within a few hours of pouring, but you need to give it at least 24 hours to solidify.
Also, when you let your wax set, the fragrance spreads evenly. Therefore, have patience before you burn your candle.
Color Changing Too Soon
It’s normal for candles to change colors or get dark after the wax starts curing (drying out). If you see that your candle is getting dark as soon as the wax cools down, it may be because you poured the wax when it was too hot. Hence, keep that in mind as well.
Is It Necessary To Trim Candle Wicks?
Yes, you should trim candle wicks to improve burn quality. Trimmed wicks provide illumination, while the untrimmed wick flames look pretty dull. Trimming the wicks is also essential to remove black residues from the wick.
If you don’t trim and keep burning the same wick, it’ll make your candle dirty. Moreover, longer wicks burn faster, meaning your candle will melt sooner. Therefore, if you want your candle to last longer, you should keep trimming the wicks.
But how often should you trim candle wicks? Ideally, you should trim candle wicks before every burn. Trim ¼ inch of your candle before burning to ensure you get brighter flames. Use a small pair of scissors or wick trimmer to cut the wick tops. After trimming, clean any residues that might settle on the candle.
Frequently Asked Questions
What Makes A Candle High Quality & Expensive?
Generally, scents are the most expensive and quality elements in a candle. They are sourced directly from the plants and even a small vial of these scents costs a lot. Moreover, the quality and price depend on the candle jars, burn time, and wick quality.
What Candle Wax Lasts The Longest?
Beeswax and soy wax are the two longest-lasting candle waxes. Beeswax lasts even longer than soy wax because it is harder than most other wax and requires a higher temperature to burn.
What Wax Is Best For Candles?
Natural wax types like beeswax or soy wax are the best. But they are a bit expensive compared to paraffin wax. If you are looking for a cheaper option, then paraffin wax will be the best for you.
How Can I Add Scent To Candles Without Using Essential Oils?
You can use other fragrances to make scented candles without using essential oils. Vanilla, lavender, olive oil, and tea leaves are some of the best alternatives to essential oils. You have to add the vanilla or lavender extracts after melting the wax and mix them nicely before pouring the wax into candle jars.
How Do You Make A Candle From Scratch Without Wax?
You can use vegetable shortening instead of wax to make your candles from scratch. Vegetable shortening is a type of solid fat. You have to melt the shortening and add candle dye and fragrance to it. And after securing the wick, pour the melted shortening into the candle jar, and your homemade candle will be ready.
How To Make A Candle Wick?
Take some cotton strings and cut them as per your candle jar size. Dip the cotton strings in melted wax, soak them for some time and take them out. Let the strings dry, and your quick candle wicks are ready to use.
Is It Cheaper To Make Your Own Candles?
Yes, it’s cheaper to make your candles than to buy them. The candle-making supplies won’t cost you a lot; you also save on manufacturing costs by making your candles.
Related: The Art of Soap Making: Homemade Soap Recipes With & Without Lye
Final Thoughts
Did you find this guide on making candles useful? Making your candles is fun and exciting. It’s also a great activity to kill time when you are bored. I love to play with colors and fragrances when I make mine. Do you also prefer scented candles, or do you like plain ones? Let me know in the comments.
For more DIY projects, check out How To Tie Dye Shirts With Food Coloring?