Art & Craft, DIY ideas and Tutorials – Craftbuds
  • About Us
  • Needlecraft
    • Crochet
    • Knitting
    • Quilting
    • Sewing
    • Embroidery
  • Cricut
  • Jewelry Making
  • Paper Craft
    • Origami
    • Drawing
  • Engraving
  • Collectibles
    • Numismatics
43K Followers
25K Followers
1K Subscribers
Subscribe
Art & Craft, DIY ideas and Tutorials – Craftbuds
  • About Us
  • Needlecraft
    • Crochet
    • Knitting
    • Quilting
    • Sewing
    • Embroidery
  • Cricut
  • Jewelry Making
  • Paper Craft
    • Origami
    • Drawing
  • Engraving
  • Collectibles
    • Numismatics
  • Craft
  • Origami
  • Paper Craft

How to Make a Cone Out of Paper – Photo & Video Tutorial

  • Sanoara
  • Posted: April 9, 2022 - Updated at: September 15, 2023
Total
2
Shares
0
0
2

Making a paper cone is a simple and easy task that can be completed in just a few minutes using common household materials. With a little folding and cutting, you can create a sturdy cone that can be used for all sorts of purposes, from holding snacks to decorating for a party. This tutorial is very simple and accessible for kids and beginners alike.

Check my other origami beginner tutorials :

  • How to Make a Kite Out of Paper?
  • How to Make a Boat Out of Paper?
  • How to Make a Heart Out of Paper?
  • How to Make Fidget Toys Out of Paper?
  • How to Make Flowers Out of Tissue Paper?
  • How to make dice out of paper?
  • How to make a spider out of paper?
  • How to make a puppet out of paper?
  • How to make a snowflake with paper?

Table of Contents

  • 1 How to Make a Cone Out of Paper?
  • 2 What can you do with paper cones?
  • 3 An alternative method to make a cone out of paper
  • 4 How do you make a cone out of paper with specific dimensions?

How to Make a Cone Out of Paper?

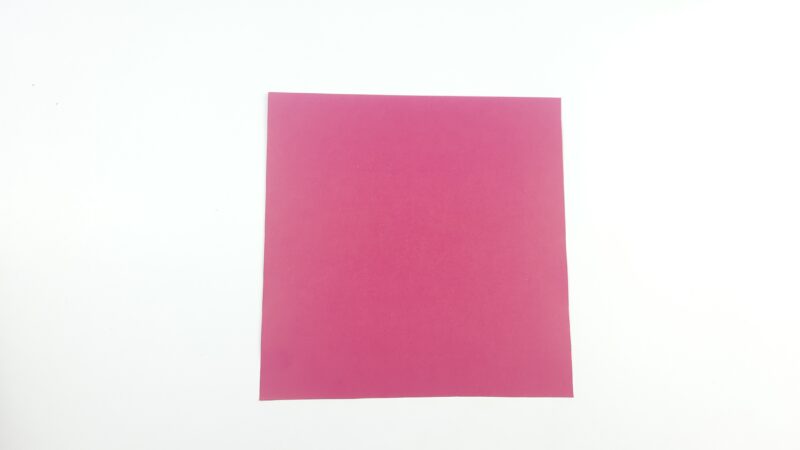
Step 1: Make sure your paper size is a squire.

How to make a cone out of paper Step 1

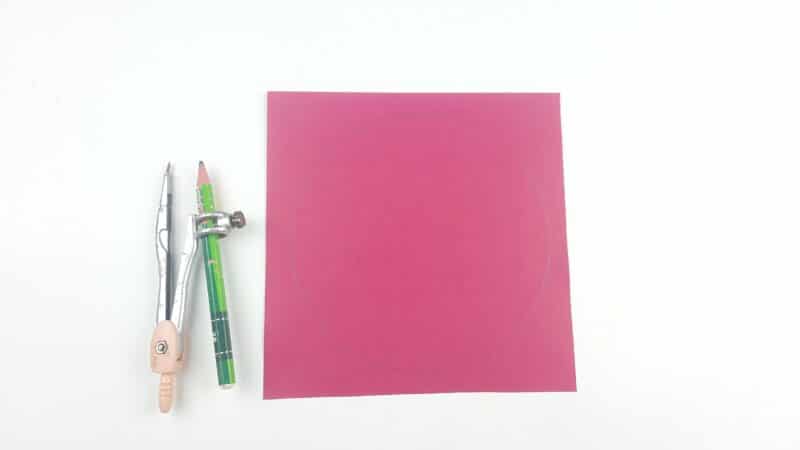
Step 2: Draw a 15cm (6 inches) circle diagram.

How to make a cone out of paper Step 2

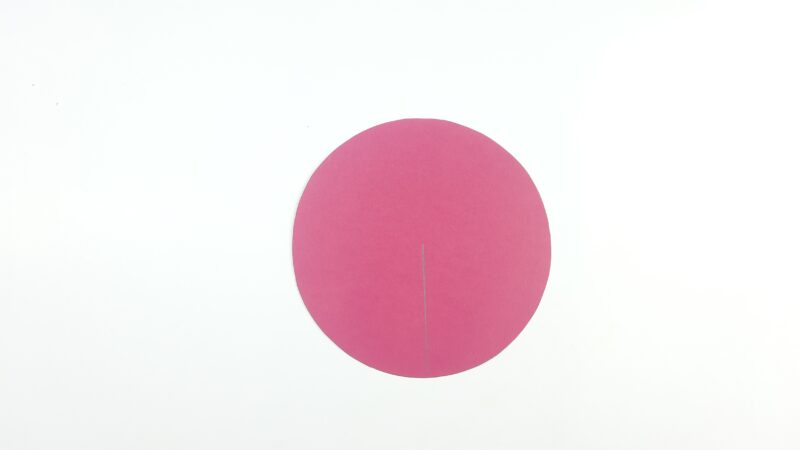
Step 3: Cut the circle.

How to make a cone out of paper Step 2

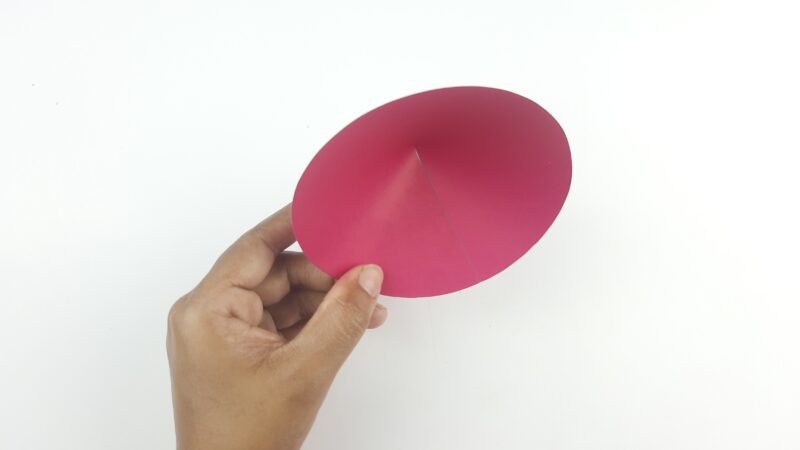
Step 4: Draw a line from the middle to the bottom.

How to make a cone out of paper Step 4

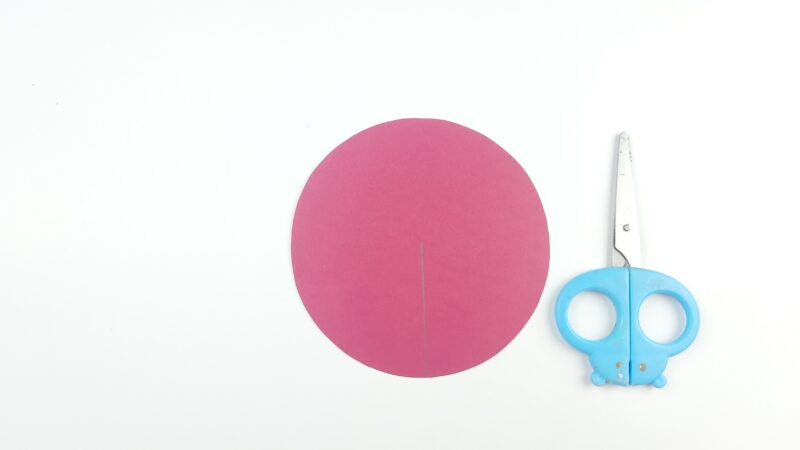
Step 5: Cut on the line.

How to make a cone out of paper Step 4

Step 6: Make a cone shape and apply glue.

How to make a cone out of paper step 6

Step 7: Finished!

How to make a cone out of paper step 7

What can you do with paper cones?

There are many things you can do with paper cones! Here are just a few ideas:

-Fill them with candy or other small treats for a fun party favor or holiday decoration.

-Use them as a simple and easy way to serve ice cream or other frozen desserts.

-Get creative and make a unique origami sculpture out of paper cones.

-Turn them into colorful bird feeders by filling them with birdseed and hanging them up in your yard.

Whatever you choose to do with them, paper cones are sure to add a touch of fun and excitement to any activity!

An alternative method to make a cone out of paper

1. Begin by folding your paper in half width-wise. Then, cut the paper along the fold. You should now have two rectangles of paper.

2. Take one rectangle and fold it in half length-wise. Cut along the fold. Unfold the paper, and you should now have a long strip.

3. Next, take one end of the strip and bring it to meet the other end, forming a loop. Tape the ends together to form a circle.

4. To form the sides of the cone, take the other rectangle of paper and cut it into a long strip, as you did in step 2. Starting at the taped seam of the base, begin wrapping the strip around, overlapping each layer as you go. Secure the end of the strip with tape.

5. Trim any excess paper from the top of the cone, and you’re done! You can now use your cone to hold whatever you like.

How do you make a cone out of paper with specific dimensions?

To make a paper cone with specific dimensions, start by folding the paper in half lengthwise. Then, cut the paper along the fold to create two long strips. Next, take one strip and measure out a triangle equal to the desired height and width of the cone. Cut out the triangle and roll it up into a cone shape. Tape or glue the edges together to secure them. Repeat this process with the other strip of paper to create a second cone. Finally, place the two cones together, matching up the edges, and tape or glue them together to form one larger cone.

Now you have a paper cone with specific dimensions that can be used for whatever you need! Whether you’re filling it with snacks or decorating, this easy-to-make cone will come in handy. So next time you need a cone, don’t reach for the store-bought kind – grab some paper and get to work!

Total
2
Shares
Share 0
Tweet 0
Pin it 2
Sanoara

I'm not just a crafter; I'm a storyteller who brings stories to life through the delicate art of paper folding. My passion for crafting goes beyond the ordinary—I specialize in DIY Origami and paper crafts. What I do isn't just a personal hobby; it's a full-fledged enterprise designed to empower and inspire others to discover the infinite possibilities that lie in a simple square of paper.

Previous Article
How to thread an embroidery needle
  • Craft
  • Embroidery
  • Needlecraft

How to Thread an Embroidery Needle – Video & Photo Tutorial

  • Lindsay
  • Posted: April 9, 2022 - Updated at: September 17, 2023
View Post
Next Article
How to make a sink skirt
  • Craft
  • DIY projects
  • Sewing

How to Make a Sink Skirt – Step By Step Tutorial

  • Mary
  • Posted: April 10, 2022
View Post
You May Also Like
View Post
  • DIY projects
  • Home

nPhoto – Professional Photo Printing Services for Photographers: Develop Your Brand with Us!

  • Jeremie Berton
  • Posted: January 14, 2025
View Post
  • Craft
  • Outdoor

5 Great Destinations in Costa Rica for Your Next Crafting Retreat

  • Craftbuds Editorial Team
  • Posted: December 16, 2024
Why-Professional-Locksmiths-Are-Essential-for-Home-Security
View Post
  • Home

Avoiding DIY Disasters: Why Professional Locksmiths Are Essential for Home Security

  • Jeremie Berton
  • Posted: April 3, 2024
Putting Together a Wooden Nativity Set for the Holidays
View Post
  • Craft
  • DIY projects
  • Home
  • Outdoor

Putting Together a Wooden Nativity Set for the Holidays

  • Sheila Mae Pedregosa
  • Posted: February 7, 2024
How is AI Impacting Crafting
View Post
  • Craft
  • Tools & Supplies

How is AI Impacting Crafting

  • Craftbuds Editorial Team
  • Posted: December 5, 2023 - Updated at: December 7, 2023
How Funny Phrases on Shirts Have Transformed
View Post
  • Craft

The Evolution of Humor: How Funny Phrases on Shirts Have Transformed 

  • Craftbuds Editorial Team
  • Posted: October 23, 2023 - Updated at: October 24, 2023
Craft Organizers for Efficient Storage Use
View Post
  • Craft
  • DIY projects

DIY Craft Organizers for Efficient Storage Use

  • Craftbuds Editorial Team
  • Posted: October 23, 2023 - Updated at: October 25, 2023
make-christmas-more-special-for-your-loved-ones
View Post
  • Craft

5 Ways to Make This Christmas More Special For Your Loved Ones!

  • Craftbuds Editorial Team
  • Posted: September 28, 2023
1 comment
  1. Pingback: How to Make a Sphere out of Paper? Video & Photo Tutorial - Craftbuds

Leave a Reply

Your email address will not be published. Required fields are marked *

Subscribe

Subscribe now to our newsletter

Art & Craft, DIY ideas and Tutorials – Craftbuds
  • About Us
  • Editorial Guidelines
  • Our Experts
  • Privacy Policy
  • Contact Us
Find fun and creative craft ideas and tutorials across various categories such as Knitting, Quilting, Sewing, PaperCraft, Jewelry Making and much more

Input your search keywords and press Enter.