Welcome to this comprehensive guide on crocheting a square, a foundational skill in the captivating world of crochet! Whether you’re a complete beginner looking to dip your toes into this timeless craft or a seasoned crocheter keen to refresh your basics, you’ve come to the right place. Squares are not just simple geometric shapes but the building blocks for various projects—from cozy blankets and stylish bags to intricate patchwork.
What makes this guide even more special? I’ve included a step-by-step video tutorial to ensure you can follow along in real time, mastering each loop and stitch as you go. So grab your crochet hook and some yarn; we’re about to embark on a creative journey that will teach you the ins and outs of crocheting a square and open doors to endless possibilities in the craft of crochet.
Table of Contents
- 1 Recommended Materials
- 2 Abbreviations:
- 3 Crochet A Square Step-by-Step Instructions
- 3.1 Round 1
- 3.2 Round 2
- 3.2.1 Chain 3 (CH 3)
- 3.2.2 Double crochet 1 (DC 1)
- 3.2.3 Double crochet 2 into the chain space (DC 2 in CH SP)
- 3.2.4 Chain 2 (CH 2)
- 3.2.5 Double crochet 2 into the chain space (DC 2 in CH SP)
- 3.2.6 Double crochet 3 (DC 3)
- 3.2.7 Double crochet 1 (DC 1)
- 3.2.8 Slip stitch into the top of your beginning 3 chains
- 3.3 Round 3
- 3.4 Round 4
- 3.5 Chain 3 (CH 3)
- 3.6 More Crochet Tutorials
- 4 Where Can You Use A Crocheted Square?
Recommended Materials
- 5 mm crochet hook (Crochet Hook Size Chart)
- Scissors
- Tapestry needle
- (Optional) Stitch marker
Related: What Do You Need to Crochet?
Abbreviations:
- CH- Chain
- DC- Double crochet
- CH SP- Chain Space
- SL ST- Slip stitch
Related: 6 Best Beginner Crochet Kits in 2023
Crochet A Square Step-by-Step Instructions
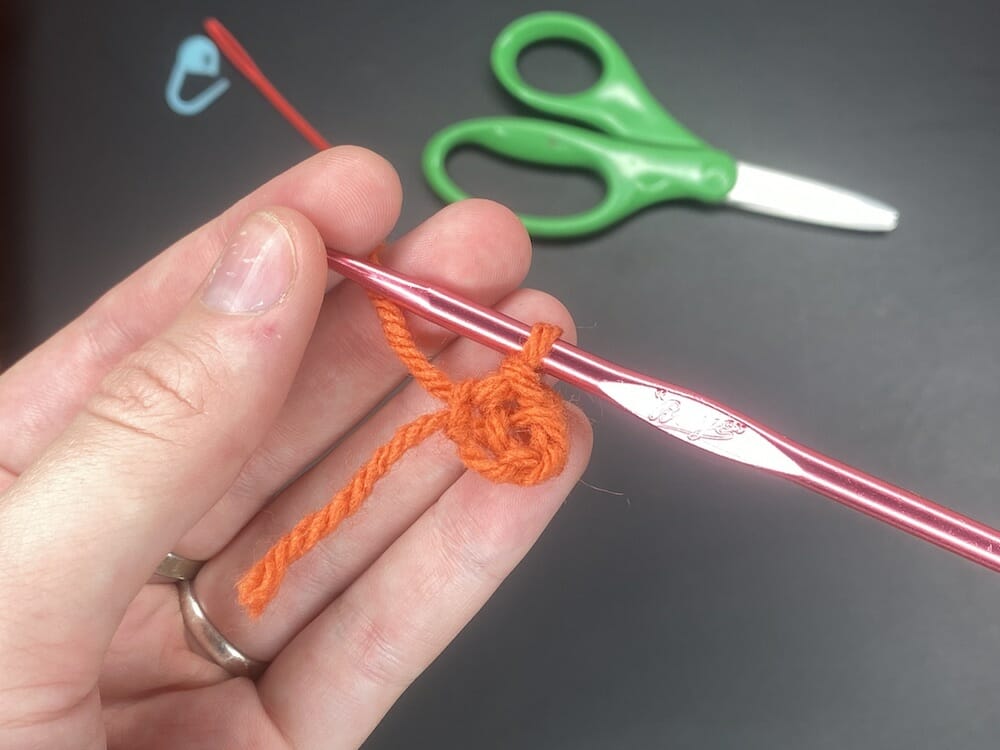
Round 1
Make a slipknot, chain 3, and slip stitch into the first stitch you created to make a ring
Chain 3 (CH 3)
Create 3 chains by yarning over and then pulling through the loop on your hook 3 times.
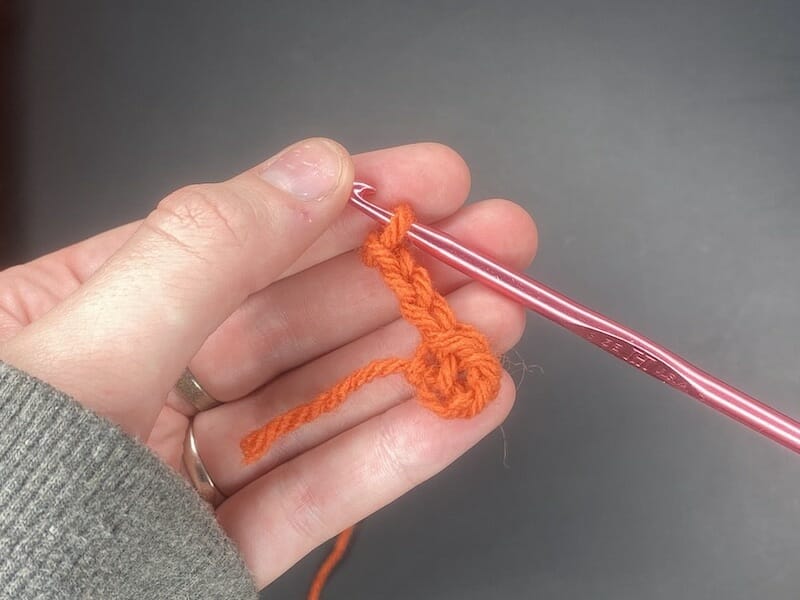
Double crochet 1 (DC 1)
Create a double crochet into the magic ring by yarning over, inserting your hook into the ring, yarning over again, pulling the yarn through the first 2 loops on the hook, yarning over again, and pulling through the last 2 loops on your hook.
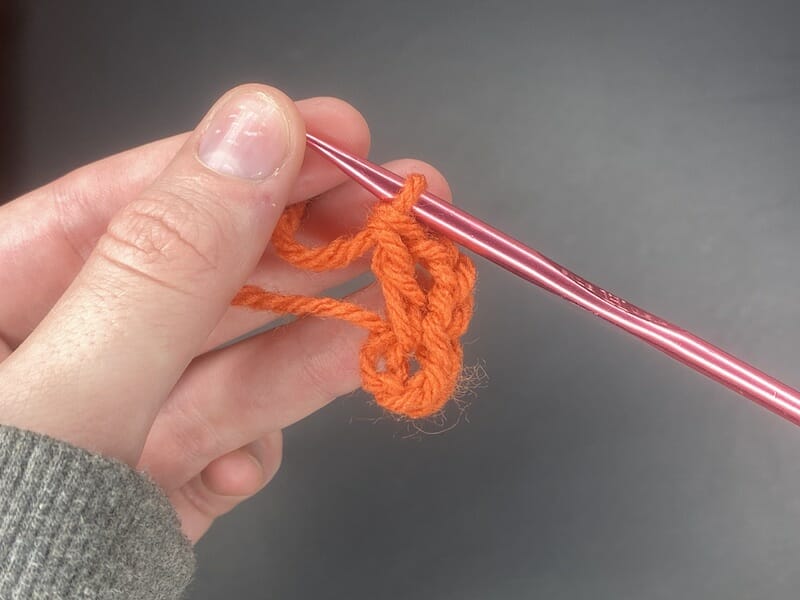
Chain 2 (CH 2)
Create 2 chains by yarning over and pulling through the loop on your hook 2 times.

Double crochet 3 (DC 3)
Double crochet 3 times into the ring by yarning over, inserting your hook into the ring, yarning over again, pulling the yarn through the first 2 loops on the hook, yarning over again, and then pulling through the last 2 loops on your hook, repeating this a total of 3 times.

Repeat the process of chaining 2 and double crocheting 3 times into the ring until you chained 2 for the fourth time. You should have your initial 3 chains and 1 double crochet, along with 3 groups of 3 double crochets, each separated by 2 chains.
Double crochet 1 (DC 1)
Double crochet once into the ring by yarning over, inserting your hook into the ring, yarning over again, pulling the yarn through the first 2 loops on the hook, yarning over again, and then pulling through the last 2 loops on your hook.

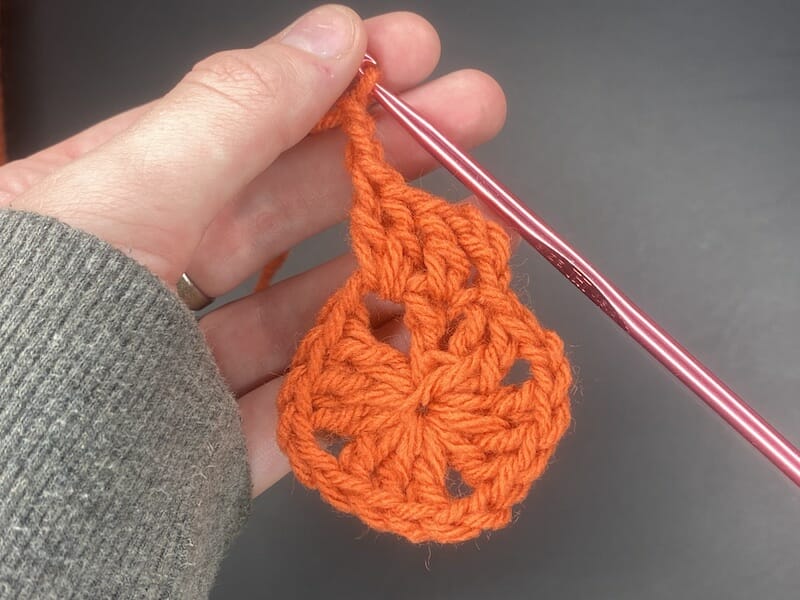
Slip stitch into the top of your beginning 3 chains
Insert your hook into the top stitch of the 3 chains you started out with and pull your yarn through that stitch and then through the one loop on your hook to connect your last double crochet to your chain
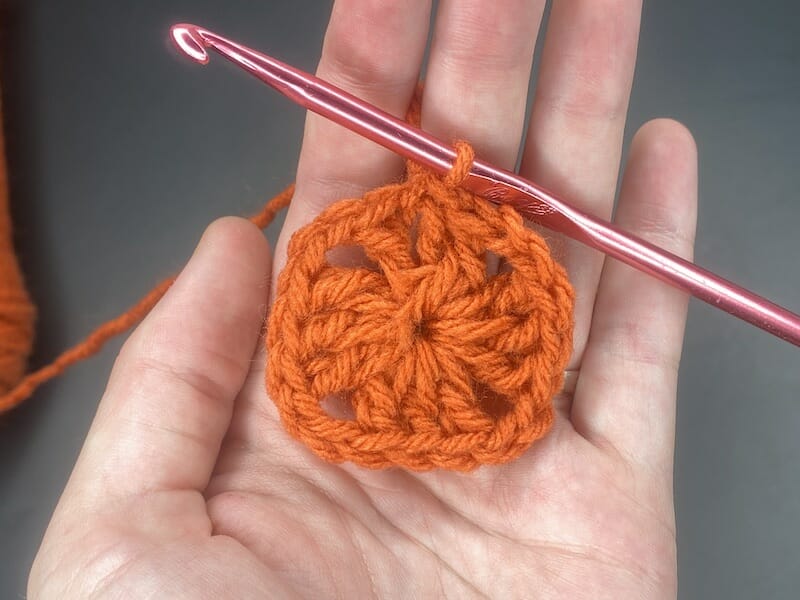
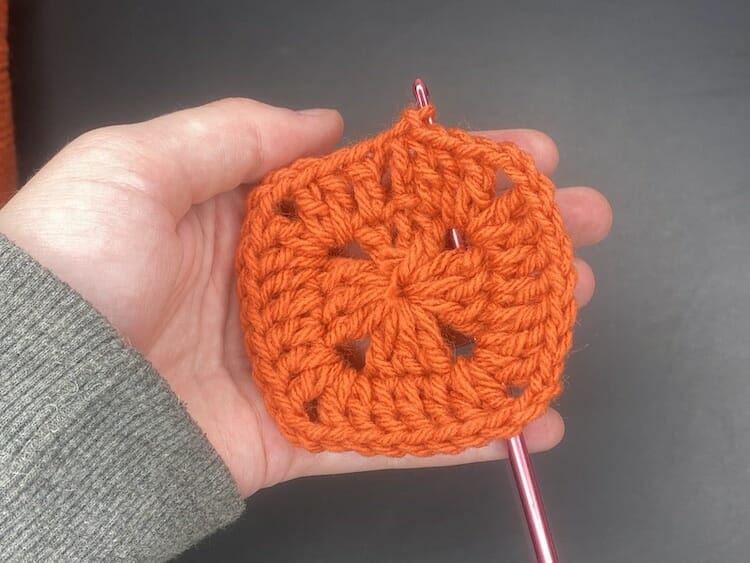
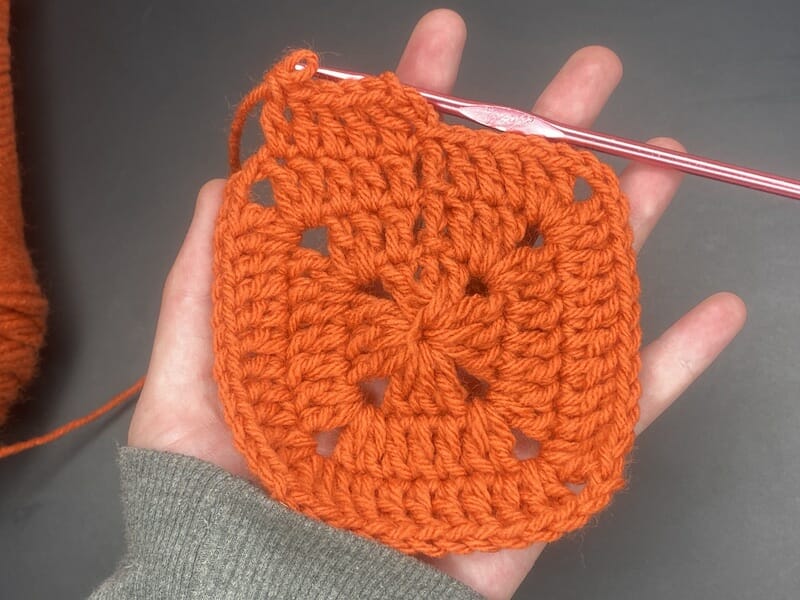
This is the end of your first round of stitches. You should see that your creation has begun to look like a small square, with the chain 2’s as corner spaces and the double crochets as the sides.
Round 2
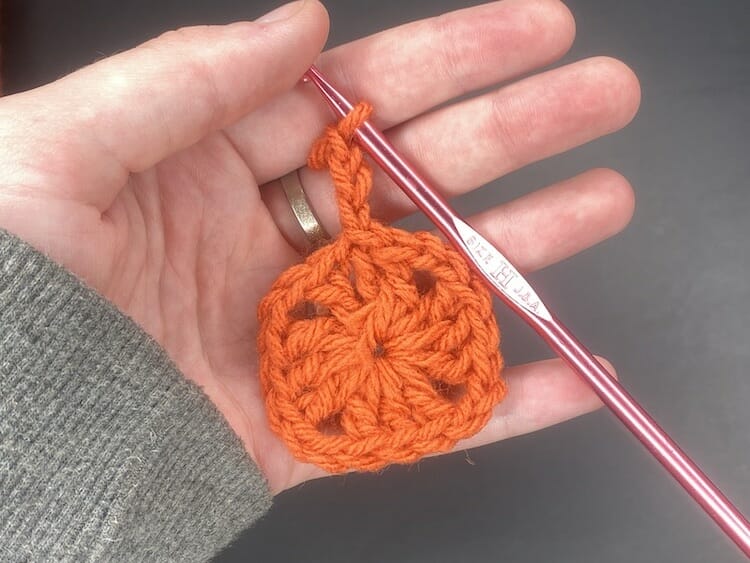
Chain 3 (CH 3)
Create 3 chains by yarning over and then pulling through the loop on your hook 3 times
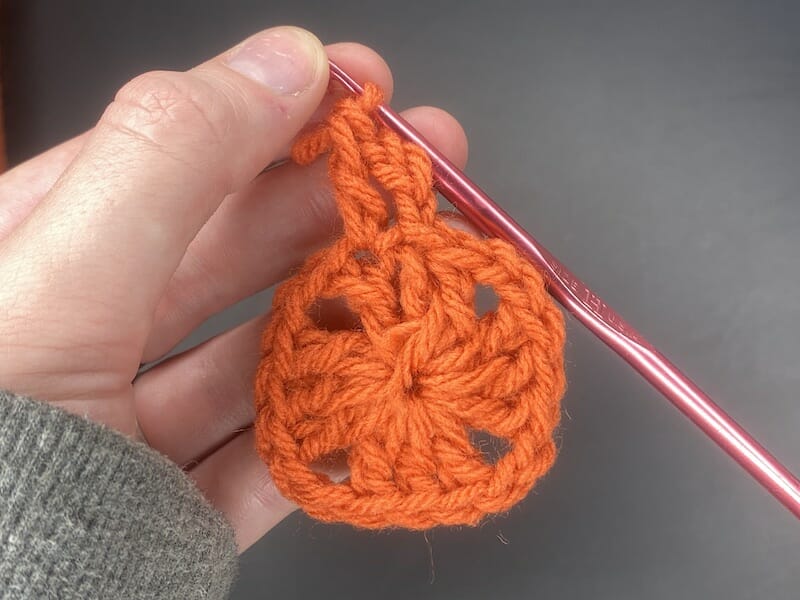
Double crochet 1 (DC 1)
Double crochet into the next stitch by yarning over, inserting your hook into the ring, yarning over again, pulling the yarn through the first 2 loops on the hook, yarning over again, and then pulling through the last 2 loops on your hook.
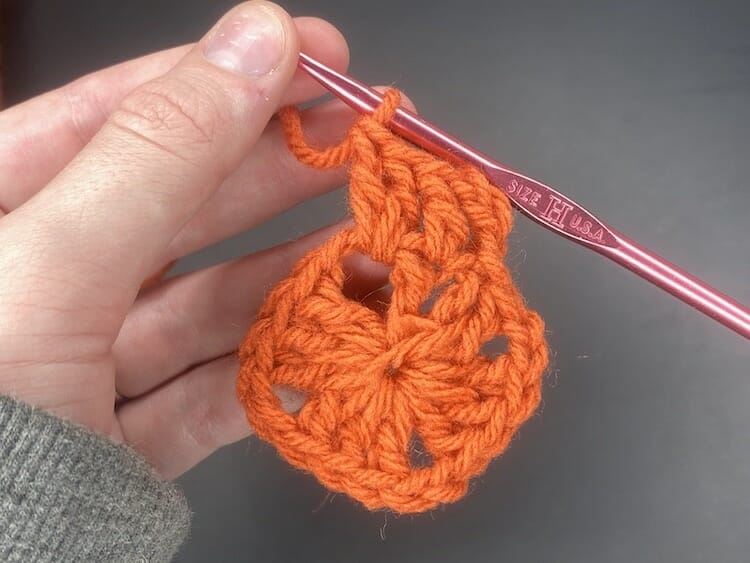
Double crochet 2 into the chain space (DC 2 in CH SP)
Into the chain space that you made in the last round, you are going to double crochet 2 times into that space by yarning over, inserting your hook into the ring, yarning over again, pulling the yarn through the first 2 loops on the hook, yarning over again, and then pulling through the last 2 loops on your hook, repeating this a total of 2 times.
Chain 2 (CH 2)
Create 2 chains by yarning over and then pulling through the loop on your hook 2 times.
Double crochet 2 into the chain space (DC 2 in CH SP)
Into the chain space that you made in the last round, you are going to double crochet 2 times into that space by yarning over, inserting your hook into the ring, yarning over again, pulling the yarn through the first 2 loops on the hook, yarning over again, and then pulling through the last 2 loops on your hook, repeating this a total of 2 times.
For the rest of the chain spaces that we will have, we are going to repeat the same stitches that we just did, which are, 2 double crochets, 2 chains, and then 2 more double crochets.
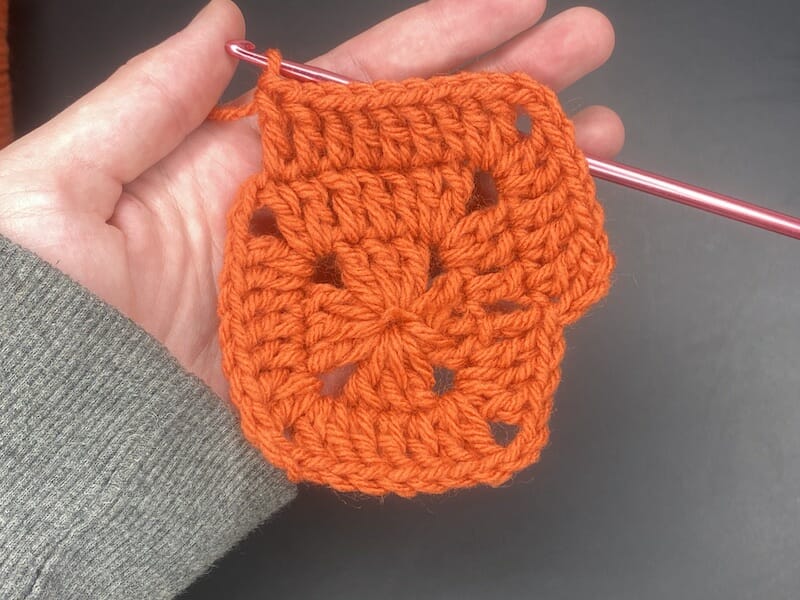
Double crochet 3 (DC 3)
Double crochet into the next 3 stitches by yarning over, inserting your hook into the stitch, yarning over again, pulling the yarn through the first 2 loops on the hook, yarning over again, and then pulling through the last 2 loops on your hook, repeating this a total of 3 times.
Repeat the process of following the pattern of crocheting 2 double crochets, chaining 2, and creating 2 more double crochets within the corner chain spaces, and double crocheting into the next 3 stitches until you have finished working the pattern into the fourth chain space. You should have 3 fully completed sides of your square, and one half finished side. You will begin the next step in the first stitch after you have put your final double crochet within the fourth chain space around your square.
Double crochet 1 (DC 1)
Double crochet once into the next stitch, inserting your hook into the ring, yarning over again, pulling the yarn through the first 2 loops on the hook, yarning over again, and then pulling through the last 2 loops on your hook.
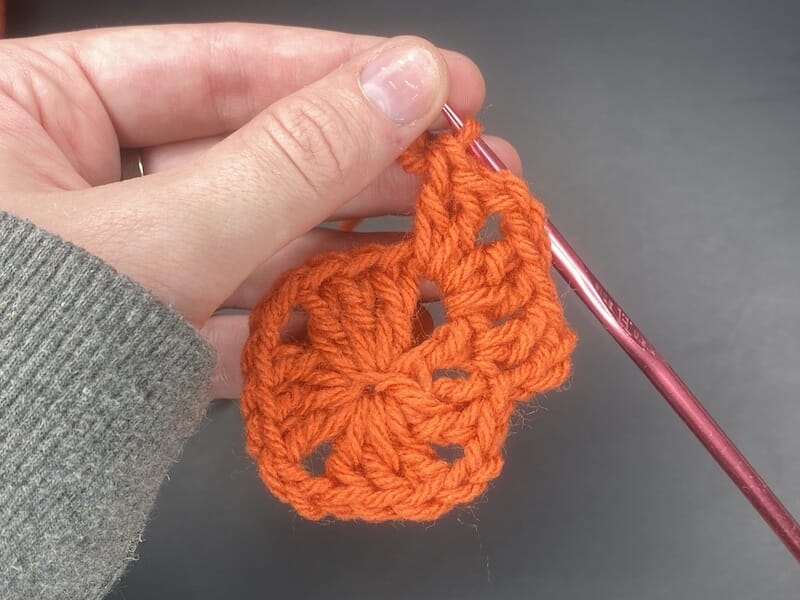
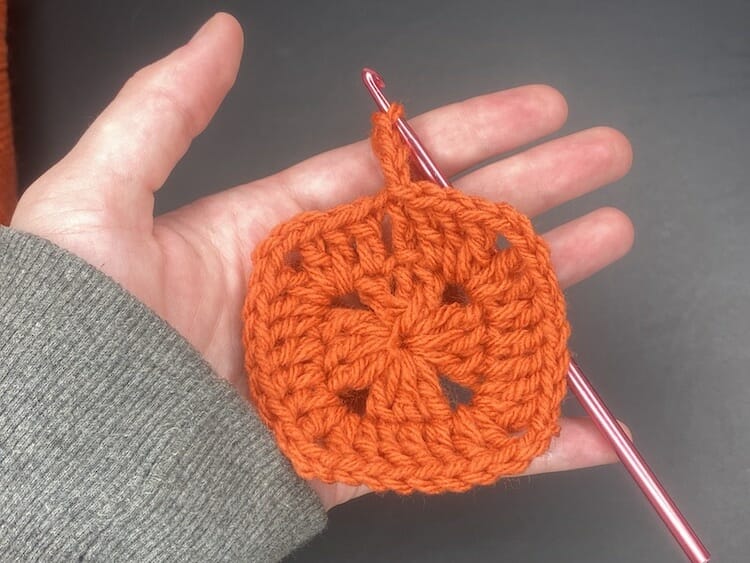
Slip stitch into the top of your beginning 3 chains
Insert your hook into the top stitch of the 3 chains you started out with and pull your yarn through that stitch and then through the one loop on your hook to connect your last double crochet to your chain.
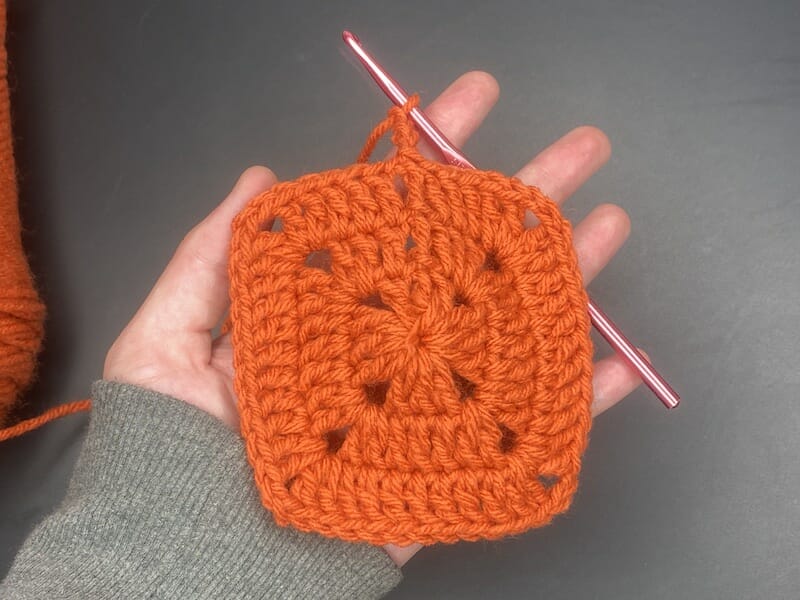
You have now finished your second round of stitches.
Round 3
Chain 3 (CH 3)
Create 3 chains by yarning over and then pulling through the loop on your hook 3 times
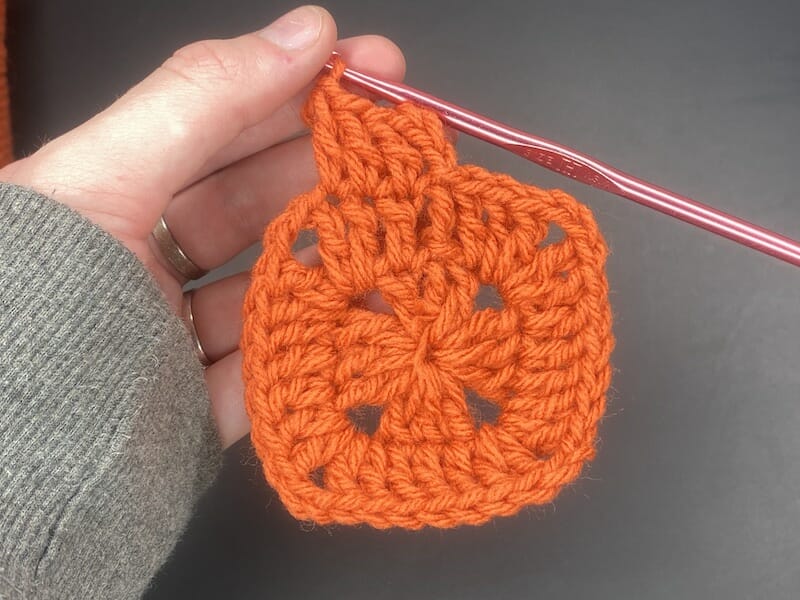
Double crochet 3 (DC 3)
Double crochet into the next 3 stitches by yarning over, inserting your hook into the stitch, yarning over again, pulling the yarn through the first 2 loops on the hook, yarning over again, and then pulling through the last 2 loops on your hook, repeating this a total of 3 times.
Double crochet 2 into the chain space, chain 2, and then double crochet 2 more times (DC 2 in CH SP, CH 2, DC 2 in CH SP)
Into the chain space that you made in the last round, you are going to double crochet 2 times into that space by yarning over, inserting your hook into the ring, yarning over again, pulling the yarn through the first 2 loops on the hook, yarning over again, and then pulling through the last 2 loops on your hook, repeating this a total of 2 times. Then, you are going to chain 2 by yarning over and pulling through the loop on your hook 2 times. To finish working into the chain space, you are going to create another 2 double crochets, following the instructions from before.
Double crochet 7 (DC 7)
Double crochet into the next 7 stitches by yarning over, inserting your hook into the stitch, yarning over again, pulling the yarn through the first 2 loops on the hook, yarning over again, and then pulling through the last 2 loops on your hook, repeating this a total of 7 times.
Repeat the process of following the pattern of crocheting 2 double crochets, chaining 2, and creating 2 more double crochets within the corner chain spaces, and double crocheting into the next 7 stitches until you have finished working the pattern into the fourth chain space. You should have 3 fully completed sides of your square, and one half finished side. You will begin the next step in the first stitch after you have put your final double crochet within the fourth chain space around your square.
Double crochet 3 (DC 3)
Double crochet into the next 3 stitches by yarning over, inserting your hook into the stitch, yarning over again, pulling the yarn through the first 2 loops on the hook, yarning over again, and then pulling through the last 2 loops on your hook, repeating this a total of 3 times.

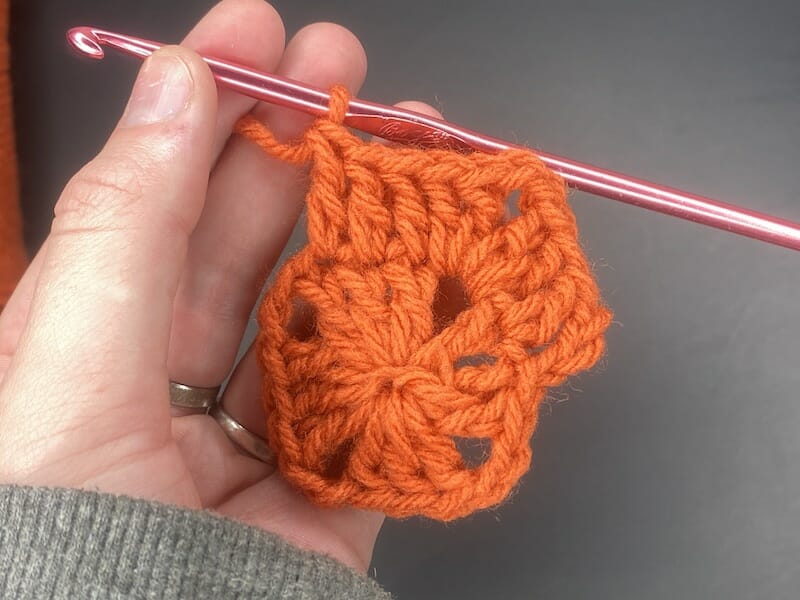
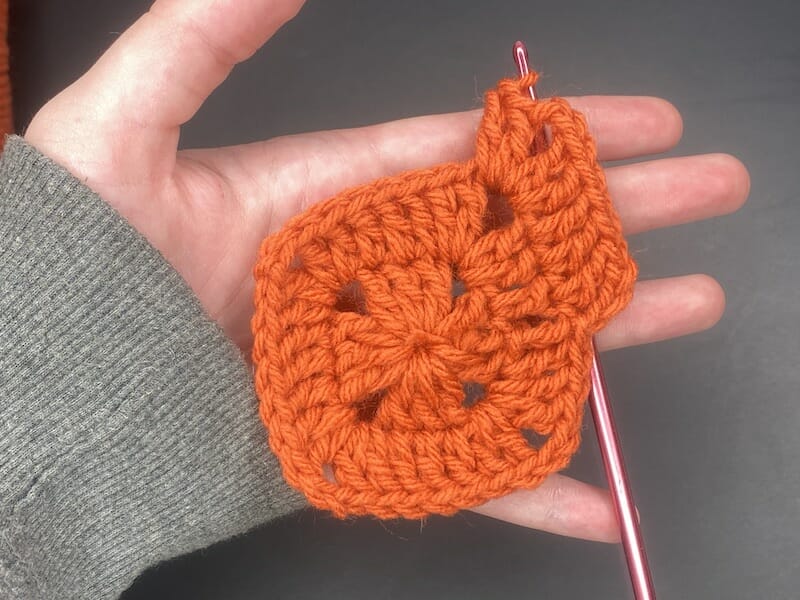
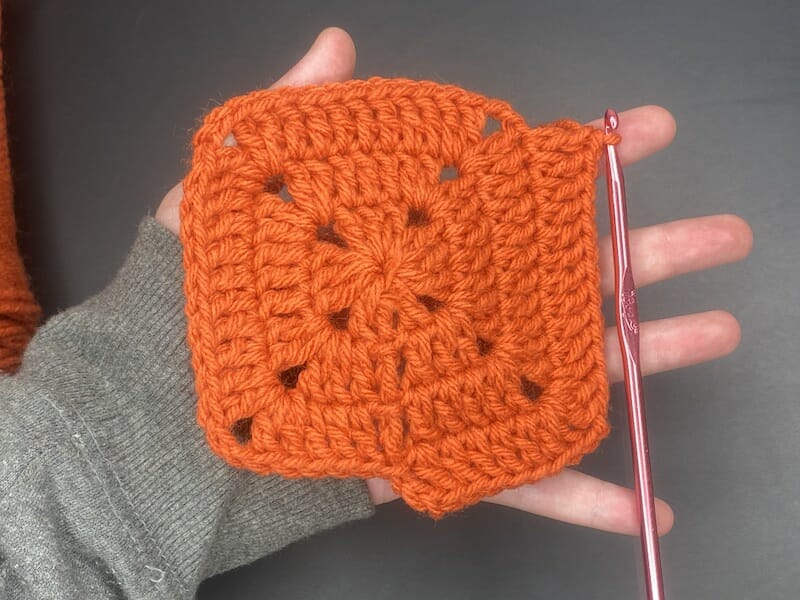
Slip stitch into the top of your beginning 3 chains
Insert your hook into the top stitch of the 3 chains you started out with and pull your yarn through that stitch and then through the one loop on your hook to connect your last double crochet to your chain.
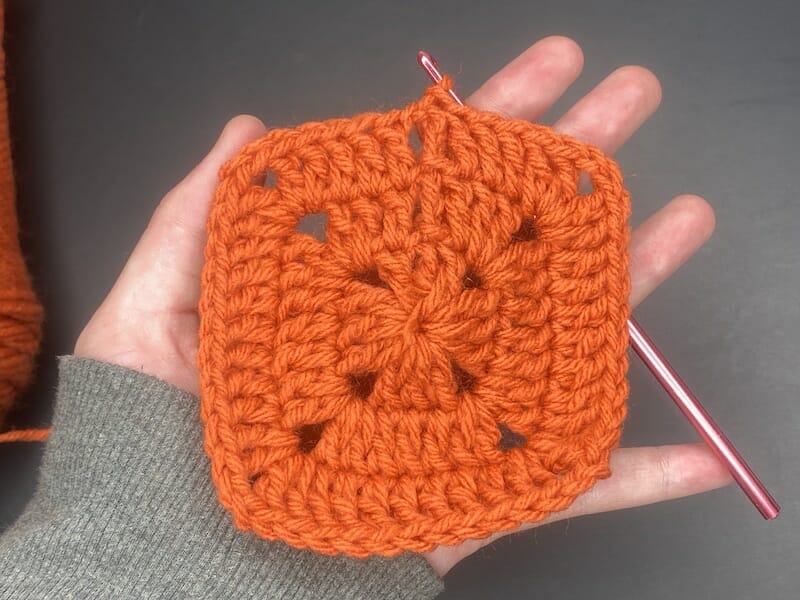
You have now finished your third round of stitches. We will now move on to the final round of stitches.
Round 4
Chain 3 (CH 3)
Create 3 chains by yarning over and then pulling through the loop on your hook 3 times.
Double crochet 5 (DC 5)
Double crochet into the next 3 stitches by yarning over, inserting your hook into the stitch, yarning over again, pulling the yarn through the first 2 loops on the hook, yarning over again, and then pulling through the last 2 loops on your hook, repeating this a total of 5 times
Double crochet 2 into the chain space, chain 2, and then double crochet 2 more times (DC 2 in CH SP, CH 2, DC 2 in CH SP)
Into the chain space that you made in the last round, you are going to double crochet 2 times into that space by yarning over, inserting your hook into the ring, yarning over again, pulling the yarn through the first 2 loops on the hook, yarning over again, and then pulling through the last 2 loops on your hook, repeating this a total of 2 times. Then, you are going to chain 2 by yarning over and pulling through the loop on your hook 2 times. To finish working into the chain space, you are going to create another 2 double crochets, following the instructions from before.

Double crochet 11 (DC 11)
Double crochet into the next 7 stitches by yarning over, inserting your hook into the stitch, yarning over again, pulling the yarn through the first 2 loops on the hook, yarning over again, and then pulling through the last 2 loops on your hook, repeating this a total of 11 times
Repeat the process of following the pattern of crocheting 2 double crochets, chaining 2, and creating 2 more double crochets within the corner chain spaces, and double crocheting into the next 11 stitches until you have finished working the pattern into the fourth chain space. You should have 3 fully completed sides of your square, and one half finished side. You will begin the next step in the first stitch after you have put your final double crochet within the fourth chain space around your square.
Double crochet 5 (DC 5)
Double crochet into the next 3 stitches by yarning over, inserting your hook into the stitch, yarning over again, pulling the yarn through the first 2 loops on the hook, yarning over again, and then pulling through the last 2 loops on your hook, repeating this a total of 5 times.

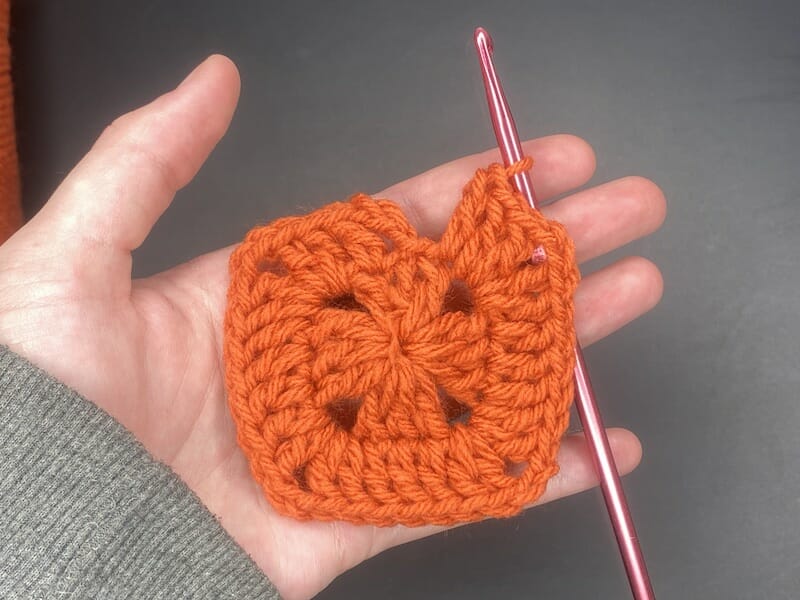
Slip stitch into the top of your beginning 3 chains
Insert your hook into the top stitch of the 3 chains you started out with and pull your yarn through that stitch and then through the one loop on your hook to connect your last double crochet to your chain.
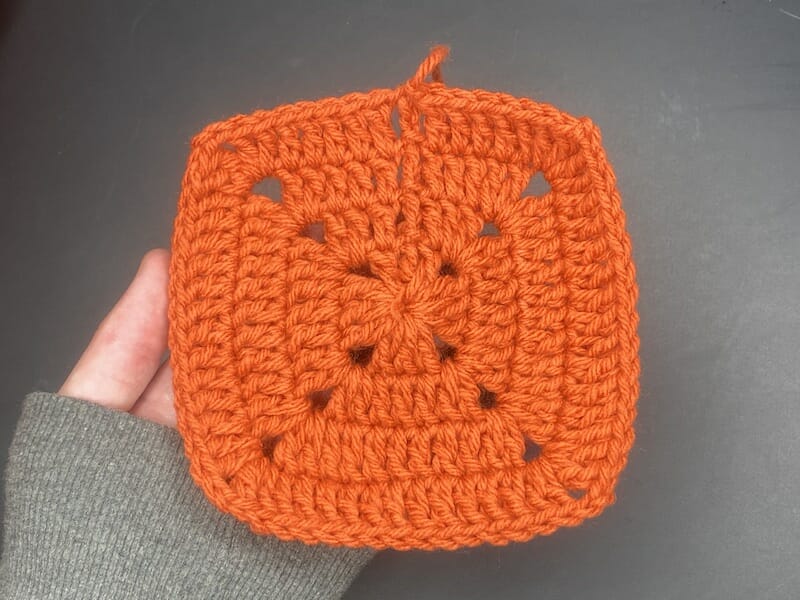
Fasten off your yarn by cutting a tail and then pulling the yarn through the loop on your hook, pull tightly to secure.
Weave in your ends with a tapestry needle.
You have completed your square!
More Crochet Tutorials
- How to Crochet a Basic Beanie Hat
- How to Crochet a Tube Top
- How to Crochet a Heart
- How to Crochet a Granny Square
- How to Crochet a Scarf
- How to Crochet a Tube Top
- How to Change Colors in Crochet
- How to Crochet a Triangle
Where Can You Use A Crocheted Square?
Knowing how to crochet a square is a versatile skill that opens the door to numerous creative projects. Here are some ideas:
Home Décor
- Granny Square Blanket: One of the most popular projects, you can make an entire blanket out of crocheted squares in various colors and patterns.
- Pillow Covers: Crochet squares can be sewn together to create stylish, cozy pillow covers.
- Table Runners and Mats: Smaller squares can be combined to make decorative table runners or placemats.
- Wall Hanging: Create a unique piece of wall art by assembling squares in a design or pattern you choose.
Fashion Items
- Scarves and Wraps: Combine squares of different colors or yarn types to create unique, eye-catching scarves or wraps.
- Bags and Purses: Sew together squares to form the body of a crochet bag or purse.
- Sweaters and Cardigans: Some clothing patterns call for crocheted squares as building blocks.
Baby Items
- Baby Blankets: Smaller squares in soft, baby-friendly yarn can be used to make blankets.
- Stroller Covers: Keep your baby cozy with a hand-crafted stroller cover made of crochet squares.
Seasonal Items
- Christmas Stockings: Use festive colors to crochet squares that you can assemble into a holiday stocking.
- Easter Basket Covers: Add a personalized touch to your holiday celebrations.
Miscellaneous
- Pet Blankets: Smaller squares can be used to create blankets for your furry friends.
- Hot Pads and Coasters: Using heat-resistant yarn, you can make practical items for the kitchen.
- Tote Bags: Create reusable and stylish grocery bags.
- Laptop Sleeves: By using smaller, tighter stitches, you can make a more durable square for things like laptop sleeves or tablet covers.
Knowing how to crochet a square allows for immense project creativity and versatility. Once you’ve mastered the basics, the possibilities are virtually endless!