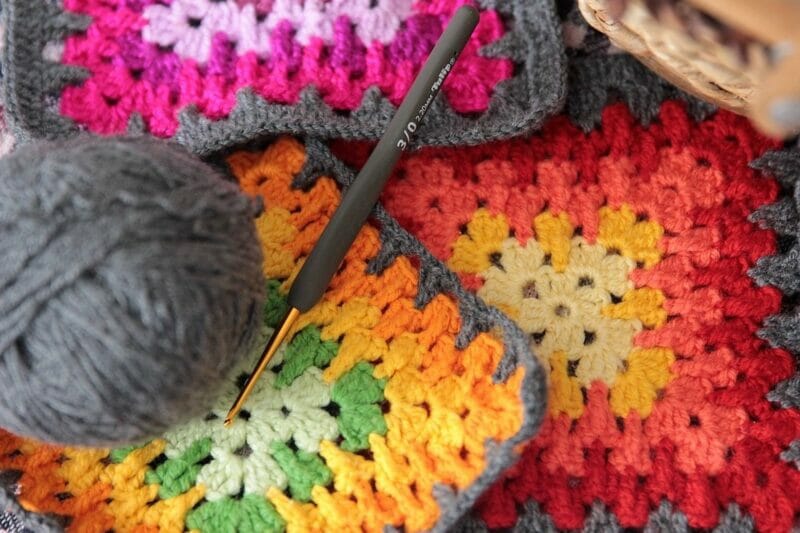
Want to learn how to crochet a granny square? Granny squares are small, crocheted, or knitted square designs that are traditionally used to create larger projects such as blankets, afghans, or other textile items. Each square is typically made individually and then joined together to form a larger fabric piece. Granny squares are known for their colorful and geometric patterns, and they have become a popular craft technique enjoyed by many people around the world.
The exact origin of granny squares is difficult to trace, as similar square motifs have been used in various cultures throughout history. However, the term “granny square” is believed to have emerged in the early 20th century. It is thought that the squares gained popularity as a way for grandmothers to use up leftover scraps of yarn to create functional and decorative items.
Granny squares became particularly prominent in the 1960s and 1970s during the heyday of the hippie movement and the rise of the “boho” or “bohemian” style. The squares were often used to make colorful, eclectic blankets and garments, reflecting the vibrant and free-spirited nature of the era. The popularity of granny squares continued through the decades, and they remain a beloved and versatile technique in the world of crochet and knitting.
Over time, various patterns and designs have emerged for granny squares, ranging from simple and basic to intricate and complex. Many crafters enjoy experimenting with different color combinations, stitches, and arrangements to create unique and personalized projects. Granny squares can be made using different materials, such as yarn or thread, and they can be worked with crochet hooks or knitting needles, depending on the preferred technique.
Table of Contents
- 1 Understanding The Basics of Crocheting
- 2 How to Crochet a Granny Square Step-By-Step
- 3 Crochet Granny Square Advanced Techniques for Intricate Designs
- 4 Blocking And Finishing Touches
- 5 Joining Granny Squares
- 6 Granny Square Troubleshooting and Common Mistakes
- 7 Care And Maintenance
- 8 How to Crochet a Granny Square Faqs
- 9 Conclusion
Understanding The Basics of Crocheting
Materials and tools needed to crochet a Granny Square
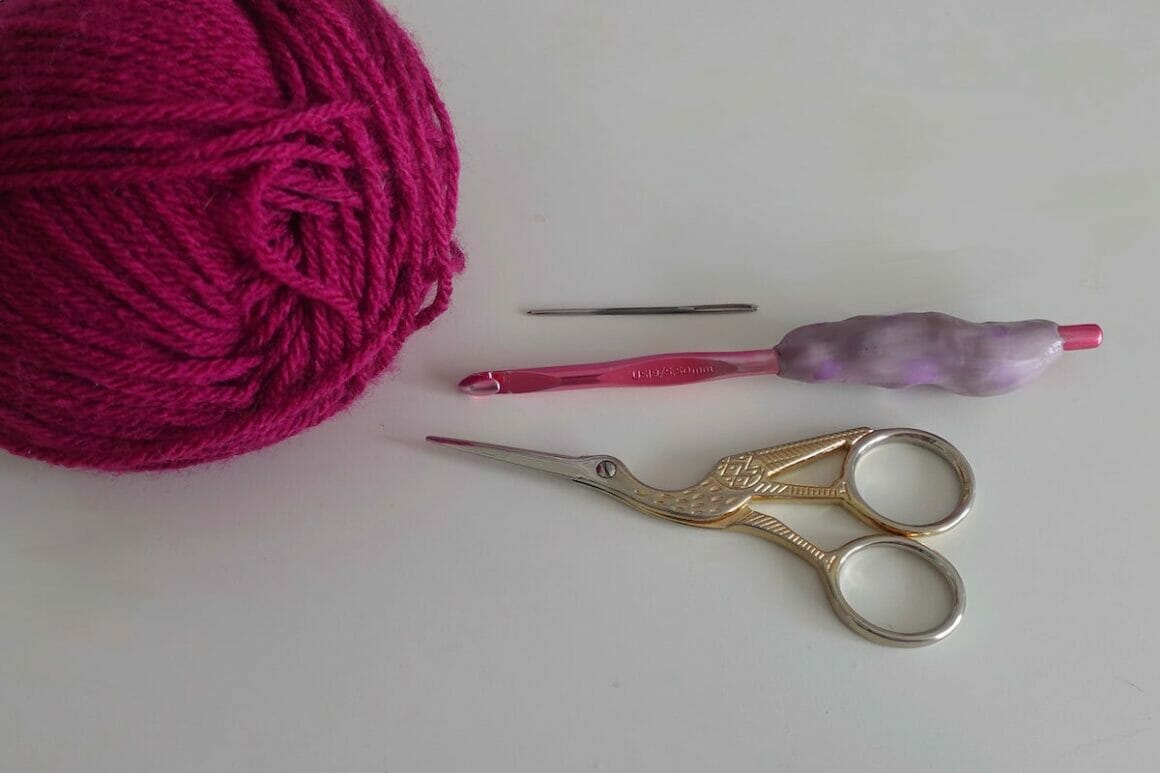
- Crochet hook. The hook size will depend on your yarn weight. I recommend a 5.5mm to start
- Yarn in your desired colors. I recommend: Loops & Threads: Impeccable in medium weight
- Scissors
- Yarn needle and threader (for weaving in ends)
Related: What do you need to crochet?
Common crochet stitches used in granny squares
Here are some common crochet stitches used in granny squares:
1. Chain stitch (CH)
The foundation stitch for most crochet projects, including granny squares. It creates a series of interconnected loops. Chain stitches are especially important on the corners of granny squares to give them sharp “square” edges.
2. Slip stitch (SL ST)
Used to join rounds or stitches together. It involves inserting the hook into a stitch or chain and pulling the yarn through both the stitch and the loop on the hook.
3. Single crochet (SC)
A basic stitch that creates a tight and dense fabric. It involves inserting the hook into a stitch, yarn over, pulling through, and then yarn over again and pulling through both loops on the hook.
4. Double crochet (DC)
A taller stitch that creates an open and lacy fabric. It involves yarn over, inserting hook into a stitch, yarn over and pull through, yarn over and pulling through two loops on the hook, and then yarn over and pulling through the remaining two loops. This stitch is the most common stitch in the basic granny square design.
5. Half double crochet (HDC)
Falls in between a single crochet and a double crochet in height. It involves yarn over, inserting the hook into a stitch, yarn over and pulling through, and yarn over and pulling through all three loops on the hook.
6. Treble crochet (TR)
A tall stitch that creates an even more open and lacy fabric than double crochet. It involves yarn over twice, inserting the hook into a stitch, yarn over and pulling through, yarn over and pulling through two loops on the hook, yarn over and pulling through two loops, and finally, yarn over and pulling through the last two loops.
These are just a few examples of common crochet stitches used in granny squares. You may also encounter other stitches depending on the desired pattern and design. Experimenting with different stitches can lead to unique and beautiful granny square designs.
Related: 27 Free Crochet Top Patterns, Tank top, Crop Top, Short & Long Sleeves & More…
How to Crochet a Granny Square Step-By-Step
Crocheting a basic granny square is a fun and relatively simple process. Here’s a step-by-step guide to get you started:
Start with a slip knot and chain 4. Slip stitch into the first chain, creating a ring.
Round 1
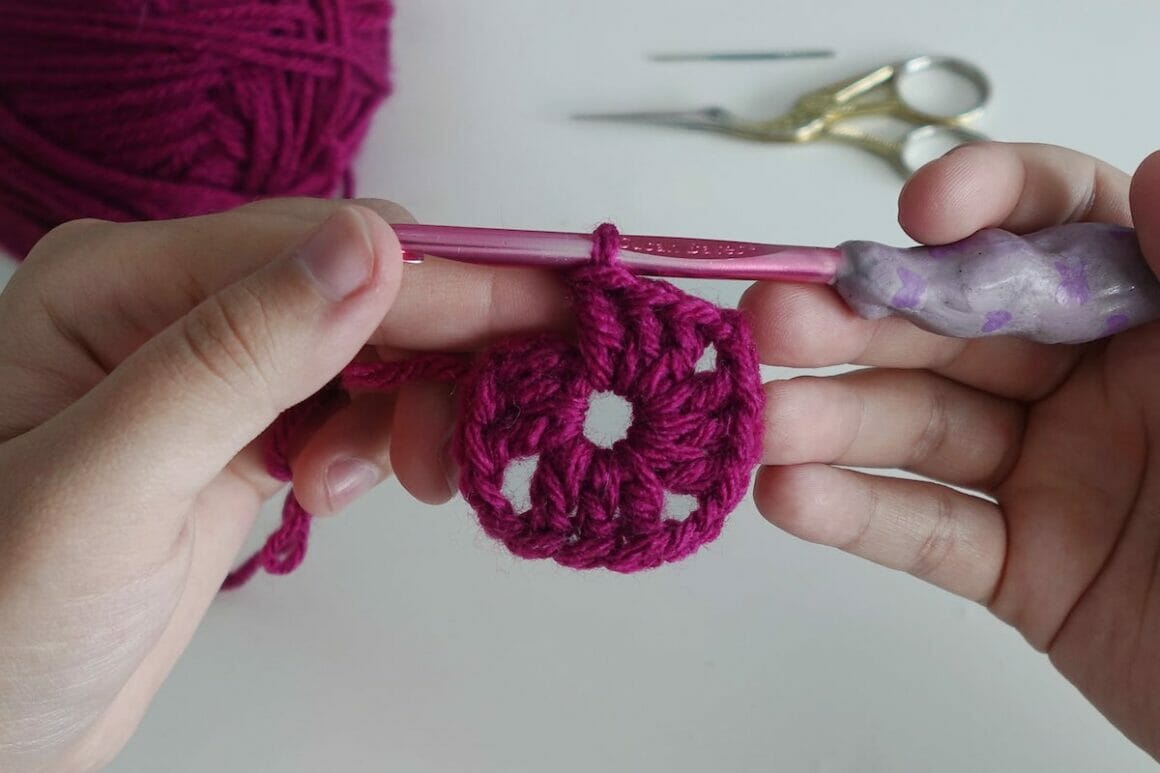
- Chain 3 (counts as your first double crochet stitch) and work 2 double crochet stitches into the center ring.
- Chain 2, and work 3 double crochet stitches into the center ring. Repeat two more times.
- Chain 2 and slip stitch into the top of the starting chain 3 to close the round. You should now have 4 groups of 3 double crochet stitches, with chain-2 spaces in between.
Round 2
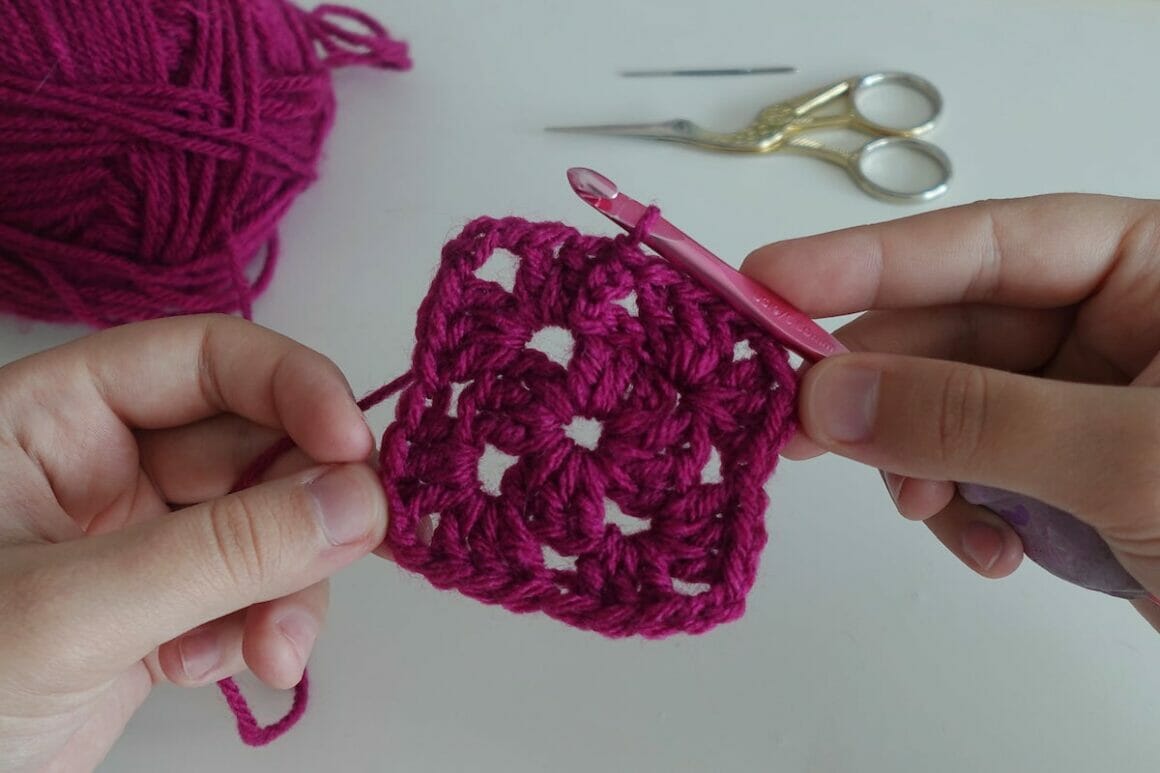
- Slip stitch into the next two stitches until you reach the first chain-2 space. In the chain-2 space, work the following: Chain 3, work 2 double crochet stitches, chain 2, and work 3 double crochet stitches. Repeat this pattern in each of the remaining three chain-2 spaces.
- Slip stitch into the top of the starting chain 3 to close the round.
Round 3
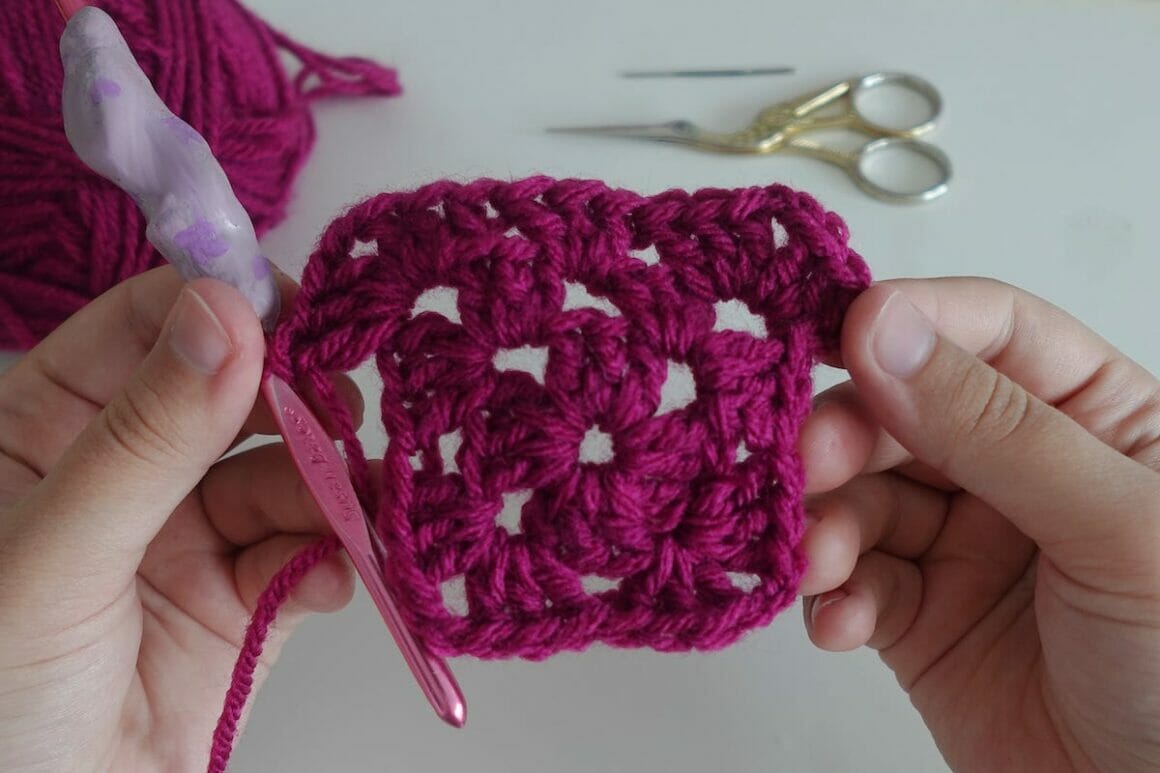
- Continue in the same manner as Round 2, with each round consisting of chain-3 corners separated by chain-2 spaces and clusters of 3 double crochet stitches in the middle of the previous row of clusters. Slip stitch to close each round.
- Repeat Round 3 and beyond. To make your square larger, repeat Round 3 until your granny square reaches the desired size. Remember to work the corners as 3 double crochet stitches, chain 2, and 3 double crochet stitches in each corner space.
Finish Off
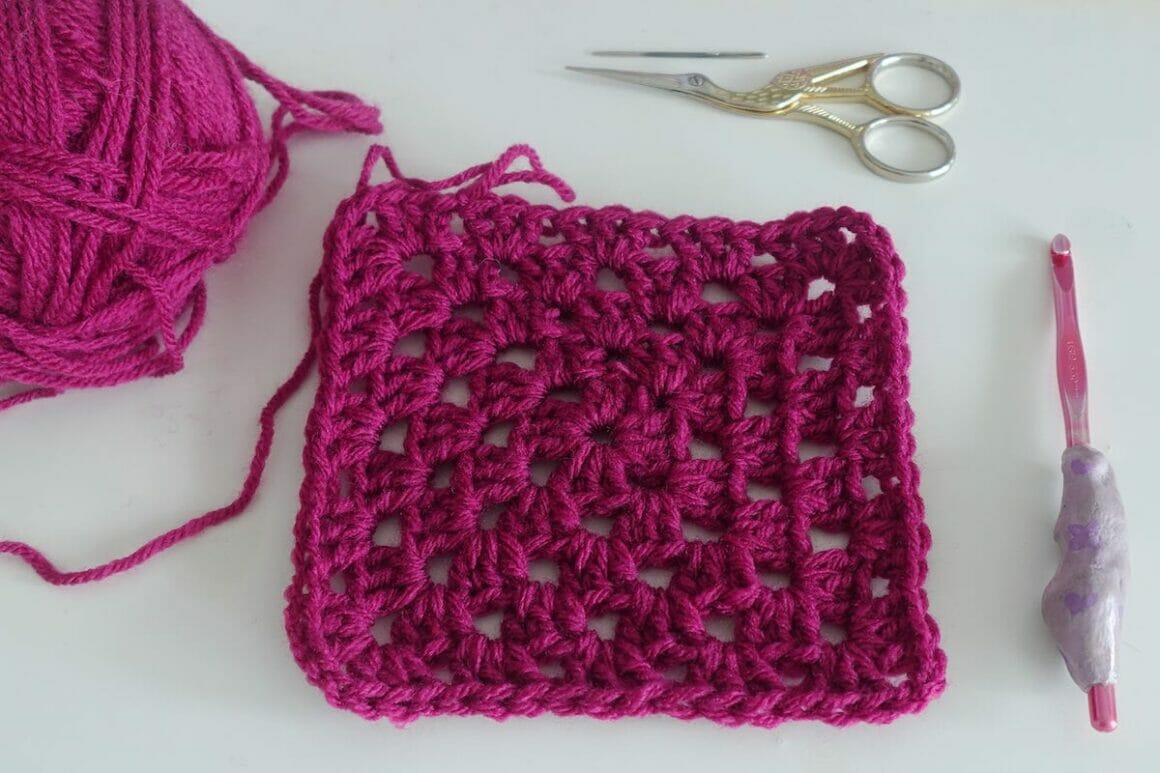
- When your granny square is the desired size, cut the yarn, leaving a long tail. Pull the tail through the last stitch to secure it. Use a yarn needle to weave in any loose ends on the back of your square.
By repeating these steps, you can create multiple granny squares and then join them together to make larger projects such as blankets or other items. Feel free to experiment with different color combinations and variations in stitch patterns to add your personal touch to your granny squares.
More Crochet Tutorials
- How to Crochet a Basic Beanie Hat
- How to Crochet a Tube Top
- How to Crochet a Heart
- How to Crochet a Granny Square
- How to Crochet a Scarf
- How to Crochet a Tube Top
- How to Change Colors in Crochet
- How to Crochet a Triangle
- Learn How to Crochet a Purse For Beginners
Crochet Granny Square Advanced Techniques for Intricate Designs
You can incorporate various techniques and stitches to add intricate designs to granny squares. Here are a few methods you can use:
1. Colorwork granny square
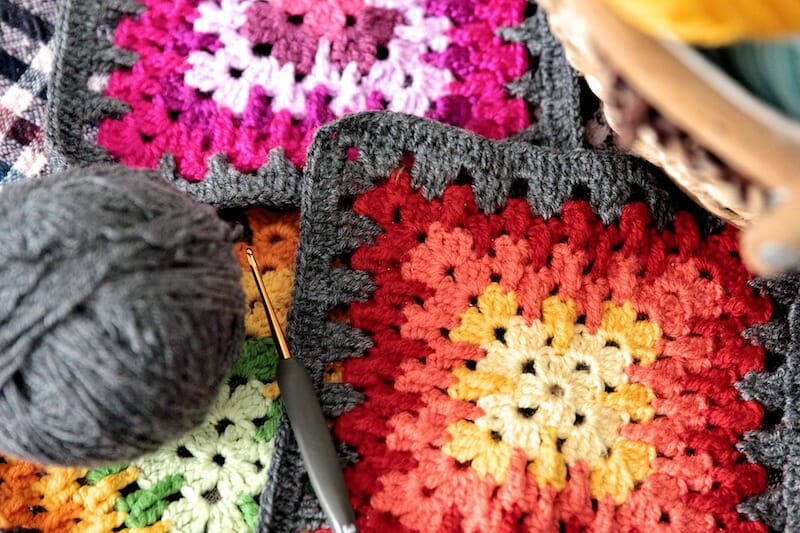
Use different colors of yarn to create patterns and designs within the squares. You can work with multiple colors in a single round or use tapestry crochet techniques to carry the unused colors along the back of the work. This allows you to create stripes, geometric shapes, or even pictorial motifs within the squares.
2. Overlay crochet granny square
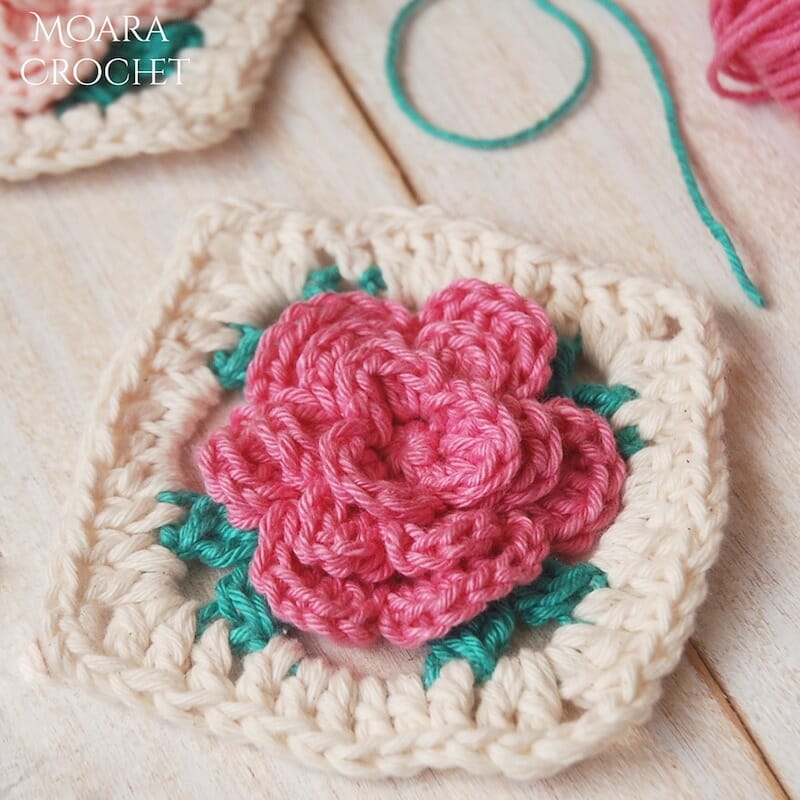
This technique involves crocheting additional stitches or motifs on top of the existing granny square. By working in front of or around the existing stitches, you can create raised textures, flowers, or intricate designs. Overlay crochet often uses stitches like slip stitches, single crochet, and double crochet to create the desired effect.
3. Appliqué granny square
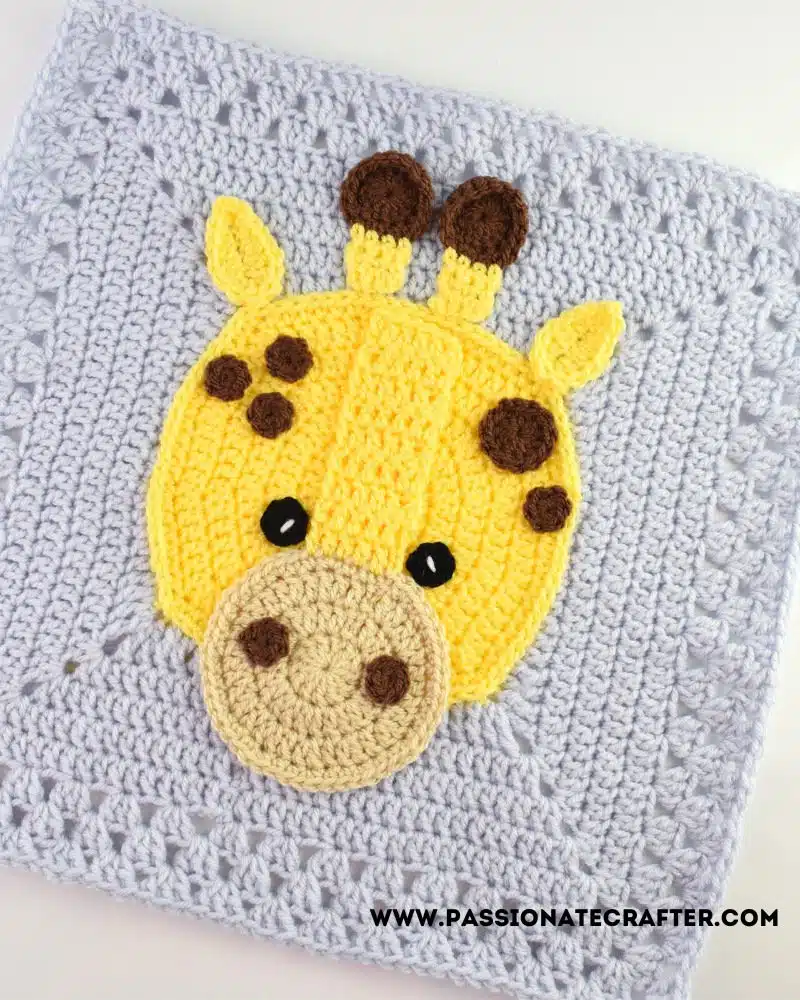
Crochet smaller motifs separately, such as flowers, leaves, hearts, or other shapes, and then attach them to the granny squares using a whip stitch, slip stitch, or a darning needle. Appliqués can be made in different colors and textures to enhance the overall design of the square.
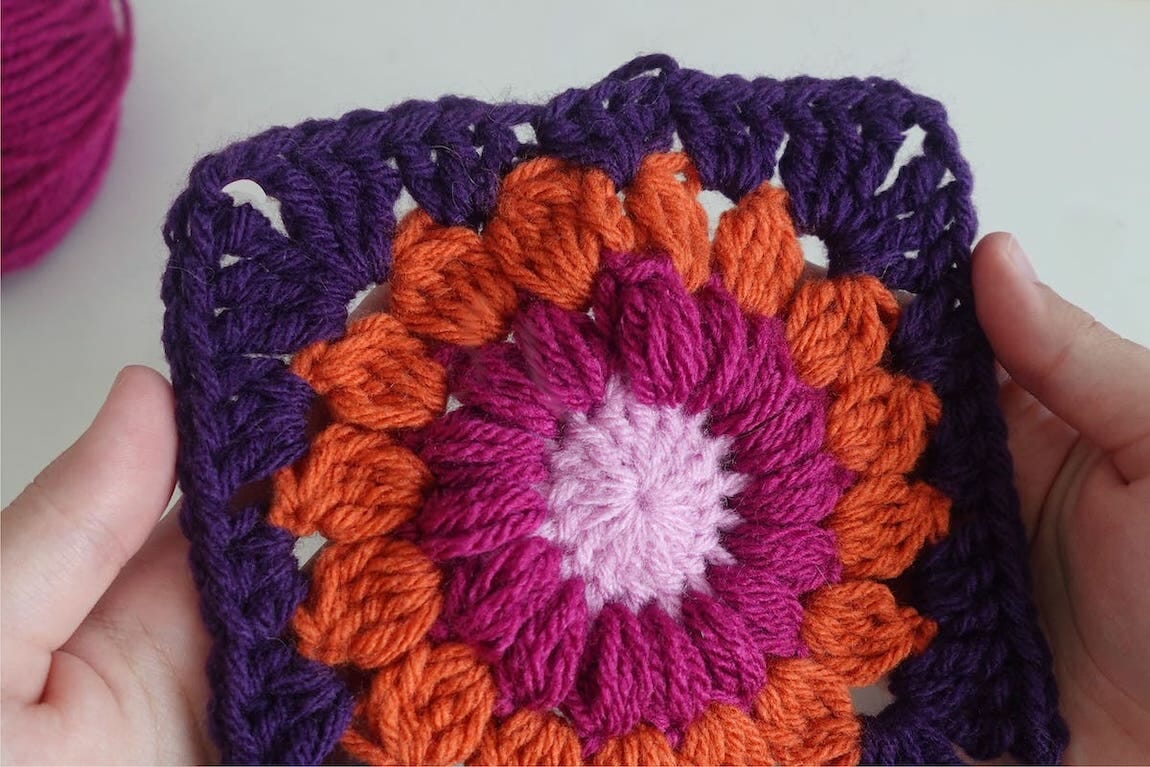
4. Bobbles and popcorn stitches
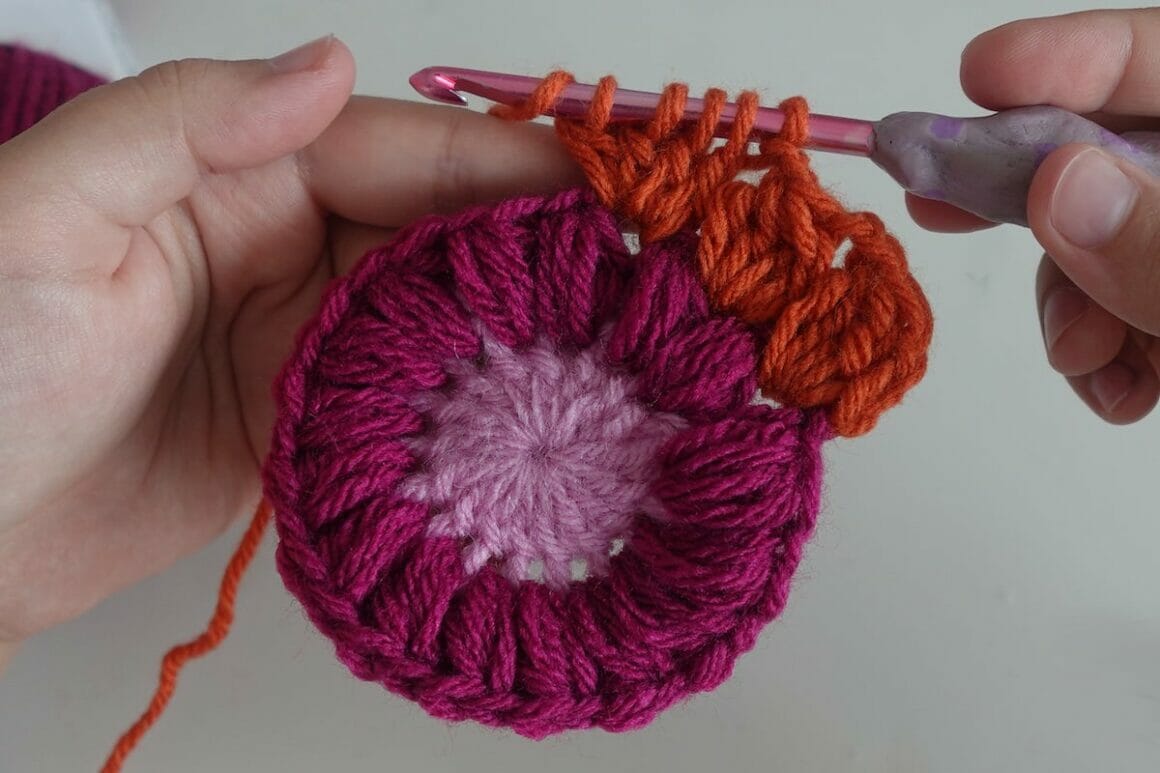
These textured stitches can be added to create raised bumps or clusters on the surface of the square. Bobbles are typically made by working multiple incomplete stitches in the same stitch and then completing them together. Popcorn stitches are similar but involve completing the stitches together in a different way. These stitches can be strategically placed to form patterns or create a three-dimensional effect.
5. Surface crochet
This technique involves working stitches directly on the surface of the completed granny square. Using a contrasting color of yarn, you can create lines, curves, or other designs by slip stitching or single crocheting on top of the stitches or in the spaces between them.
Remember to plan your design in advance by sketching it out or using graph paper. This will help you visualize how the intricate elements will fit into the granny square pattern. Additionally, taking your time and working with precision will ensure that your intricate designs are well-executed and visually appealing.
Related: 6 Best Beginner Crochet Kits in 2023
Blocking And Finishing Touches
Blocking is not necessarily essential for granny squares, as they are typically small individual designs that are later joined together. However, blocking can be beneficial in certain cases to improve the appearance and shape of the squares, especially if the squares have become distorted or uneven during the crocheting process.
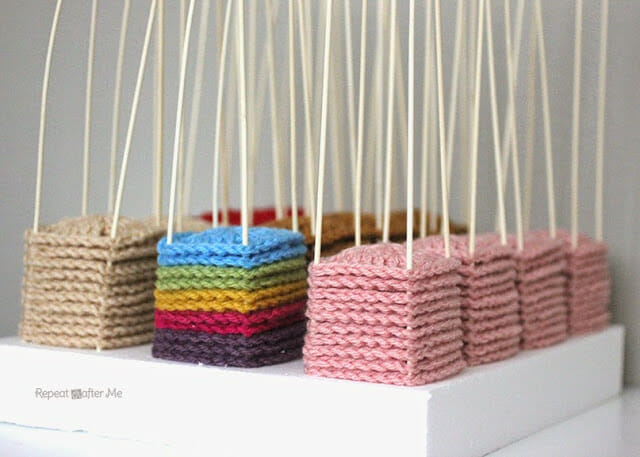
When blocking granny squares, the process typically involves wetting the squares, shaping them to the desired size and shape, and then allowing them to dry completely. You can use blocking mats, pins, or a blocking board to help maintain the shape while the squares dry.
Related: Knitting Vs Crochet: A Side-by-Side Comparison
Here are a few reasons why blocking granny squares can be helpful:
1. Shape correction
Sometimes, the edges of granny squares can become wavy or uneven due to variations in tension or stitch tension. Blocking can help to even out these imperfections and create a more symmetrical and uniform shape.
Related: 5 Best Yarn Winders – Complete Buying Guide
2. Size adjustment
Granny squares may turn out slightly different sizes, depending on the yarn, hook size, and individual tension of the crocheter. Blocking can be used to adjust the size of the squares, making them more consistent before joining them together.
3. Enhancing stitch definition
Blocking can help to open up the stitches and make the pattern more visible and defined. This can be particularly useful if you want to showcase intricate stitch work or create a more polished look for your granny squares.
4. Preparing for joining
If you plan to join the granny squares together, blocking can make the process easier by ensuring that all the squares are of the same size and shape. This can result in a neater and more professional-looking finished project.
While blocking is not mandatory for granny squares, it can be a useful technique to enhance their appearance and create a more cohesive finished project.
Joining Granny Squares
There are several techniques you can use to join granny squares together. Here are some common methods.
1. Whip stitch
This is a simple and sturdy method for joining squares. With the right sides facing each other, align the squares and use a yarn needle to stitch through the corresponding stitches along the edges. Repeat for each side, weaving in the yarn ends as you go.
2. Slip stitch join
This method creates a decorative ridge on the right side of the work. With the right sides together, insert your hook into the corner stitch of one square, yarn over, and pull through both loops on the hook. Continue slip stitching through the corresponding stitches of both squares, working across the edges you want to join. This technique is best for joining squares that have a consistent stitch count on each side.
3. Single crochet join
This technique creates a more solid and seamless join. With right sides facing each other, insert your hook into the corner stitch of one square, yarn over, and pull through a loop. Yarn over again and pull through both loops on the hook, creating a single crochet stitch. Continue single crocheting through the corresponding stitches of both squares, working across the edges you want to join.
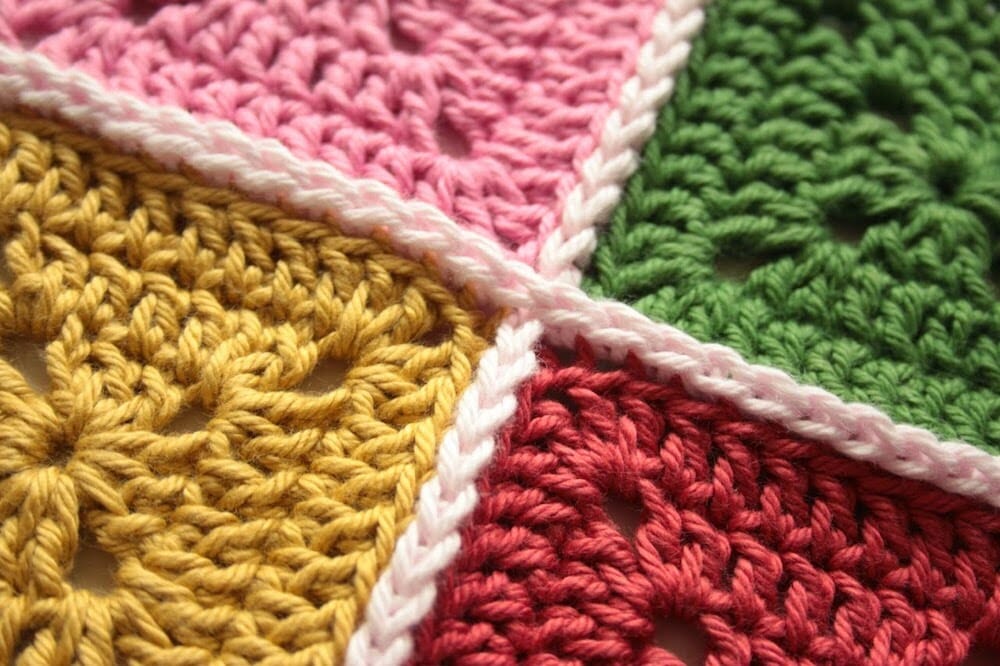
4. Flat braid join
This method creates a decorative braided look between the squares. It involves slip stitching, chaining, and slip stitching again to join the squares. It’s best suited for squares with an even number of stitches on each side.
5. Join-as-you-go (JAYG)
This technique allows you to join the squares as you crochet the final round of each square. There are different variations of JAYG, such as joining with slip stitches, single crochet, or double crochet. Each method involves incorporating the joining stitch into the final round of each square, connecting it to the adjacent square as you go.
6. Joining with a border
You can create a border around each square, leaving one side open for joining. Then, use the desired joining technique (such as whip stitch or slip stitch) to connect the open sides of the squares. This method provides a neat and finished look to the squares.
Remember to consider the desired outcome, the appearance you want to achieve, and the thickness of your squares when choosing a joining method. Experiment with different techniques to find the one that works best for your specific project and aesthetic preferences.
Related: 21 Free Crochet Tank Top Patterns with Tutorials
Granny Square Troubleshooting and Common Mistakes
Identifying and fixing tension issues
Tension issues can affect the overall look and size of your granny squares. Here are some tips to help you prevent tension problems while crocheting:
1. Consistent hook size
Use the same hook size throughout your project to ensure consistent tension. Variations in hook size can result in squares that are different sizes or have uneven stitches.
2. Gauge swatch
Before starting your granny squares, make a gauge swatch using the same yarn and hook you plan to use. Follow the pattern instructions for a small square and measure it to see if it matches the recommended gauge. Adjust your hook size if necessary to match the gauge provided in the pattern. This will help ensure that your squares turn out the correct size and have the right tension.
3. Relax your grip
Hold the yarn and hook with a relaxed grip. Avoid gripping too tightly, as it can lead to tight stitches and uneven tension. Allow the yarn to glide smoothly through your fingers while maintaining control.
4. Yarn tension
Be mindful of the tension in the yarn as you work. Avoid pulling the yarn too tightly or too loosely. Find a comfortable balance that allows the stitches to be even and consistent. Practice maintaining consistent tension by crocheting with a relaxed but controlled motion.
5. Take breaks
Crocheting for long periods without breaks can cause fatigue and affect your tension. Take regular breaks to rest your hands and relax your muscles. This will help you maintain consistent tension throughout your project.
6. Blocking
After completing your granny squares, consider blocking them to even out the tension and shape them. Wet blocking or steam blocking can help relax the stitches and make them more uniform.
7. Practice
Like any skill, crochet tension improves with practice. The more you crochet, the better you’ll become at maintaining consistent tension. If you notice tension issues in your squares, practice on smaller swatches or projects to refine your technique.
By following these tips and practicing regularly, you can minimize tension issues and achieve consistent and well-formed granny squares.
Care And Maintenance
If you have damaged granny squares that need repair or mending, you can follow these steps to fix them:
1. Assess the damage
Examine the granny square to identify the specific areas that need repair. Look for loose stitches, unraveling yarn, or holes that need to be fixed.
2. Gather necessary materials
Prepare the materials you’ll need for the repair, including the same yarn used in the granny square, a crochet hook in an appropriate size, a yarn needle, and scissors.
3. Fix loose stitches
If you have loose stitches, gently pull the yarn to tighten them. Use the crochet hook to adjust the stitches, ensuring they match the tension and appearance of the surrounding stitches.
4. Repair unraveling yarn
If you notice yarn that has unraveled, cut off the damaged section, leaving a tail of yarn. Attach a new length of yarn by threading it onto the yarn needle, then weave it through the surrounding stitches, following the path of the original yarn. Secure the ends by knotting or weaving them in to prevent further unraveling.
5. Fix holes
If there are small holes in the granny square, you can use the same technique as repairing unraveling yarn. Weave a new length of yarn through the surrounding stitches, creating a bridge over the hole. Secure the ends as mentioned above.
6. Replace damaged sections
In cases where the damage is extensive or irreparable, you may need to remove and replace a section of the granny square. Carefully unravel the damaged portion, being mindful not to unravel more than necessary. Re-crochet the section by following the original pattern and joining it back into the square using the same joining method.
7. Block and blend
After making the necessary repairs, block the granny square to help even out the tension and shape. Wet blocking or steam blocking can be effective. Additionally, if the repaired sections look slightly different from the rest of the square, you can use a yarn needle to gently blend the repaired areas with the surrounding stitches.
Remember to take your time and be patient during the repair process. With careful attention to detail, you can mend damaged granny squares and restore their original beauty.
How to Crochet a Granny Square Faqs
Can I crochet granny squares with different weights of yarn?
Yes, you can crochet granny squares with different weights of yarn. Granny squares are versatile and can be adapted to accommodate various yarn weights. Here are a few considerations when working with different yarn weights:
1. Adjust hook size
Use a crochet hook size that corresponds to the yarn weight you are using. Heavier yarns generally require larger hooks, while lighter yarns need smaller hooks. Consult the yarn label or a crochet hook size chart to determine the appropriate hook size for your chosen yarn weight.
2. Consistency
If you are using different weights of yarn within the same granny square, it’s important to maintain consistent tension throughout your work. Keep in mind that the squares may come out slightly different sizes if you use different yarn weights, so you might need to adjust the number of rounds or stitches to ensure they are consistent.
3. Balance the tension
When using different yarn weights, be mindful of the tension in your stitches. Adjust your tension accordingly to create even and consistent stitches. This will help ensure that all the squares have a similar appearance despite the difference in yarn weight.
4. Blend or contrast
Depending on your design preferences, you can choose to use different yarn weights to create a blended or contrasting effect in your granny squares. Blending yarn weights can create a subtle gradient or ombré effect while contrasting weights can add visual interest and texture to your squares.
5. Block as needed
After completing your granny squares, consider blocking them to even out the stitches and shape them. Wet blocking or steam blocking can help adjust the tension and ensure that the squares are consistent in size and appearance.
Remember that experimentation is key. Crocheting with different yarn weights in granny squares allows for creativity and unique results. Embrace the variation in yarn weights to create diverse textures and visual effects in your projects.
How can I adjust the size of my granny squares?
To adjust the size of your granny square, you have a few options:
1. Changing the hook size
Using a larger hook size will create larger stitches and result in a larger granny square. Conversely, using a smaller hook size will create smaller stitches and result in a smaller granny square. Experiment with different hook sizes until you achieve the desired size.
2. Adding or subtracting rounds
Each round of a granny square adds height and width to the motif. To make the square larger, you can add more rounds by repeating the pattern of chain spaces and clusters of stitches. If you want to make the square smaller, you can omit some of the rounds.
3. Adjusting the Stitch count
The number of stitches in each round can also affect the size of your granny square. You can add or subtract stitches within each round to make the square larger or smaller. Just make sure to maintain the overall pattern and symmetry of the square as you modify the stitch count.
4. Changing the yarn weight
Using a thicker yarn will generally result in a larger granny square while using a thinner yarn will yield a smaller square. Keep in mind that changing the yarn weight will also impact the overall texture and drape of your project.
Remember to make a gauge swatch before starting your granny square to determine the number of stitches per inch or centimeter you are achieving with your chosen hook and yarn combination. This will help you estimate how many stitches and rounds you need to adjust to achieve your desired size.
By combining these methods or experimenting with different variations, you can customize the size of your granny square to fit your specific project requirements.
Do granny squares use a lot of yarn?
The amount of yarn used in granny squares can vary depending on several factors, including the size of the square, the weight of the yarn, the stitch pattern, and the number of rounds worked. Generally, granny squares use less yarn compared to larger projects like blankets or garments.
The size of the granny square will have the most significant impact on yarn usage. Smaller squares require less yarn, while larger squares will use more.
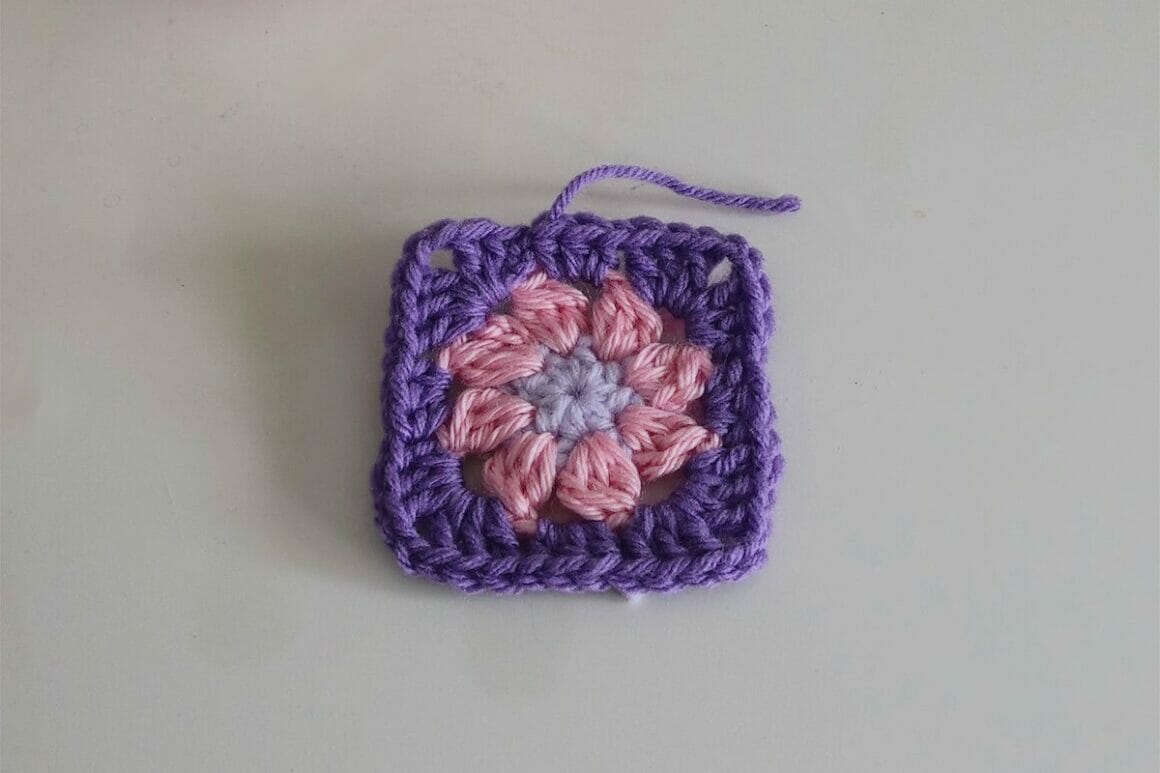
Additionally, the stitch pattern used can affect yarn usage. Some stitch patterns may be more open and require less yarn, while others may be denser and use more yarn.
The weight of the yarn also plays a role. Thicker yarns, such as bulky or chunky weights, will use more yarn than thinner yarns like lace or fingering weight.
To estimate the yarn requirements for your granny squares, you can refer to the pattern instructions, which often provide guidance on the estimated yardage or the number of grams required. If you are working without a pattern, you can create a sample square using a small amount of yarn and then measure how much yarn it used. This can help you estimate how much yarn you will need for a larger project with multiple squares.
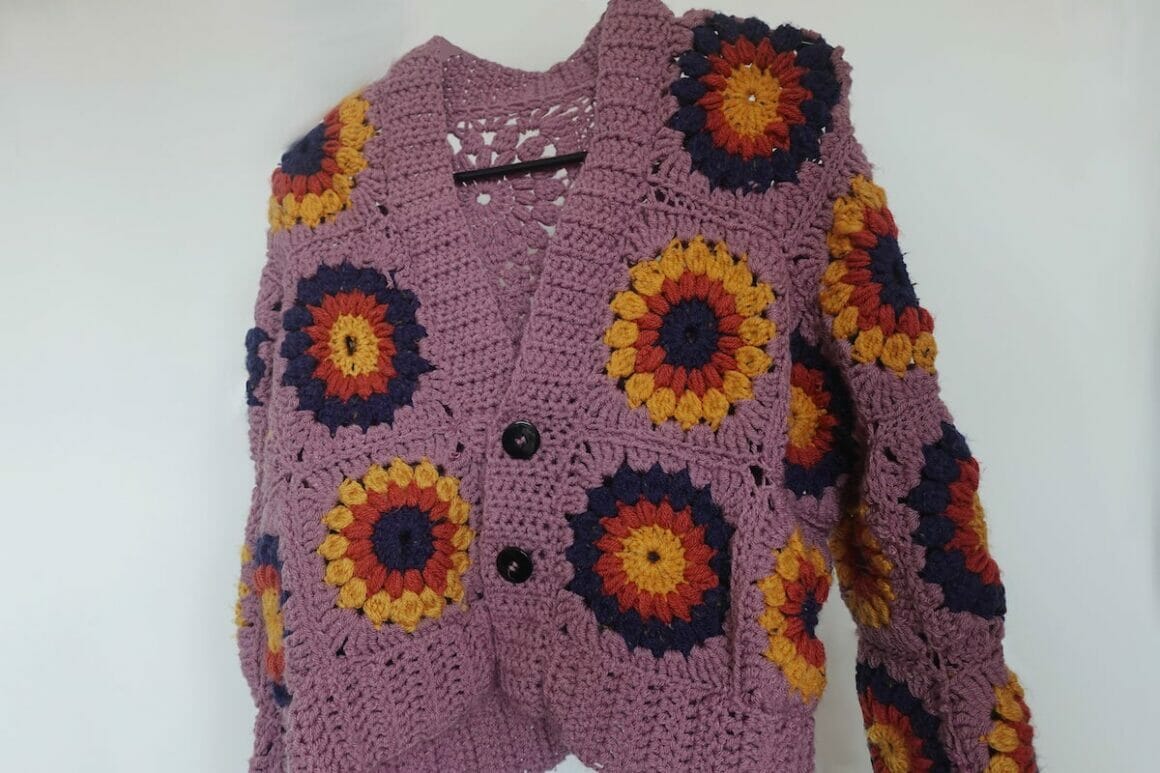
It’s worth noting that granny squares are often a great way to use up leftover yarn from other projects. Since they are typically smaller, they can be an ideal project for using up odds and ends of yarn.
Ultimately, the amount of yarn used in granny squares will depend on the factors mentioned above. Consider the size, stitch pattern, yarn weight, and any specific pattern instructions to determine the approximate amount of yarn you will need for your granny square project.
Why is my granny square not flat?
If your granny square is not laying flat and appears wavy or distorted, it is likely due to tension or stitch placement issues. Here are some common reasons why granny squares may not lay flat:
1. Tension inconsistency
Uneven tension can cause the stitches to vary in size and tightness, leading to a distorted square. Pay attention to your tension and try to maintain a consistent level of tightness throughout your work.
2. Too many or too few stitches in the corners
Granny squares typically have clusters of stitches in the corners to create the square shape. If you have too many or too few stitches in the corners, it can cause the square to warp. Ensure that you are following the pattern instructions correctly and placing the correct number of stitches in each corner.
3. Incorrect stitch placement
Crocheting stitches into the wrong spaces or skipping stitches can cause the square to become uneven. Make sure you are inserting the hook into the correct spaces indicated by the pattern, such as the chain spaces or previous stitches.
4. Tugging or pulling the yarn too tightly
If you pull the yarn too tightly when crocheting, it can cause the stitches to be too tight and restrict the natural drape of the square. Remember to maintain a relaxed tension while crocheting.
5. Blocking issues
If you haven’t blocked your granny square or have not blocked it properly, it may not lay flat. Blocking involves wetting or steaming the square and then shaping it to its desired dimensions while allowing it to dry. Blocking can help even out stitches and create a neater and flatter finished square.
6. Yarn type and weight
The yarn you use can also affect the flatness of the granny square. Different yarn types and weights have varying properties and behaviors. Some yarns may be stiffer or more prone to stretching, which can impact the square’s flatness. Consider using a yarn that is well-suited for granny squares and has a good stitch definition.
If your granny square is not laying flat, carefully review your technique, tension, stitch placement, and blocking method. Making adjustments in these areas should help you achieve a flatter and more even granny square.
Related: 21 Stylish Free Crochet Crop Top Patterns
Conclusion
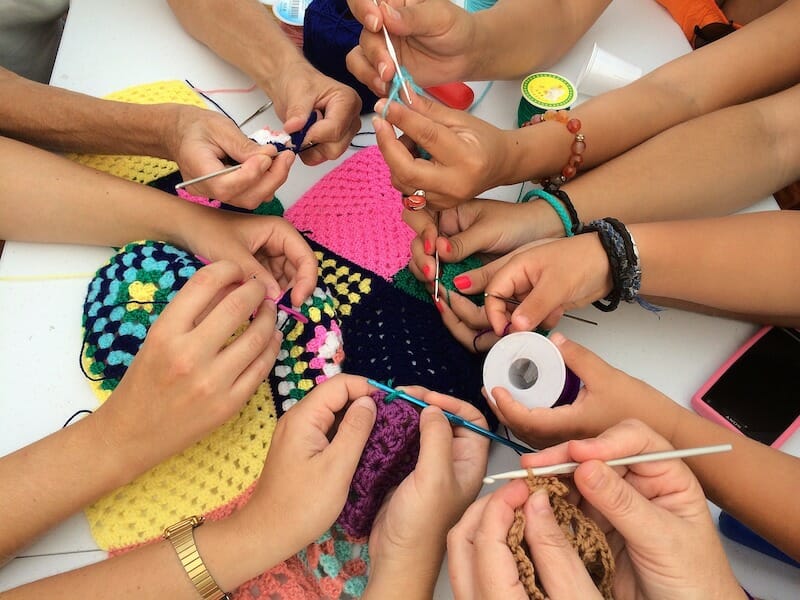
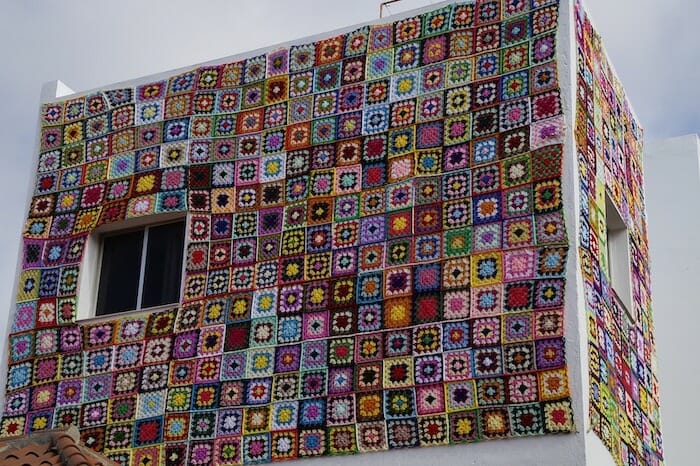
Today, granny squares continue to be a popular craft form, and they are often used not only for blankets but also for garments, accessories, home decor items, and even art installations. Their versatility, portability, and potential for creative expression have made granny squares a cherished and enduring tradition in the world of fiber arts.
To recap, when making granny squares, you learn and practice basic crochet stitches, stitch combinations, joining methods, intricate design methods, tension control, blocking, and creative experimentation. These skills enable you to create various designs, join squares together, and explore your creativity.
Regular practice improves crochet skills, develops consistency in tension and stitch work, and enhances understanding of stitch combinations. Building a collection of granny squares opens up possibilities for a variety of projects. Lastly, practicing and experimenting with granny squares brings personal satisfaction and enjoyment to the crocheting process. Happy crocheting!

