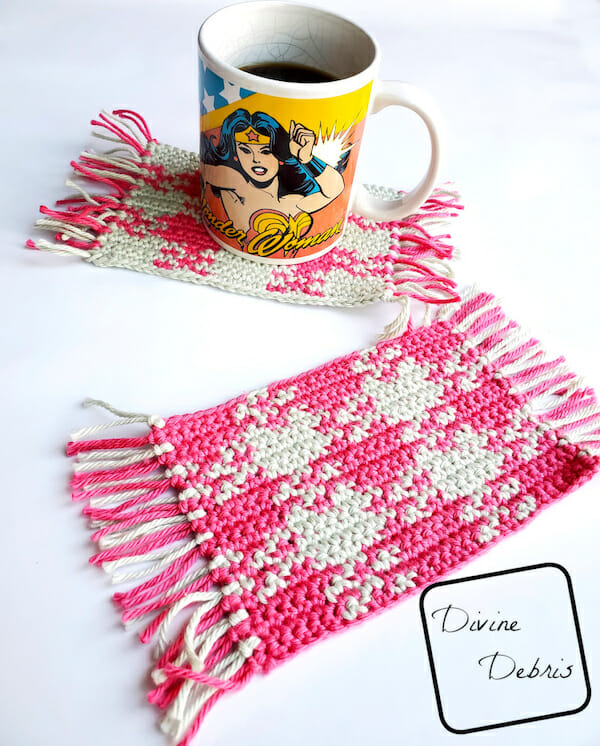
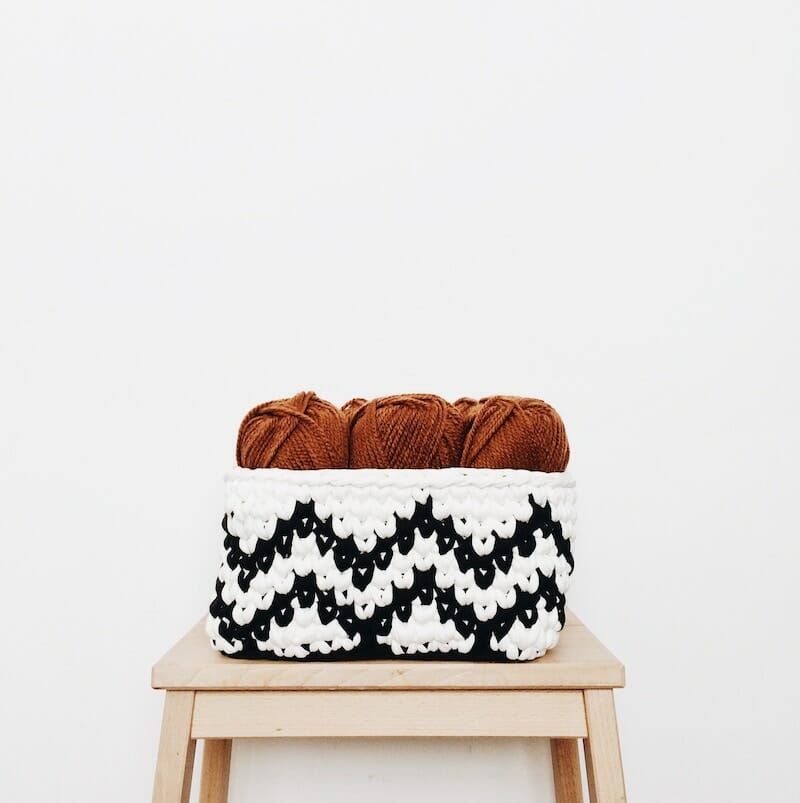
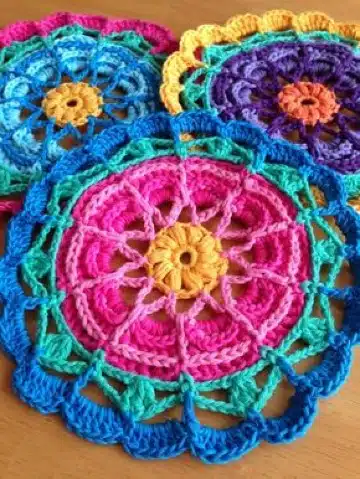
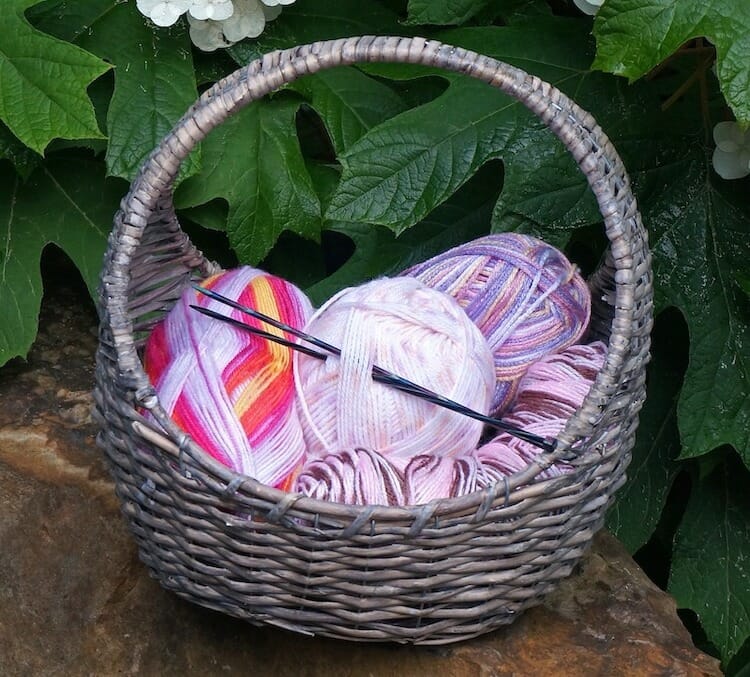
Color changes in crochet are essential for creating visually appealing and dynamic projects. Using different colors can add depth, dimension, and interest to your crochet work, making it more eye-catching and unique. In this article, we’ll go through the steps on how to change colors for beginner crocheters, learn different techniques for color changes in crochet, and get tips on how to achieve seamless color changes.
Table of Contents
- 1 The importance of color changes in crochet
- 2 Essential Tools For Color Changes in Crochet
- 3 Changing Colors in Rows
- 4 Basic Color Change Techniques
- 5 Color Pattern Placement
- 6 Advanced Color Change Techniques
- 7 Changing Colors in Rounds
- 8 Joining New Colors
- 9 Creating Seamless Transitions
- 10 Troubleshooting Common Issues in Color Change
- 11 Finishing Touches
- 12 How to Change Colors in Crochet FAQs
- 12.1 What if I make a mistake in my color changes?
- 12.2 How do you change colors when crocheting a blanket?
- 12.3 How do you end a crochet row and start a new color?
- 12.4 How do you alternate two colors when crocheting?
- 12.5 How to change colors crochet granny square
- 12.6 3. Yarn over with the second color yarn
- 12.7 How to change colors crochet amigurumi
- 13 Key Takeaways
The importance of color changes in crochet
If you’re curious about how color choices can enhance your crochet projects, here are some key reasons why:
1. Visual Appeal
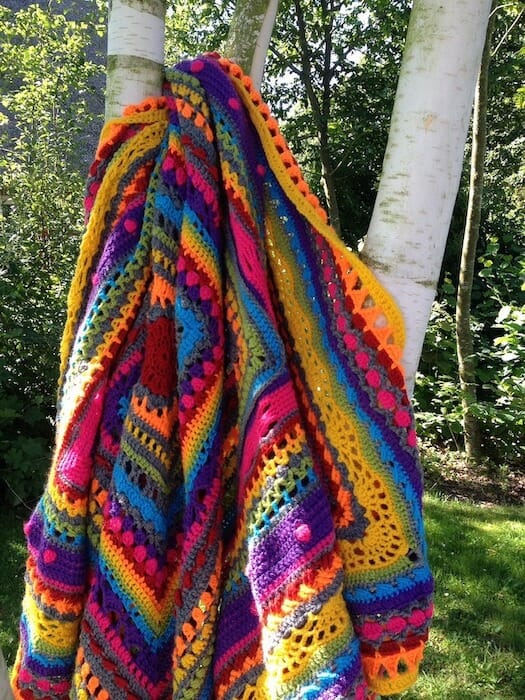
Color changes can transform a simple crochet design into a stunning piece of art. You can create intricate patterns, gradients, stripes, or designs by incorporating multiple colors, resulting in a visually appealing finished product. Combining colors can evoke different moods, convey a theme, or add vibrancy to your work.
2. Contrast and Definition
Using contrasting colors can help define the shape and texture of your crochet stitches. Changing colors strategically can make the individual stitches stand out, creating a more defined and textured appearance. This is particularly useful for projects like blankets, amigurumi, or garments where you want the details to be clearly visible.
3. Highlighting Specific Elements
Color changes can be used to draw attention to specific elements or sections of your crochet project. For example, you can use a bold or brighter color to emphasize certain motifs, borders, or edging. This technique can create focal points and enhance the overall design of your work.
4. Personalization and Creativity
Choosing colors allows you to personalize your crochet projects and express your creativity. You can experiment with different color combinations, gradients, or ombré effects to add your unique touch to the design. This aspect of crochet allows you to infuse your personality into your work and make it truly one-of-a-kind.
5. Enhancing the Overall Aesthetic:
Color choices play a crucial role in establishing your crochet project’s overall aesthetic and mood. For example, pastel colors might create a soft and delicate look, while bold and vibrant colors can give a project a modern or eclectic feel.
6. Storytelling and Symbolism ??
Colors can convey emotions, symbolize ideas, or tell a story within your crochet projects. You can infuse deeper meaning into your work by incorporating specific colors with cultural or personal significance. This can be particularly powerful when creating items like blankets, shawls, or accessories that hold sentimental value.
Remember, color choices in crochet are subjective, with no right or wrong combinations. It’s all about exploring your creativity, experimenting with different colors, and finding what resonates with you and your project.
Essential Tools For Color Changes in Crochet
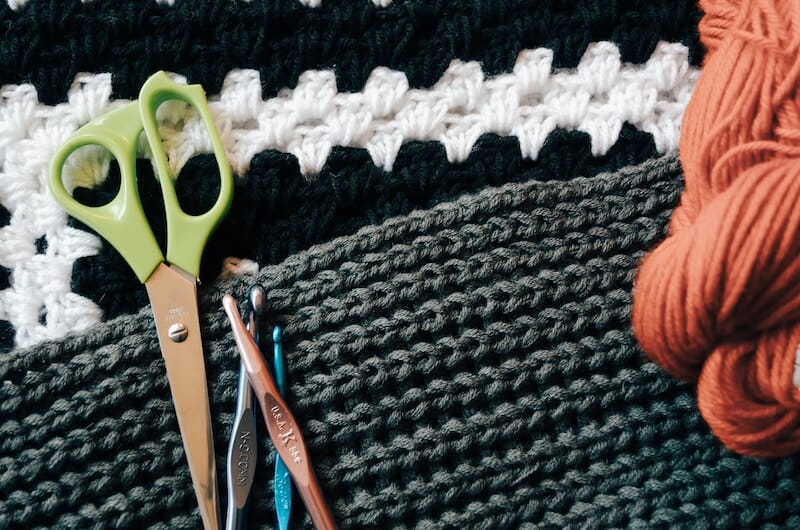
There are a few essential tools and considerations to remember when it comes to color changes in crochet. Here are the key tools you’ll need and tips for selecting the right yarn for smooth color transitions.
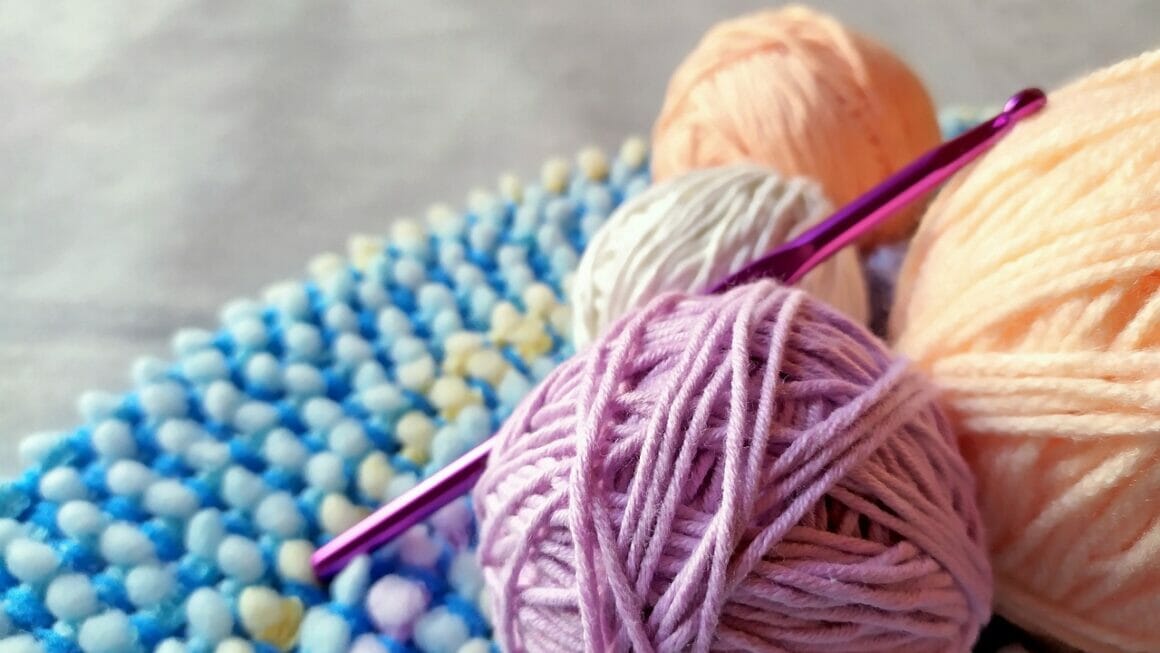
Selecting the right yarn for color transitions
Selecting the right yarn is crucial for achieving seamless color transitions. Here are some things to consider:
- Fiber Content: Choose yarns with similar fiber content to ensure consistent tension and stitch definition throughout your project. Fibers can behave differently when working together, so it’s best to stick with similar compositions.
- Weight: Opt for yarns of the same weight or thickness. Mixing different weights can result in uneven tension and may affect the overall appearance of your color transitions.
- Color Compatibility: Consider the color properties of the yarn you use, such as variegated, self-striping, or solid colors. Ensure that your chosen colors work well together and create the desired effect.
Crochet Hooks
You’ll need crochet hooks appropriate for the yarn you’re working with. Choose a hook size that complements the yarn weight to achieve consistent stitch size and tension. You can find the recommended hook size on the package of your yarn.
Yarn Needles
Yarn needles are essential for weaving in ends and securing color changes. They help to seamlessly blend the new yarn with the existing stitches, ensuring a tidy and professional finish.
Stitch Markers
Stitch markers are handy tools for marking the beginning or end of a color change section.
They help you track where to make the color transition and maintain the pattern or design.
Planning and Practice
Before diving into complex color changes, planning your color transitions and practicing on a small swatch or sample is helpful. Some helpful websites, such as Stitchfiddle, allow you to plan out your color changes on a grid when working on tapestry projects.
Remember, practice and experimentation are key to mastering color changes in crochet. Don’t be afraid to try new techniques, play with different color combinations, and let your creativity shine through your projects.
Remember, practice and experimentation are key to mastering color changes in crochet. Don’t be afraid to try new techniques, play with different color combinations, and let your creativity shine through your projects.
When it comes to color transitions in crochet, there isn’t a specific type of yarn that works best universally. The choice of yarn depends on the specific effect you want to achieve and the project you’re working on. Consider the desired effect, the type of project, and the technique you plan to use when selecting your yarn. Don’t be afraid to experiment and mix different yarn types to achieve the color transitions you envision.
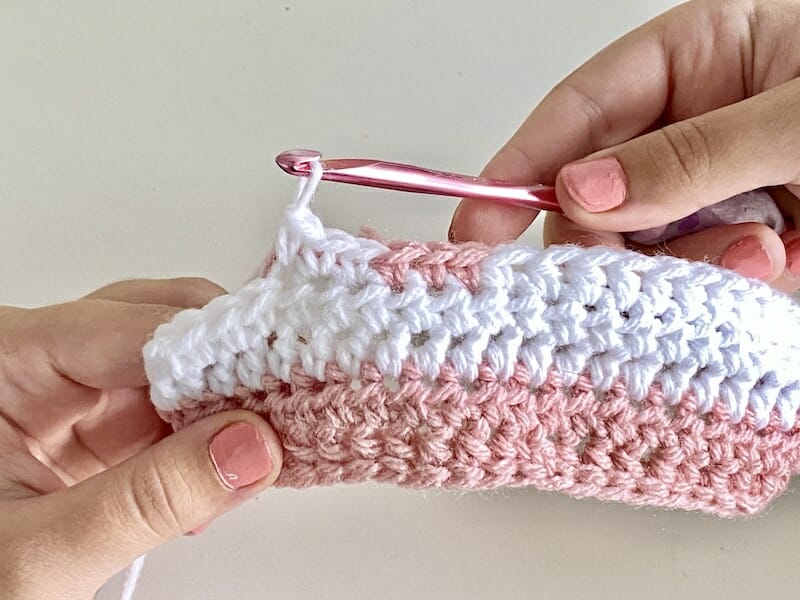
Changing Colors in Rows
What is the best way to change colors for beginner crocheters?
For beginner crocheters, changing colors in crochet can seem a bit intimidating at first, but with some practice, it becomes easier. Here’s a step-by-step guide on the best way to change colors for beginners:
1. Prepare your new yarn

Before you start changing colors, have your new yarn ready. Cut the working yarn, leaving a tail of several inches. Insert the hook into the next stitch as indicated in the pattern, and place the new yarn over the hook, leaving a tail of several inches as well.
2. Secure the new yarn
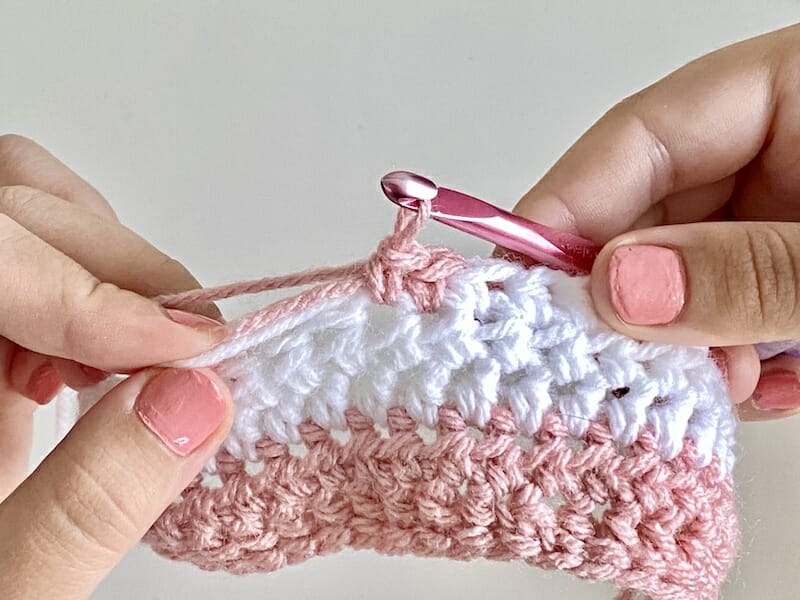
With the new and working yarn held together, yarn over with the new yarn and draw it through the stitch, essentially making a slip stitch. This secures the new yarn and prevents it from unraveling. You can also tie a loose knot with the two yarn tails to keep them in place temporarily.
3. Carry the working yarn along the back of your stitches
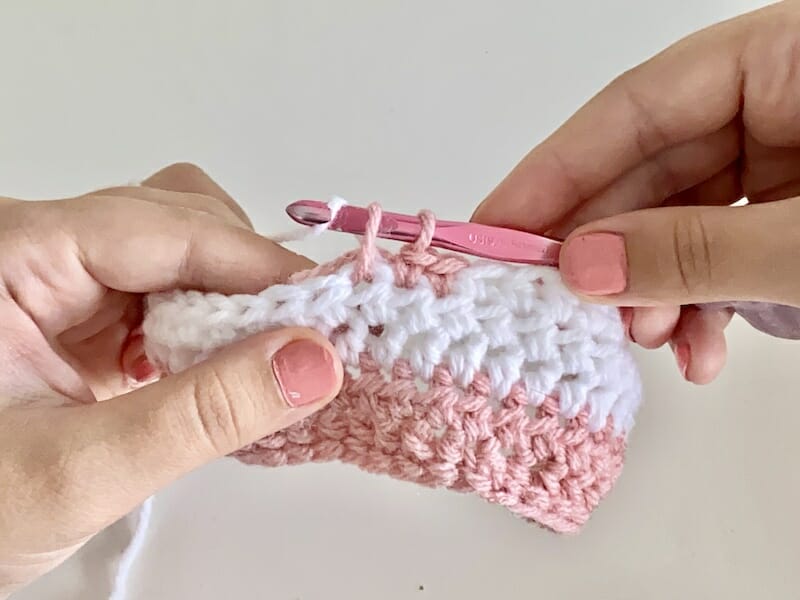
Once the new yarn is secured, you can carry the working yarn along the back of your stitches. This helps avoid loose loops and creates a neater color transition. Hold the working yarn loosely along the back of your work as you continue crocheting with the new yarn.
4. Crochet over the carried yarn
When working on the next row or round, you can crochet over the carried yarn to further secure it. This means that you’ll insert your hook into the stitches while also enclosing the carried yarn within the stitches. This technique helps to hide the carried yarn and keeps the back of your work tidy.
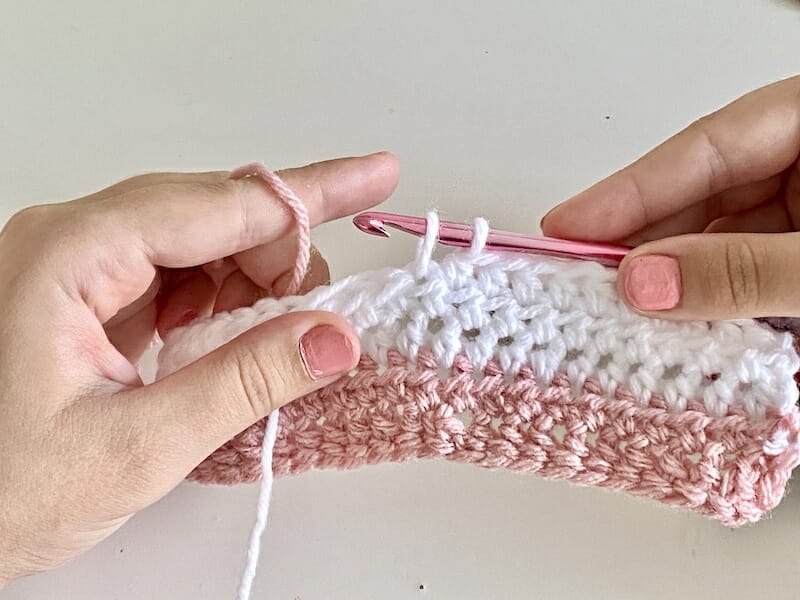
5. Weave in the ends
Once you’ve finished crocheting with a particular color, you’ll have two yarn tails—the starting tail and the ending tail. Weave in these ends using a yarn needle to finish the color change. Weave the tails under the stitches of the same color, going back and forth a few times to ensure they’re secure. Trim any excess yarn.
As a beginner, practicing color changes on small swatches or simple projects is helpful before attempting more complex patterns. Start with straightforward color changes, such as alternating rows or stripes, and gradually progress to more intricate techniques like tapestry crochet or colorwork patterns.
Remember, with practice, changing colors in crochet will become more natural and comfortable. Don’t be discouraged if your first attempts aren’t perfect—like any skill, it takes time to refine and improve. Enjoy the process and have fun exploring the world of color in crochet!
Basic Color Change Techniques
There are several basic color change techniques in crochet that you can use to incorporate different colors into your projects. Here are three commonly used techniques:
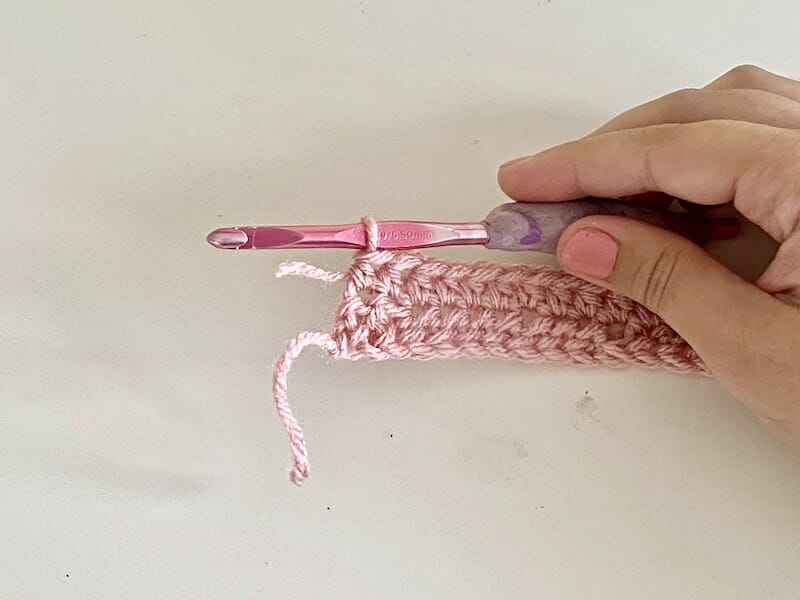
1. Cut and Tie Method
- Finish the last stitch with the old color, leaving a tail of several inches.
- Cut the old color yarn, leaving another tail of several inches.
- Join the new color yarn by making a slip knot and placing it on your hook.
- Insert the hook into the next stitch, yarn over with the new color yarn, and pull through to complete the stitch.
- Continue crocheting with the new color, carrying the old color yarn along the back of the stitches.
- To secure the tails, tie them together in a loose knot and weave them in later.
2. Invisible Join Method

- Finish the last stitch with the old color, leaving a tail of several inches.
- Cut the old color yarn, leaving another tail of several inches.
- Join the new color yarn by making a slip knot and placing it on your hook.
- Insert the hook into the next stitch, yarn over with the new color yarn, and pull through to complete the stitch.
- Drop the old color yarn and continue crocheting with the new color.
- To secure the tails, thread each tail onto a yarn needle and weave them in along the back of the stitches.
3. Join-As-You-Go Method

- Finish the last stitch of the old color on your motif or square.
- To join the new color, complete the last stitch with the new color yarn instead of the old color.
- Cut the old color yarn, leaving a tail of several inches. – Continue crocheting with the new color, working over the old color yarn.
- To secure the tails, tie them together in a loose knot and weave them in later.
These are just a few examples of basic color change techniques. Depending on the project and pattern you’re working on, variations or additional techniques may exist. It’s always a good idea to follow the pattern instructions for specific color change techniques, as they may vary depending on the design.
As you gain more experience with color changes, you can explore advanced techniques like tapestry crochet, intarsia, or stranded colorwork to create intricate patterns and designs with multiple colors.
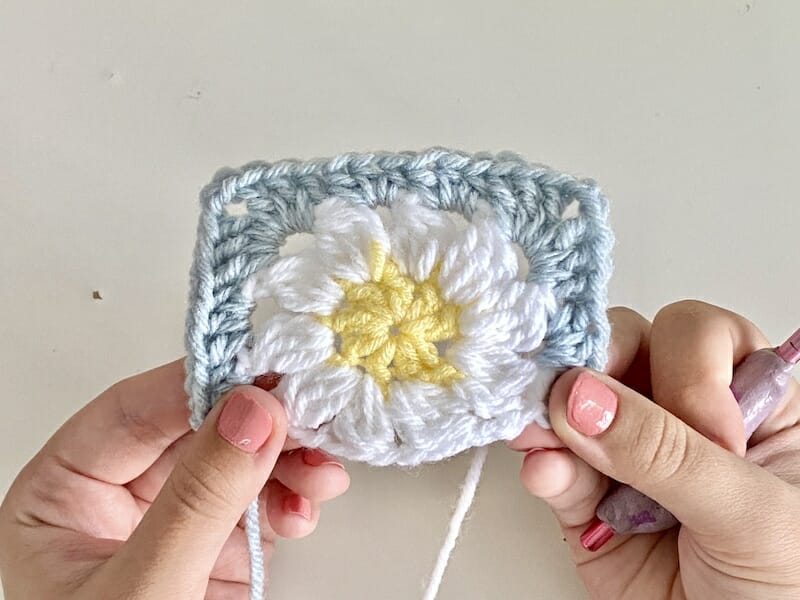
Color Pattern Placement
Creating stripes
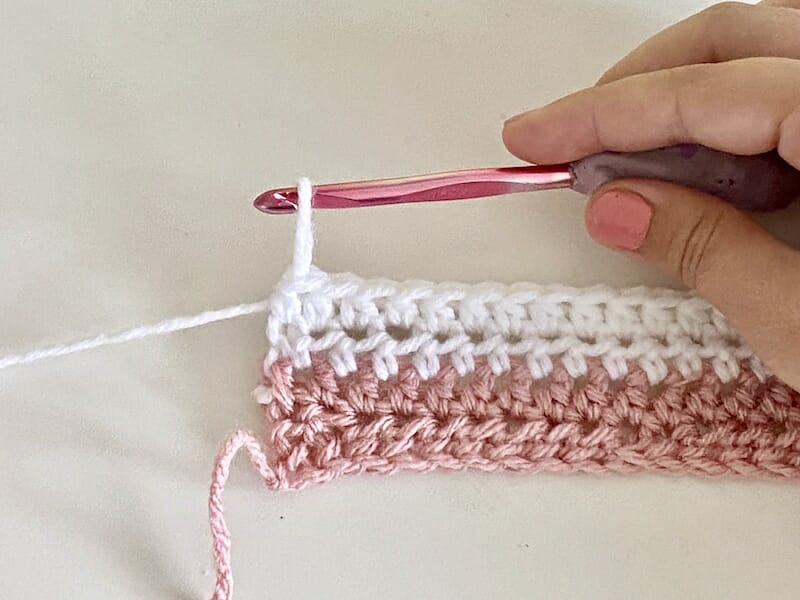
To create stripes in crochet work, choose the colors you’d like to use and plan your stripe pattern. Finish the current color by completing the last stitch, cutting the yarn, and creating a “Magic Knot”:
- Join the new color by folding it in half, forming a loop on your hook.
- Pull the loop through the stitch, crocheting over the tails of both the old and new colors to secure them.
- Continue crocheting with the new color as per your pattern’s instructions.
- Once you’ve worked with the new color for a few rows, weave in the ends of both colors to hide them. Repeat these steps to add stripes with different colors, giving your crochet projects a vibrant and customizable look.
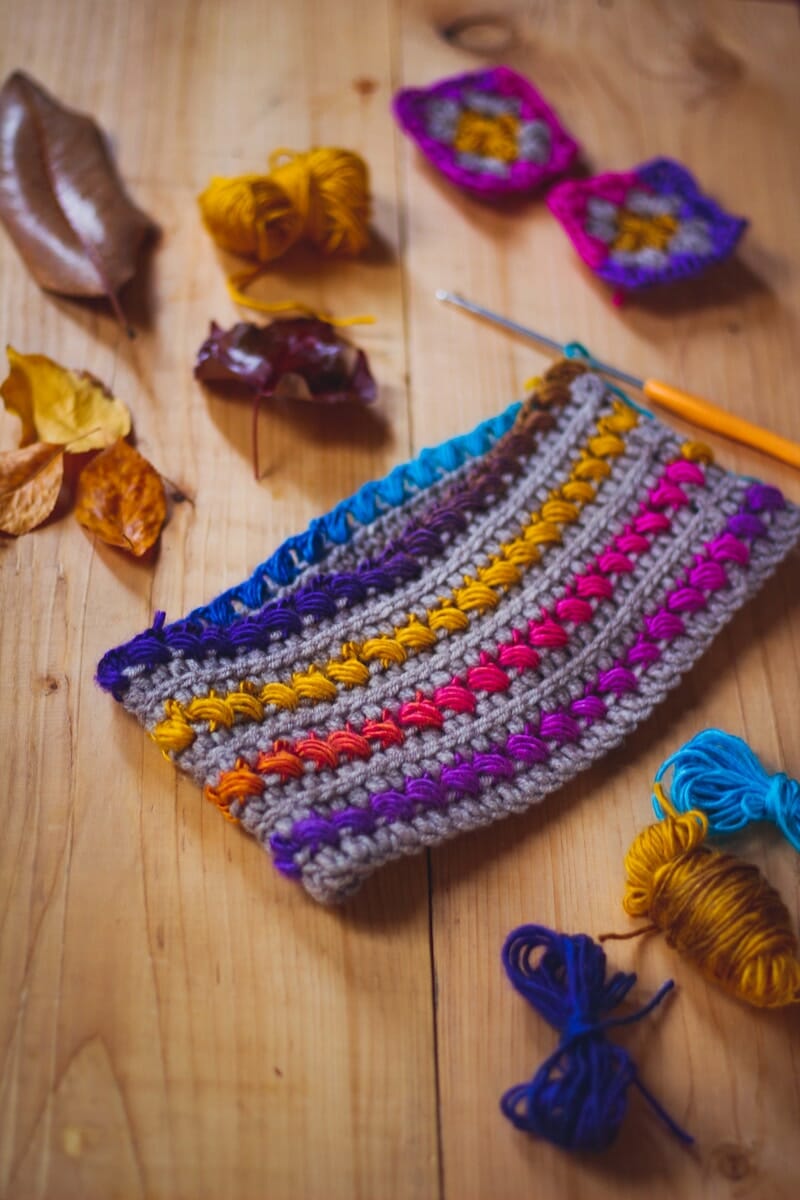
Advanced Color Change Techniques
When you’re ready to delve into advanced techniques for changing colors in crochet, there are several exciting options to explore. These techniques allow you to create intricate colorwork and stunning designs. Here are a few advanced techniques for changing colors in crochet:
1. Tapestry Crochet
Tapestry crochet involves working with multiple colors in the same row or round, creating detailed patterns and motifs. The basic concept is to carry the unused colors along the back of the work while working over them with the current color. You’ll crochet over the carried yarn, trapping it within the stitches to create the design. This technique requires careful tension management and attention to detail.
Related: 5 Best Yarn Winders – Complete Buying Guide
2. Intarsia Crochet
Intarsia crochet is similar to tapestry crochet but involves larger blocks of color rather than detailed patterns. With intarsia, you use separate bobbins or balls of yarn for each color section, working with one color at a time. When changing colors, you drop one color and pick up the next, twisting the yarns to prevent holes or gaps. Intarsia is commonly used for color-blocking or creating bold geometric designs.
3. Fair Isle Crochet
Fair Isle crochet, also known as stranded colorwork, is a technique that originates from traditional Fair Isle knitting. It involves carrying multiple colors across the back of the work but typically with shorter floats (the strands of yarn carried behind). Fair Isle crochet creates intricate patterns and motifs with small color repeats. Tension management is crucial to prevent the floats from being too tight or loose.
4. Overlay Crochet
Overlay crochet is a technique that combines different colors by working stitches on top of existing stitches. This technique often creates textured designs or overlay motifs on a solid background. You can achieve dimensional and eye-catching effects by changing colors and crocheting over previous rows.
These advanced techniques may require more practice and patience compared to basic color change techniques. It’s recommended to start with small swatches or practice pieces to familiarize yourself with the techniques before attempting larger projects. Following patterns and tutorials specifically designed for these techniques can be helpful in understanding the intricacies of each method.
Changing Colors in Rounds
Can I change colors in the middle of a row or round?
Yes, you can absolutely change colors in the middle of a row or round in crochet. Changing colors mid-row or mid-round allows you to create different color patterns stripes, or add decorative elements to your project. Here’s how you can do it:
Changing Colors Mid-Row
1. When you reach the stitch where you want to change colors, stop with the last yarn over and pull through the old color.
2. Drop the old color yarn and pick up the new color yarn, making sure to leave a tail of several inches.
3. Yarn over with the new color yarn and pull through to complete the stitch.
4. Continue crocheting with the new color for the remaining stitches in the row.

The same steps can be followed when changing colors mid-round.
It’s important to carry the unused color along the back of your work to ensure a smooth color transition. You can crochet over the carried yarn to trap it within the stitches and avoid loose loops or gaps. Remember to maintain an even tension as you work with the new color to achieve a neat and consistent appearance.
Changing colors mid-row or mid-round gives you the flexibility to create complex color patterns, shapes, or textured designs in your crochet projects. You can achieve beautiful color transitions with practice and experimentation and bring your creative vision to life.
Joining New Colors
Joining new colors in crochet refers to the process of incorporating a different color of yarn into your project. Here are a few common methods for joining new colors in crochet:
1. Slip Stitch Join
- Start your stitch as usual with the old color.
- When you have two loops on your hook, drop the old color and pick up the new color, leaving a tail of several inches.
- Insert the hook into the stitch, yarn over with the new color, and pull it through the stitch and the loops on the hook.
- Continue crocheting with the new color, working over the tail to secure it.
2. Invisible Join

- Finish the last stitch of the old color as usual, leaving a tail of several inches.
- Cut the old color yarn, leaving another tail of several inches.
- Join the new color by making a slip knot and placing it on your hook.
- Insert the hook into the stitch, yarn over with the new color yarn, and pull through the stitch and the loops on the hook.
- Drop the old color yarn and continue crocheting with the new color, working over the tails to secure them.
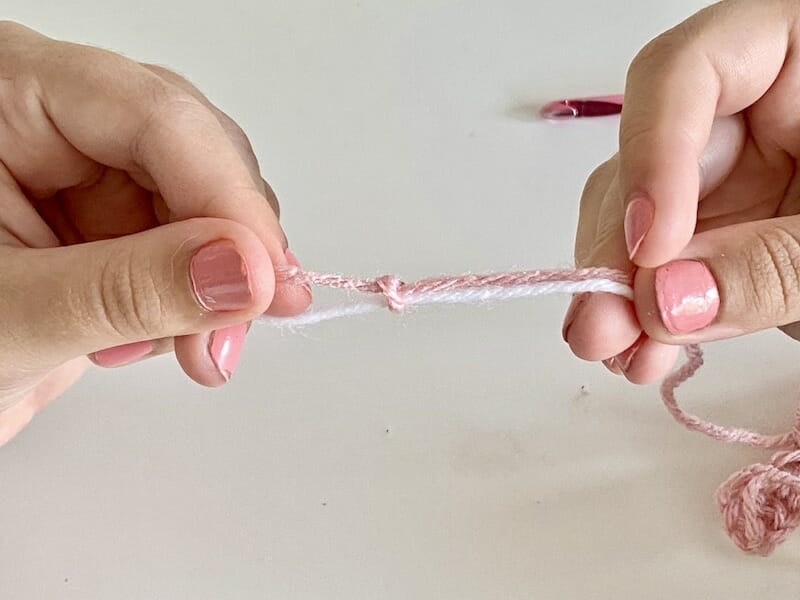
3. Magic Knot
- Take the ends of both the old and new color yarn and lay them parallel to each other.
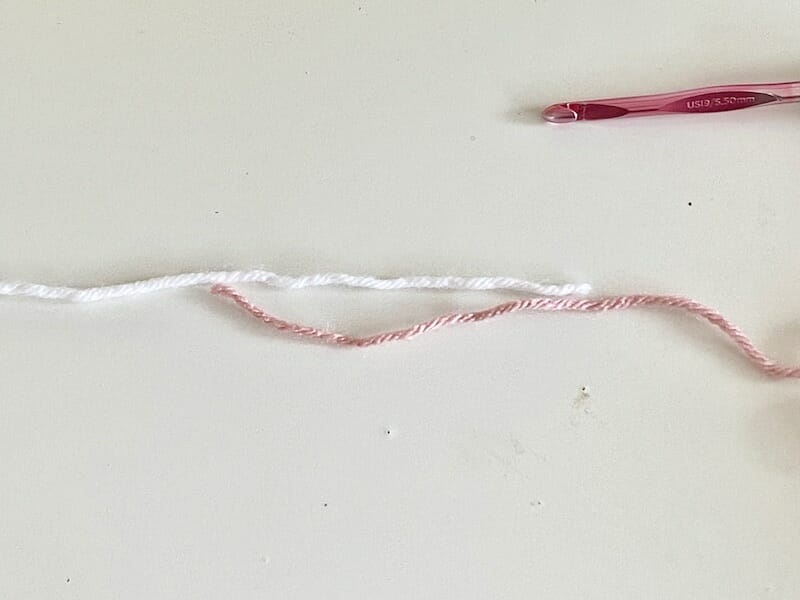
- Tie a loose knot on one end using the other color.
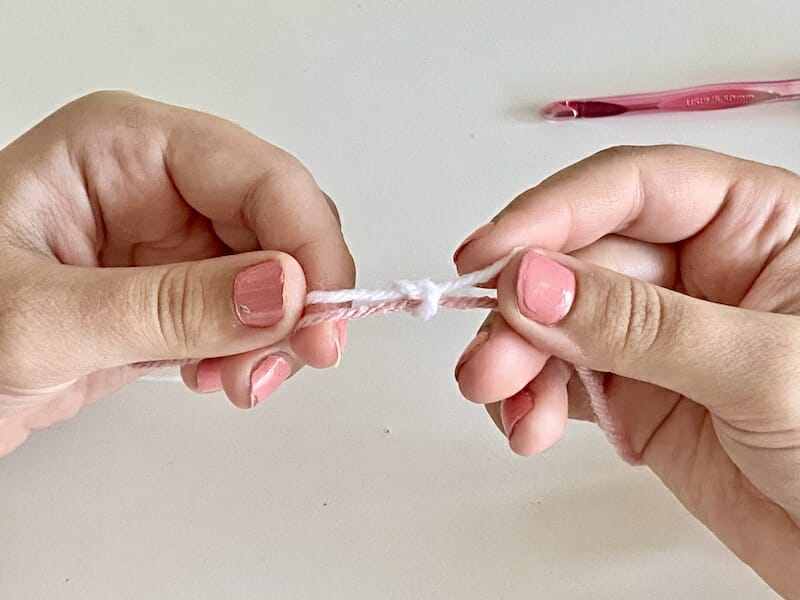
- Repeat for the other end.

- Pull the ends gently to tighten the knot.
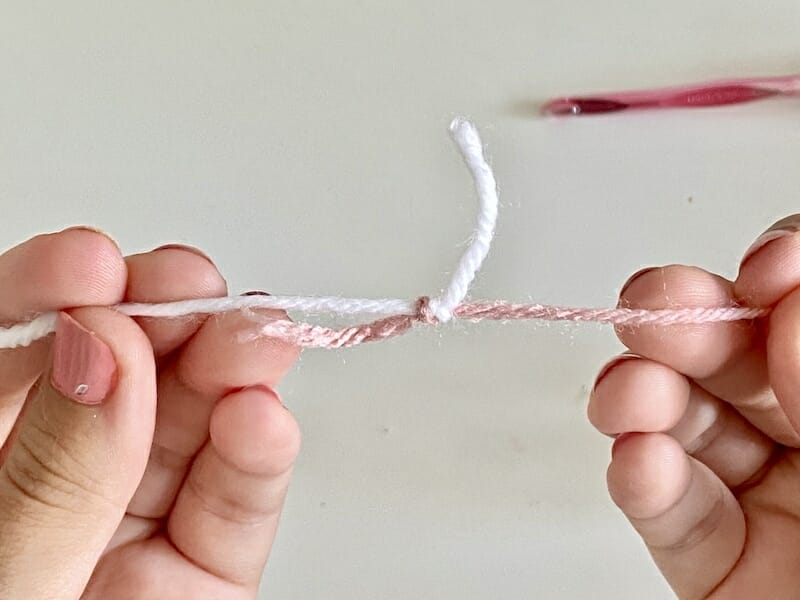
- Trim the excess yarn ends and weave in the ends to secure the join.
Choose the joining method that suits your project and personal preference. Remember to weave in the ends securely to prevent them from unraveling. Practice and experiment with different techniques to find the one that works best for you.
Creating Seamless Transitions
How do you change colors seamlessly in crochet?
Jogless join technique
The jogless join technique in crochet is used to create a seamless and smooth transition when joining rounds in amigurumi, hats, or any crochet project worked in continuous rounds. It helps eliminate the visible “step” or jog that often occurs when changing colors or transitioning to a new round. Here’s a step-by-step guide on how to achieve a jogless join in crochet:
1. Complete the last stitch of the current round using the old color yarn.
2. Drop the old color yarn and pick up the new color yarn, leaving a tail of several inches.
3. Insert the hook into the first stitch of the new round with the new color yarn.
4. Yarn over with the new color yarn and pull it through the stitch, creating a loop on the hook.
5. Here’s where the jogless join technique comes into play: Instead of completing the stitch with the new color yarn as you would normally do, insert the hook into the same stitch of the previous round (the one right below the current stitch).
6. Yarn over with the new color yarn and pull it through both the stitch of the previous round and the loop on the hook.
7. Continue crocheting in the new round as directed by your pattern.
By inserting the hook into the same stitch of the previous round, you create a slight overlap that reduces the visible jog in the color change. This technique aligns the stitches and minimizes the step-like appearance, resulting in a smoother and more seamless transition.
The jogless join technique is especially useful when working with striped or multi-colored designs where the color changes occur in continuous rounds. It provides a cleaner finish and helps maintain the pattern’s integrity without any visible disruptions.
Spiral color changes
Spiral color changes in crochet refer to changing colors without distinct rounds or visible joining points. This technique is commonly used in projects like amigurumi or hats where a continuous spiral is desired. Here’s how to do spiral color changes in crochet:
1. Start with the first color: Begin your project using the first color yarn, making the necessary stitches according to your pattern.
2. Prepare for the color change: When you’re ready to change colors, stop with the last stitch of the current color, leaving two loops on your hook.
3. Introduce the second color: Drop the first color yarn and pick up the second color yarn, leaving a tail of several inches. Insert the hook into the next stitch with the new color yarn.
4. Complete the color change: Yarn over with the second color yarn and pull it through the stitch on the hook, essentially making a slip stitch with the new color.
5. Continue crocheting with the second color: Instead of joining the round, continue crocheting in a spiral without slip stitching or chaining. Work the next stitches over the carried tail of the first color and carry it along the back of your work.
6. Repeat as desired: To switch back to the first color or introduce a new color, repeat steps 2-5, dropping the current color yarn and picking up the next color yarn to continue crocheting in the spiral.
You can achieve a smooth and seamless color change by working in a continuous spiral without joining rounds. Be sure to carry the unused color yarn along the back of your work as you switch colors to avoid loose loops or gaps.
It’s important to note that the spiral color change technique is unsuitable for projects requiring distinct rounds or stitch count adjustments. It works best for projects where a seamless, uninterrupted spiral is desired.
With practice, you’ll become more comfortable with spiral color changes and be able to create beautiful, seamless color transitions in your crochet projects.
Troubleshooting Common Issues in Color Change
Preventing gaps and holes
Gaps and holes can sometimes be caused by uneven tension between the different colors when crocheting. Be mindful of maintaining consistent tension when working with each color to ensure that the yarns flow smoothly and minimal gaps are shown.
Fixing uneven tension
Uneven tension in crochet, where some stitches are tighter or looser than others, can affect your project’s overall appearance and drape. Here are some tips to help fix uneven tension:
1. Relax and Reassess
Take a moment to relax your grip and assess your tension. Sometimes, tension issues can arise from holding the yarn too tightly or being too tense while crocheting. Remember to maintain a relaxed grip on the yarn and hook to allow for even tension.
2. Practice Consistency
Consistency is key to achieving even tension. Aim to maintain the same level of tension throughout your work, regardless of the stitch or row you’re working on. Practice making consistent tension by working on small swatches or practice pieces before starting a larger project.
3. Adjust Your Hook Size
If your stitches are consistently too tight or loose, you can try adjusting your hook size. If your stitches are tight, switch to a larger hook size to create more relaxed tension. Conversely, if your stitches are loose, switch to a smaller hook size to tighten the tension.
4. Block Your Work
Blocking can help even out tension issues and improve the appearance of your crochet project. Wet blocking or steam blocking can relax the fibers and allow them to settle into a more consistent tension. Follow the blocking instructions specific to the type of yarn and project you’re working on.
5. Frog and Re-Crochet
If the uneven tension is concentrated in a specific section of your project, you may consider unraveling or “frogging” those stitches and re-crocheting them. Pay close attention to your tension while redoing the stitches to ensure a more even result.
6. Practice and Patience
Achieving consistent tension takes practice and patience. The more you crochet, the more you’ll develop muscle memory and a sense of your own tension. Don’t get discouraged if it takes time to achieve perfect tension; it will improve with experience.
Remember that everyone’s tension is unique, and a slight variation in tension can add character and texture to your crochet projects. Embrace imperfections as part of the handmade charm. With time and practice, you’ll become more confident in maintaining even tension and producing beautifully consistent crochet work.
Dealing with tangled yarn during color changes
Dealing with tangled yarn during color changes can be frustrating, but there are a few tips and techniques that can help minimize tangles and make the process smoother:
1. Yarn Management
Before starting your project, take some time to organize and separate your yarn colors. Wind each color into separate balls, or use yarn bobbins or small containers to keep them separated. This will help prevent the yarn from getting tangled as you work.
2. Untwisting Yarn
The yarns can become twisted and tangled as you crochet with multiple colors and make color changes. To prevent this, periodically stop and let the crochet piece dangle, allowing the yarn to untwist naturally. You can also gently spin the piece in the opposite direction to help untangle the yarn.
3. Tangle Prevention
When changing colors, be mindful of how you handle the yarns. Avoid twisting the yarns around each other as you switch colors. Hold the unused yarn to the side or loosely wrap it around your fingers, making sure it doesn’t twist around the working yarn. This will help minimize tangles and keep the yarns separated.
4. Check Tension
Tangled yarn can sometimes be caused by uneven tension between the different colors. Be mindful of maintaining consistent tension when working with each color to ensure that the yarns flow smoothly and don’t get tangled.
5. Pause and Detangle
If you do encounter a tangled mess, it’s best to pause and take the time to untangle it before continuing. Trying to crochet with tangled yarn can lead to further frustration and knots. Gently separate the strands and untwist any knots or tangles using your fingers or a crochet hook.
6. Practice
Changing colors and untangling yarn can be a bit time-consuming, especially when working on intricate projects. It’s important to practice patience and take breaks when needed. Remember that untangling yarn is a part of the process, and with practice, it becomes easier to manage.
By implementing these tips and techniques, you can minimize tangled yarn during color changes and enjoy a smoother crochet experience. Stay patient, be mindful of yarn management, and take the time to untangle any snags that may occur along the way.
Finishing Touches

To add decorative edging in crochet, first choose your preferred edging pattern, which can include lacey, scalloped, or picot designs. Join the yarn at any corner or stitch of your project, create a base with a series of chain stitches, and then follow the selected edging pattern. This involves working a combination of stitches, such as single crochets, double crochets, picots, or clusters, along the edge of your project, ensuring consistency throughout.
Adjust with extra stitches or chain spaces when you reach corners as needed. Complete the pattern around the entire perimeter, join it to the starting point, and finish by weaving in ends. Optionally, block your project for a polished appearance. Adding a decorative edging enhances the final look of your crochet creation, whether it’s a blanket, shawl, or another project.
More Crochet Tutorials
- How to Crochet a Basic Beanie Hat
- How to Crochet a Tube Top
- How to Crochet a Heart
- How to Crochet a Granny Square
- How to Crochet a Scarf
- How to Crochet a Tube Top
- How to Crochet a Square
- How to Crochet a Triangle
- How to Crochet a Purse For Beginners
How to Change Colors in Crochet FAQs
What if I make a mistake in my color changes?
Making a mistake in color changes in crochet is common, especially when working on projects with intricate colorwork. While it can be frustrating, there are a few steps you can take to rectify the situation:
1. Look closely at the mistake and determine what went wrong. Identify if it’s a color change in the wrong place, a missed color change, or any other issue related to the colorwork.
2. Determine the most appropriate solution Based on the mistake and its impact. You have a few options:
- Undo and Redo: If the significant mistake cannot be easily fixed, consider unraveling or “frogging” the affected stitches back to the mistake and redoing the color changes correctly. It may be time-consuming but it will ensure a proper outcome.
- Integrate the Mistake: If the mistake is minor and doesn’t significantly affect the overall look, you may choose to leave it as is and continue with your project. Sometimes, small imperfections can add character and uniqueness to your work.
- Embellish or Modify: Another option is creatively incorporating the mistake into your design. You can add stitches or motifs to camouflage the error or slightly modify the pattern to accommodate the mistake.
Remember, crochet is a creative endeavor, and mistakes are a part of the process. Don’t be too hard on yourself. You’ll become more confident in executing flawless color changes with patience and practice. And even if mistakes occur, they can often be rectified or embraced as unique features in your finished project.
How do you change colors when crocheting a blanket?
To change colors when crocheting a blanket, you can use the technique we learned previously called ”Cut and Tie Method”. To recap, start by finishing the last stitch with the old color and cut the yarn, leaving a few-inch tail. Prepare the new color by folding it in half and placing the loop on your hook.
Insert the hook into the stitch where you want to begin using the new color and pull the loop through, securing the tails of both the old and new colors along the edge.
Continue crocheting with the new color, crocheting over the tails for a few stitches to keep them in place. Weave in the ends of both colors once you’ve worked with the new color for a few rows. Repeat these steps for any additional color changes in your blanket, ensuring each color transition is neatly executed.
How do you end a crochet row and start a new color?
To seamlessly join new yarn colors at the end of a row, you can use the “Magic Knot” join method. Finish your last row and cut the yarn close to the last stitch.
Frog your yarn a few stitches back, and now you’ll attach your new color for your next row with a Magic Knot:
- Begin by aligning the ends of both the old and new color yarns side by side.

- Tie a loose knot on one end using the other color.

- Repeat for the other end.
- Pull the ends gently to tighten the knot.

This technique helps maintain a smooth transition between colors in your crochet work.
How do you alternate two colors when crocheting?
To alternate seamlessly between two colors when crocheting, you can use a simple technique called the “color change” or “stripe” method. Here’s how you can alternate between two colors in your crochet project:
1. Start with the first color
Begin your row or round with the first color by making the necessary number of stitches as specified in your pattern.
2. Prepare for the color change

When you reach the point where you want to switch to the second color, stop with the last yarn over and pull through the first color.
3. Chain 1 with your new color and slip stitch
Chain 1 with your new color and slip stitch in every stitch until the beginning of the round. Continue with the second color.
4. Continue crocheting with your desired stitches into the slip stitches

For the next round, continue crocheting with your desired stitches into the slip stitches from the previous row.
5. To switch back to the first color – repeat steps 2-5
To switch back to the first color, repeat steps 2-5, dropping the second color yarn and picking up the first color yarn to continue crocheting.
Repeating this process allows you to alternate between the two colors in your project. Remember to carry the unused yarn along the back of your work, loosely crocheting over it to secure it in place. This will help avoid loose loops and ensure neat color changes.
It’s important to note that the process is slightly different when working in the round. After completing the first round with the first color, join the second color at the beginning of the next round by making a slip stitch with the second color. Then, continue crocheting with the second color for that round. For subsequent rounds, switch colors using the same process as described above.
With practice, you’ll become more comfortable and efficient in alternating between two colors, allowing you to create beautiful stripes or color patterns in your crochet projects.
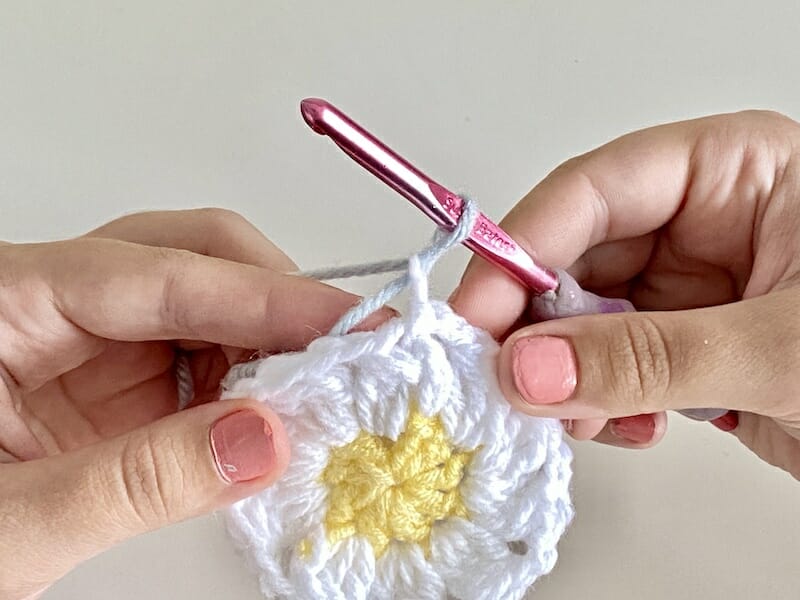
How to change colors crochet granny square
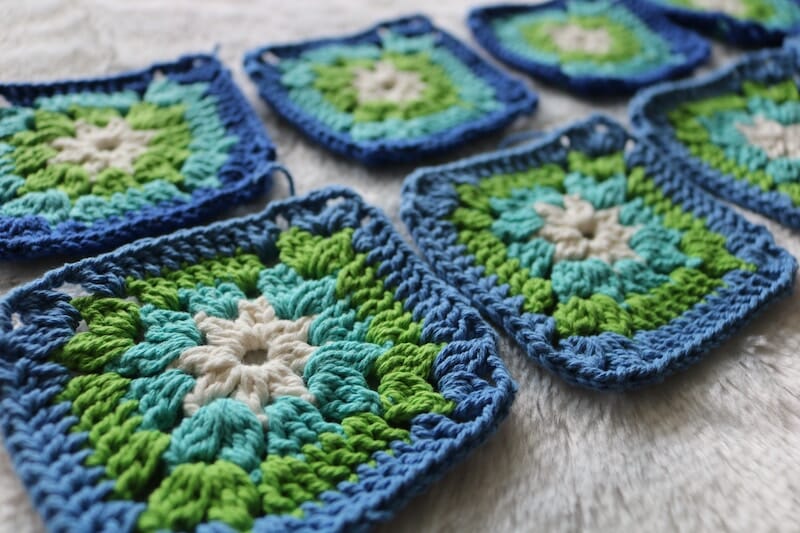
Changing colors in a crochet granny square is similar to the color-changing techniques we learned previously, called the “Join-as-you-go” technique. Here’s a step-by-step guide on how to change colors in a crochet granny square:
1. Start with the first color
Begin your granny square with the first color yarn by making the necessary rounds and stitches according to your pattern. When you reach the round where you want to switch colors, stop with the last stitch of the current color, leaving a loop on your hook.
2. Introduce the second color
Drop the first color yarn and pick up the second color yarn, leaving a tail of several inches. Insert the hook into the top of the first stitch of the current round (or as specified in your pattern) with the new color yarn.
3. Yarn over with the second color yarn
Yarn over with the second color yarn and pull it through the stitch on the hook, essentially making a slip stitch with the new color. This slip stitch joins the new color and completes the color change.
4. Repeat the process

If you want to switch back to the first color or introduce a new color, repeat steps 2-5, dropping the current color yarn and picking up the next color yarn to continue crocheting.
When changing colors in a granny square, it’s essential to carry the unused yarn along the back of your work, crocheting over it to secure it in place. This will help avoid loose loops and ensure neat color changes.
Remember to maintain consistent tension throughout the color changes to achieve a uniform and professional appearance in your granny square. With practice, you’ll become more comfortable with changing colors in granny squares and create stunning multicolored designs.
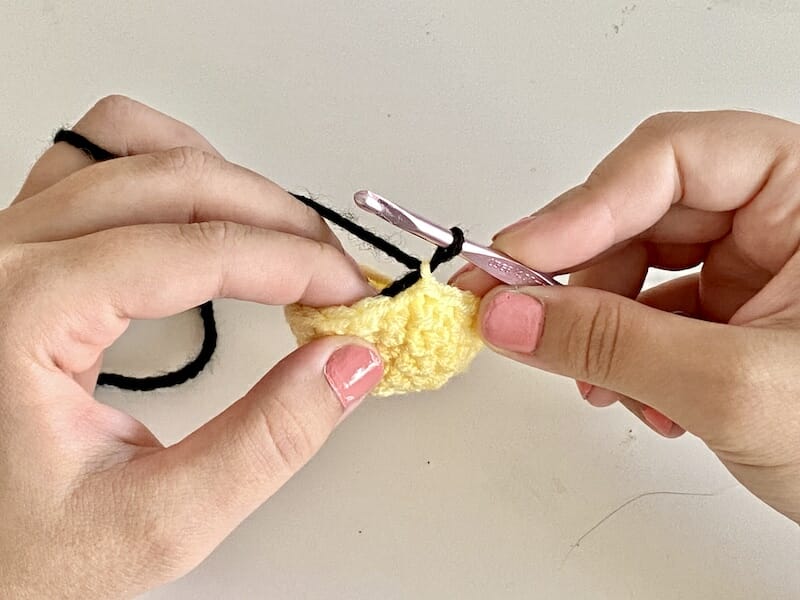
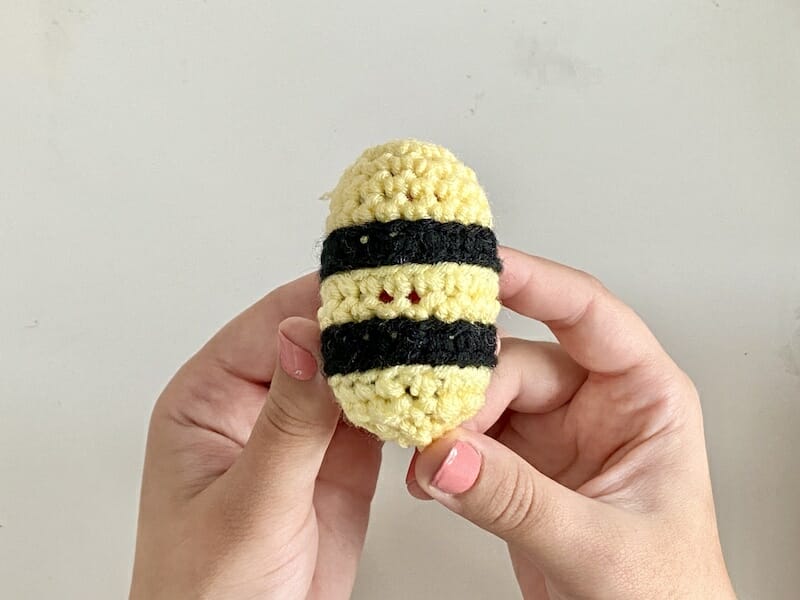
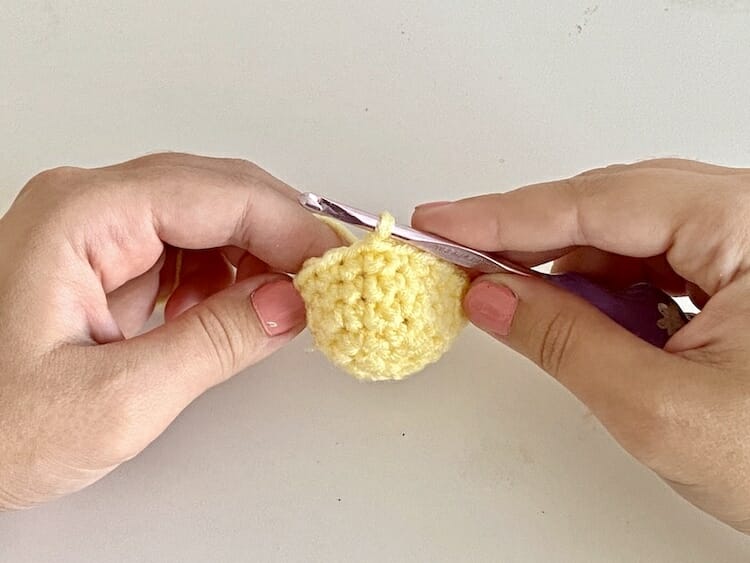
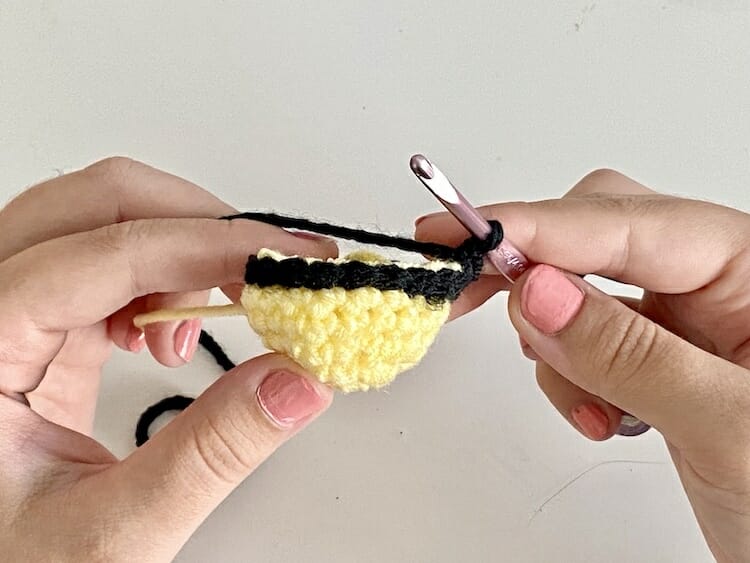
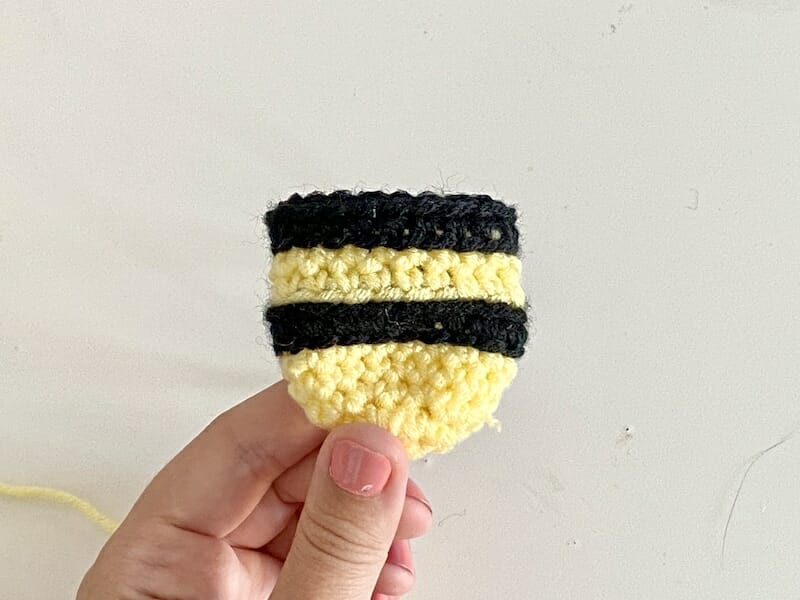
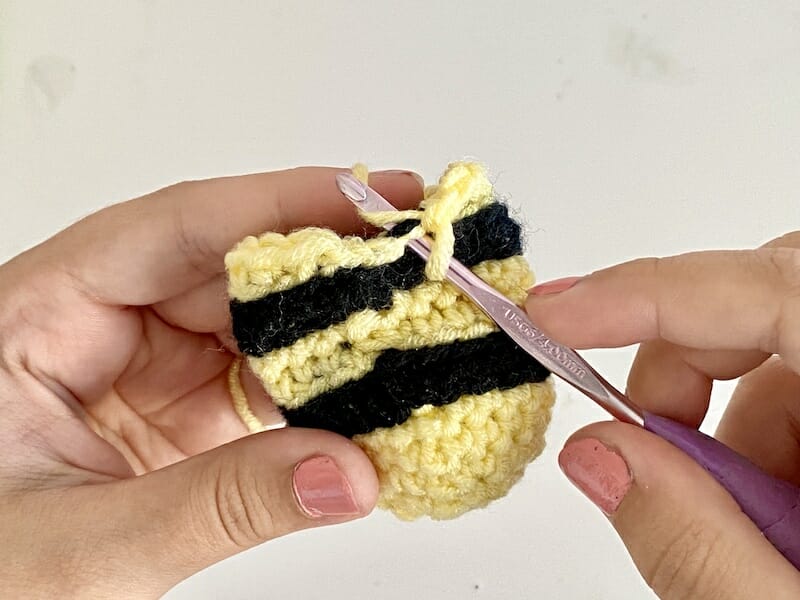
How to change colors crochet amigurumi
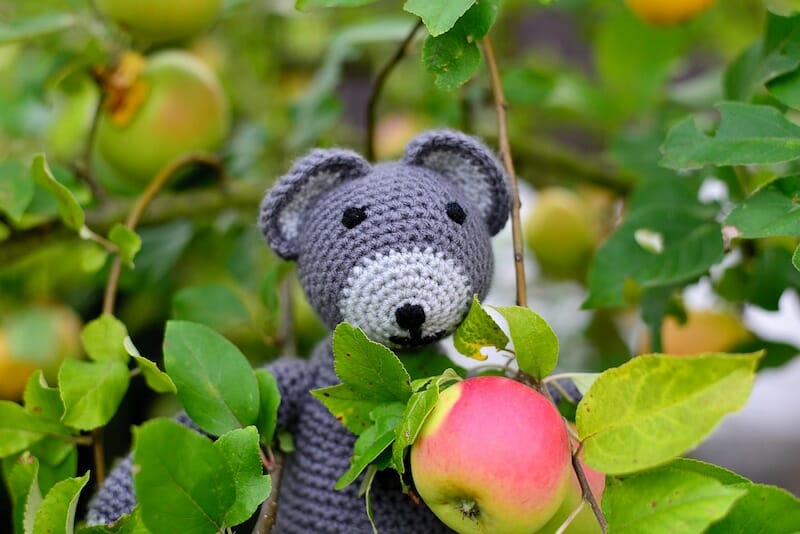
Changing colors in crochet amigurumi, which are small stuffed animals or toys, is similar to regular crochet projects.
1. Prepare for the color change

When you reach the stitch where you want to switch colors, stop with the last stitch of the current color, leaving two loops on your hook.
2. Yarn over with the second color

Yarn over with the second color yarn and pull it through the stitch on the hook, essentially making a slip stitch with the new color. This slip stitch joins the new color and completes the color change.
3. Continue crocheting with the second color

You can continue crocheting with the second color, following the amigurumi pattern instructions for the subsequent stitches and rounds.
4. To change back to the previous color, repeat steps 1-3

When working on amigurumi projects, carrying the unused color yarn inside the amigurumi and crochet over it to secure it is important. This helps prevent the unused yarn from being visible on the outside of the amigurumi. Be mindful of maintaining consistent tension throughout the color changes to achieve a neat and professional finish.
Changing colors in amigurumi allows you to create different color combinations and add details and embellishments to your stuffed toys. With practice, you’ll become more comfortable changing colors in amigurumi and creating adorable and colorful crochet toys.
Key Takeaways
In conclusion, mastering the art of color changes in crochet is essential and incredibly rewarding. It opens up a world of creative possibilities, allowing you to transform simple designs into stunning pieces of art. From choosing the right yarn and tools to learning various techniques, this journey promises to enhance your crochet projects in countless ways.
Whether you’re a beginner looking to add a pop of color to your creations or an experienced crocheter ready to delve into advanced colorwork, this comprehensive guide has you covered. Remember that practice makes perfect, and don’t be discouraged by any initial challenges you encounter. The key is to embrace the process, experiment with different color combinations, and let your unique creativity shine through your projects.
So, grab your yarn, crochet hooks, and get ready to embark on a colorful crochet adventure. With the knowledge and tips shared here, you’ll soon be crafting eye-catching, seamless color changes and turning your crochet pieces into works of art that reflect your personal style and storytelling abilities. Happy crocheting!