From treasured family heirlooms to modern fashion statements, crochet creations have woven their way into our hearts and homes. But for those yet to discover the joys of this timeless art, the process can seem intricate, even daunting. Enter the realm of crochet with this step-by-step guide crafted especially for beginners. Whether you’re a novice searching for a new hobby or an enthusiast aiming to add a chic purse to your collection, this guide will meticulously walk you through each stitch, ensuring your journey is smooth, enjoyable, and fulfilling.
With just a 5 mm crochet hook, some worsted yarn, and a dash of dedication, you’ll create a stylish purse that’s as sturdy as it is stylish and embark on a journey of creativity and self-expression. Dive in and let each stitch weave a story of patience, artistry, and elegance. Ready to begin? Let’s unravel the magic of crochet together!
Table of Contents
- 1 Recommended Materials
- 2 Abbreviations:
- 3 Instructions To Crochet a Purse
- 4 Semi-circle flap
- 5 Joining the edges of the rectangle
- 5.0.1 Grab your rectangle and fold it so the single crochet edges are lined up with one another. Your single crochet rows should be going vertically.
- 5.0.2 Create a slipknot
- 5.0.3 Attach slipknot to folded corner stitches on one side of the rectangle
- 5.0.4 Single crochet into the same stitch you attached your yarn to
- 5.0.5 Repeat the step of joining the edges by inserting your hook under both stitches along the edge and single crocheting them together.
- 5.0.6 For the next side of the rectangle, you will repeat all of the steps you have just done.
- 6 Attaching the flap
- 6.0.1 Grab both your finished pouch as well as your semi-circle. Place the semi-circle so the flat side is aligned with the back top edge of the pouch.
- 6.0.2 Create a slipknot
- 6.0.3 Attach slipknot to the right corner of the flap and back corner of the rectangle.
- 6.0.4 Single crochet into the space you connected your slipknot, as well as along the entire edge of the flap and rectangle to join the 2 panels together.
- 6.1 More Free Crochet Patterns
- 7 You have now completed your purse!
Recommended Materials
- 5 mm crochet hook
- Choice of weight 4 worsted yarn
- Scissors
- Tapestry needle
- (Optional) Stitch marker
Abbreviations:
- CH- Chain
- SC- Single crochet
- HDC- Half Double crochet
- INC- Increase
- SL ST- Slip stitch
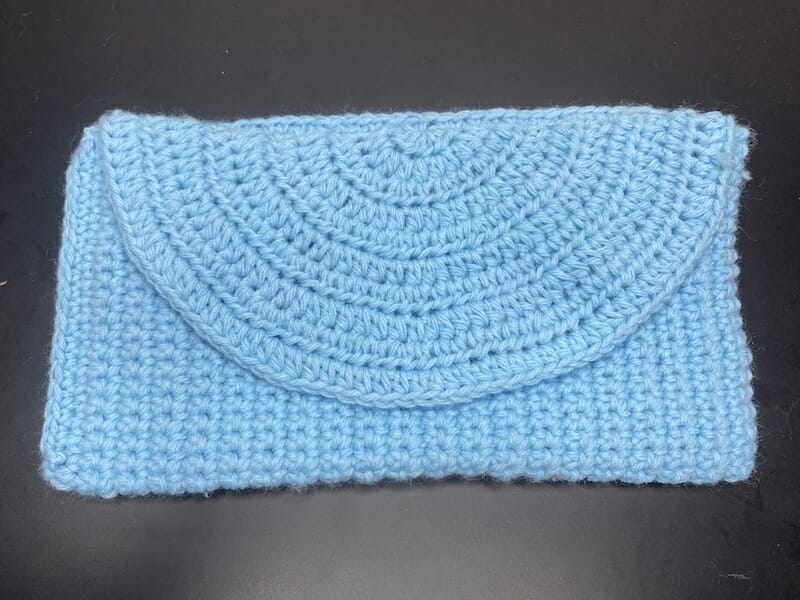
This bag will mainly be made up of single crochet stitches. While single crochets take longer to do, your work will ultimately pay off. Single crochets will make your purse more secure than if we used looser stitches that create more gaps within the panel. This pattern consists of making a large rectangle, which we will then fold in half and stitch together to create a pouch. We will then add a semi-circle to the top of the pouch to create a flap. Let’s begin!
More Crochet Tutorials
- How to Crochet a Basic Beanie Hat
- How to Crochet a Tube Top
- How to Crochet a Heart
- How to Crochet a Granny Square
- How to Crochet a Scarf
- How to Change Colors in Crochet
- How to Crochet a Triangle
- How to Crochet a Top
Instructions To Crochet a Purse
Beginning chain
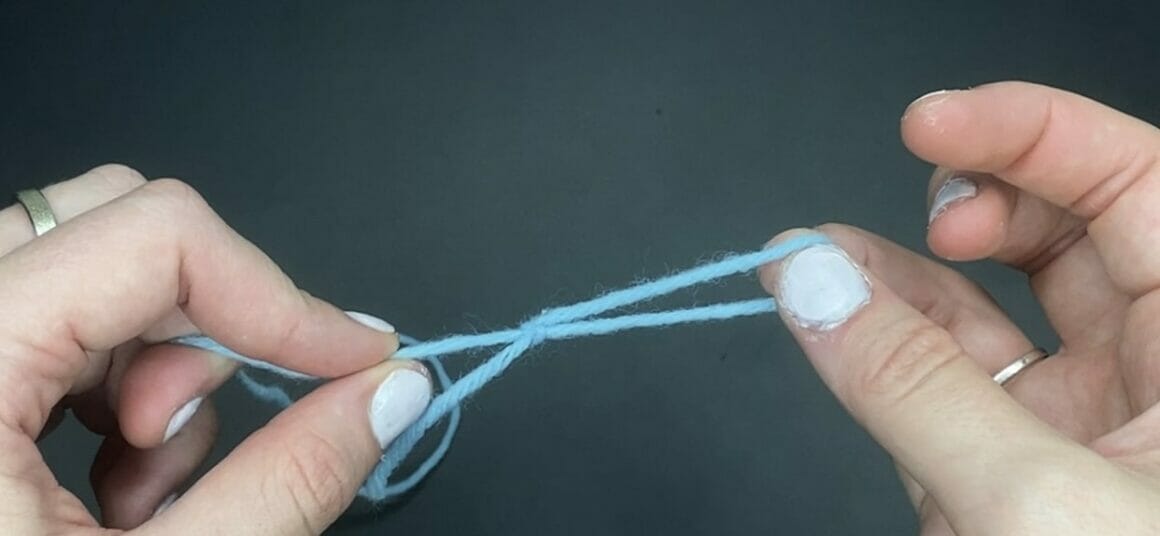
Create a slipknot
Create a loop with your yarn so that the 2 strands of yarn are crossing over one another. Insert your thumb and index finger through the loop, then grab the top strand of yarn. Pull this strand through the loop and pull tight to create your slipknot.
Chain 43 (CH 43)
Chain by yarning over and pulling through the loop currently on your hook for a total of 41 times
Row 1
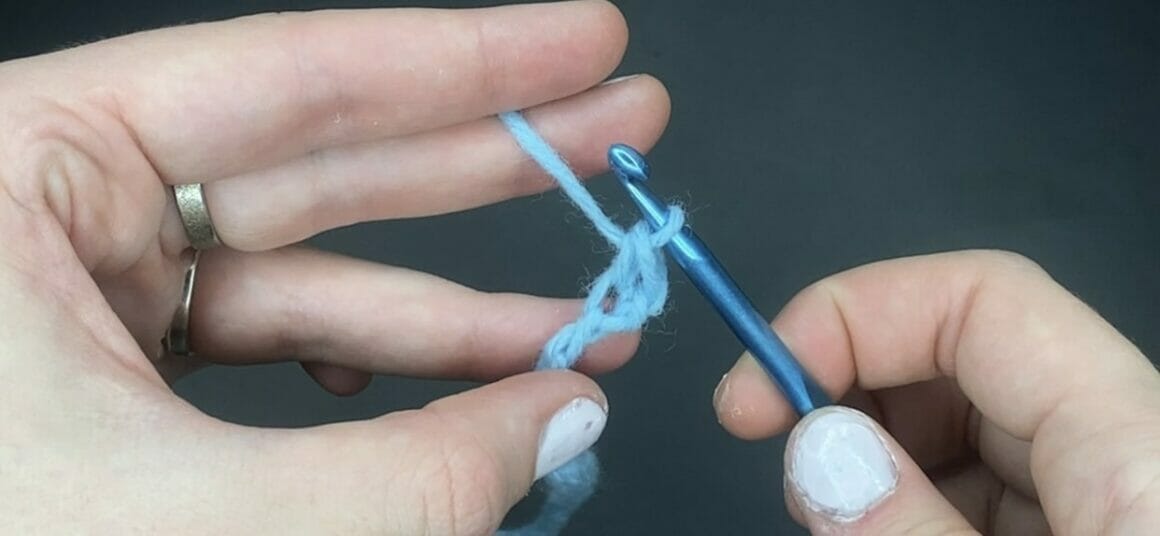
Single crochet into the second chain from your hook (SC in second CH from hook)
Count the chain currently on your hook and the one before to find the second chain from your hook. Insert your hook into this chain and yarn over, pull the hook through the stitch, then yarn over and pull through both loops on your hook to create a single crochet.
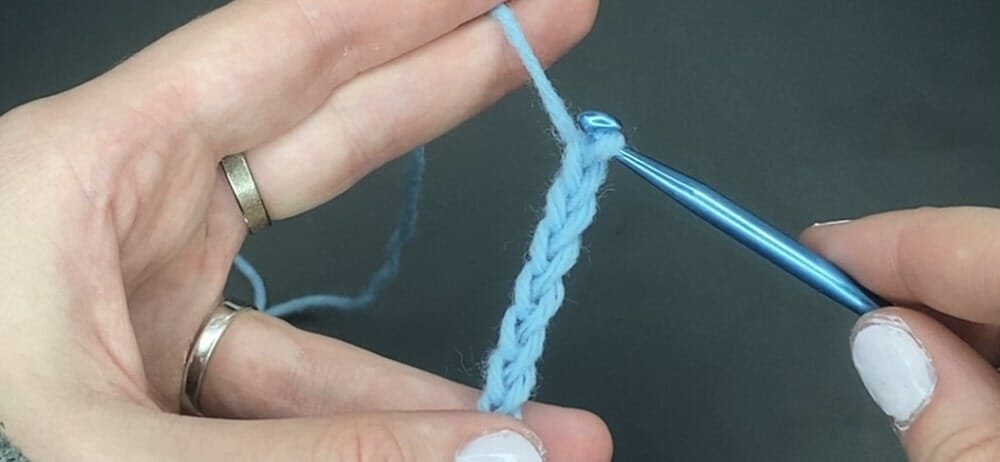
Single crochet across your beginning chain (SC across)
Create a single crochet into the next chain by inserting your hook into the chain, yarning over and pulling your hook through the chain, and then yarning over and pulling through the 2 loops currently on your hook. Repeat these actions across the rest of your beginning chain.
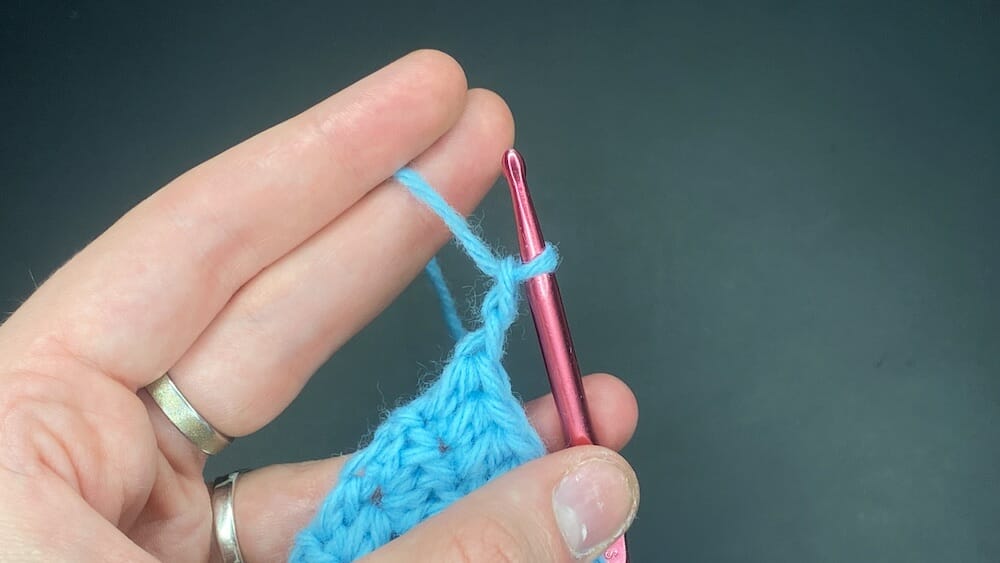
Once you reach the end of your row, chain 1 (CH 1)
Once you have placed your single crochet into the last chain, chain 1 by yarning over and pulling through the loop currently on your hook to create the needed height for your next row of stitches
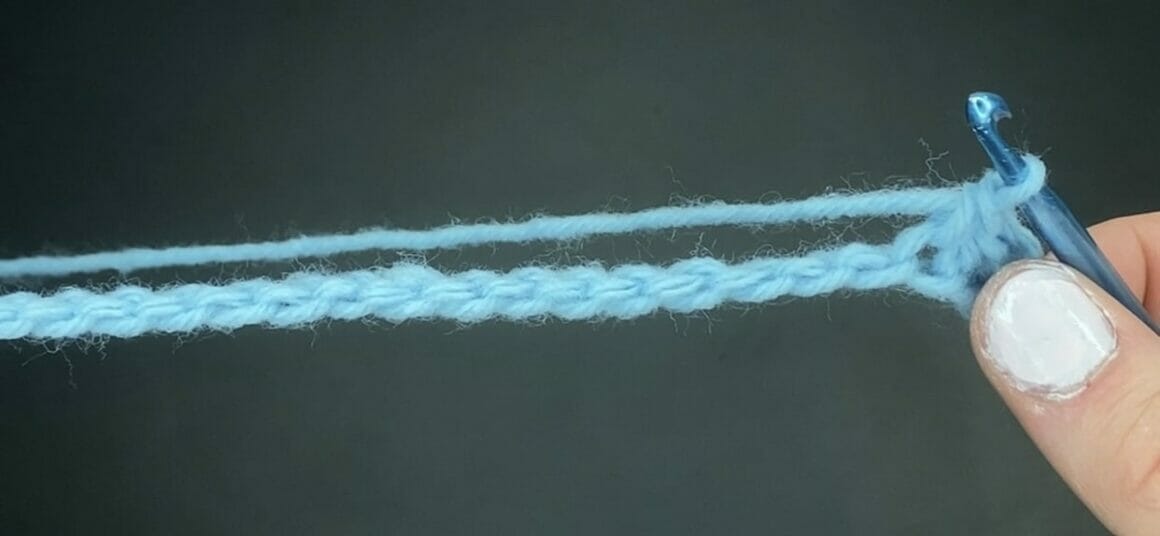
Row 2
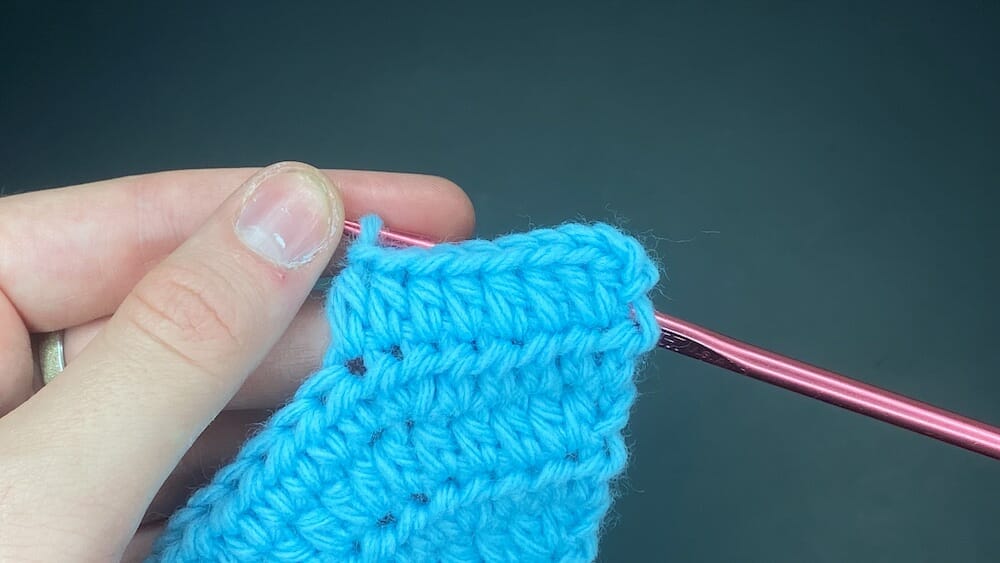
Single crochet across the row into every single crochet stitch that you had previously made in the chain (SC across)
Single crochet by inserting your hook into the stitch, yarning over, pulling your hook through the stitch, yarning over, and pulling through the 2 loops currently on your hook. Repeat this into every stitch along the row.
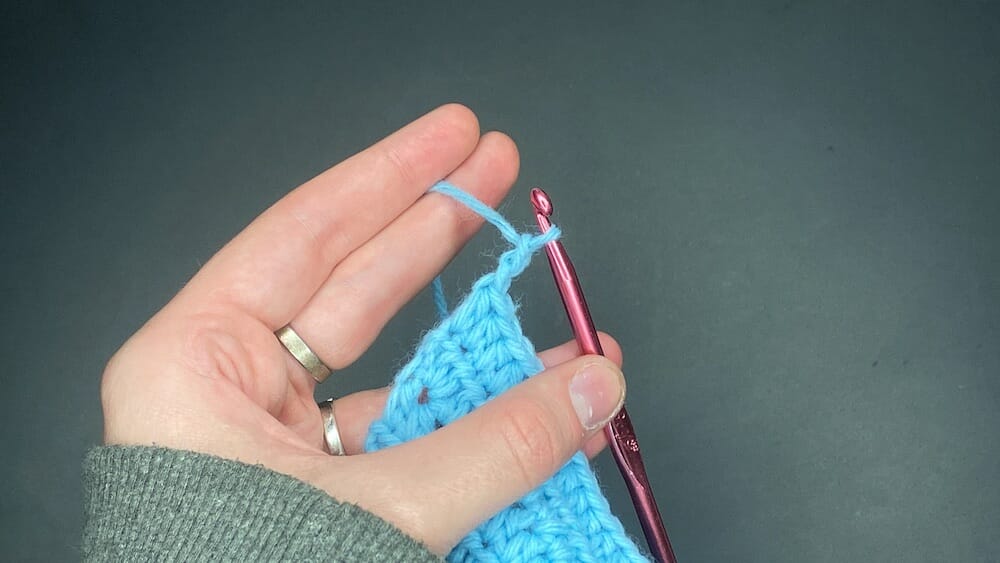
Chain 1 (CH 1)
When you have completed your row of single crochet stitches, chain 1 by yarning over and pulling through the loop currently on your hook to create the height needed for your next row of stitches.
Row 3-40
Repeat these 2 next steps repeatedly until you reach the necessary row count.
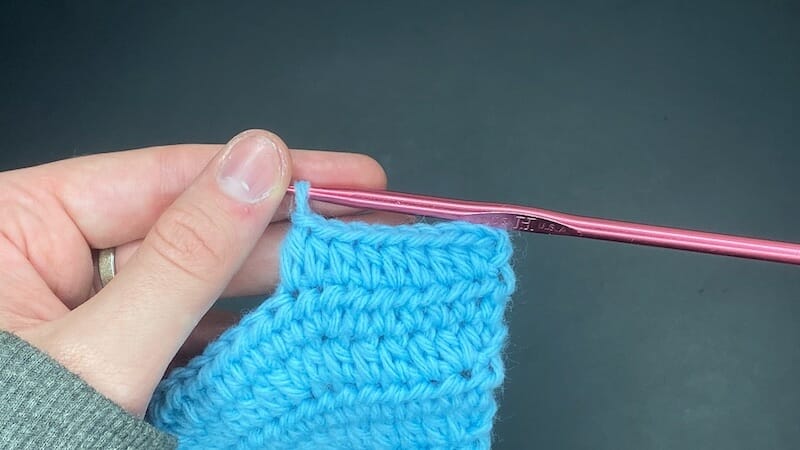
Single crochet across the row (SC across)
Single crochet into each stitch by inserting your hook into the stitch, yarning over, pulling your hook through the stitch, yarning over, and pulling through the 2 loops currently on your hook. Repeat this along the entire row.
Chain 1 (CH 1)
At the end of your row of single crochets, chain 1 by yarning over and pulling through the loop currently on your hook
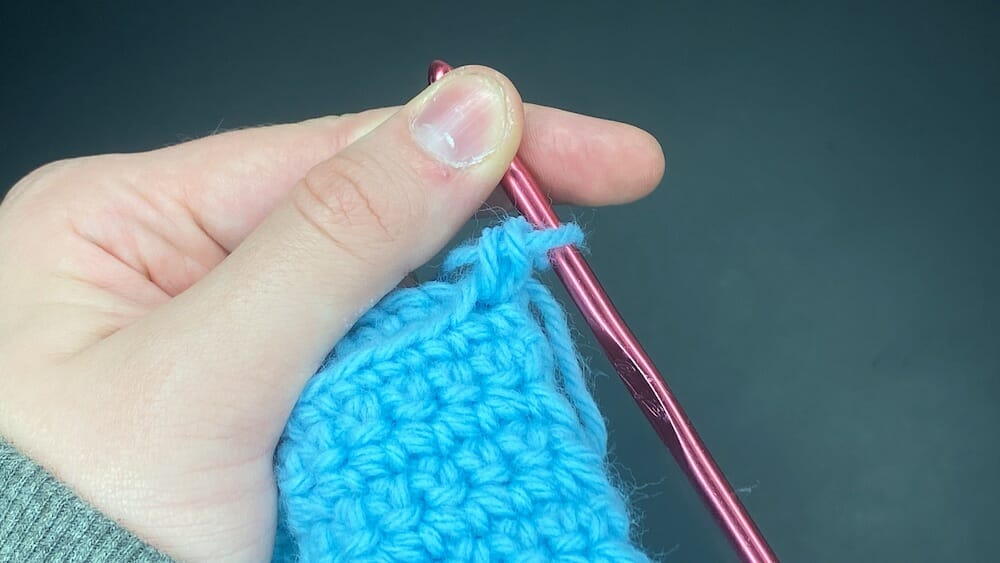
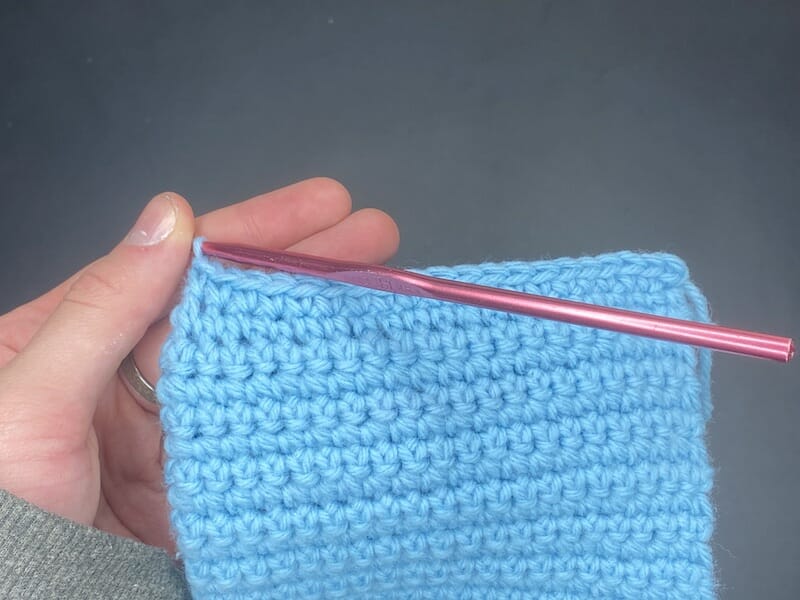
Once you have single crocheted into the last stitch of row 40, chain 1 as you had been previously, then cut your yarn, leaving a tail, which you will then pull through the chain loop. This fastens off your yarn, securing the last stitch in your row to prevent your stitches from unraveling. (CH 1 and fasten off)
Chain 1 by yarning over and pulling through the loop currently on your hook
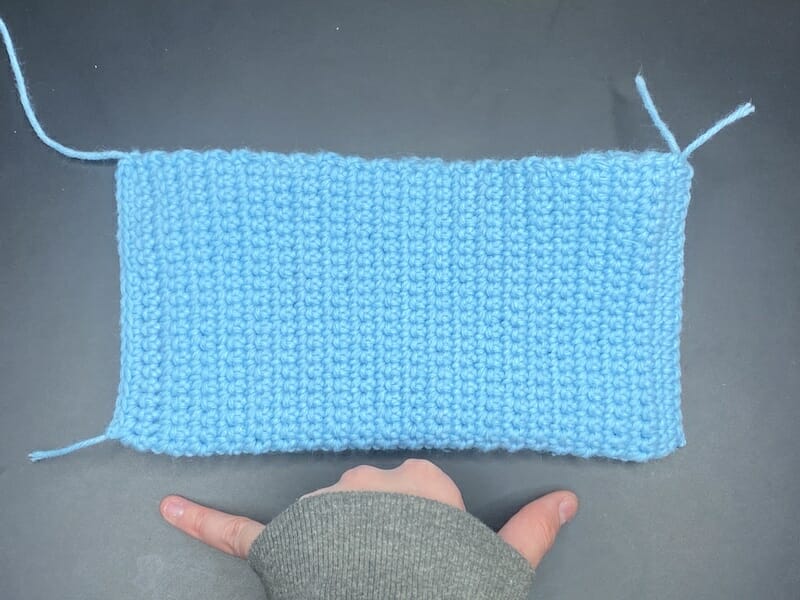
You now have a rectangle. You will fold this in half later to create the pouch of the purse and then join the ends together.
Semi-circle flap
You are now going to create the flap to cover the purse opening. We will only work on one side to create the half circle by making a magic ring. We will repeat the same increases that you would typically do for a regular circle throughout the flap rows.
Row 1
Create a magic ring and secure it with a chain.
Create a magic ring by wrapping your yarn twice around 2 of your fingers, then inserting your hook under the first yarn loop, grabbing the second. Pull the second yarn strand under the first, then chain 1 to secure your magic ring.
Chain 1 (CH 1)
Chain 1 by yarning over and pulling through the loop currently on your hook.
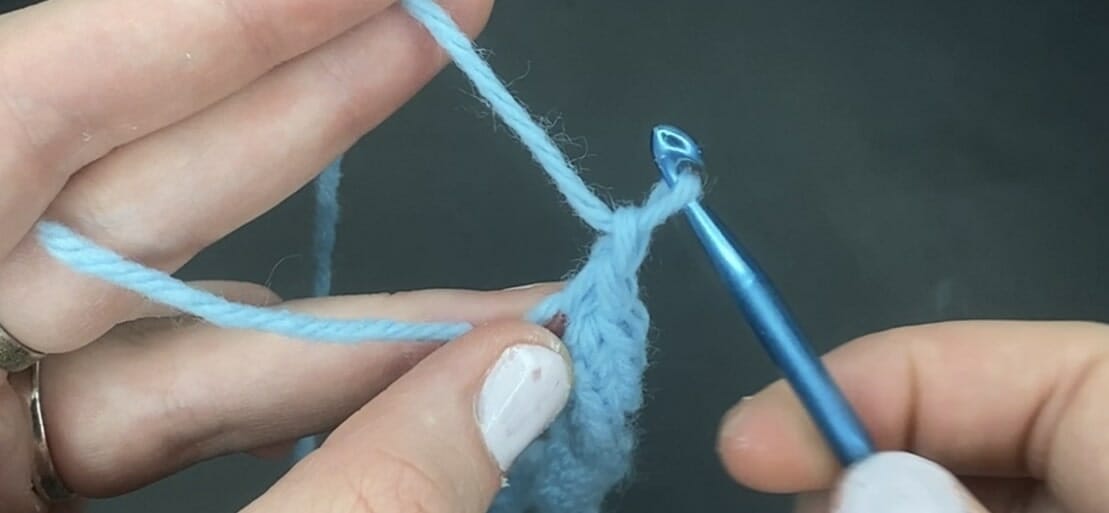
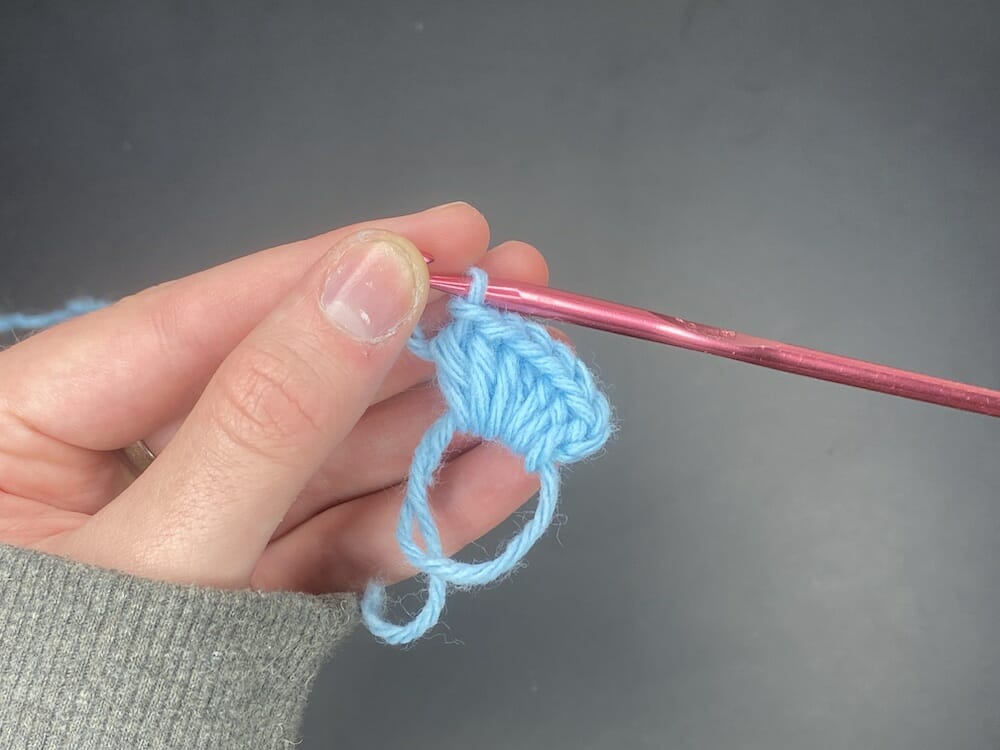
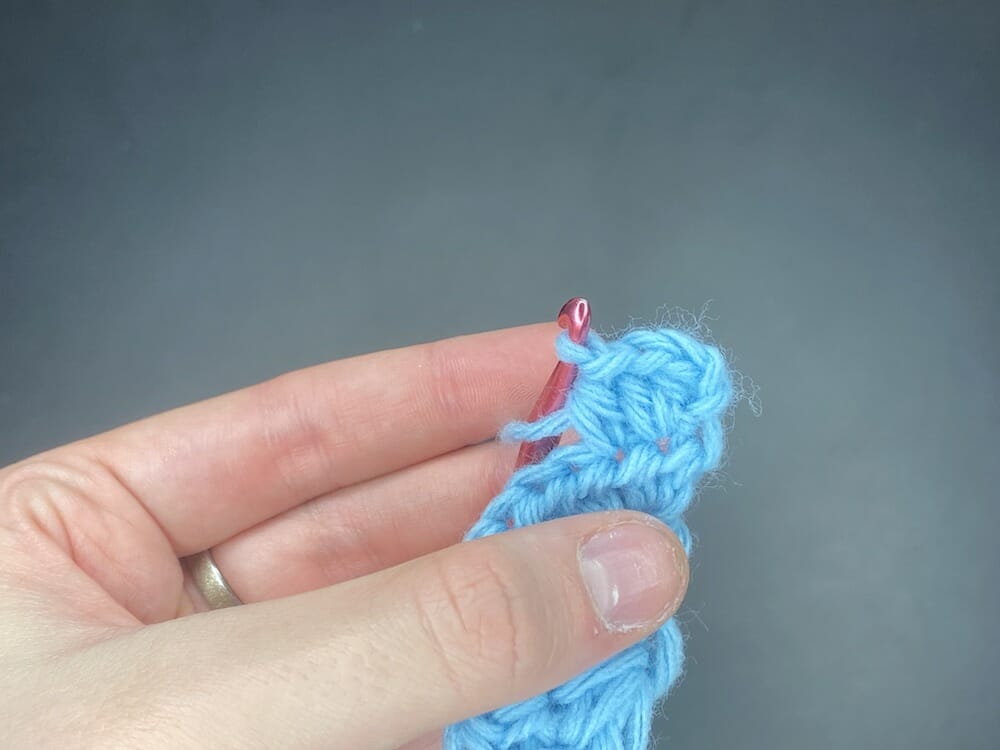
Half double crochet 6 into the magic circle (HDC 6)
Half double crochet by yarning over, inserting your hook into the stitch, yarning over, pulling your hook through the stitch, and then pulling through all 3 loops on your hook. Repeat this 6 times into the magic ring.
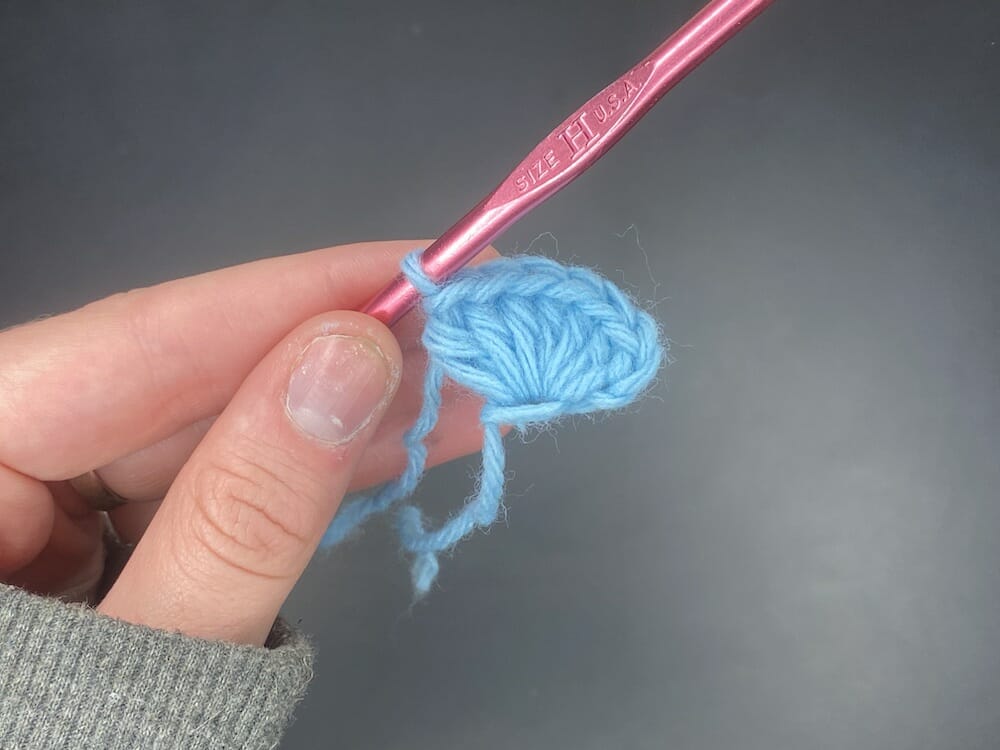
Tighten the magic ring making sure that the stitches fall on one side of the magic ring. You will not be joining into the last stitch as if you were creating a circle. The next steps will be similar to crocheting a basic circle, but you will be crocheting in rows instead of rounds. (Close magic ring)
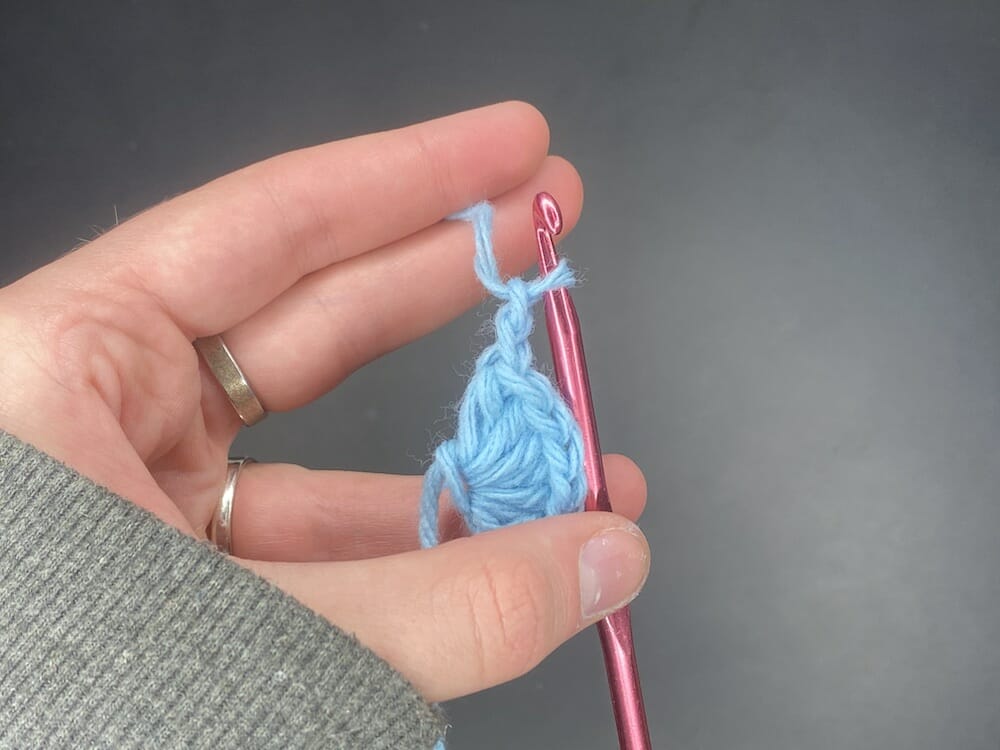
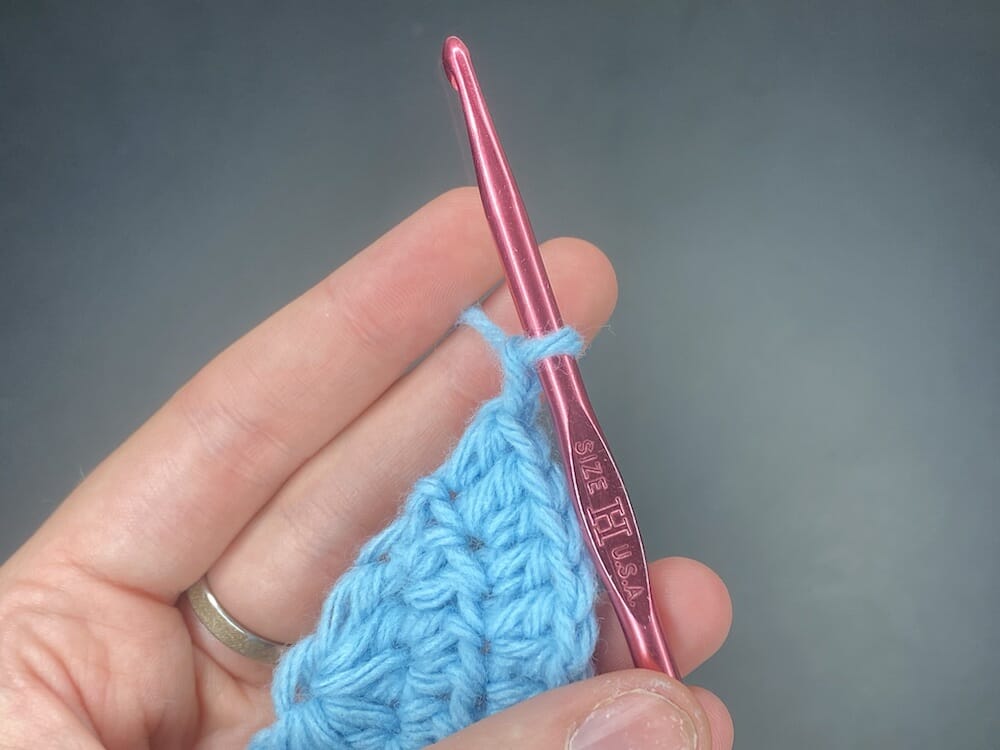
After you have finished 6 half double crochets in the magic circle, chain 2 (CH 2)
Chain 2 by yarning over and pulling through the loop currently on your hook
Row 2
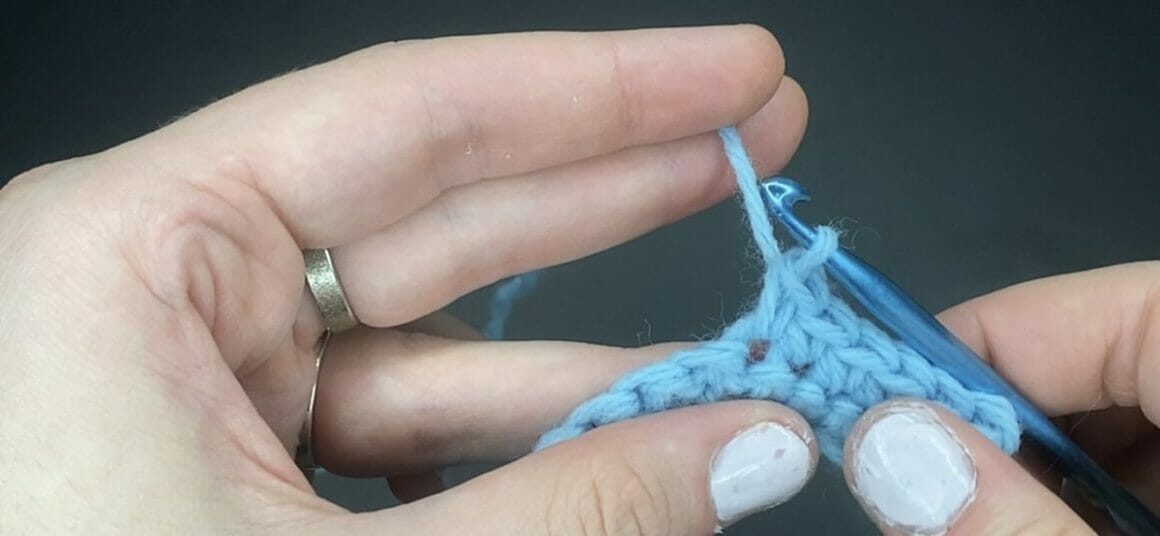
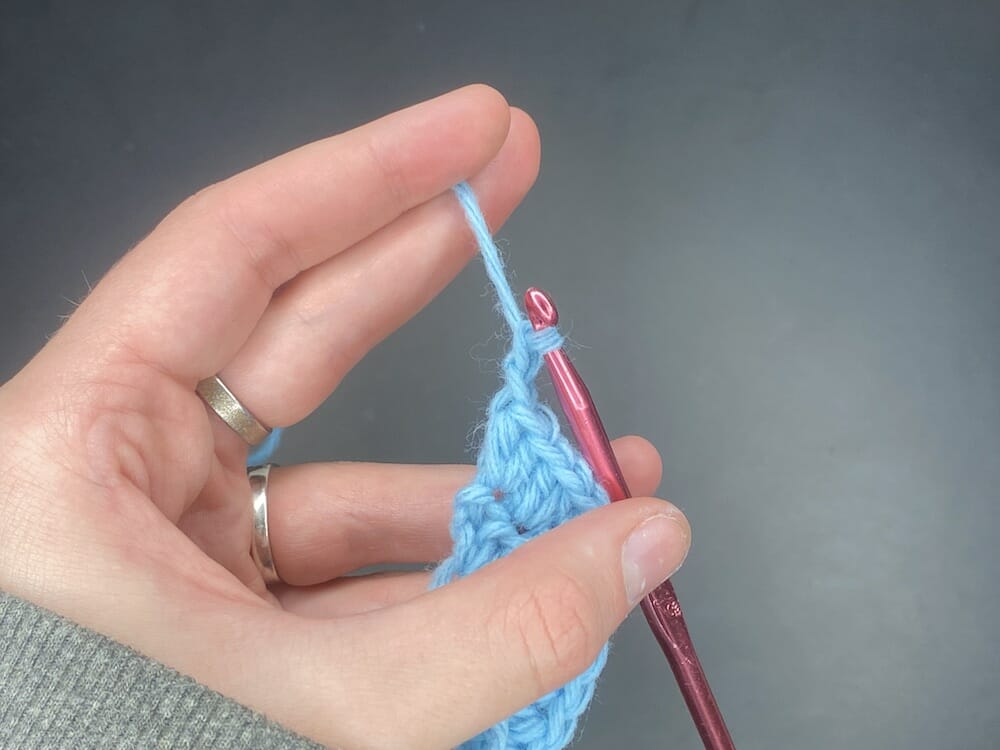
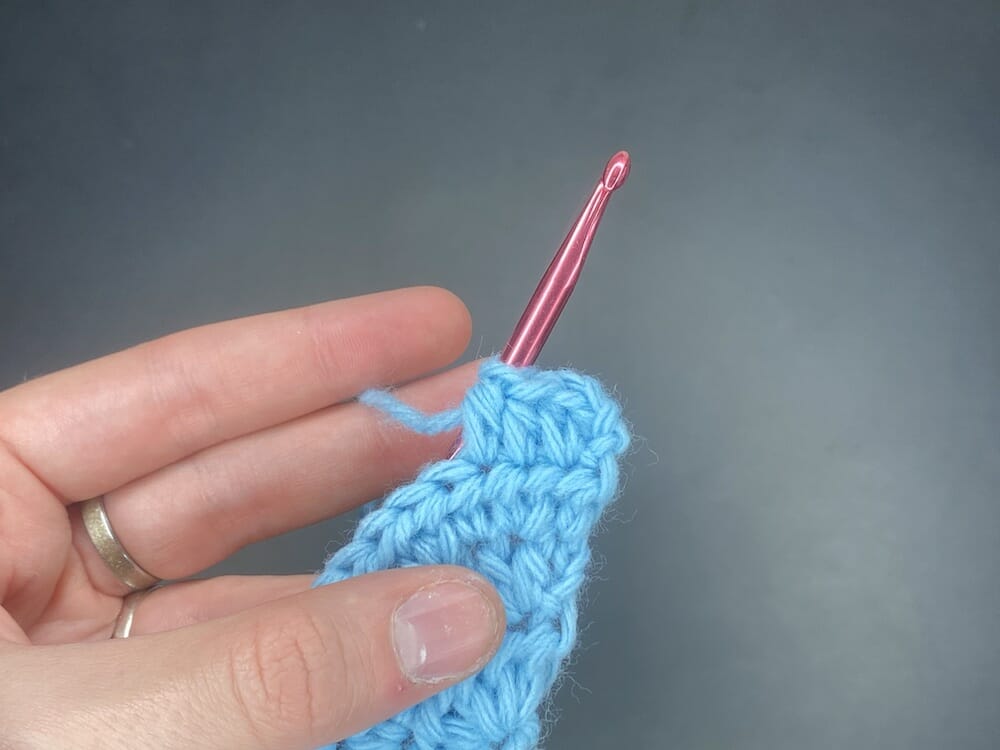
Half double crochet increase into every stitch of the row (HDC INC for the entire row)
Half double crochet by yarning over, inserting your hook into the stitch, yarning over, pulling your hook through the stitch, and then pulling through all 3 loops on your hook. Repeat this into the same stitch you put the first stitch into. For the rest of the row, you will be putting 2 half-double crochets together in each stitch.
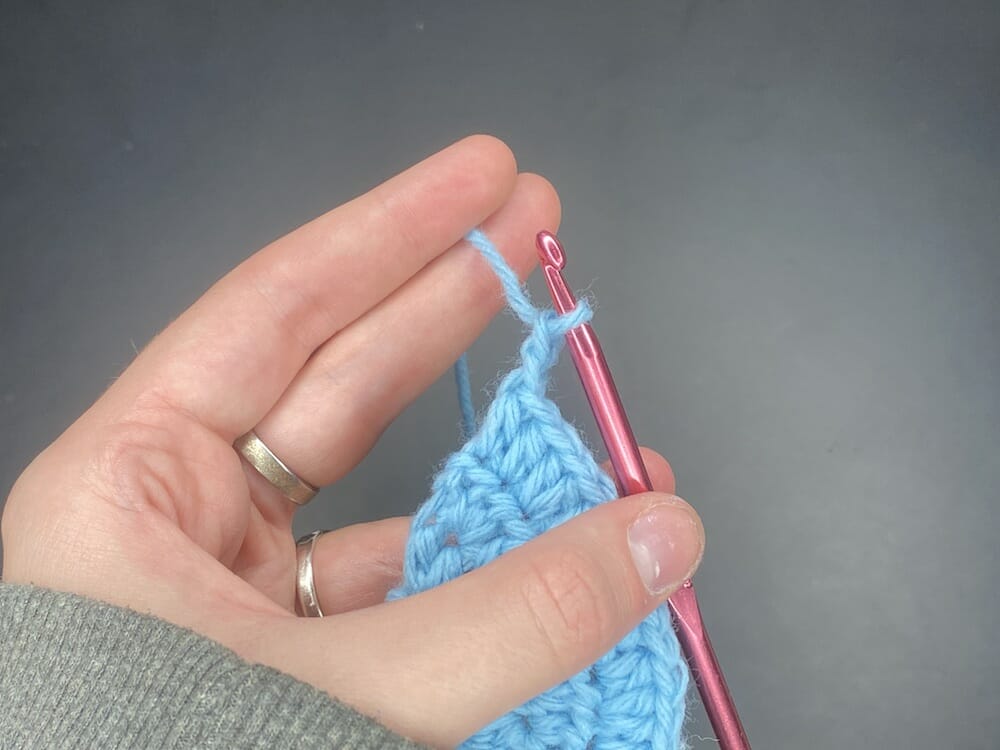
Chain 2 (CH 2)
Chain 2 by yarning over and pulling through the loop currently on your hook.
Row 3
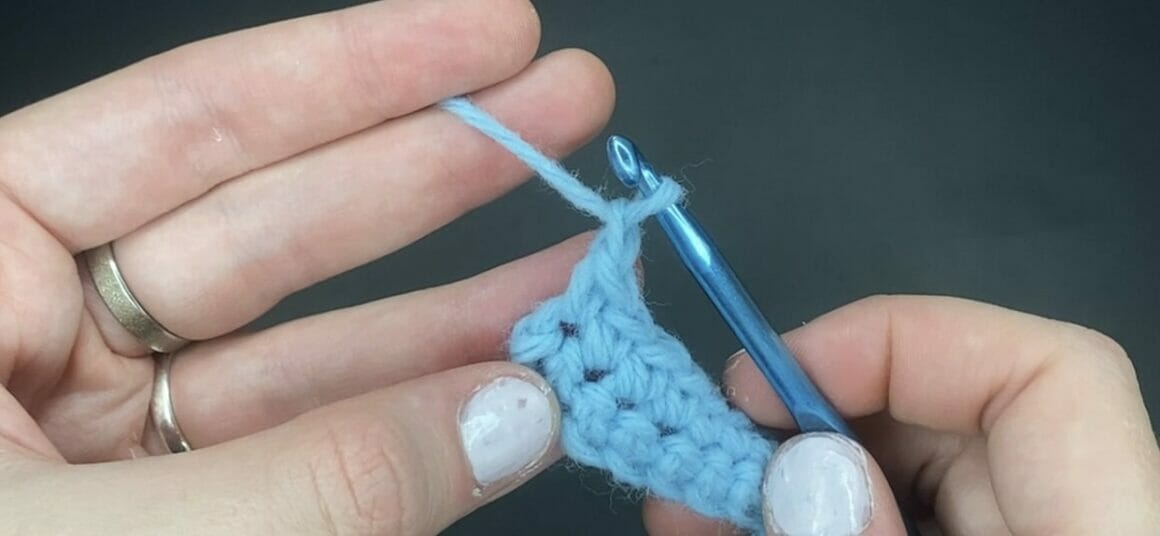
Half double crochet increase into the first stitch of the row, followed by 1 half double crochet (HDC INC, HDC)
Half double crochet by yarning over, inserting your hook into the stitch, yarning over, pulling your hook through the stitch, and then pulling through all 3 loops on your hook. Repeat this into the same stitch you put the first stitch into. Into the next stitch, put 1 half double crochet.
For the rest of the row, you are going to repeat the pattern of half double crochet, increasing into one stitch, then half double crocheting into the next.
Chain 2 (CH 2)
Chain 2 by yarning over and pulling through the loop currently on your hook.
Row 4
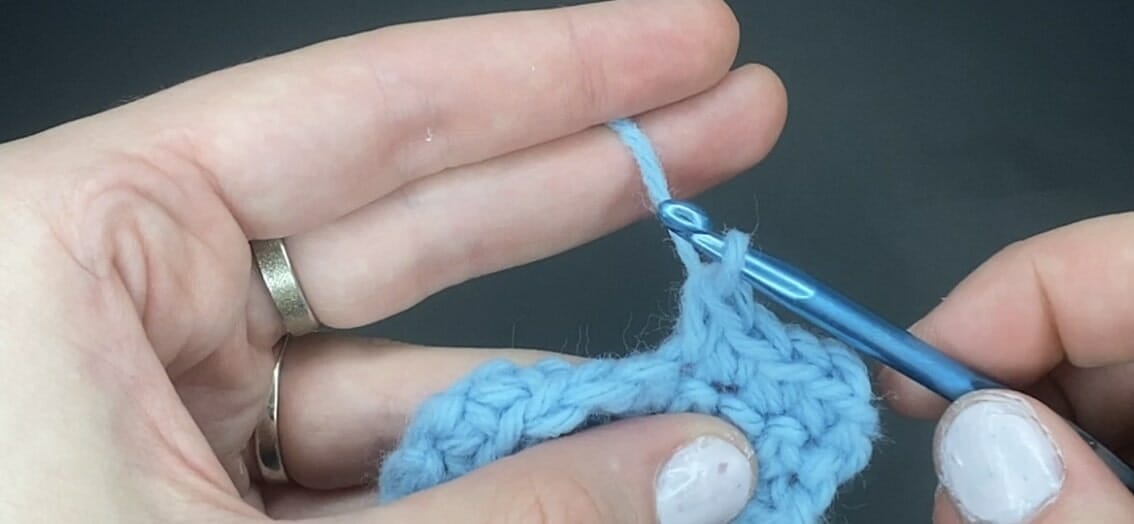
Half double crochet increase into the first stitch of the row, followed by 2 half double crochets (HDC INC, 2 HDC)
Half double crochet by yarning over, inserting your hook into the stitch, yarning over, pulling your hook through the stitch, and then pulling through all 3 loops on your hook. Repeat this into the same stitch you put the first stitch into. Into the next 2 stitches, make 2 half-double crochets.
For the rest of the row, you are going to repeat the pattern of half double crochet, increasing into one stitch, then half double crocheting into the next 2 stitches.
Chain 2 (CH 2)
Chain 2 by yarning over and pulling through the loop currently on your hook.
Row 5
Half double crochet increase into the first stitch of the row, followed by 3 half double crochets (HDC INC, 3 HDC)
Half double crochet by yarning over, inserting your hook into the stitch, yarning over, pulling your hook through the stitch, and then pulling through all 3 loops on your hook. Repeat this into the same stitch you put the first stitch into. Into the next 3 stitches, make 3 half-double crochets.
For the rest of the row, you are going to repeat the pattern of half double crochet, increasing into one stitch, then half double crocheting into the next 3 stitches.
Chain 2 (CH 2)
Chain 2 by yarning over and pulling through the loop currently on your hook.
Row 6:
Half double crochet increase into the first stitch of the row, followed by 4 half double crochets (HDC INC, 4 HDC)
Half double crochet by yarning over, inserting your hook into the stitch, yarning over, pulling your hook through the stitch, and then pulling through all 3 loops on your hook. Repeat this into the same stitch you put the first stitch into. Into the next 4 stitches, make 4 half-double crochets.
For the rest of the row, you are going to repeat the pattern of half double crochet, increasing into one stitch, then half double crocheting into the next 4 stitches.
Chain 2 (CH 2)
Chain 2 by yarning over and pulling through the loop currently on your hook.
Row 7
Half double crochet increase into the first stitch of the row, followed by 5 half double crochets (HDC INC, 5 HDC)
Half double crochet by yarning over, inserting your hook into the stitch, yarning over, pulling your hook through the stitch, and then pulling through all 3 loops on your hook. Repeat this into the same stitch you put the first stitch into. Into the next 5 stitches, make 5 half-double crochets.
For the rest of the row, you are going to repeat the pattern of half double crochet, increasing into one stitch, then half double crocheting into the next 5 stitches.
Chain 2 (CH 2)
Chain 2 by yarning over and pulling through the loop currently on your hook.
Row 8
Half double crochet increase into the first stitch of the row, followed by 6 half double crochets (HDC INC, 6 HDC)
Half double crochet by yarning over, inserting your hook into the stitch, yarning over, pulling your hook through the stitch, and then pulling through all 3 loops on your hook. Repeat this into the same stitch you put the first stitch into. Into the next 6 stitches, make 6 half-double crochets.
For the rest of the row, you are going to repeat the pattern of half double crochet, increasing into one stitch, then half double crocheting into the next 6 stitches.
Chain 2 (CH 2)
Chain 2 by yarning over and pulling through the loop currently on your hook.
Row 9:
Half double crochet increase into the first stitch of the row, followed by 7 half double crochets (HDC INC, 7 HDC)
Half double crochet by yarning over, inserting your hook into the stitch, yarning over, pulling your hook through the stitch, and then pulling through all 3 loops on your hook. Repeat this into the same stitch you put the first stitch into. Into the next 7 stitches, make 7 half-double crochets.
For the rest of the row, you are going to repeat the pattern of half double crochet, increasing into one stitch, then half double crocheting into the next 7 stitches.
Chain 2 (CH 2)
Chain 2 by yarning over and pulling through the loop currently on your hook.
Row 10
Half double crochet increase into the first stitch of the row, followed by 8 half double crochets (HDC INC, 8 HDC)
Half double crochet by yarning over, inserting your hook into the stitch, yarning over, pulling your hook through the stitch, and then pulling through all 3 loops on your hook. Repeat this into the same stitch you put the first stitch into. Into the next 8 stitches, make 8 half-double crochets.
For the rest of the row, you are going to repeat the pattern of half double crochet, increasing into one stitch, then half double crocheting into the next 8 stitches.
Once you have half double crocheted into the last stitch of row 10, chain 1, cut your yarn, leaving a tail you will pull through the chain loop. This fastens off your yarn, securing the last stitch in your row to prevent your stitches from unraveling. (CH 1 and fasten off)
Chain 1 by yarning over and pulling through the loop currently on your hook
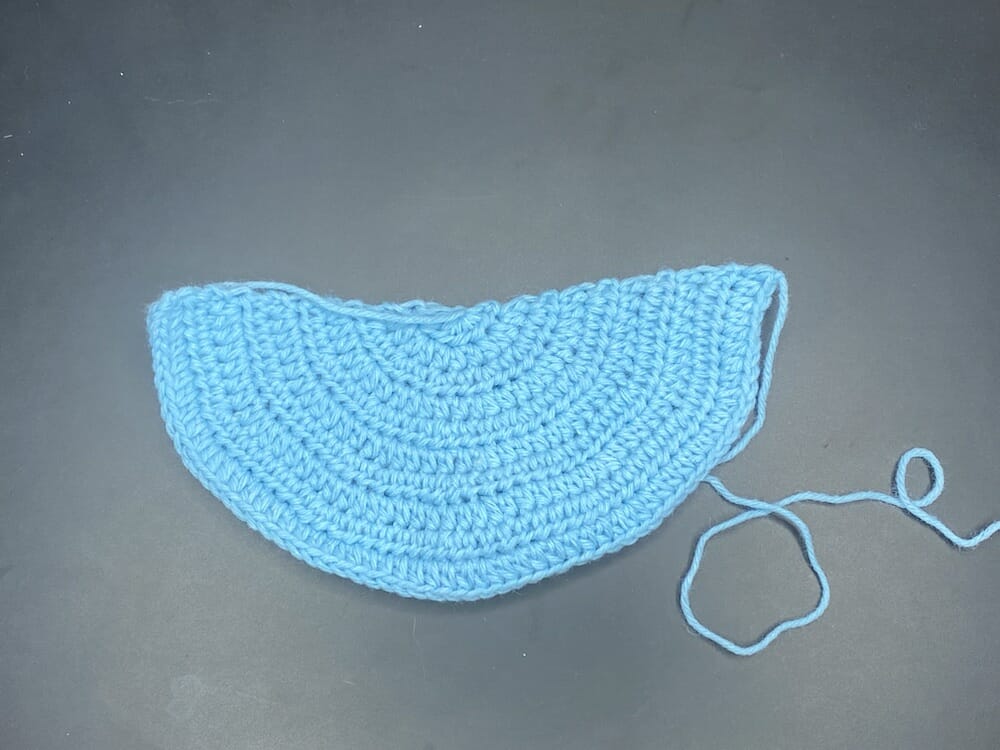
You now have a semi-circle, which we will use as a flap to cover the purse opening.
Joining the edges of the rectangle
Grab your rectangle and fold it so the single crochet edges are lined up with one another. Your single crochet rows should be going vertically.
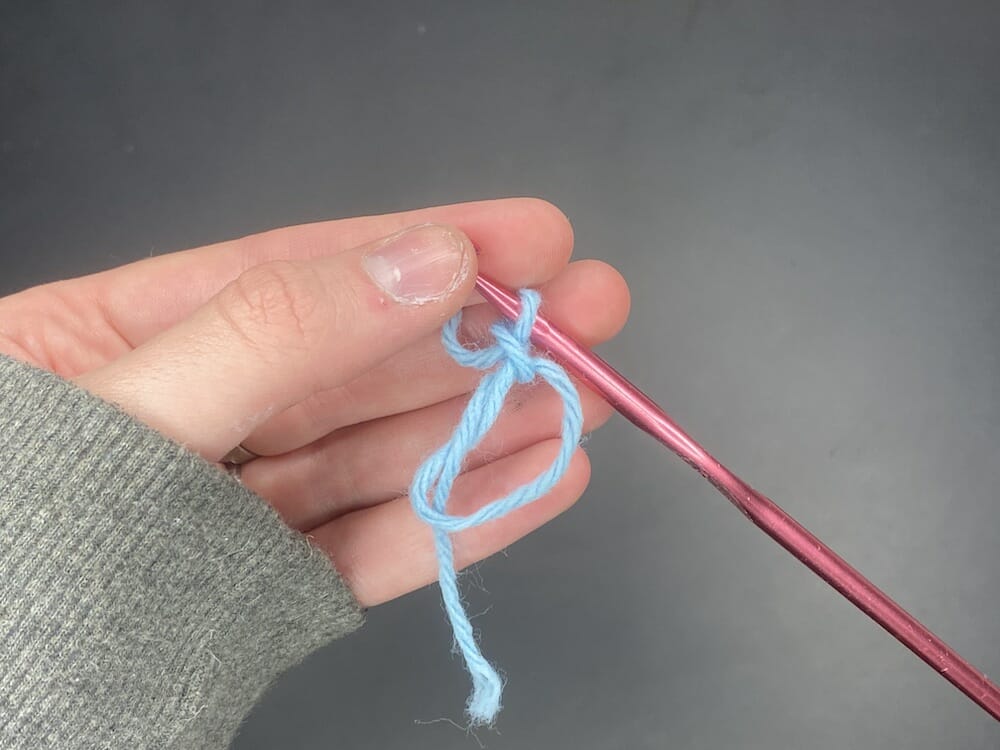
Create a slipknot
Create a loop with your yarn so that the 2 strands of yarn are crossing over one another. Insert your thumb and index finger through the loop, then grab the top strand of yarn. Pull this strand through the loop and pull tight to create your slipknot.
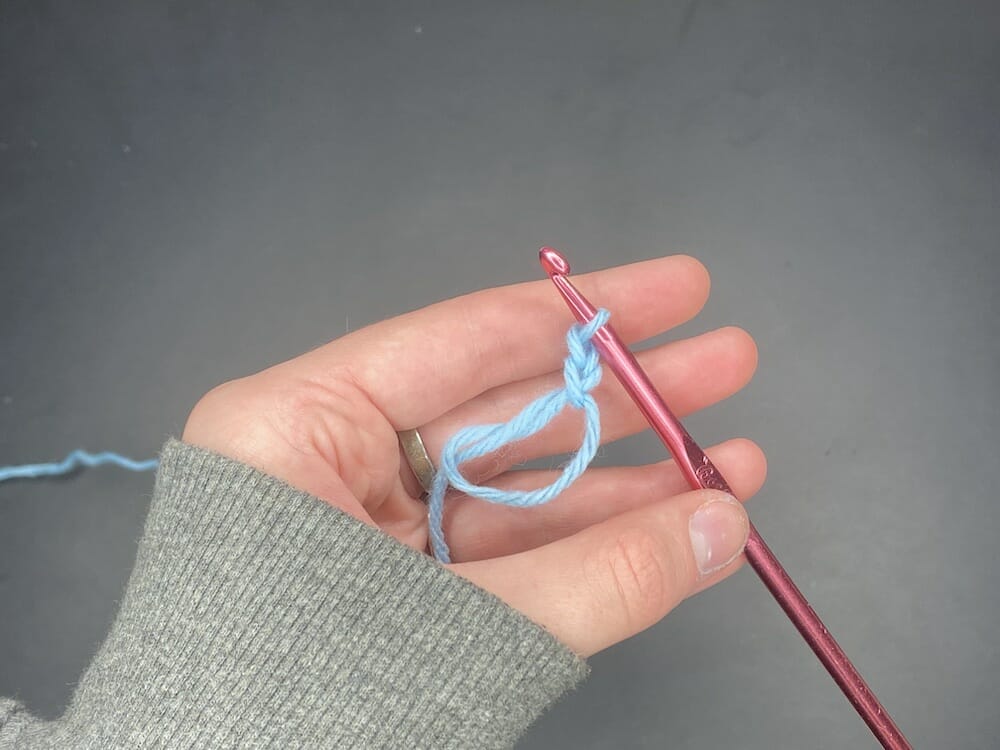
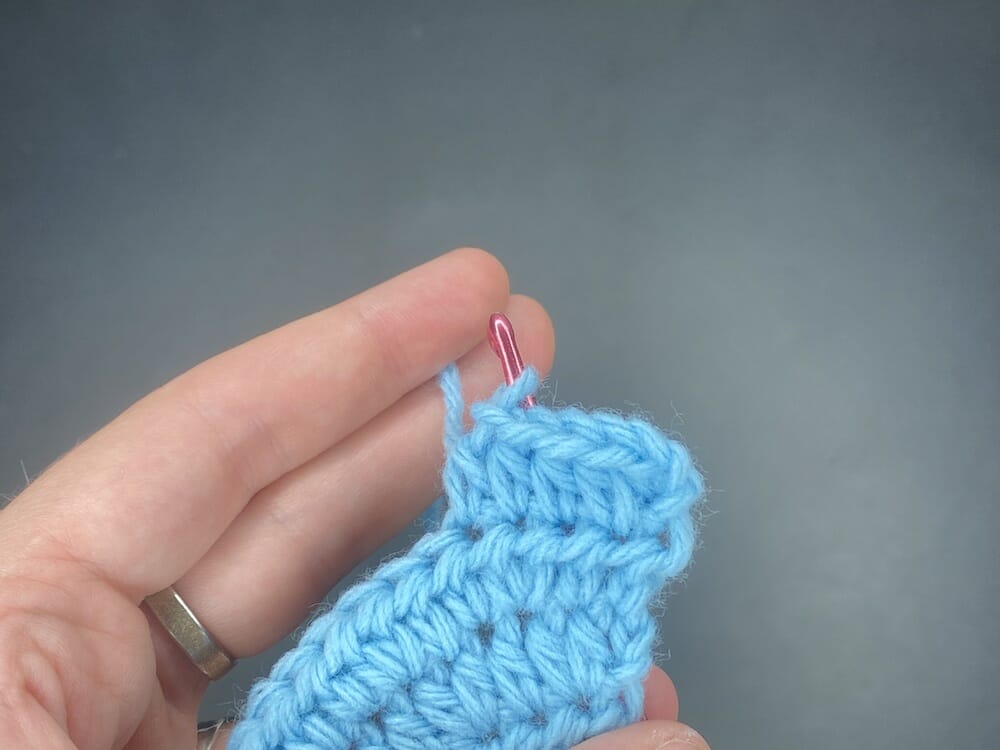
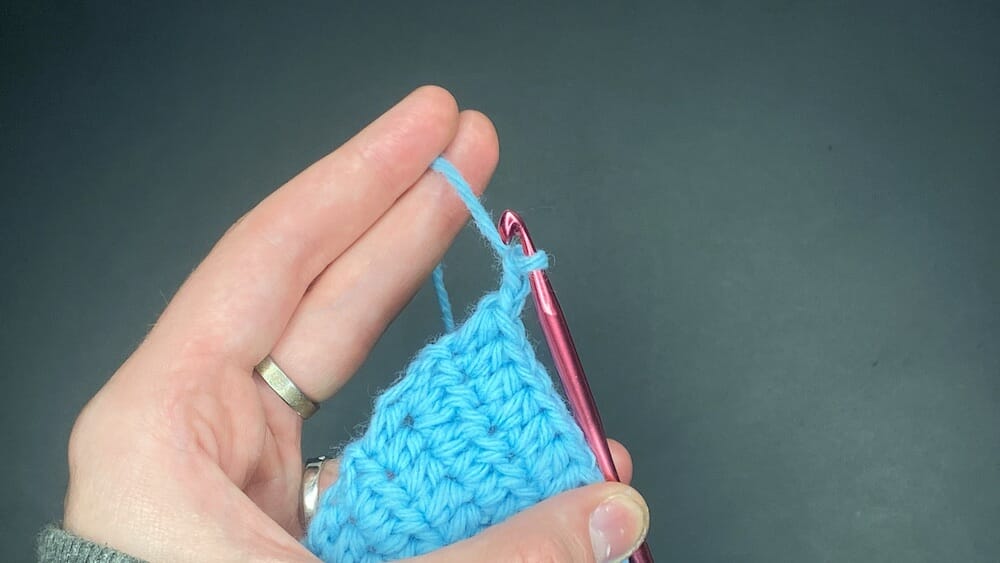
Attach slipknot to folded corner stitches on one side of the rectangle
Insert your hook underneath both stitches of the folded rectangle, one behind the other. Put the slipknot on your hook and pull it through both stitches. Chain 1 by yarning over and pulling through the loop currently on your hook to secure the slipknot
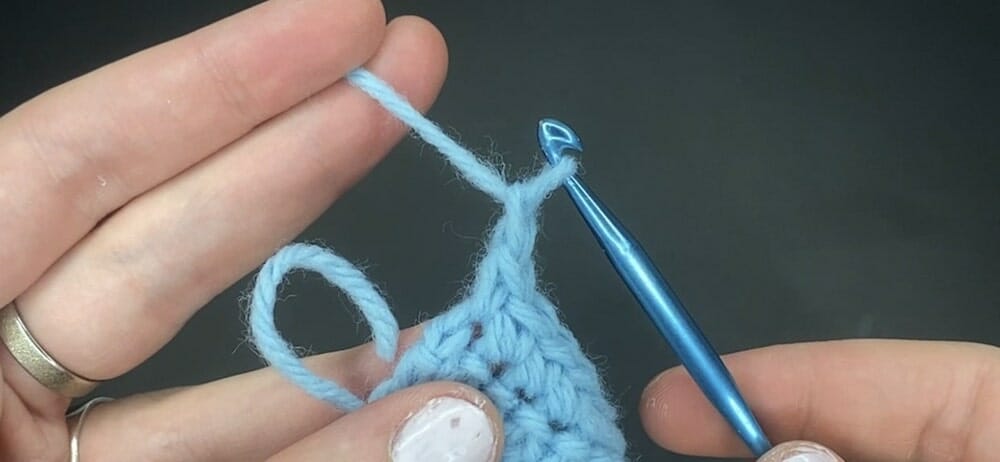
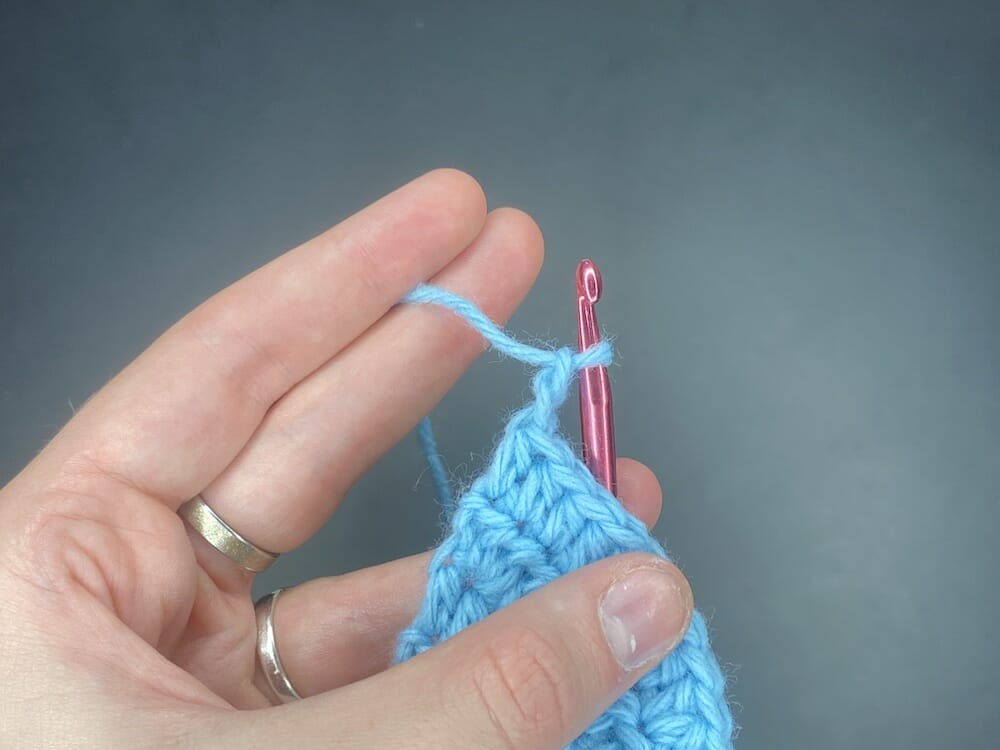
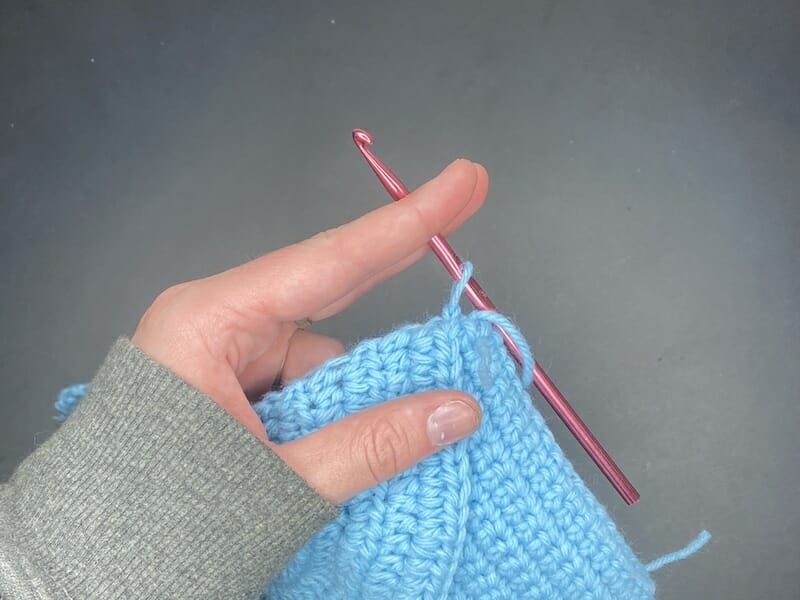
Single crochet into the same stitch you attached your yarn to
Create a single crochet into both stitches of the folded edge by inserting your hook into both stitches, yarning over and pulling your hook through the stitches, and then yarning over and pulling through the 2 loops currently on your hook.
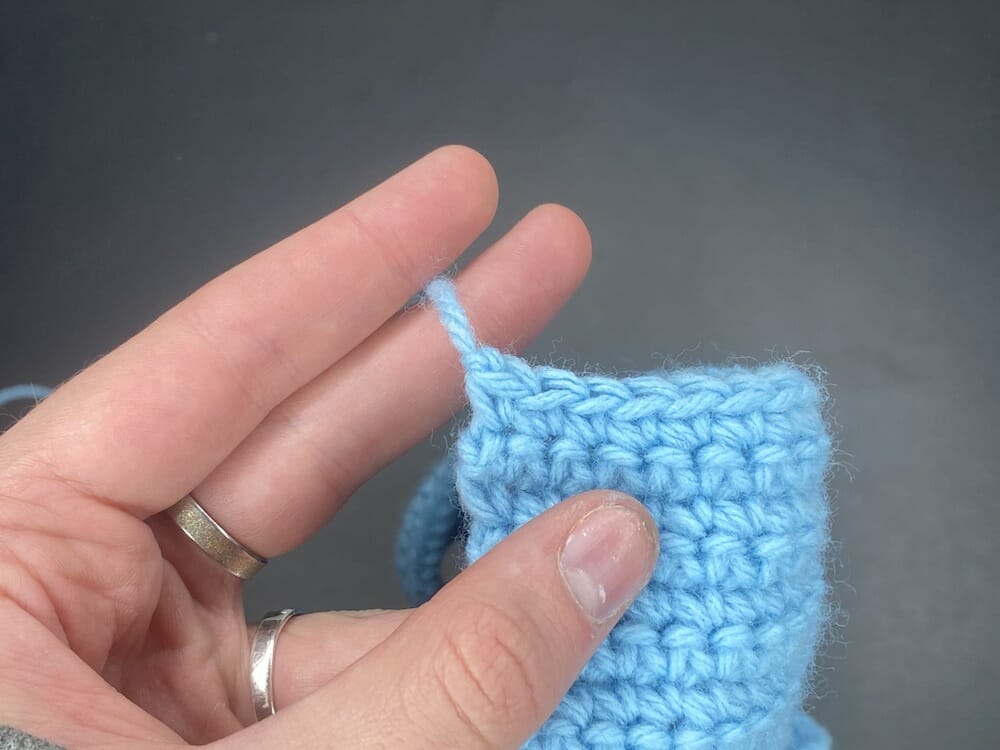
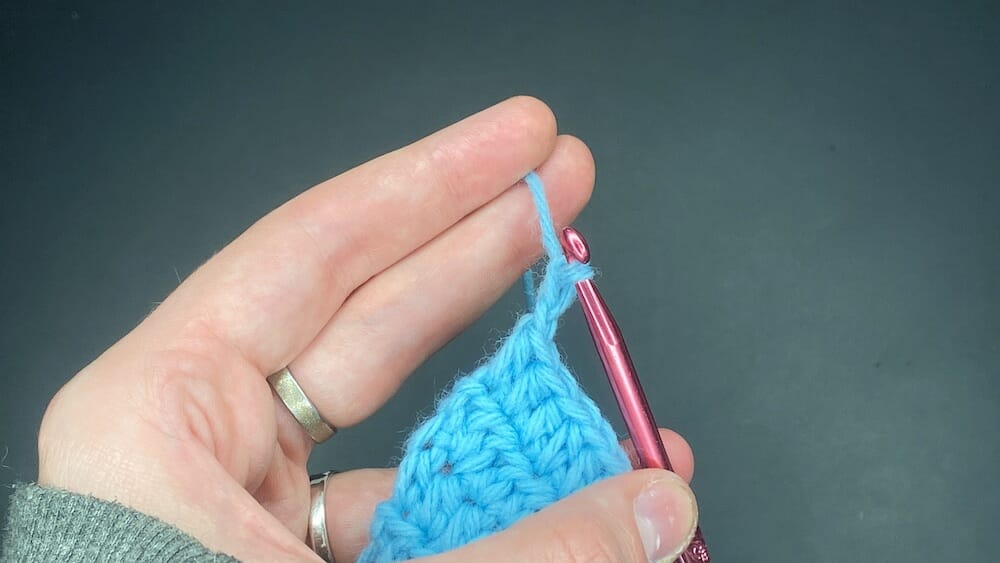
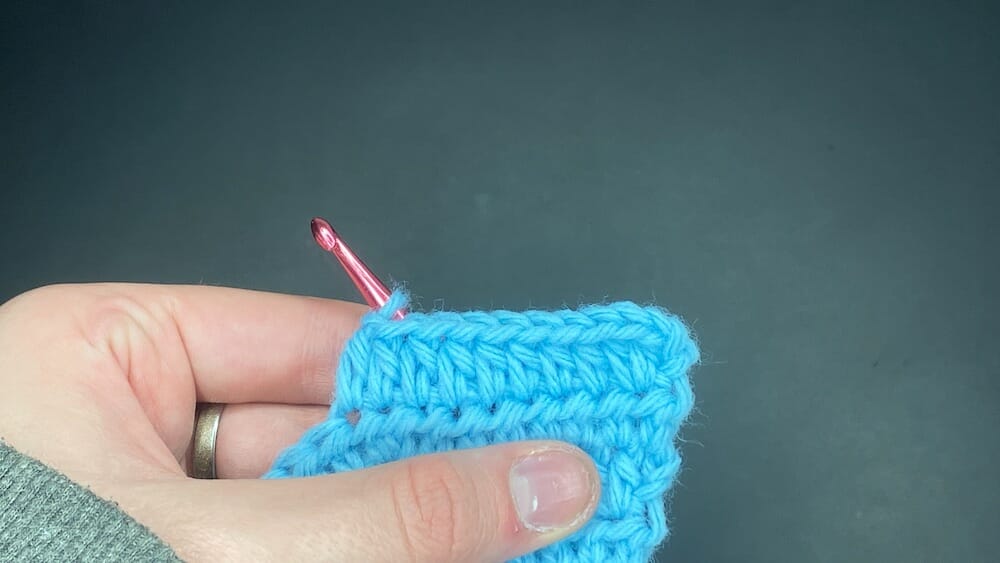
Repeat the step of joining the edges by inserting your hook under both stitches along the edge and single crocheting them together.
Create a single crochet into both stitches of the folded edge by inserting your hook into both stitches, yarning over and pulling your hook through the stitches, and then yarning over and pulling through the 2 loops currently on your hook. Repeat this along the entire edge.
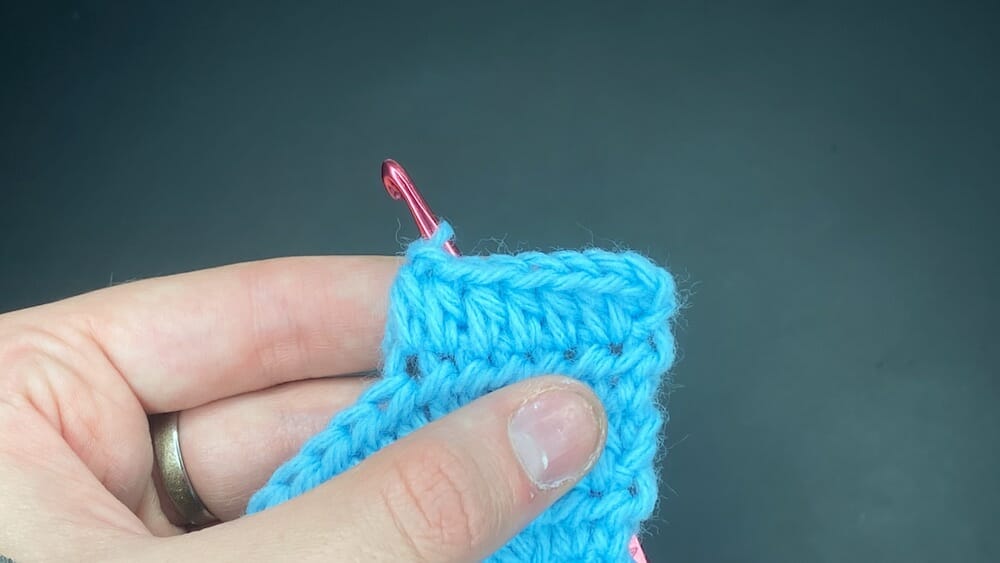
Once you have joined your last 2 stitches together, chain 1, cut your yarn, leaving a tail you will pull through the chain loop. This fastens off your yarn, securing the last stitch in your row to prevent your stitches from unraveling. (CH 1 and fasten off)
For the next side of the rectangle, you will repeat all of the steps you have just done.
Attaching the flap
Grab both your finished pouch as well as your semi-circle. Place the semi-circle so the flat side is aligned with the back top edge of the pouch.
Create a slipknot
Create a loop with your yarn so that the 2 strands of yarn are crossing over one another. Insert your thumb and index finger through the loop, then grab the top strand of yarn. Pull this strand through the loop and pull tight to create your slipknot.
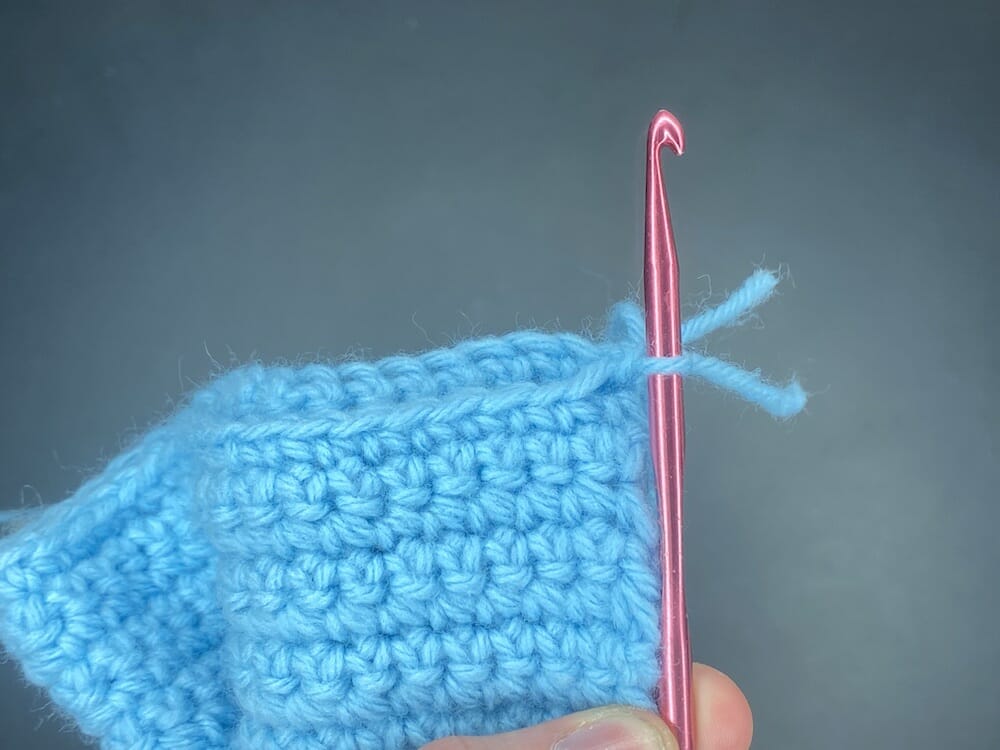
Attach slipknot to the right corner of the flap and back corner of the rectangle.
Insert your hook into the flap’s corner and through the rectangle’s back corner. Chain 1 by yarning over and pulling through the loop currently on your hook to secure the slipknot.
Single crochet into the space you connected your slipknot, as well as along the entire edge of the flap and rectangle to join the 2 panels together.
Insert your hook through the top of the flap and through the top of the rectangle and single crochet by yarning over, pulling your hook back through the stitch, and then yarning over and pulling through the 2 loops currently on your hook. Repeat this process across the edges of the flap and rectangle, ensuring that you are joining both panels together.
Once you have single crocheted across the top of your purse, chain 1, cut your yarn, leaving a tail, which you will pull through the chain loop. Pull on the tail to secure your stitch. (CH 1, fasten off)
Chain 1 by yarning over and pulling through the loop currently on your hook. Cut your yarn and pull the strand through the chain loop to secure your stitch.
More Free Crochet Patterns
- 27 Free Crochet Top Patterns
- 15 Crochet Bag Patterns & Kits For Beginners
- 32 Free Crochet Sweater Patterns For All Seasons
- 30 Free Crochet Scarf Patterns for All Skill Levels
- 15 Free Crochet Alter Top Patterns
- 21 Free Crochet Tank Top Patterns with Tutorials
- 23 Free Crochet Cardigan Patterns
- 21 Free Crochet Crop Top Patterns
You have now completed your purse!